Lesson 4: Using [Forever] blocks

Repeatedly Checking Conditions

As observed in the previous Lesson, the [If then] block only checks conditions once. In order for conditions contained in the [If then] blocks to be checked repeatedly, a [Forever] C block is needed. The [Forever] block is a C block from the Control category that repeats the behaviors contained inside of it, forever.
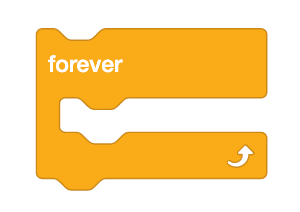
An empty VEXcode VR Forever block.
  • Load the Unit7Lesson3 project from the previous Lesson.
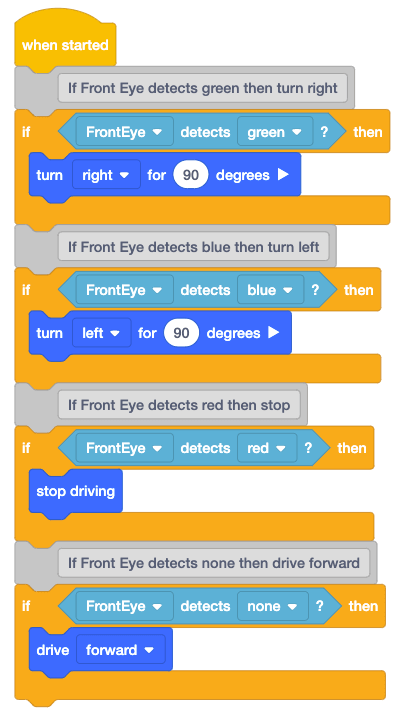
    The same VEXcode VR blocks project from the end of the last lesson. It begins with a When Started block and then there is an If Then block with a boolean parameter of a Color Sensing block that reads 'Front Eye detects green?' and a Turn right for 90 degrees block inside the If container. Next there is the same if block and turn block stack but changed to turn left for 90 degrees if the color blue is detected. Next, the same if block and turn block stack is used but changed to Stop Driving if the color red is detected. Lastly, the same if block and turn block stack is used but changed to Drive Forward if no color is detected.
  • Rename the project Unit7Lesson4.

    VEXcode VR Toolbar with the 'Project Name' button highlighted in a red box, to the left of the Select Playground button. The project name is set to Unit 7 Lesson 4.
  • Drag a [Forever] block into the workspace and attach it to the top of the stack of blocks. Notice that this will include all four [If then] blocks inside of the [Forever] block.
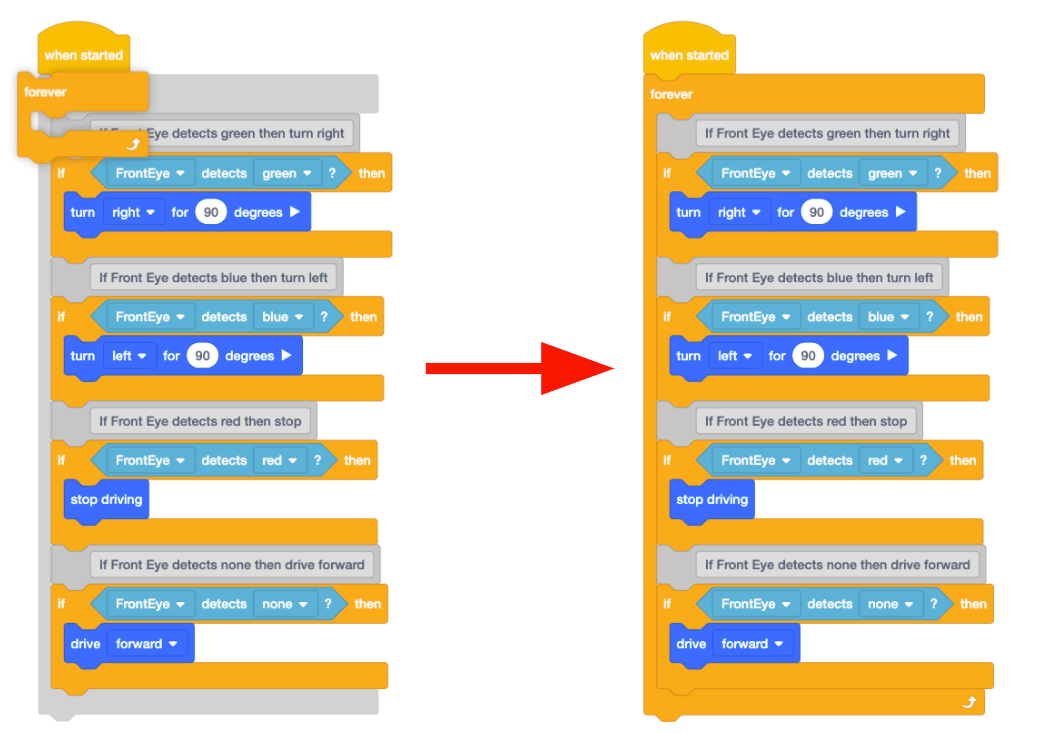
    The VEXcode VR blocks project from earlier but with an arrow indicating the addition of a Forever block wrapped around all of the if statements. It begins with a When Started block and then there is a series of four if statements wrapped in a Forever block. First is an If Then block with a boolean parameter of a Color Sensing block that reads 'Front Eye detects green?' and a Turn right for 90 degrees block inside the If container. Next there is the same if block and turn block stack but changed to turn left for 90 degrees if the color blue is detected. Next, the same if block and turn block stack is used but changed to Stop Driving if the color red is detected. Lastly, the same if block and turn block stack is used but changed to Drive Forward if no color is detected.

    For Your Information

    Blocks can be added to the beginning or middle of the project stack by lining up the top of the block, with the desired placement in the stack.
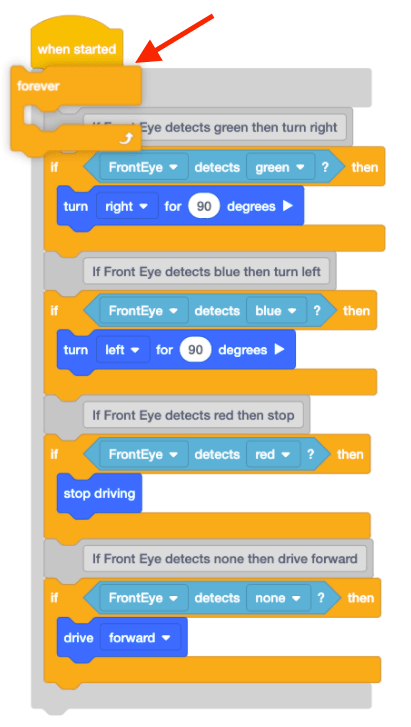
    A visualization of how a Forever block can be dragged to the top of a stack and automatically wrap around the stack's contents. The VEXcode VR blocks project is the same as before and contained in a forever loop. The if statements are as follows: First is an If Then block with a boolean parameter of a Color Sensing block that reads 'Front Eye detects green?' and a Turn right for 90 degrees block inside the If container. Next there is the same if block and turn block stack but changed to turn left for 90 degrees if the color blue is detected. Next, the same if block and turn block stack is used but changed to Stop Driving if the color red is detected. Lastly, the same if block and turn block stack is used but changed to Drive Forward if no color is detected.

    This video below shows how to add the [Forever block] around the four [If then] blocks in the current project. Notice that the top of the [Forever] block is lined up just after [When started] and the first [If then] block. The [Forever] block then wraps around all the following blocks in the project stack.

  • Now that the [Forever] block is added to the project so that all of the [If then] blocks will constantly have their conditions checked, open the Disk Maze Playground and run the project.
  • When this project is run, the VR Robot will navigate the Disk Maze Playground from start to finish. Once the VR Robot detects red, it will stop driving.
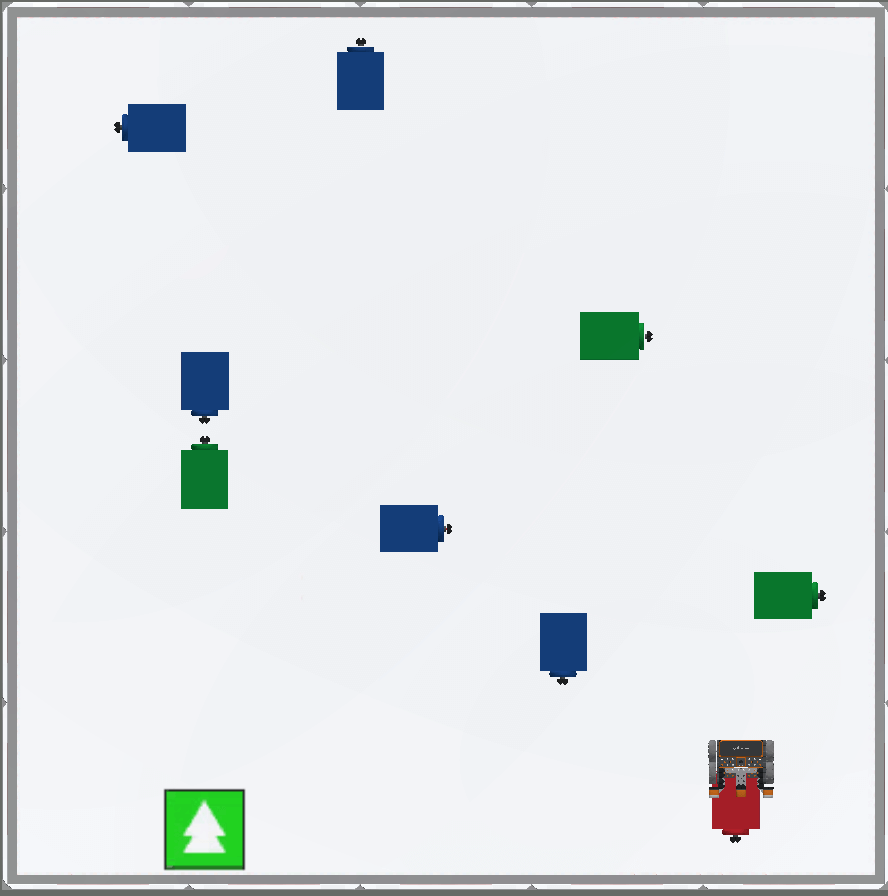
    A top-down view of the VR Disk Maze Playground, with the VR robot having passed each disk and resting at the final red disk.
  • In the project from the previous Lesson, the conditions within the [If then] blocks were only checked once. Since the conditions within the [If then] blocks were only checked once, the VR Robot drove forward forever because the condition of no color being detected was reported as TRUE.
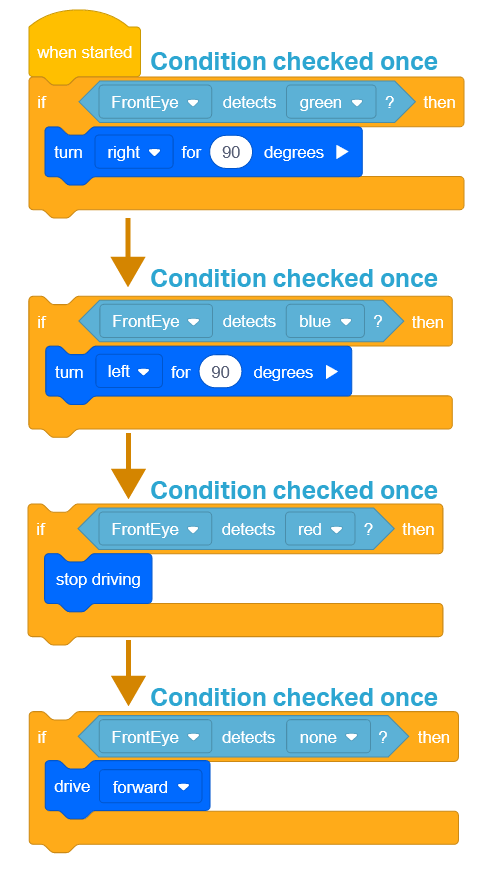
    A diagram of the flow of logic in our VEXcode VR blocks project without the forever block. Arrows indicate that each if statement is only run once before the project ends, thus making our project much less responsive than we would like. Our project checks if the front eye detects green, and if so it turns right for 90 degrees. Next, if the front eye detects blue it turns left for 90 degrees. Next, if the front eye detects red it stops driving. Lastly, if the front eye detects none it drives forwards.
  • Now that the [Forever] block has been added, each condition of the [If then] C blocks will be checked repeatedly. During the flow of the project, if the condition of the [If then] C block is TRUE, the blocks inside of the [If then] C block are executed. If the condition of the [If then] C block is FALSE, the blocks inside of the [If then] C block are skipped, and the flow of the project will continue to the next block in the stack. This enables the VR Robot to perform discrete behaviors such as turning or stopping once it detects a certain color.
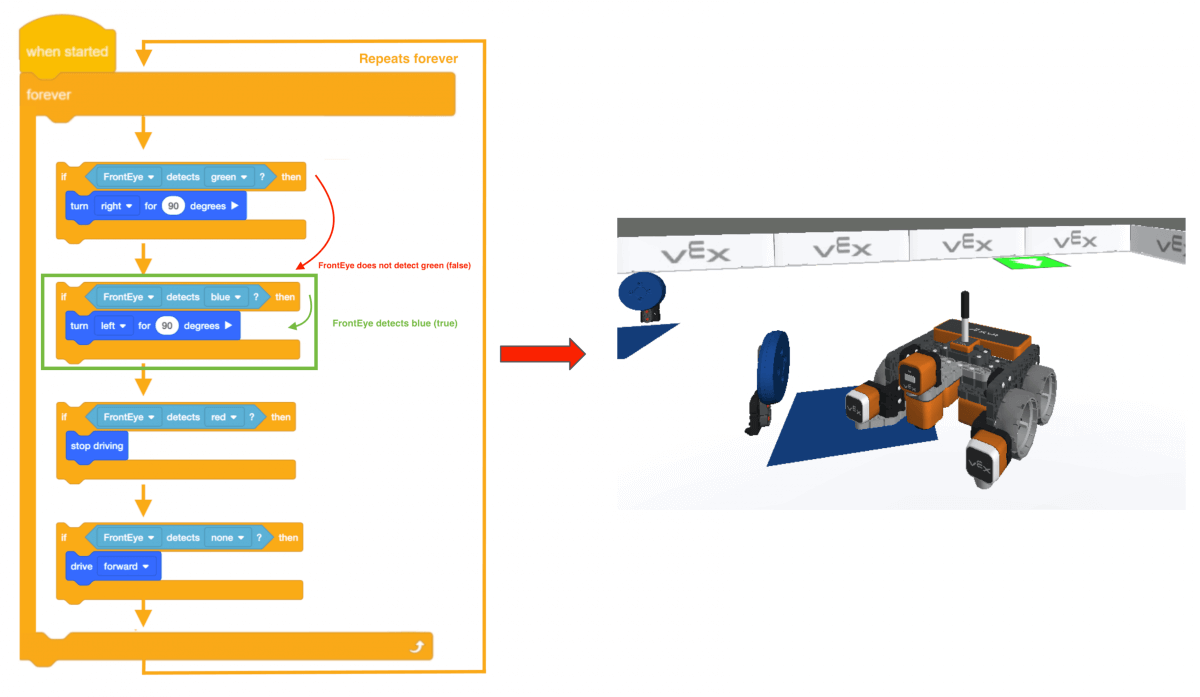
    A diagram of the flow of logic of the VEXcode VR blocks project to the left running through an example of the VR robot in the image to the right. The image shows the VR robot reaching a blue disk and turning left. The diagram indicates that the if statements repeat forever, and each one is checked each loop. After the front eye doesn't detect green, it checks for the color blue next which returns true and turns the robot left for 90 degrees. After that, the flow of logic continues down the stack, checking for red and nothing.
  • [If then] blocks are used with [Forever] blocks to ensure that conditions are constantly checked.
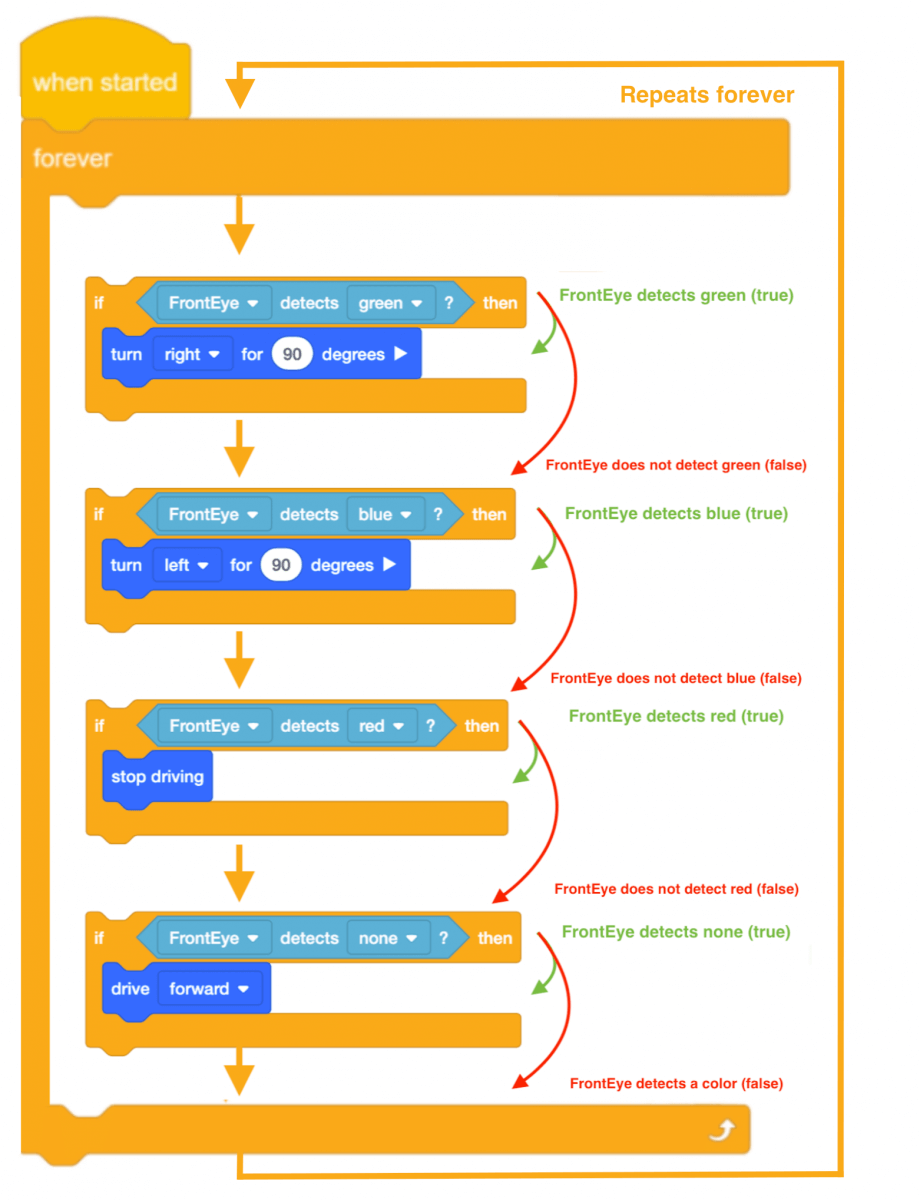
    A diagram of the flow of logic in our VEXcode VR blocks project with the outer Forever block included. Each arrow is now labeled with what that logic command is measuring, and a yellow arrow shows the flow of logic repeating through each block in the Forever loop continually. It is clear that every if statement is checked on each loop of the forever block, no matter if the result is true or false.

Using Switch Blocks 

This is the Switch [Forever] block. The Switch Python command for Forever creates a while loop where the condition is True. The commands nested within the loop when then be repeated forever, as the condition is always True. 
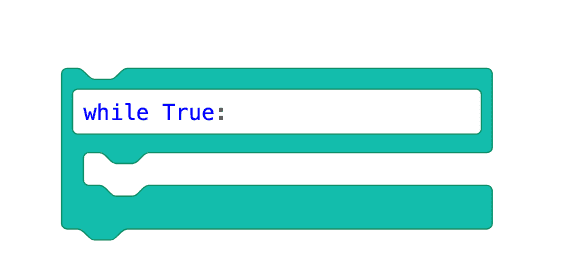
A VEXcode VR switch block version of the Forever block. The Python code reads 'while True:', which is the Python equivalent of a forever statement.

Questions

Please select a link below to access the lesson quiz.

Google Doc / .docx / .pdf