Programming Turning Right and Left - Python
The Speedbot is ready to turn!
This exploration will give you the tools to be able to start creating some cool projects for your Speedbot to follow.
- VEXcode V5 Python instructions that will be used in this exploration:
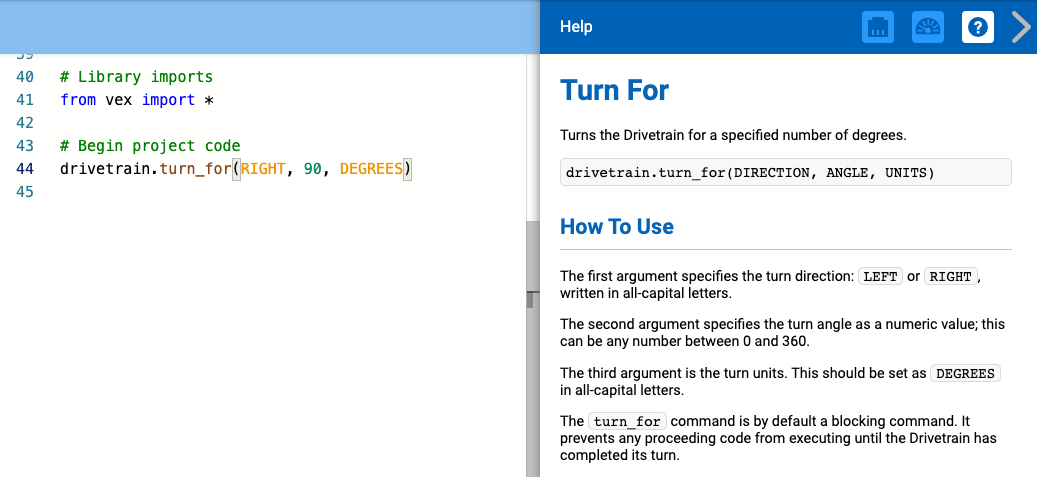
- drivetrain.turn_for(RIGHT, 90, DEGREES)
-
To find out more information about the instruction, select Help and then select the question mark icon next to a command to see more information.

- Make sure you have the hardware required, your engineering notebook, and VEXcode V5 downloaded and ready.
| Quantity | Materials Needed |
|---|---|
| 1 |
Speedbot Robot |
| 1 |
Charged Robot Battery |
| 1 |
VEXcode V5 |
| 1 |
USB Cable (if using a computer) |
| 1 |
Engineering Notebook |
Step 1: Preparing for the Exploration
Before you begin the activity, do you have each of these items ready?
- Are all the motors plugged into the correct ports?
- Are the smart cables fully inserted into all of the motors?
- Is the Brain turned on?
- Is the battery charged?
Step 2: Start a New Project
Complete the following steps to begin the project:
-
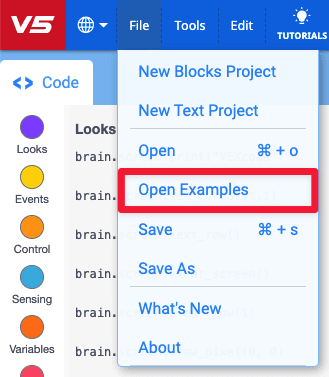
Open the File menu and select Open Examples.

-
Select and open the Speedbot (Drivetrain 2-motor, No Gyro) template project. The template project contains the Speedbot's motor configuration. If the template is not used, your robot will not run the project correctly.

-
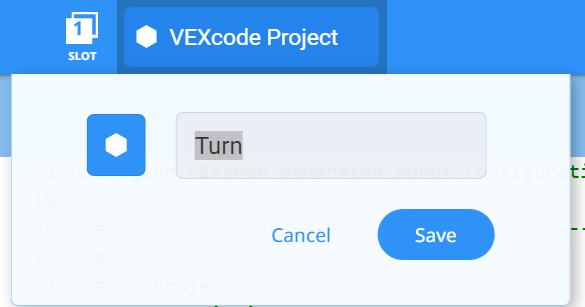
Since you will be working on turning the Speedbot, you will name your project Turn.

-
When finished, select Save.
![]() Teacher Tips
Teacher Tips
Project Names can have spaces between or after the words.
Step 3: Turn Right
You are now ready to begin programming the robot to turn right!
-
Add the instruction to the project, so your project looks like this:
# Library imports from vex import * # Begin project code drivetrain.turn_for(RIGHT, 90, DEGREES) - Select the Slot icon to choose one of the eight available slots on the Robot Brain and select slot 1.
- Connect the V5 Robot Brain to the computer using a micro USB cable and power on the V5 Robot Brain. The Brain icon in the toolbar turns green once a successful connection has been made.
- When the V5 Robot Brain is connected to the computer, the Build icon changes to the Download icon. Select Download to download the project to the Brain.
![]() Teacher Toolbox
Teacher Toolbox
Remind students to disconnect the USB cable from the Robot Brain. Having the robot connected to a computer while running a project could cause the robot to pull on the connection cable.
![]() Teacher Toolbox
-
Stop and Discuss
Teacher Toolbox
-
Stop and Discuss
Ask students to predict what they think will happen when this project is downloaded and run on the Speedbot. Tell the students to record their predictions in their engineering notebooks. If time allows, ask each group to share their predictions.
-
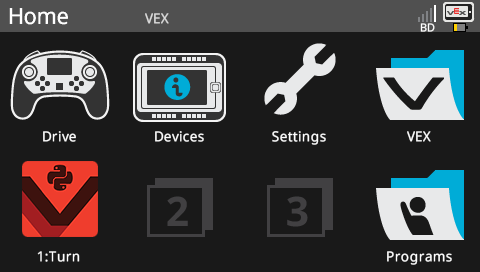
Check to make sure your project has downloaded (Python) by looking at the Robot Brain’s screen. The project name Turn should be listed in Slot 1.

![]() Teacher Toolbox
-
Model First
Teacher Toolbox
-
Model First
-
Model running the project in front of the class before having all the students try at once. Gather the students in one area and leave enough room for the Speedbot to move if it is placed on the floor.
-
Tell the students it is now their turn to run their project. Make sure that they have a clear path and that no Speedbots will run into each other.
-
Remind students to save their projects as they work. This section (Python) from the VEX Library explains saving practices in VEXcode V5.
- Run the project (Python) on the Speedbot robot by making sure the project is selected and then press the Run button on the Robot Brain.
Step 4: Turn Left
Now that you have programmed your robot to turn right, let us program it to turn left.
-
Change the parameter in the instruction to display LEFT instead of RIGHT, so your project looks like this:
# Library imports from vex import * # Begin project code drivetrain.turn_for(LEFT, 90, DEGREES) - Select the Project Name to change it from Turn to TurnLeft.
- Select the Slot icon to choose a new slot. Select slot 2.
- Download (Python) the project.
- Check to make sure your project has downloaded (Python) by looking at the Robot Brain’s screen. The project name TurnLeft should be listed in Slot 2.
- Run (Python) the project on the robot by making sure the project is selected and then press the Run button.
Step 5: Wait then Turn Left
Now that we have programmed the robot to turn left right then turn left, we can now add a wait instruction so that the robot waits a certain amount of time before turning left.
-
Add a wait instruction before the drive_for command. Be sure the wait is indented to match the drive_for command, and that all commands are below the “Begin project code” comment. This tells the robot to wait three seconds before driving in reverse.
# Begin project code wait(3, SECONDS) drivetrain.turn_for(LEFT, 90, DEGREES) - Select the Project Name to change it from TurnLeft to WaitLeft.
- Select the Slot icon to choose a new slot. Select slot 3.
- Download (Python) the project.
- Check to make sure your project has downloaded (Python) by looking at the Robot Brain’s screen. The project name WaitLeft should be listed in Slot 3.
- Run (Python) the project on the robot by making sure the project is selected and then press the Run button.
Step 6: Complete the Security Camera Challenge!

In the Security Camera Challenge, the robot must start by turning to the right 90 degrees. The robot will then turn to the left 180 degrees then right 180 degrees “scanning” just like a security camera. The robot will then repeat turning 180 degrees to the left and 180 degrees to the right two more times. Thus, the robot will scan 180 degrees three times total.
Before programming the robot, plan out the robot's path and behaviors in your engineering notebook.
After completing the Security Camera Challenge, you will be able to combine forward and backwards movements with additional robot behaviors to complete even more advanced challenges.
![]() Teacher Toolbox
-
Solution
Teacher Toolbox
-
Solution
View a sample solution below:
# Library imports
from vex import *

# Begin project code

# The robot will turn right 90 degrees
drivetrain.turn_for(RIGHT, 90, DEGREES)

# The robot will turn left 180 degrees
drivetrain.turn_for(LEFT, 180, DEGREES)

# The robot will turn right 180 degrees
drivetrain.turn_for(RIGHT, 180, DEGREES)

# The robot will turn left 180 degrees
drivetrain.turn_for(LEFT, 180, DEGREES)

# The robot will turn right 180 degrees
drivetrain.turn_for(RIGHT, 180, DEGREES)

# The robot will turn left 180 degrees
drivetrain.turn_for(LEFT, 180, DEGREES)

# The robot will turn right 180 degrees
drivetrain.turn_for(RIGHT, 180, DEGREES)