Designing and Scaling a Racecourse
| Quantity | Materials Needed |
|---|---|
| 1 |
Engineering Notebook |
| 1 |
Roll of Tape |
| 1 |
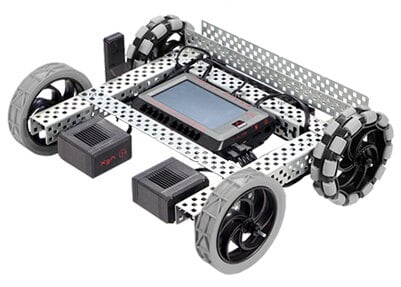
VEX V5 Speedbot with a charged battery |
| 1 |
VEX V5 Controller |
| 1 |
Meter Stick or Ruler |
Step 1: Measuring Your Robot

Measure the length and width of the VEX V5 Speedbot using a meter stick or ruler and write its dimensions in your engineering notebook.
Step 2: Sketching and Measuring the Area

Draw a simple sketch of the available area for your racecourse design in your engineering notebook. Using a meter stick or ruler, measure the dimensions of the area and record them on the sketch of the area in your engineering notebook.
Step 3: Creating a Scaled Version

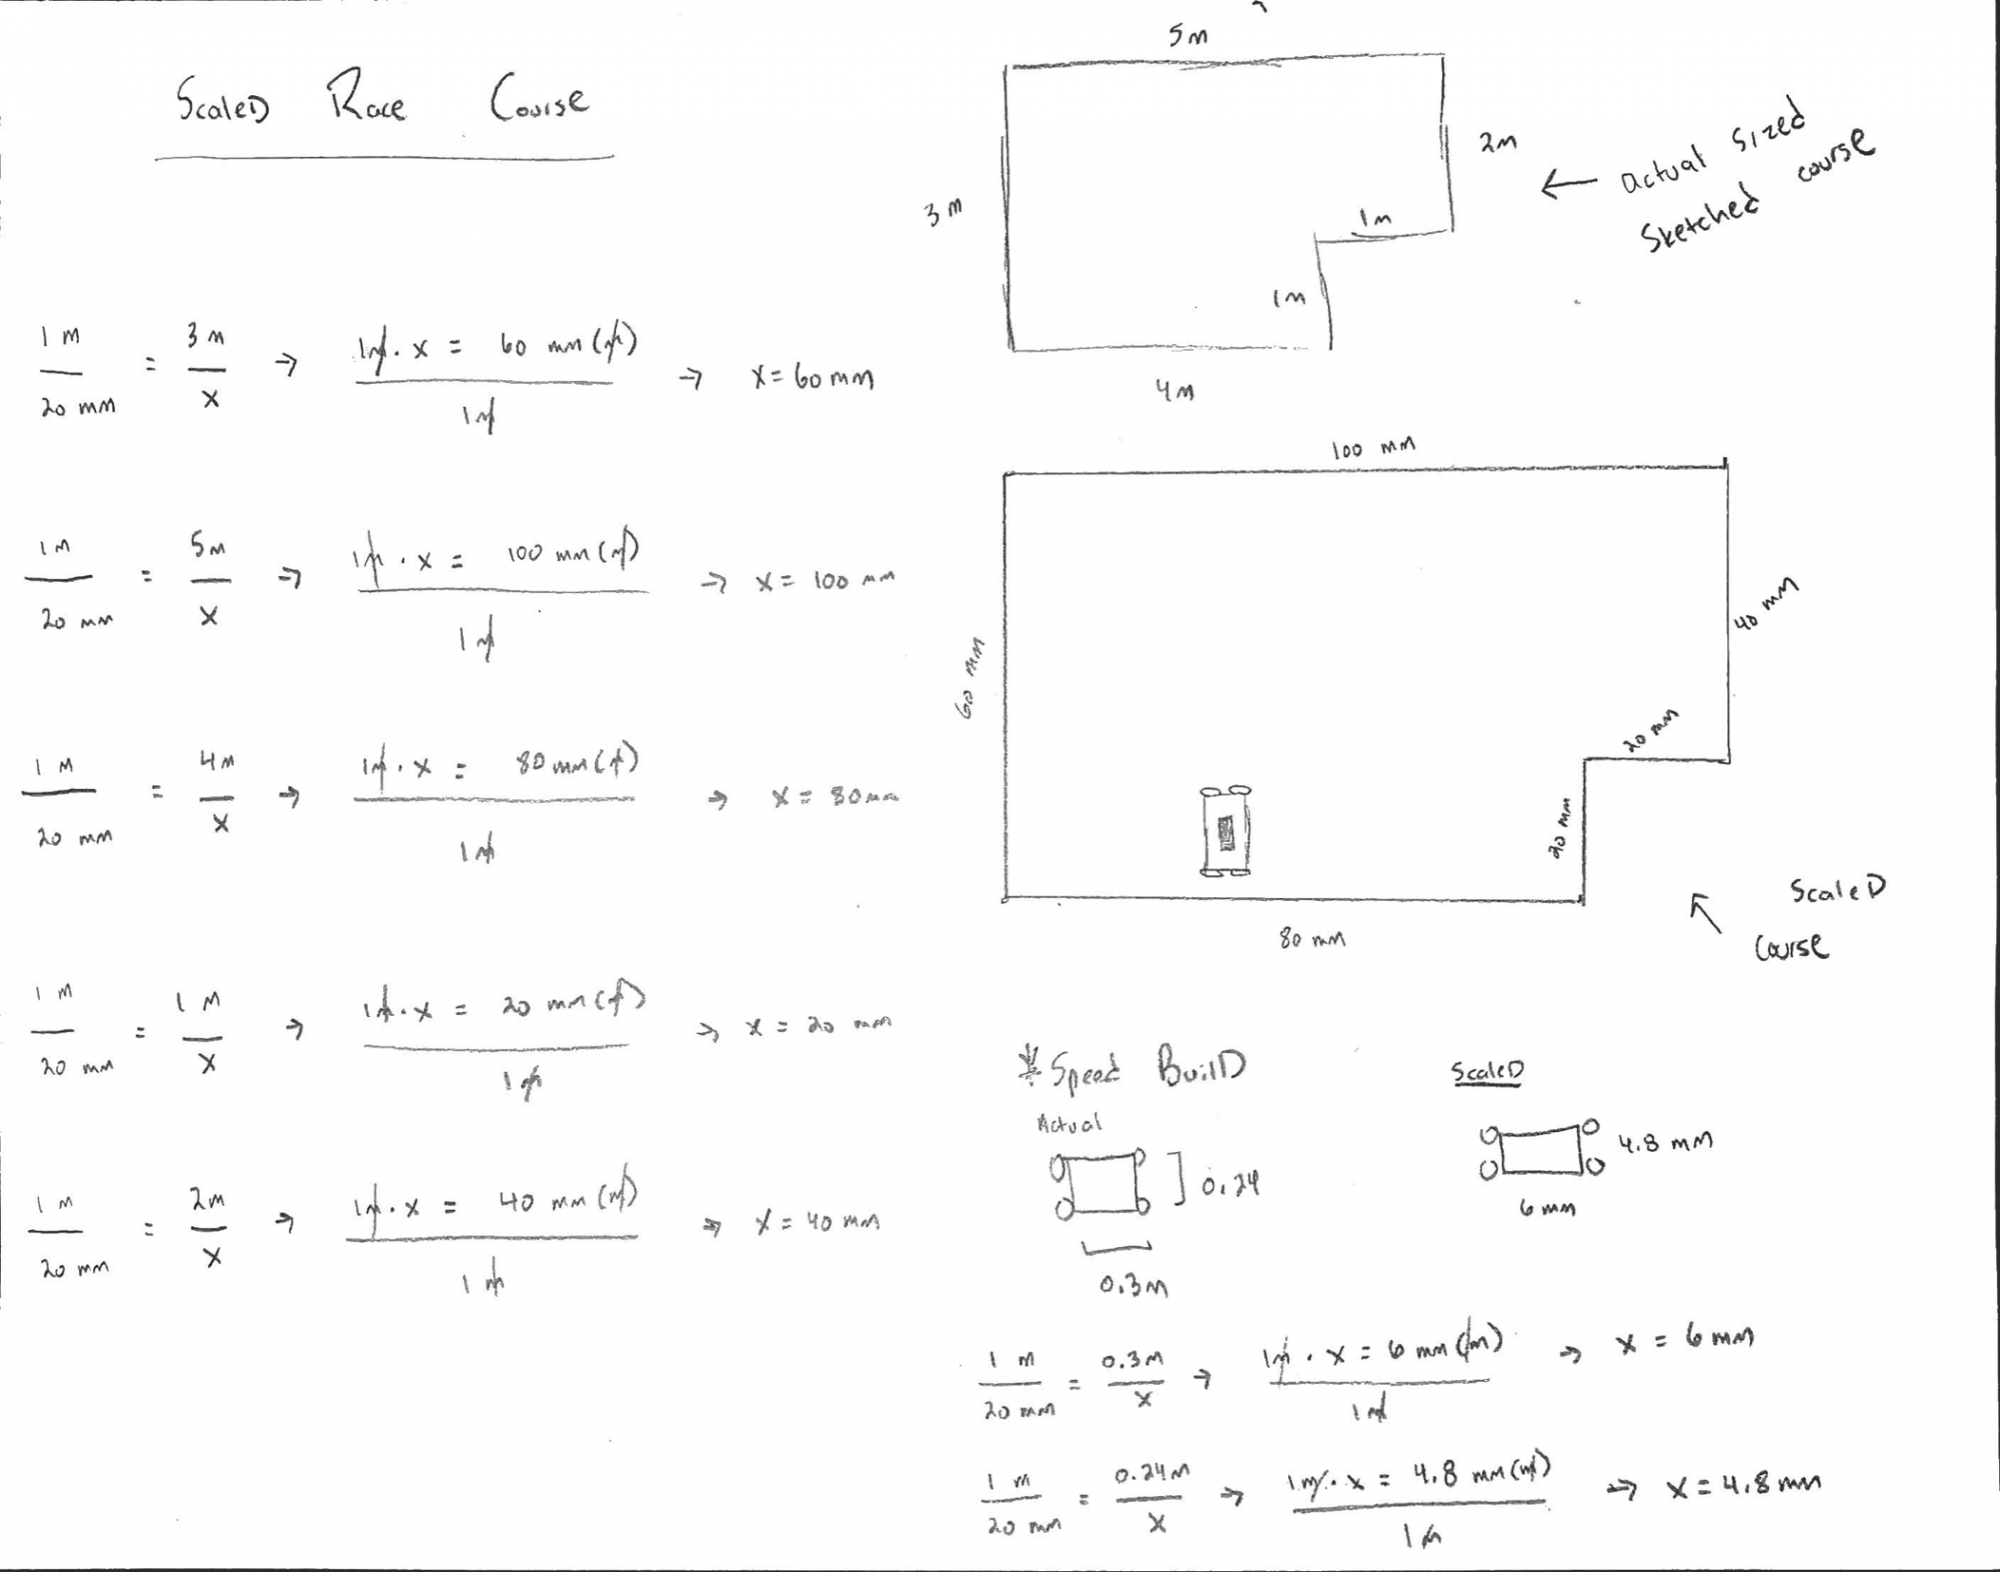
In your engineering notebook, create a scaled version of the area you sketched using your recorded measurements. Before starting, decide the scale at which you would like to recreate the area in meters. For example, 20 millimeters on the sketch may be 1 meter in the area you have available for your racecourse, like in the example above.
You should consider the size of your sketch when choosing the scale. Too large of a scale may not fit on the paper that you are using.
Add a scaled version of the VEX V5 Speedbot to your sketch to help visualize its scaled size in comparison to the scaled area you have created.
Respond to the questions below in your engineering notebook:
- How did you determine the scale to you use in your sketch?
- How did the dimensions of your robot influence your scale?
Step 4: Designing Your Course

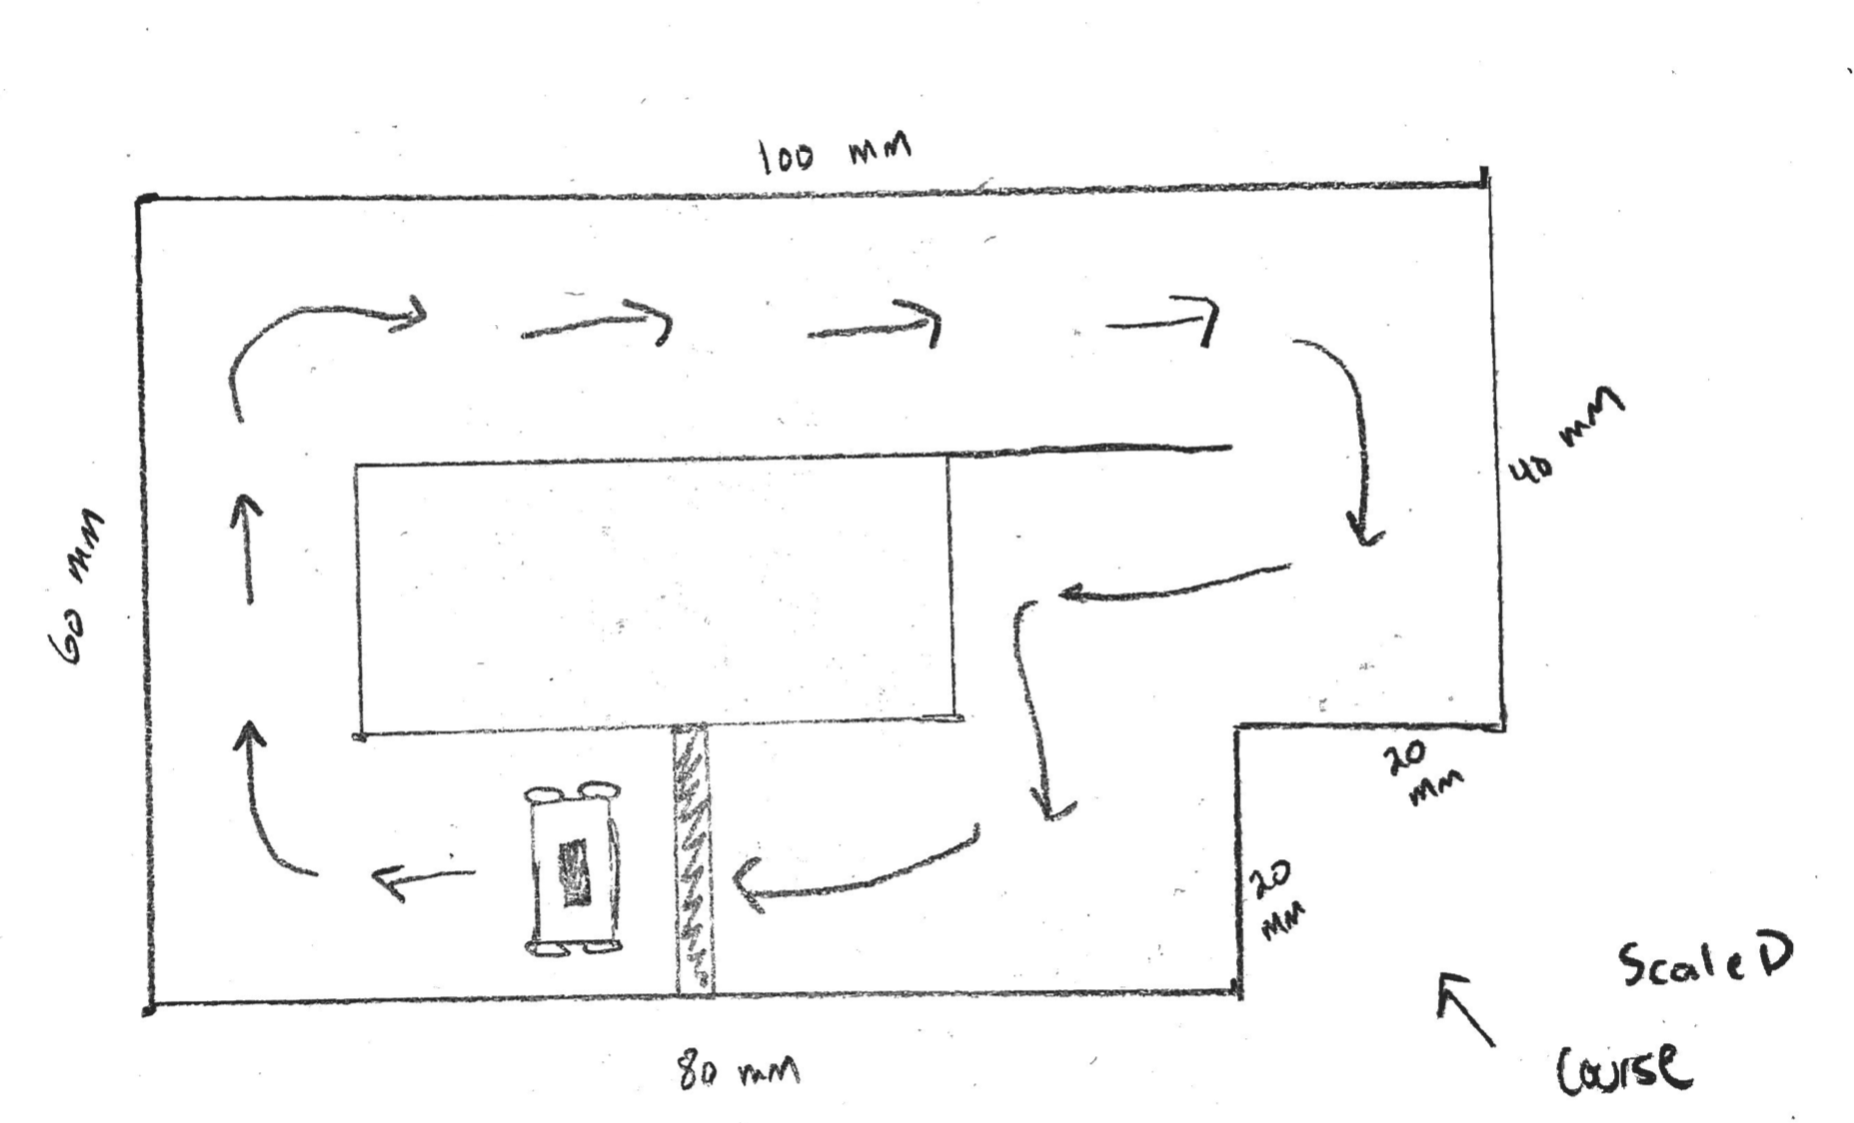
Sketch a racecourse within the scaled area that you made in your engineering notebook. Keep in mind the size of the VEX V5 Speedbot and how it is represented in the scale that you used. The robot should be able to navigate the course without leaving the sides of the racecourse.
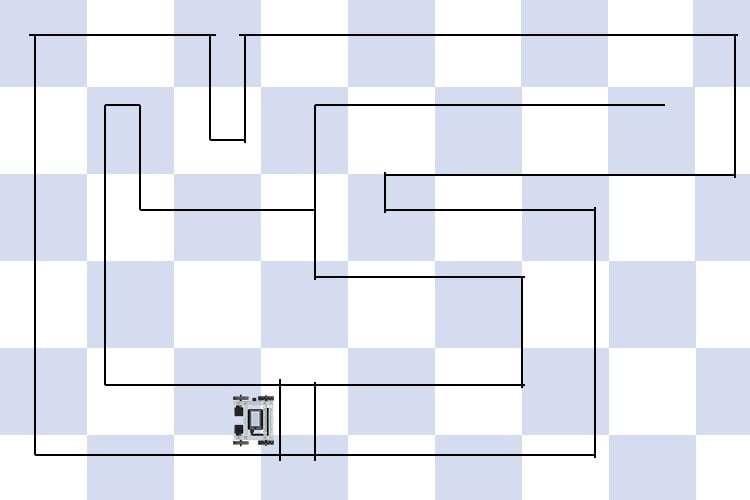
Try to be as creative as possible with your course by adding multiple turns and straightaways. Use arrows or other symbols to indicate the direction the robot on the racecourse should travel in. In addition, indicate the location of the starting and finishing lines using a symbol or lines.
Step 5: Create Your Course

Using tape and the scaled sketch of your racecourse, create a full size version of the course in the area you originally measured. Pay close attention to the scale that you chose for your drawing and use a meter stick or ruler to ensure the full size version of your course matches the dimensions of the scaled version you created in your engineering notebook.
Respond to the questions below in your engineering notebook:
- What was the most difficult part when creating a full sized version of the course from your scaled version? Why?
- What strategies did you use to determine if your measurements were accurate? How did you come up with them?
Step 6: Test Your Course

Time to test the course! Do the scaled measurements on the Racecourse work? Let's find out!
Follow the following procedure:
1. Ensure both the Robot Brain and Controller are turned on.
2. Pair the V5 Controller to the V5 Robot Brain.
3. Place your Speedbot at the start line on your Racecourse.
4. Review how to drive the robot using the Controller.
5. Run the Drive Program to drive the Speedbot through the Racecourse.
6. Make note of any places in the Racecourse that should be adjusted for size in your engineering notebook.
7. After you have driven the robot around the Racecourse a few times to test the size, sketch the Racecourse again with the improved sizes.
8. Re-scale the Racecourse, document the changes made and why in your engineering notebook, and test it again!