
Play
Part 1 - Step by Step
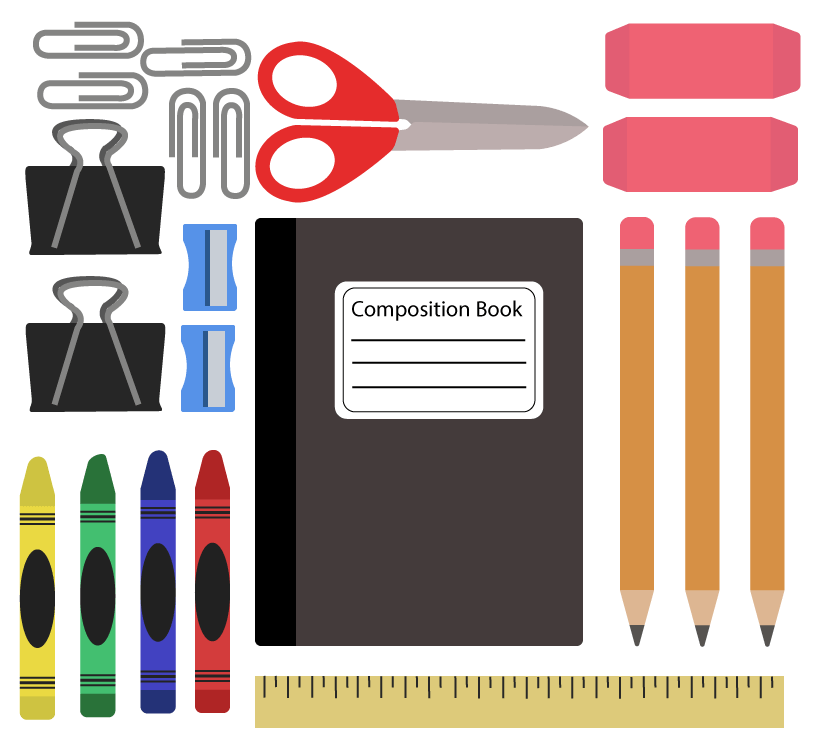
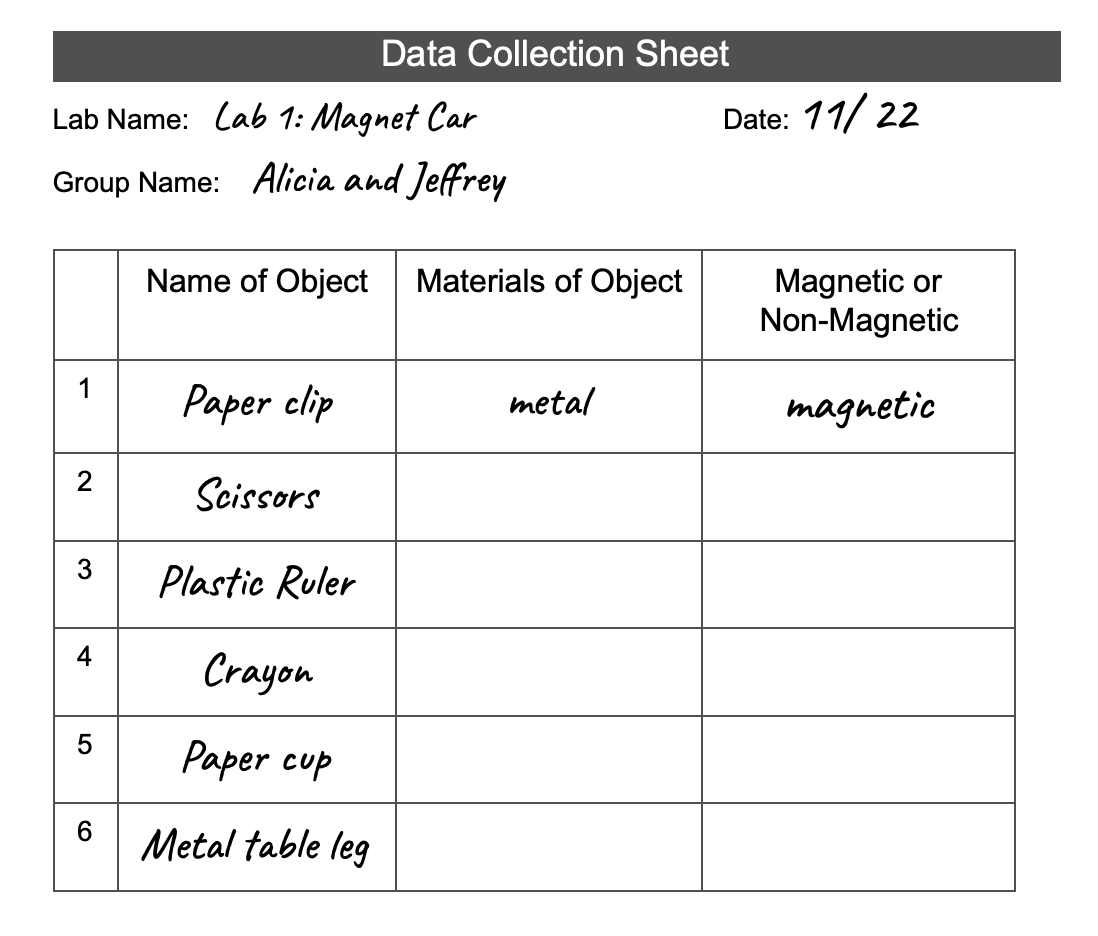
- InstructInstruct students that they will be testing the magnetism of the six classroom objects that you have distributed, and see what common characteristics they share. The students will be testing the objects to see if they are magnetic or nonmagnetic and determine that the items that are magnetic have metal properties. They will record their results on their Data Collection Sheet.
Various Classroom Objects - ModelModel how to complete the first trial with students.
- Pass out the Data Collection Sheet and have the students fill out the “Name of Object” portion. Students should enter all six items on the sheet.
-
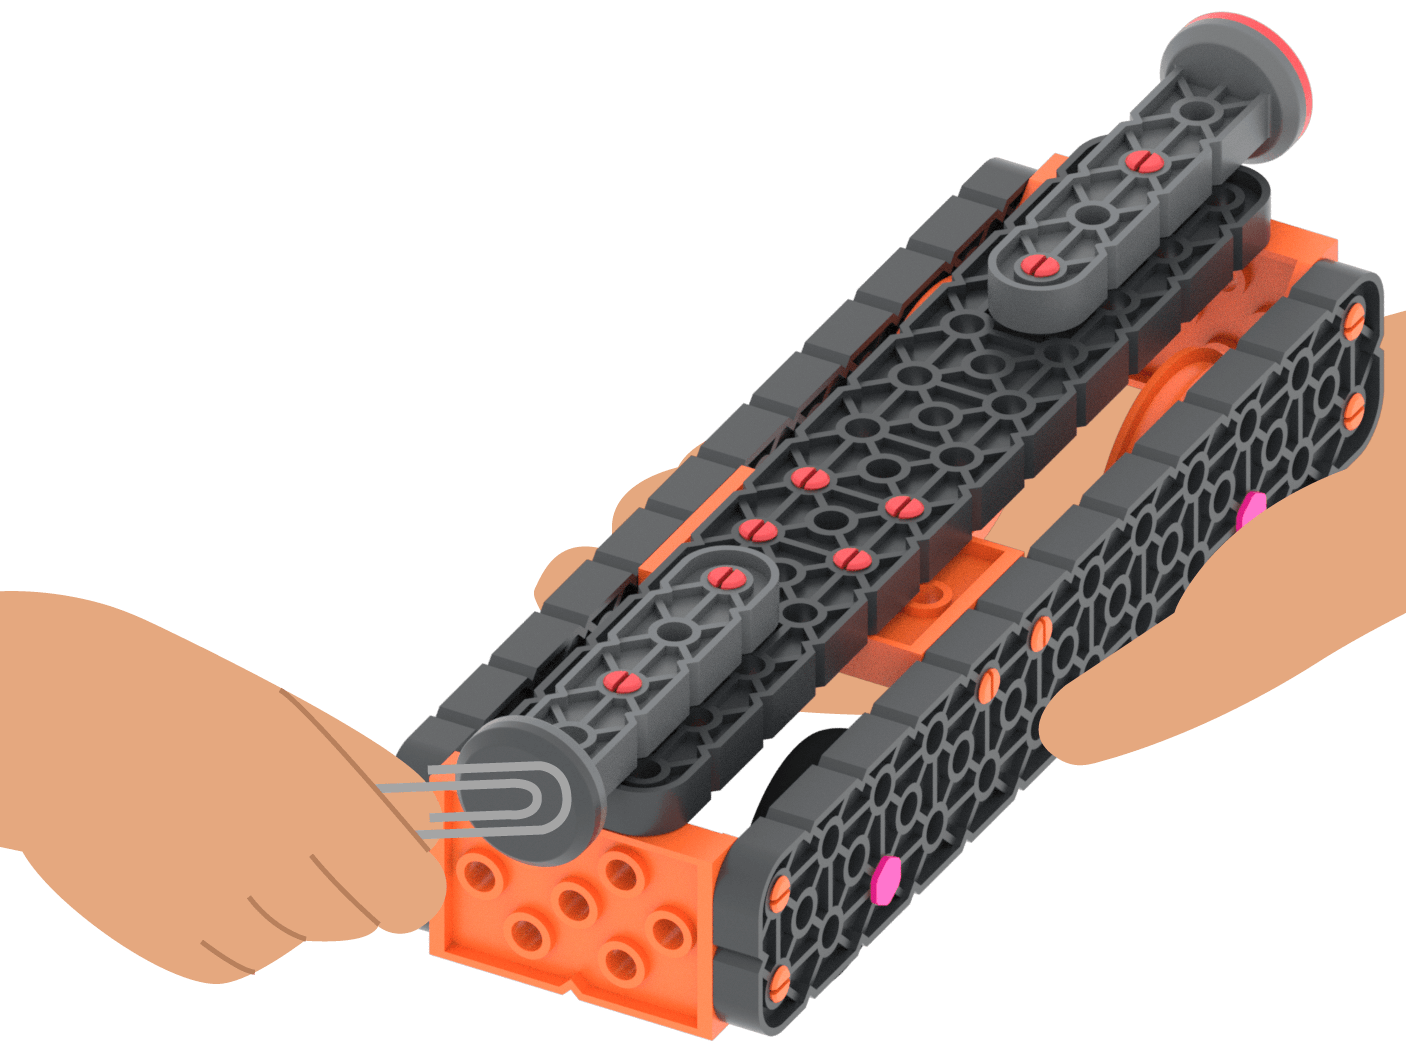
Then, show students how to hold the Magnet Car in your hand testing an object for magnetic properties by holding it near one of the magnets on the car. They should try both magnets on the Magnet Car to see what happens.
Testing Various Classroom Objects - Model how to fill in the Data Collection Sheet correctly to identify which items are magnetic and which are not, and to describe what materials they think the object is made of.
How to Complete Your Data Collection Sheet
- FacilitateFacilitate good testing practices by circling the room and asking the students questions such as:
- At what distance do you need to hold the objects away from the magnets on the Magnet Car to test for magnetism?
- What happens if you move the object closer? Farther away?
- What patterns do you see on your data collection sheet? What do the items that are attracted or repelled by the magnets have in common?
- What have you noticed about the materials of the magnetic objects?
- RemindRemind groups that their attempts at the activity may not work as planned at first. Trial and error is part of learning.
- Encourage groups take turns placing the objects in front of the magnets on the Magnet Car. It can be helpful to see how your classmates collect and record data.
- They should try both magnets on the Magnet Car to see what happens.
- AskAsk students what challenged them in this test trial. What strategy did they try to overcome this challenge?
What what they would do differently next time to make things work better.
Mid-Play Break & Group Discussion
As soon as every group has tested their objects, come together for a brief conversation.
- Why do you think some items were attracted to the magnets and some were not?
- What are the properties that the magnetic objects share? What materials are they made of?
- The magnetic objects contain metal.
- Introduce the concept of magnetic poles. Show how the magnets on the magnet car will attract or repel other magnets.
- All magnets have north and south poles. The magnetic force in a magnet flows from one end of the object to the other. One end is called the North Pole while the other is called the South Pole.
- Opposite poles are attracted to each other, while the same poles repel each other.
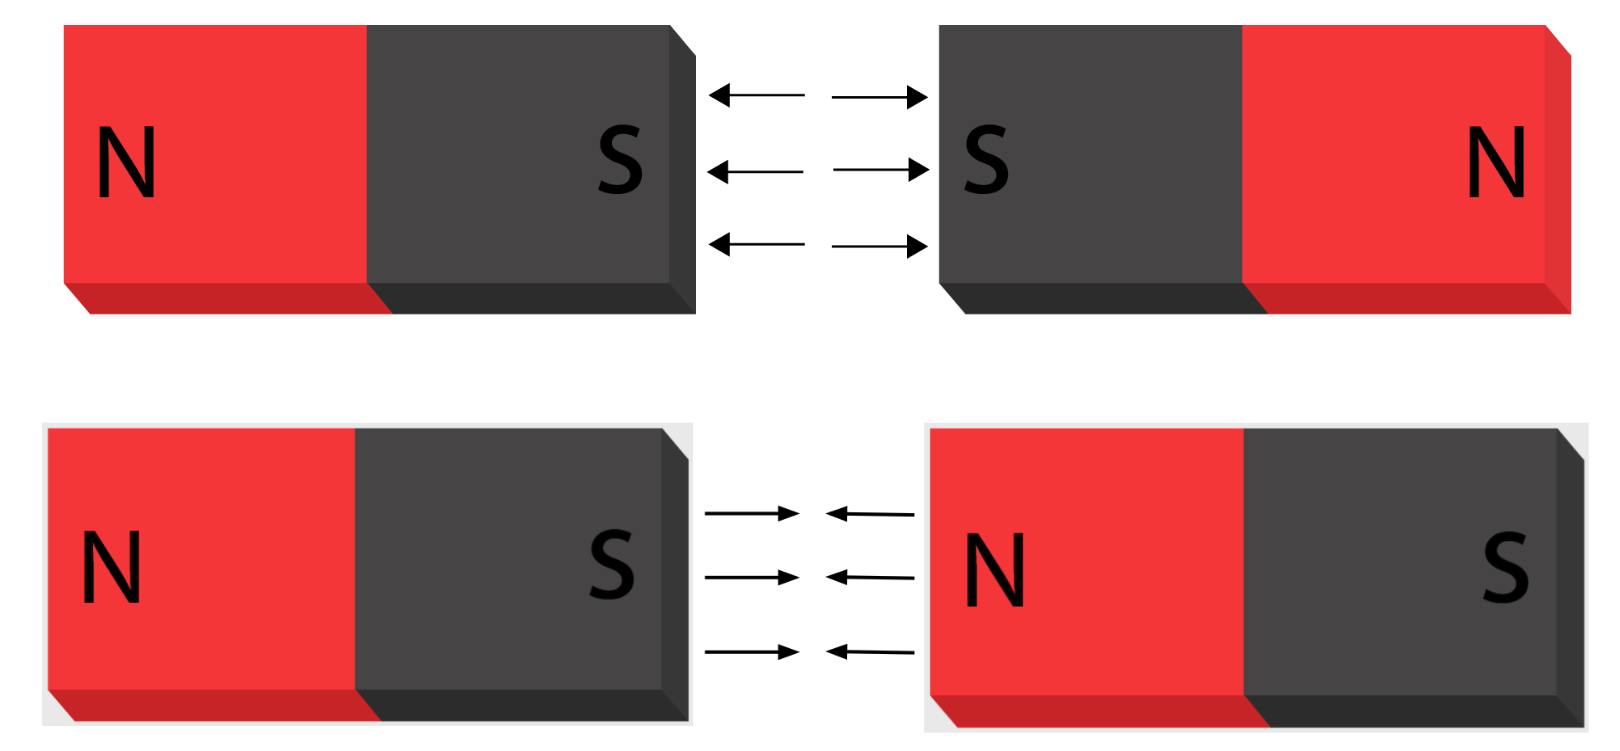
- The Magnet Car has a Red North Magnet one one side and a Black South Magnet on the other that either attract or repel other magnets depending on which pole is closest to the magnet. This magnetic force can be used to power their Magnet Car.
Part 2 - Step by Step
- InstructInstruct students that they will be using the magnetic force of their magnets to drive the Magnet Car from the start to the finish of a challenge course. Inform students that they will not be able to use their hands. Watch the animation below to see a magnet being used to repel and move the Magnet Car across a Field Tile.
Video file
Move the Magnet Car - ModelModel for students how to experiment with moving their Magnet Car without touching it. Once they have had a chance to experiment, they will apply what they have learned to complete the test course.
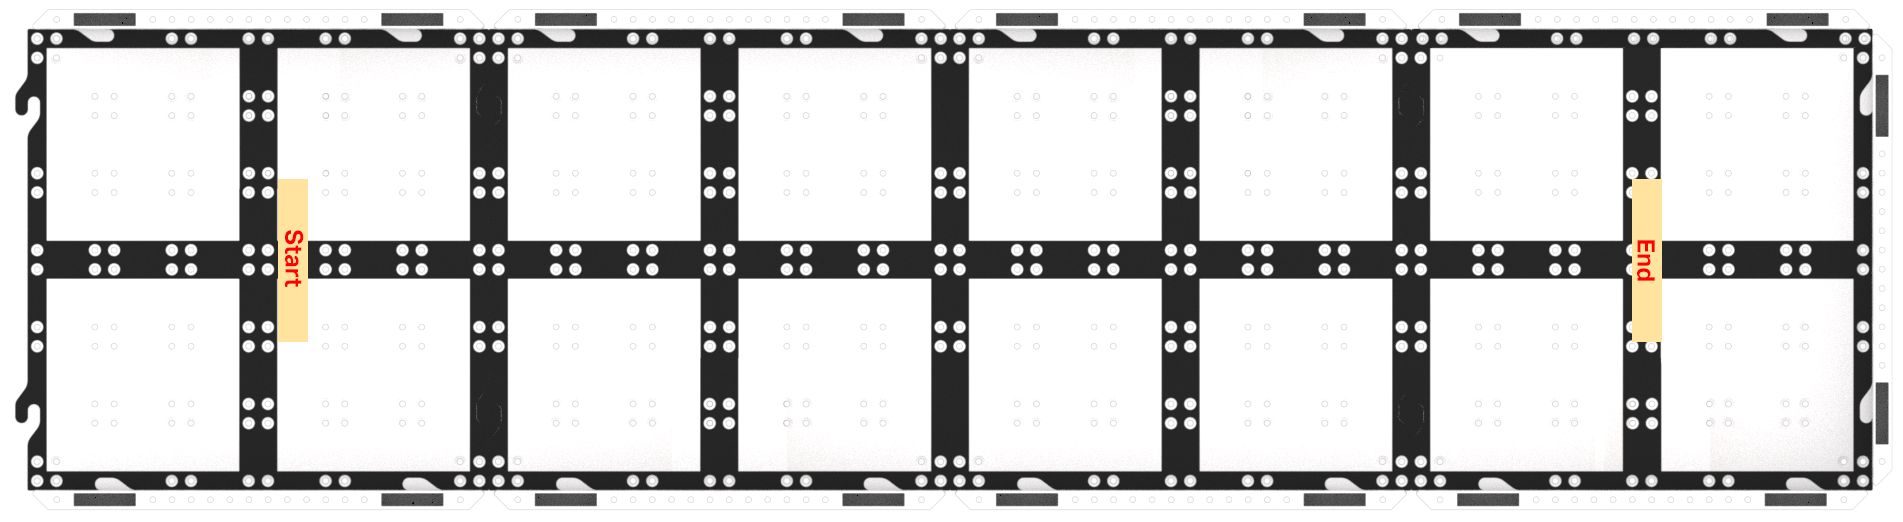
- Show students the test course so they can see the distance that they will need their Magnet Car to travel. You can set up a challenge course for students by connecting Tiles in a 1X4 formation to create a long rectangle, and use tape to mark the start and the finish line of the challenge course.
- If using Tiles doesn’t work for your learning environment, simply use masking tape on the floor to mark the beginning and end of the challenge course. The starting point and finish line should be at least 1 meter (~40 inches) apart.
- You can set up one challenge course for the whole class to use, or have students set up their own course with their group using tape on the floor.
Challenge Course Setup - Have students experiment with the magnets and the Magnet Car in order to figure out how to move the car with magnetic force and not use their hands.
-
They will need to place one of the magnets that you provided, near either the Red North Magnet or the Black South Magnet on the Magnet Car without touching it.
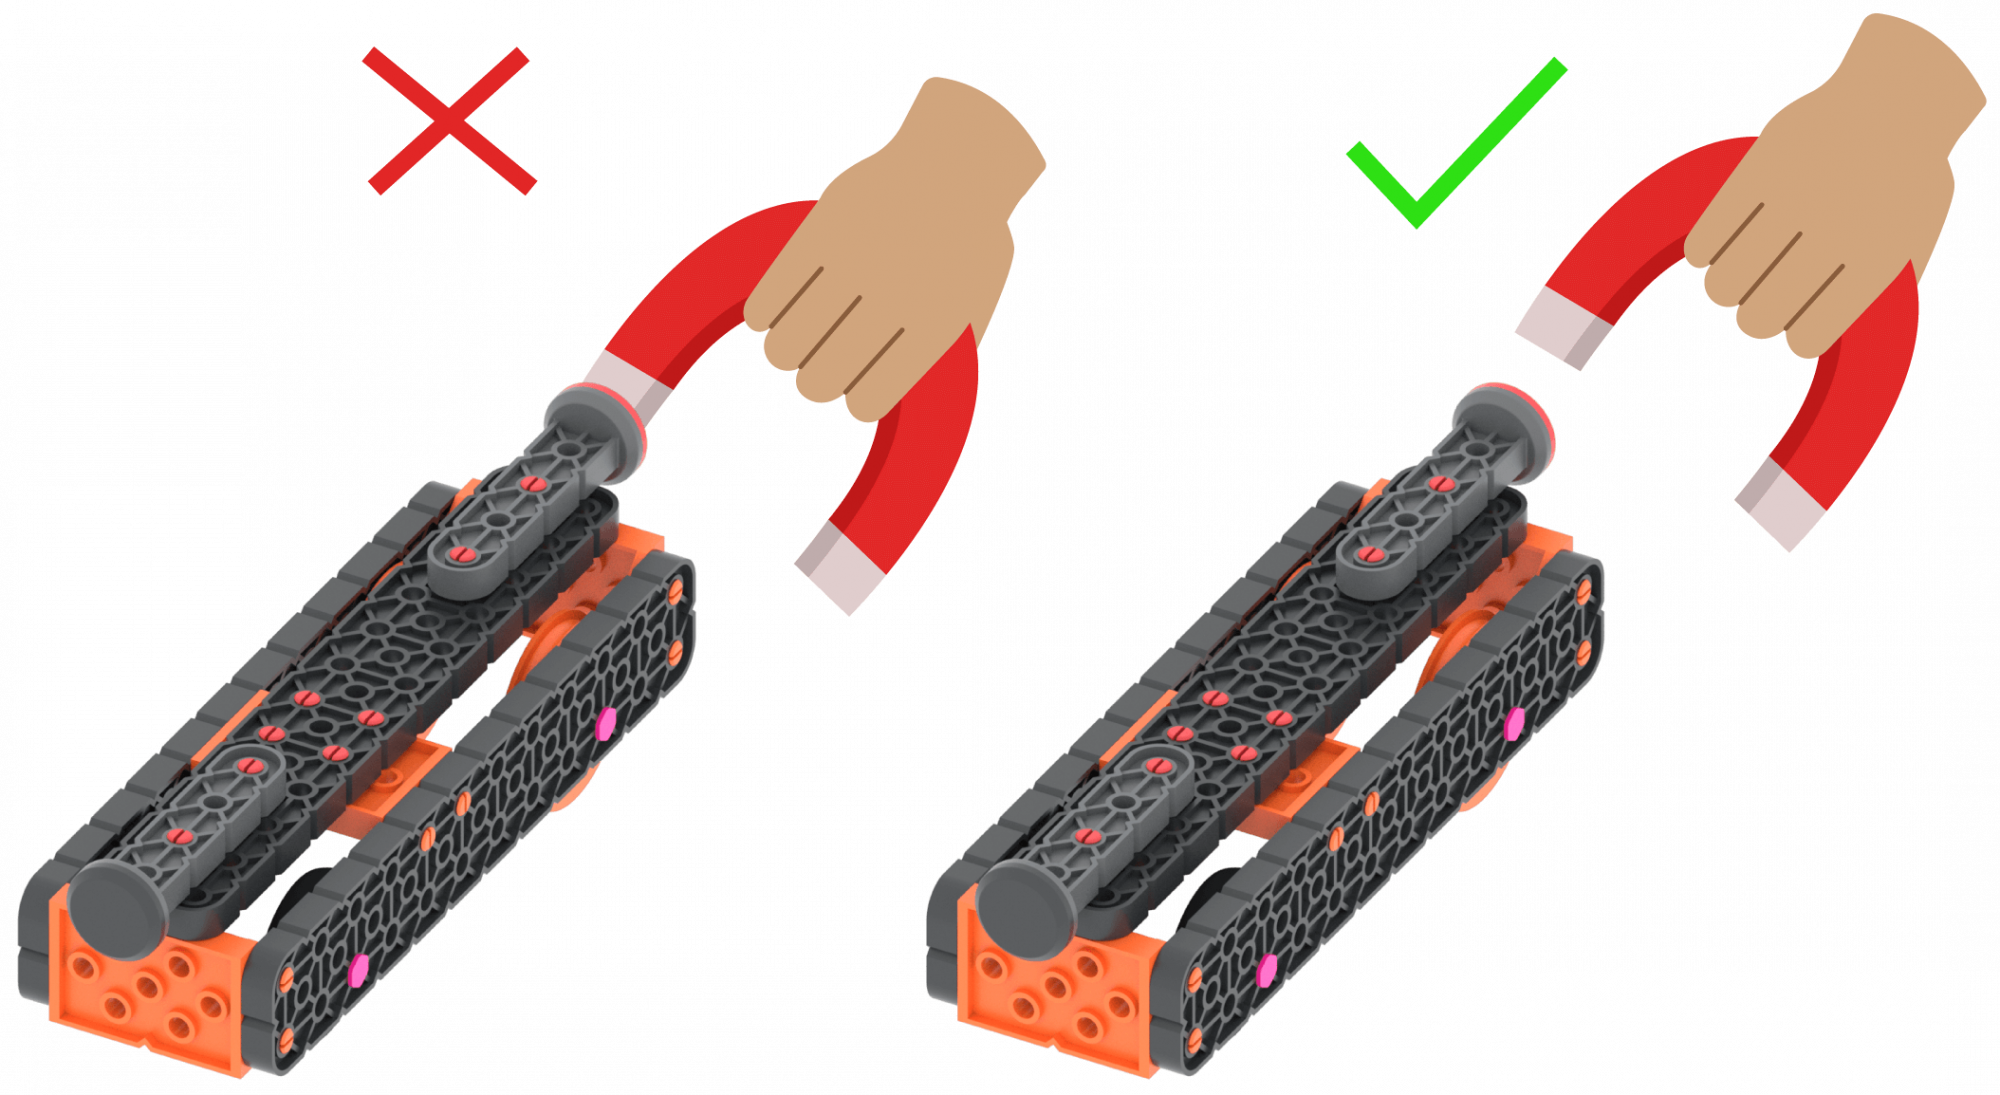
How to Hold the Magnet Near the Magnet Car -
The car should move either forward or backwards. Encourage students to place the magnet on the other side of the Magnet Car to observe what happens.
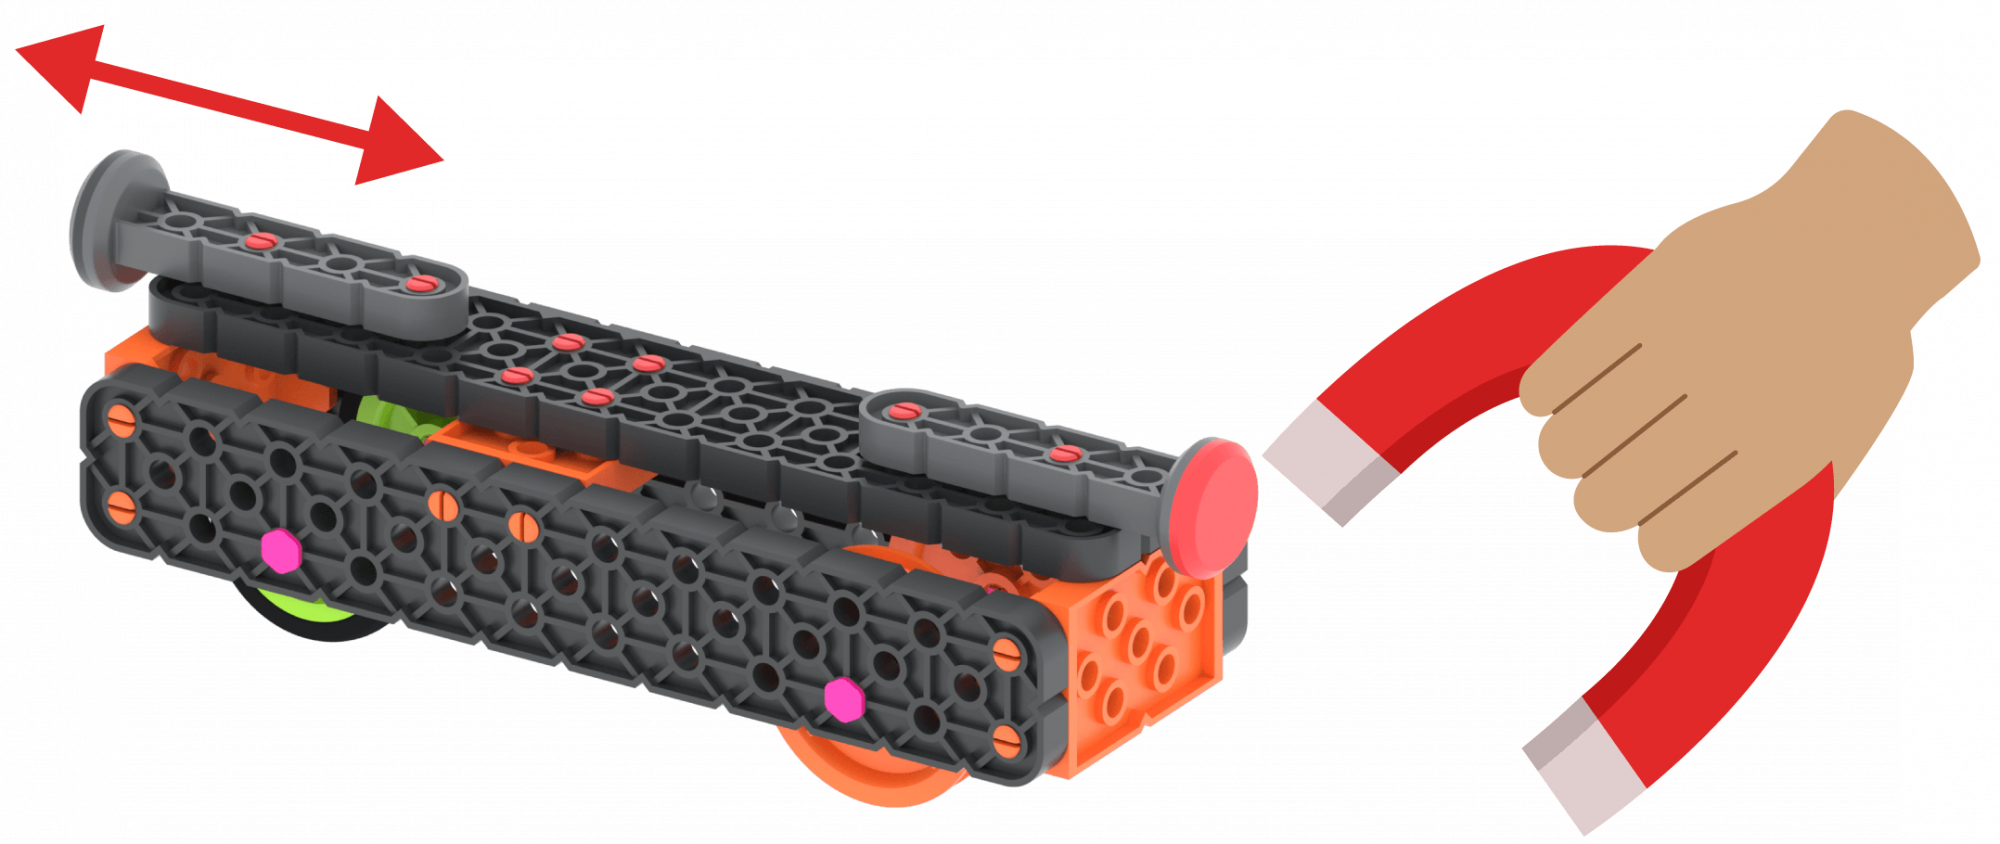
Magnetic Force Moving the Magnet Car - Encourage students to try using a different magnet to move the car.
- Once students have had a chance to experiment with moving the car, have them complete the challenge to move the Magnet Car from start to finish using magnetic force.
- Show students the test course so they can see the distance that they will need their Magnet Car to travel. You can set up a challenge course for students by connecting Tiles in a 1X4 formation to create a long rectangle, and use tape to mark the start and the finish line of the challenge course.
- FacilitateFacilitate good discussion practices by circling the room and asking questions to the groups about their results such as:
- How does the Magnet Car move differently when you hold the additional magnet near the Red North Magnet vs. the Black South Magnet?
- Is it easier to push or pull the Magnet Car with the additional magnet?
- What happens if you use more than one magnet to push or pull the Magnet Car? Is the magnetic force stronger? Does the car go farther?
- RemindRemind students that their attemps might not be successful on the first try. Trial and error is a part of the challenge.
Encourage students to try different distances for holding magnets or magnet configurations to move their Magnet Car.
- AskAsk students questions to encourage a growth mindset.
- What was the most difficult part of this challenge? How did you work around this?
- How did you help your group to complete the challenge?
- If you had to complete the challenge again, what would you do differently?
Optional: Teams may deconstruct their Magnet Car at this point in the experience.