
Lesson 1: Getting Started with VEXcode VR Python
Using Python with VEXcode VR requires a VR Enhanced or Premium license. Make sure you are logged in with your class code and that the VR Logo in the top left corner is grey or gold.
This lesson will show you how to get started with VEXcode VR Python. This lesson will also direct you to articles in the VEX Library.
Learning Outcomes
- Identify how to launch VEXcode VR Python.
- Identify the features of a VR Robot.
- Identify the features of the VEXcode VR Playgrounds.
- Identify how to access help in VEXcode VR Python.
Launching VEXcode VR Python
VEXcode VR Python does not require a download in order to get started. VEXcode VR Python can be run on most popular browsers and on most devices. For more information on the browser supported by VEXcode VR, see this STEM Library article.
To launch VEXcode VR Python, first go to vr.vex.com.
The following pop-up will appear when VEXcode VR is launched. Select Login Here to login with your class code.
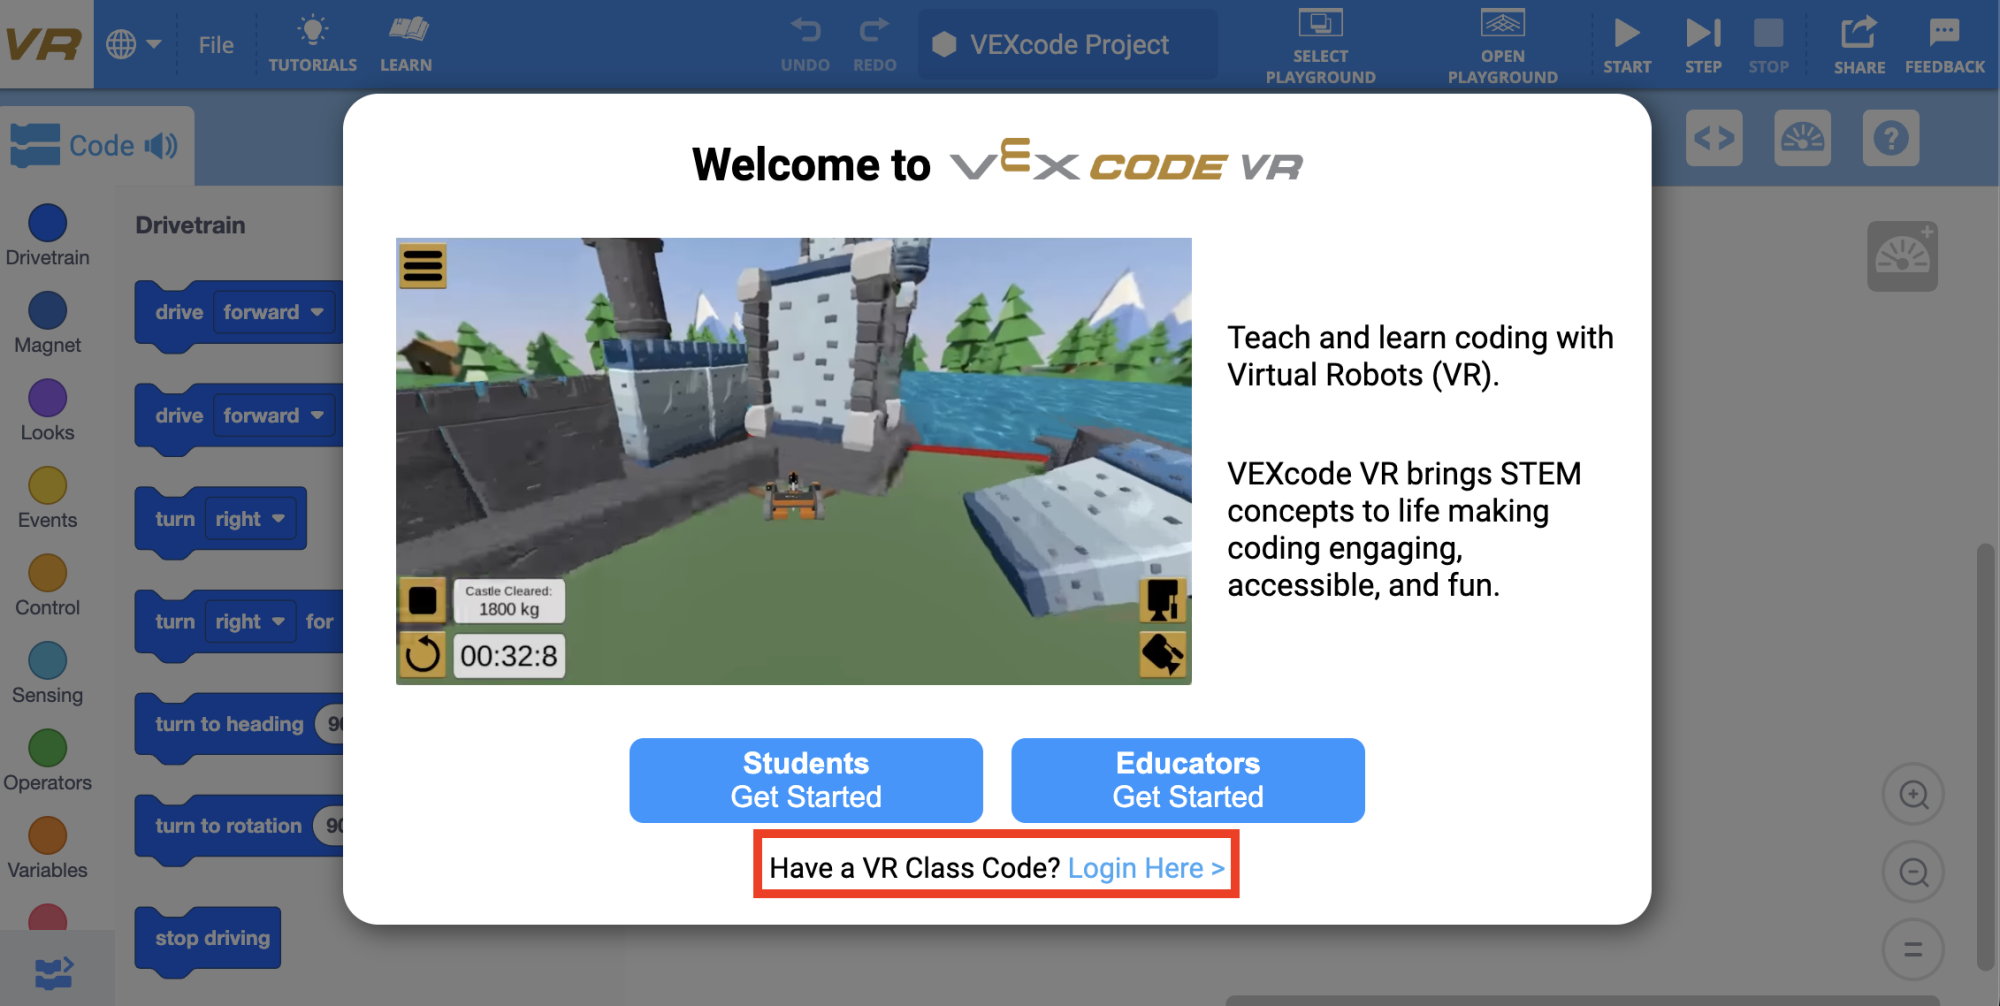
Enter your class code and then select Submit.

VEXcode VR may launch in Blocks mode. To switch to Python, select File in the Toolbar, select New Text Project, then select a Playground. View the video clip below, or this article to review the steps. You are now ready to create a project in VEXcode VR Python.
Features of the VR Robot and VEXcode VR Playgrounds
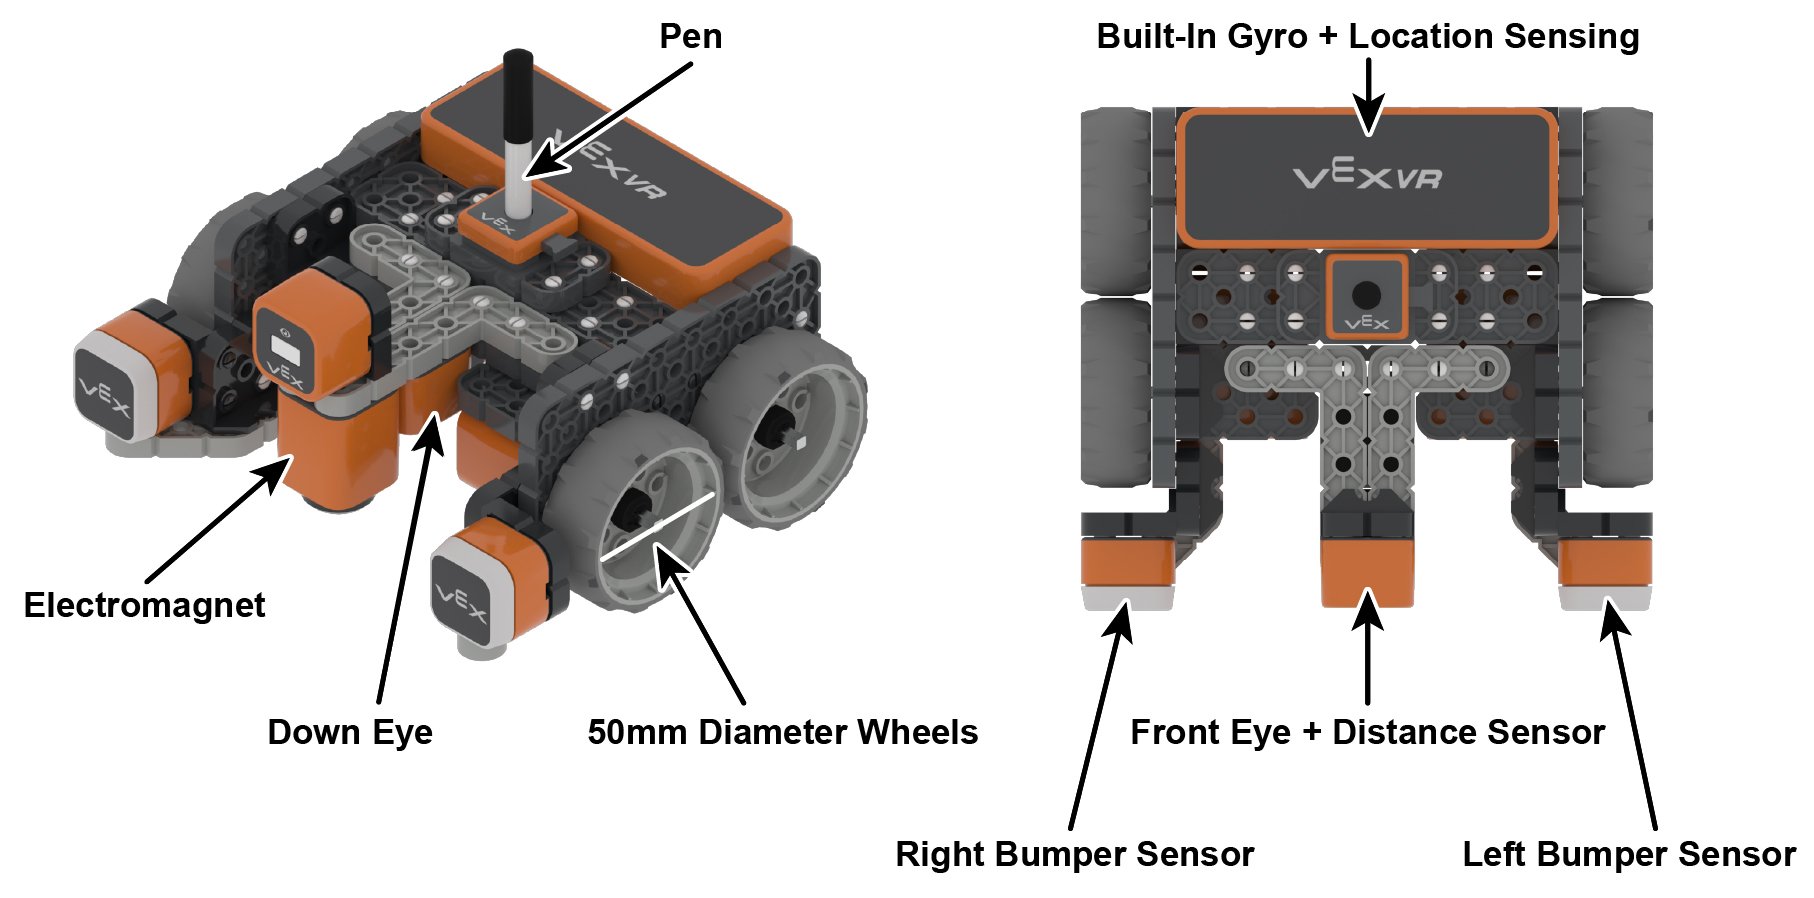
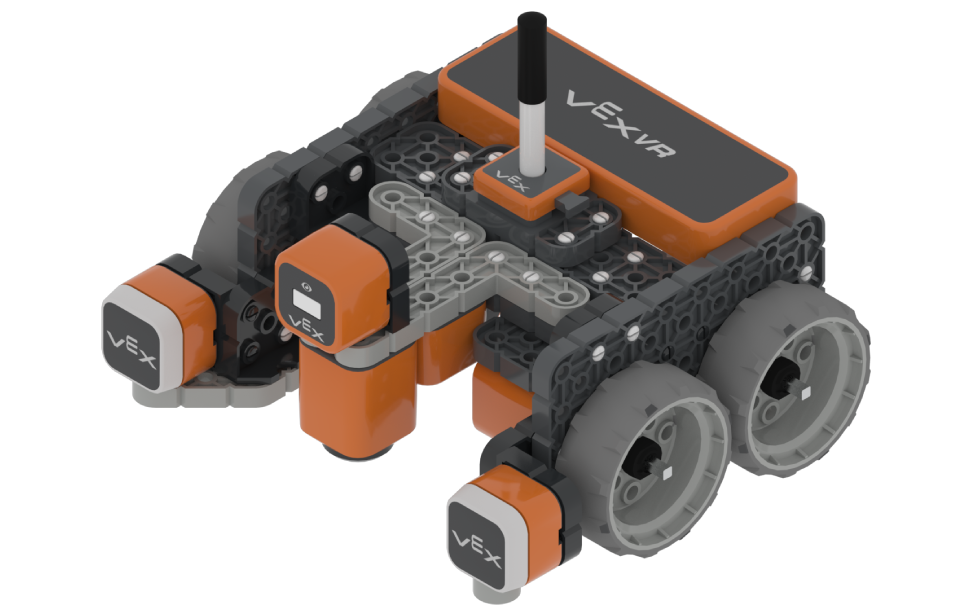
The VEX VR Robot is equipped with sensors, controls, and many physical features. In VEXcode VR, the robot is already preconfigured. This eliminates the need for a robot configuration or a predetermined template project that you would normally have to use with a physical robot. Read this STEM Library article to learn about the VR Robot's features.
A Playground is a virtual space in which your VR Robot can interact and move. VEXcode VR includes a variety of different playgrounds. Read this STEM Library article to learn about the VEXcode VR Playgrounds.
Accessing Help in VEXcode VR Python
There is also help information located in VEXcode VR Python. You can use the built-in Help at any time to learn more about commands and how they are used in a project.
-
Help can be accessed by selecting the Help icon beside an individual command. To close the Help, select the arrow to the right of the Help icon in the Help window. See the video below, or read this article, for how to access Help in VEXcode VR Python.
Video file