
Lesson 2: Creating Projects in VEXcode VR Python
Now it is time to get started with VEXcode VR Python and the VR Robot! With VEXcode VR Python, you can program a VR Robot to do many things. This lesson will show you how to get started programming with VEXcode VR Python.
Learning Outcomes
- Identify how to add, move, and delete commands in a project.
- Identify how to run a project in VEXcode VR Python.
- Identify how to load, rename, and save a project.
- Identify how to open an example project.
Building a New VEXcode VR Python Project
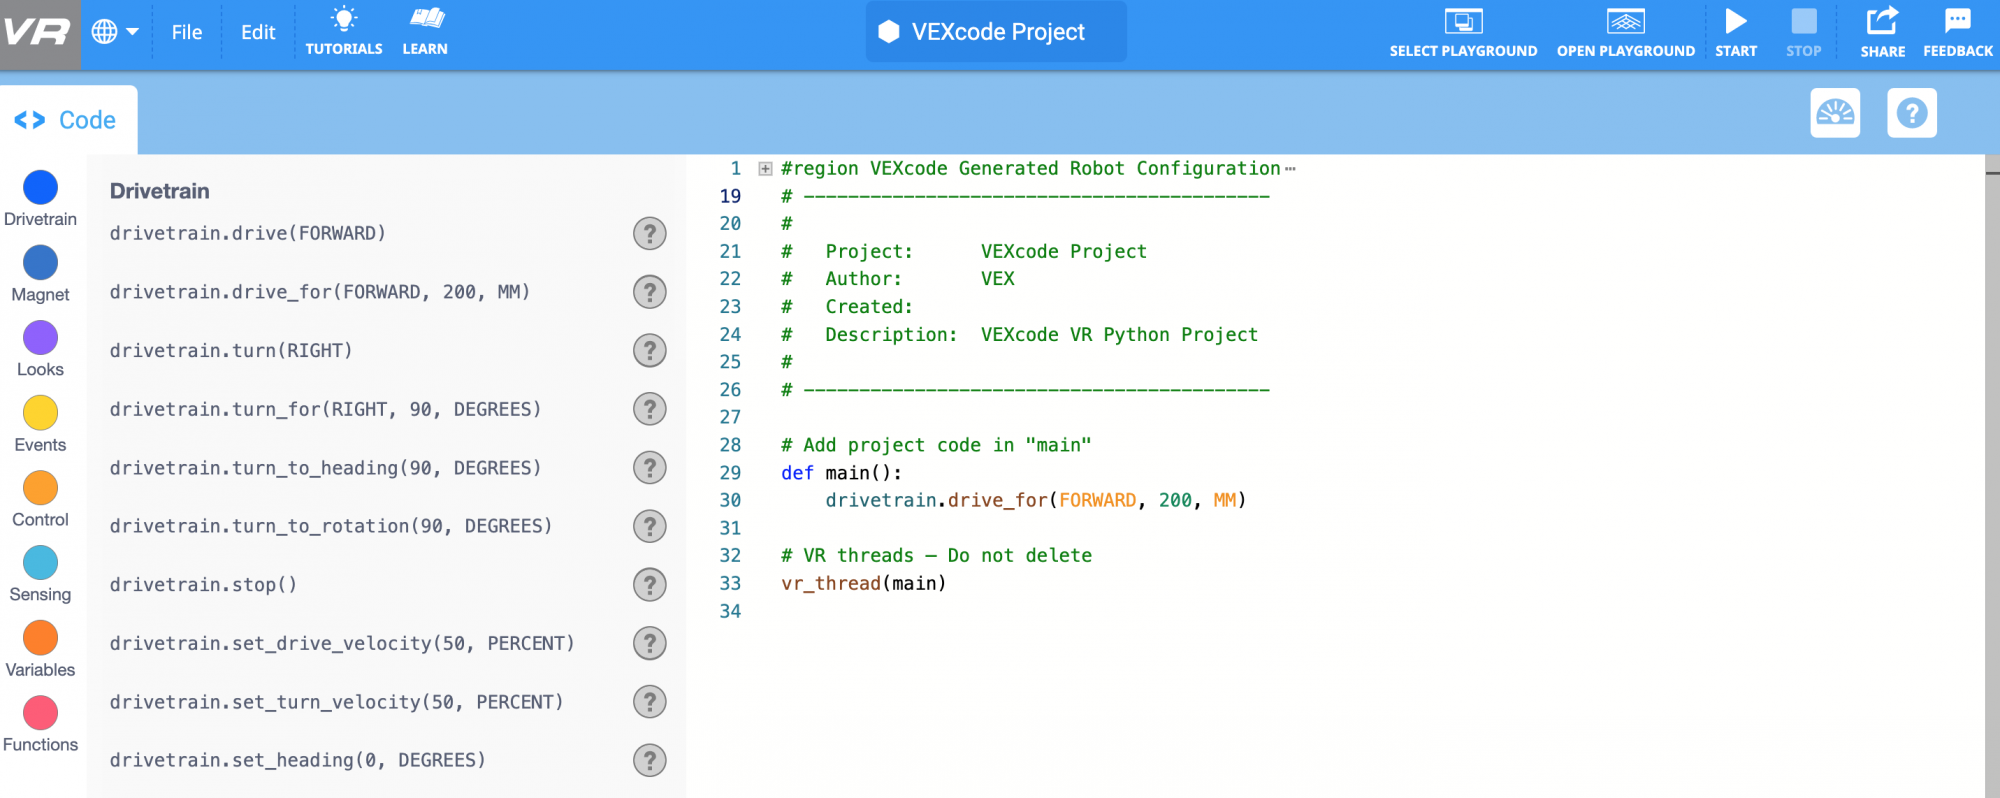
Every VEXcode VR Python project begins by defining the main function, and uses a comment and a def main function to identify where your project should begin. 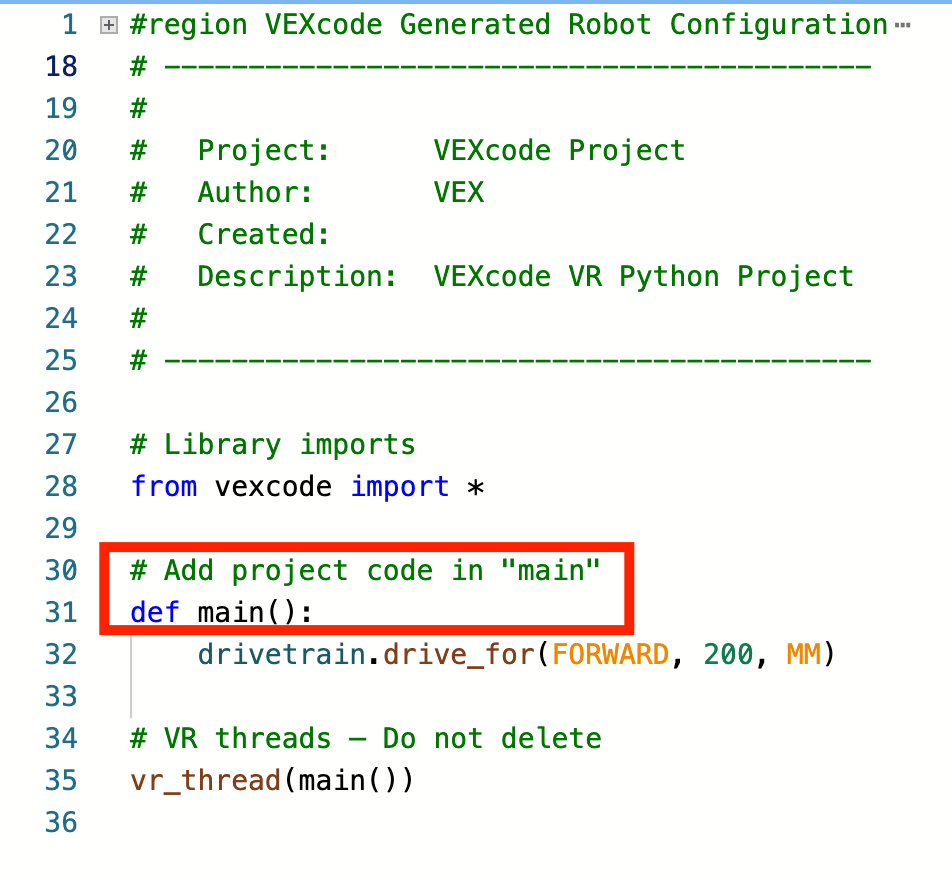
Each new Text project has a default Drivetrain command added. When you build your project, your first command will replace this one. 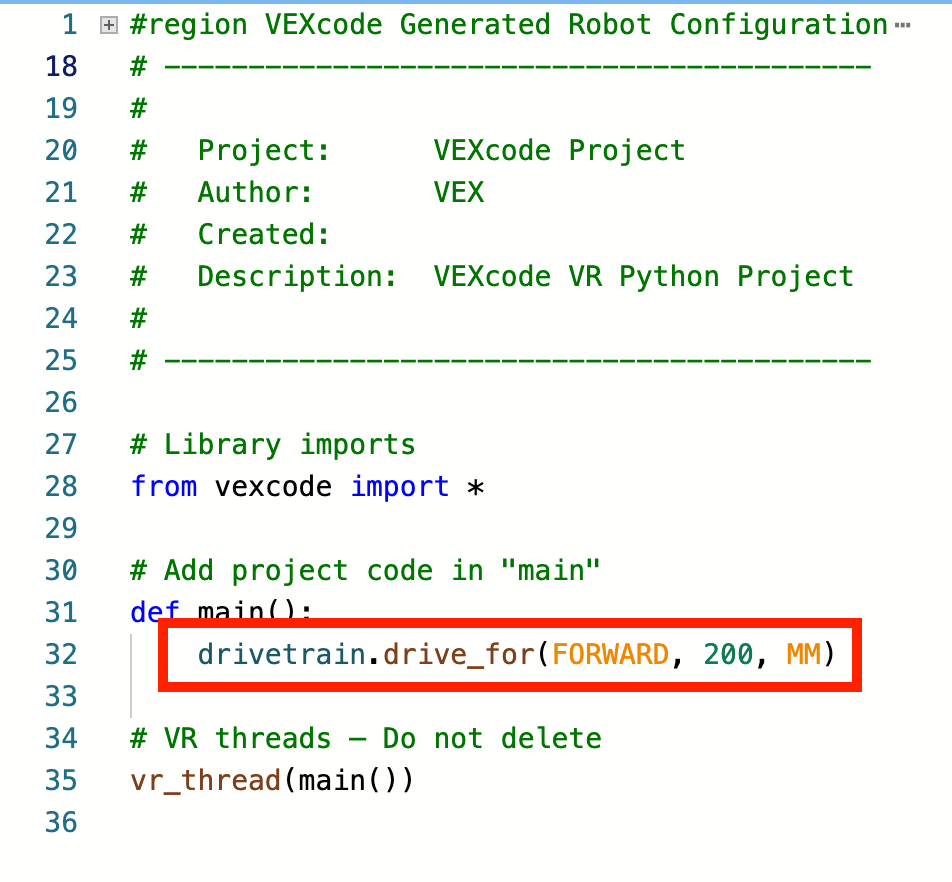
Adding, Moving, and Deleting Commands
There are several ways to add commands to a VEXcode VR Python project.
- Drag and drop from the Toolbox: You can select a command in the Toolbox and drag and drop it into a project. In the Workspace, the command will be colorized. (You will learn more about the colorization of commands later in this Unit.)
- To edit a command or its parameters once it is in your project, type directly in the Workspace.
- View the video clip below to see a turn_for command selected in the Toolbox, dragged into the Workspace, and added below the drive_for command. The direction parameter is then highlighted and changed from right to left, and the 90 is highlighted and changed to 180 degrees.
- Typing in the Workspace: You can also type commands directly into the Workspace. As you type commands in the Workspace, they will be automatically colorized.
- To add a command in the desired location, use the cursor or press 'Enter'/'Return' on the keyboard at the end of a row to move to the next row.
- To indent commands, press 'Tab' on the keyboard. Notice that as you type, the auto-complete feature will populate command options for you.
- In the video clip below, the first command will be typed completely, and the second command will be added using the auto-complete feature. To learn more about using the auto-complete feature in VEXcode VR Python, see this VEX Library article.
- Copy and Paste: Once commands are added to a project, they can also be copied and pasted using keyboard commands or the Context Menu in VEXcode VR Python.
- To copy a command or sequence of commands using the Context Menu, select the command and right click or long press to open the Context Menu. Then select 'Copy'.
- To paste with the Context Menu, place your cursor in the desired location in the project, and right click or long press to open the Context Menu. Then select 'Paste'. Your commands will now be added to the project.
- In the video clip below, two of the three lines of code in the project will be highlighted, then the Context Menu is opened and ‘Copy’ is selected to copy the commands. The cursor is then moved to the next line of the project. The Context Menu opens again, and ‘Paste’ is selected to paste the commands, and create a five line project.
- The Context Menu can also be used to move, or reorder, commands in a project.
- To move command(s) within a project:
- Use your cursor and the 'Enter'/'Return' button on the keyboard to create a space in the project in the desired location.
- Select the command(s) that you wish to move.
- Right click or long press to open the Context Menu, and select 'Cut'.
- Place your cursor in the open space you created, and right click or long press to open the Context Menu.
- Select ‘Paste’ to paste the commands in the new order.
- The video clip below shows the five line project created above. First a space is added between the third and fourth lines of code. Then the last turn_for command is highlighted, Context Menu is opened, and ‘Cut’ is selected. The command is then removed from the project, and the cursor is placed in the open space. The Context Menu opens again and ‘Paste’ is selected, so now the turn_for command is the fourth line in the project.
- To move command(s) within a project:
- To delete a command, select the command and press 'Delete'/'Backspace' on your keyboard, or use the Context Menu and select 'Cut'.
- When a command is deleted, an empty space will appear. Extra spaces between commands may not prevent your project from running, but can be eliminated if desired. To consolidate your project, use the cursor or arrow buttons, and the 'Delete'/'Backspace' button on the keyboard to move subsequent lines of the project up to the desired location.
- In the video below, the first line of the project is highlighted and deleted. The ‘Backspace’ button is then used to align the remaining lines of code to eliminate the empty first row of the project.
Starting a Project
Once you are ready to try your project with the VR Robot, you can do so. Select 'Open Playground' in the upper right corner of the Toolbar, if the Playground Window is not already open. Then select 'Start', located to the right of the Playground button. The VR Robot will now run your project in the Playground Window.
In the video clip below, the ‘Open Playground’ button is selected, and the Playground Window opens. Then, the ‘Start’ button is selected, and the project begins to run, causing the robot to turn right. To learn more about starting a project, view this VEX Library article.
Renaming, Saving, and Opening a Project
In VEXcode VR Python, all projects begin with a default name of “VEXcode Project”. To rename your project, select the project name box and type your desired project name. Then select 'Save'.
In the video clip below, the project name box is selected, and a new project name of ‘Turn and Drive’ is typed in the dialog box. Then the ‘Save’ button is selected, and the project name changes in the VEXcode VR Toolbar.
To learn more about naming and saving project, view the article that matches your device in the VEX Library.
When you are done coding, you can download a copy of your project. Select 'File' in the Toolbar, then select ‘Save’ or ‘Save As’.

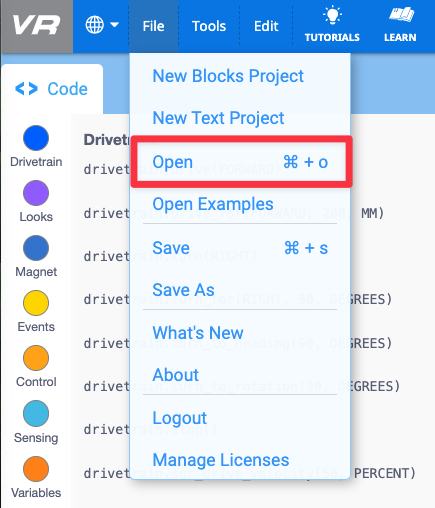
To open a saved project from your device, select 'File' in the Toolbar. Then select 'Open'.
- For device-specific information about naming and saving projects to your device, see this VEX Library article.
Opening an Example Project
Example projects are a great place to learn about commands and behaviors.
- To open an example project, select 'File' in the Toolbar. Then select 'Open Examples'.
- Select the example project you wish to open.
- If you have an unsaved project open in the Workspace, you will be prompted to discard or save it. Once that selection is made, the example project will open in the Workspace.
- In the video clip below, the File menu is opened, and ‘Open Examples’ is selected. The ‘Drivetrain Moves and Turns’ project is selected from the list of available project. A prompt shows ‘Your project was never saved. Save it now?’ with two options - Discard, or Save. The ‘Discard’ button is selected, and the example project opens in the Workspace. View this article to learn more about using example projects in VEXcode VR.
You can now start the example project to observe the behaviors, and then edit the example project as you would a new Text project.