
Background
The Mars Rover: Landing Challenge Unit will challenge your students to build VEXcode 123 projects to solve a problem. This Unit introduces students to using the Eye Sensor on the front of the 123 Robot in a challenge, inspired by the process scientists use while attempting to land spacecraft, like the Mars 2020 Perseverance rover. Students will code the 123 Robot to detect an obstacle, then glow a color to indicate an obstacle was found on the landing site.
NASA’s Mars 2020 Mission
NASA’s Mars 2020 Mission addresses high-priority science goals for Mars exploration: life, climate, geology, and humans. But before the Perseverance rover can begin its mission gathering rock and soil samples on the surface, the rover needs to safely land on the Red Planet.
According to NASA, only about 40% of missions ever sent to Mars (by any space agency) have been successful. The entire process of Entry, Descent, and Landing will take only minutes, but the spacecraft carrying the Perseverance rover needs to slow down from almost 20,000 km per hour (~12,500 miles per hour) to zero and find an open, flat area to land. The martian surface is full of obstacles — massive impact craters, cliffs, cracks and jagged boulders. Unpredictable winds can also stir up further complications.

To help ensure a safe landing, the Perseverance rover will take images while descending and compare those images to the maps. It quickly can decide if that area was determined to be hazardous by scientists and make adjustments to land in an open area. Watch the video below to see how the rover is expected to land.
In this Unit, students will be coding the 123 Robot to detect obstacles at the landing sites on their 123 Fields to help ensure a safe landing for the rover.
What is a sensor?
A sensor is, in essence, a device that helps a robot to understand the world around it. It does this by collecting and reporting data about its environment, which can then be used in a project to make the robot make decisions, or perform certain behaviors. This sequence can be thought of as a Sense → Think → Act decision loop.
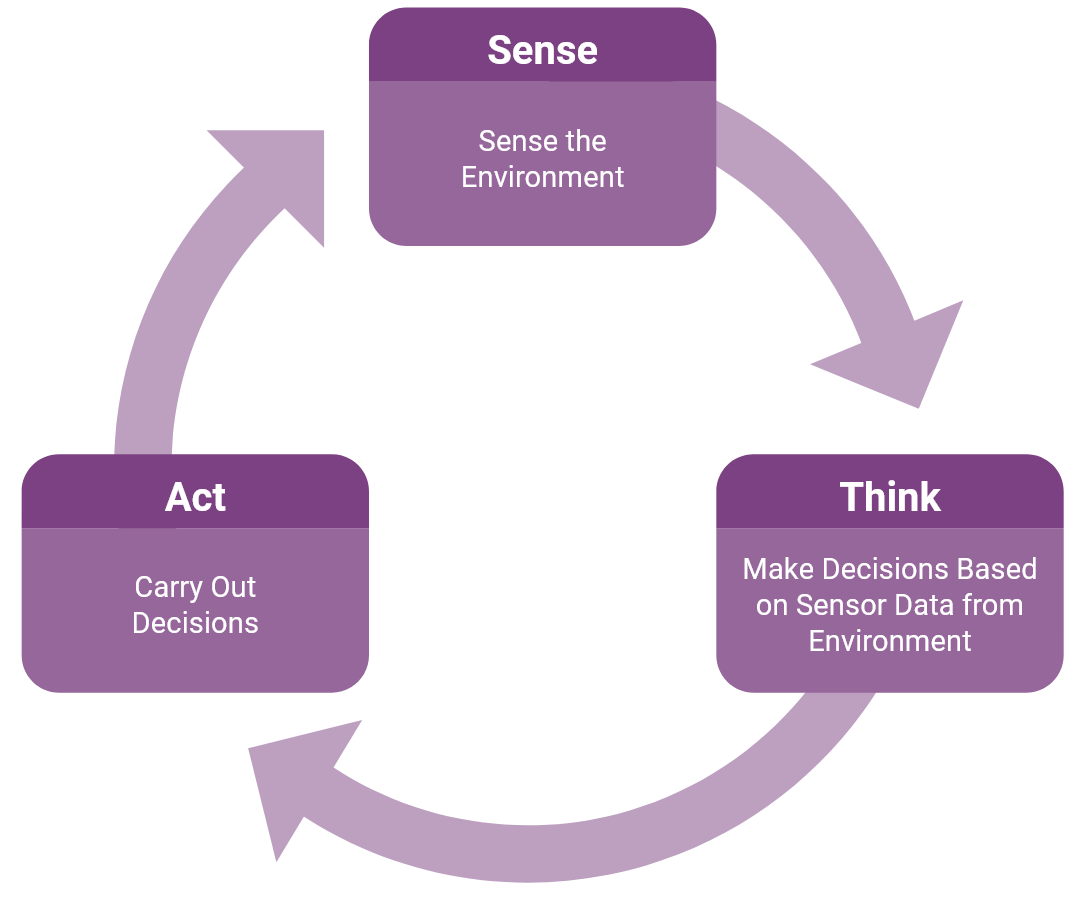
In this Unit, the 123 Robot will be detecting objects on the 123 Field to help clear the area for a safe rover landing. The project students create carries out this loop as the Eye Sensor will Sense the presence of an object, then the VEXcode 123 commands Think and make decisions based on whether the Eye Sensor detects an object or not, and then the 123 Robot will Act by having the button on the robot glow.
What is the Eye Sensor?
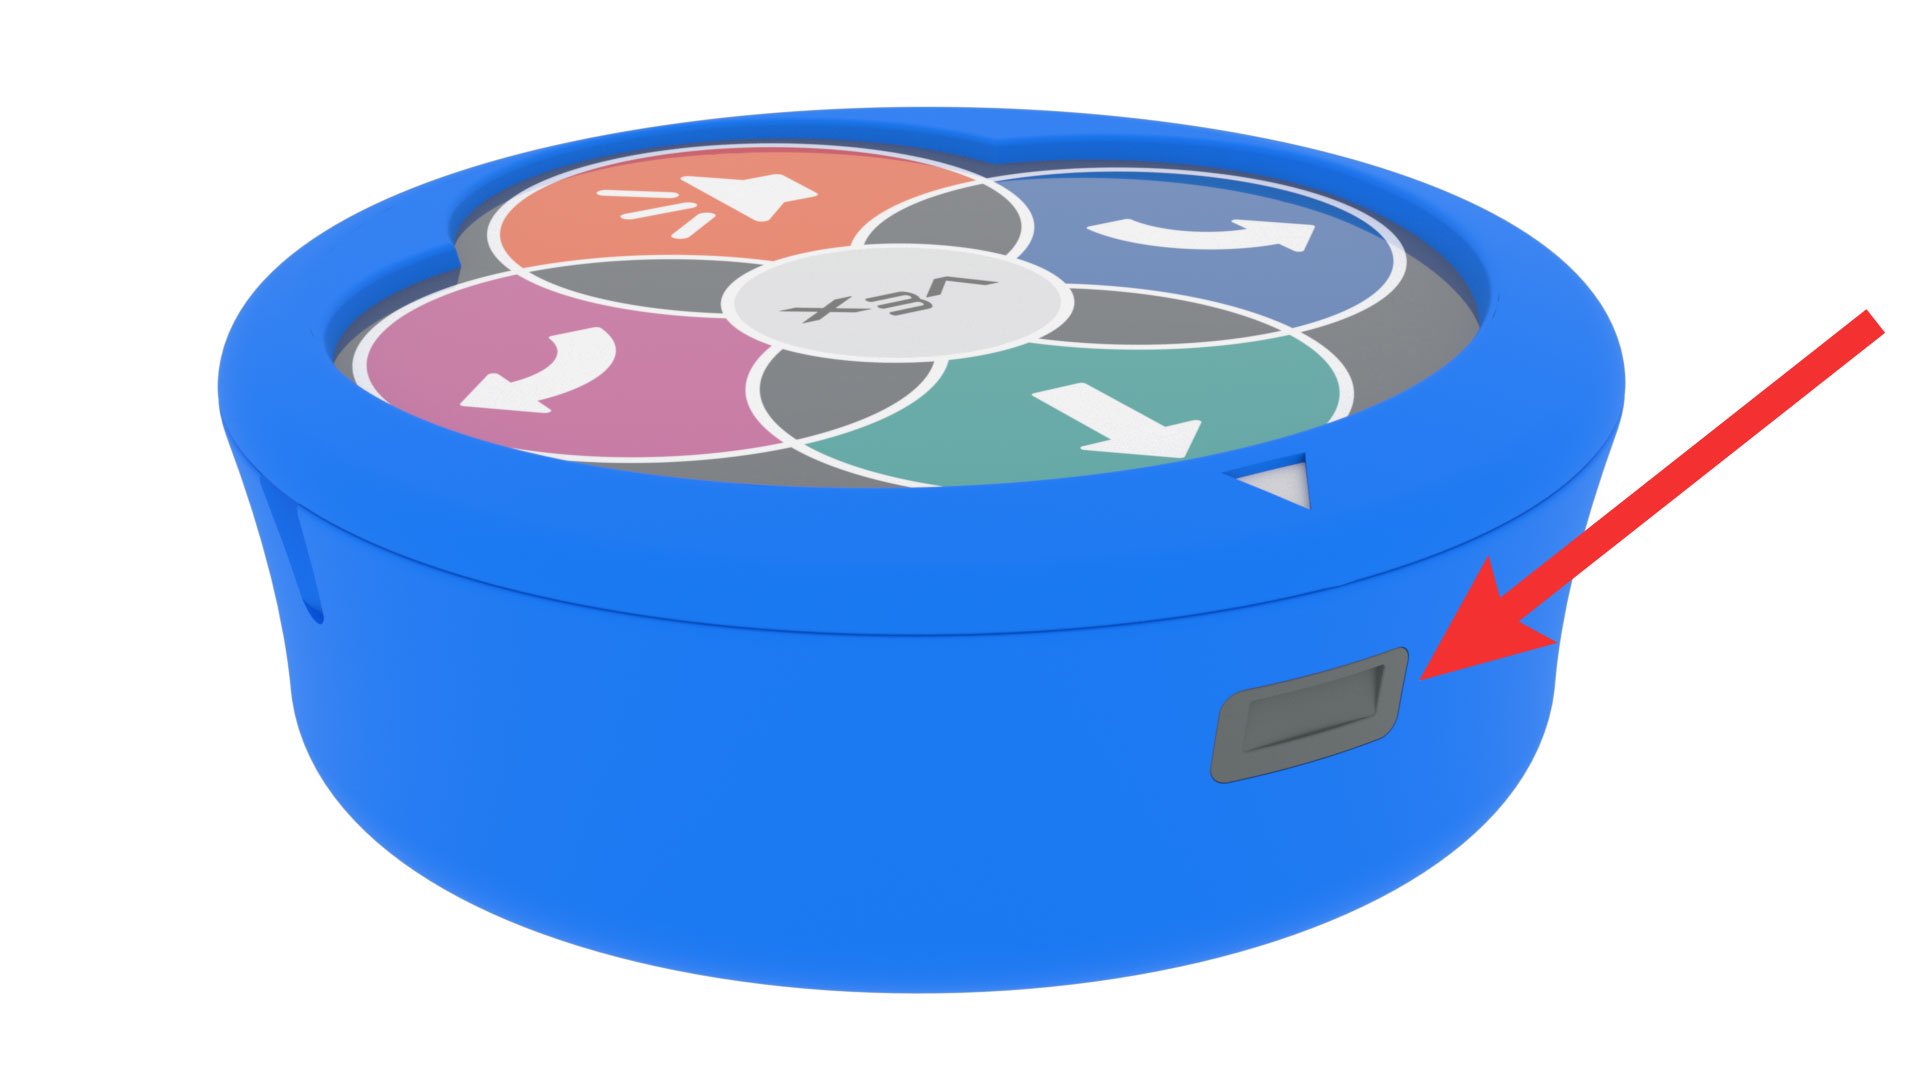
The Eye Sensor on the 123 Robot is located on the front-facing side, below the white arrow. The Eye Sensor can be used to detect the presence or absence of an object, as well as its color or brightness level.
The Eye Sensor uses infrared light to detect objects. Light-colored objects reflect infrared light and are detected more easily by the Eye Sensor. Dark-colored objects absorb infrared light and the Eye Sensor does not detect them as well. During the Unit, use white or light-colored paper for the obstacles to ensure that the Eye Sensor will be able to detect these objects.
In this Unit, the Eye Sensor will be used to detect when an object is present in the path of the 123 Robot. The position of the Eye Sensor on the 123 Robot means that it can only detect objects directly in front of it. Be mindful of this when you are placing your 123 Robots and obstacles with your students so that the materials are setting students up for success.
For more information about how to code the Eye Sensor with VEXcode 123, see the Coding the VEX 123 Eye Sensor using VEXcode 123 VEX Library article.
What is VEXcode 123?
VEXcode 123 is a block-based programming language used with the 123 Robot. A programming language is a set of rules in which symbols represent actions. Programming languages follow step-by-step instructions that a computer executes in order for a project to run.
For more information on how to work with VEXcode 123, see the VEXcode 123 Section of the VEX Library.
What VEXcode 123 Blocks Do You Need?
The blocks in VEXcode 123 represent 123 Robot commands that are used to create a project in VEXcode 123. Below is a list of the main blocks used during this Unit.
| VEXcode 123 Blocks | Behaviors |
|---|---|
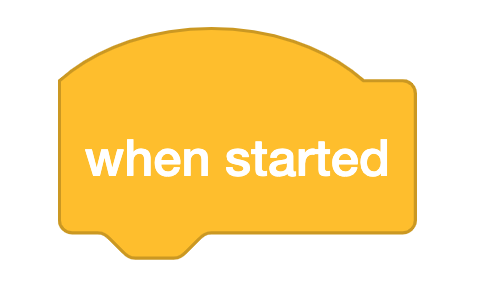 |
The {When started} block begins running the attached stack of blocks when the project is started. |
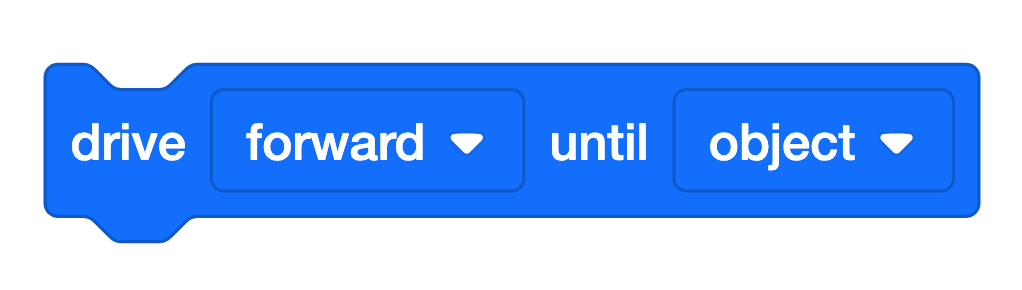 |
The [Drive until] block drives the 123 Robot until one of three conditions is met.
|
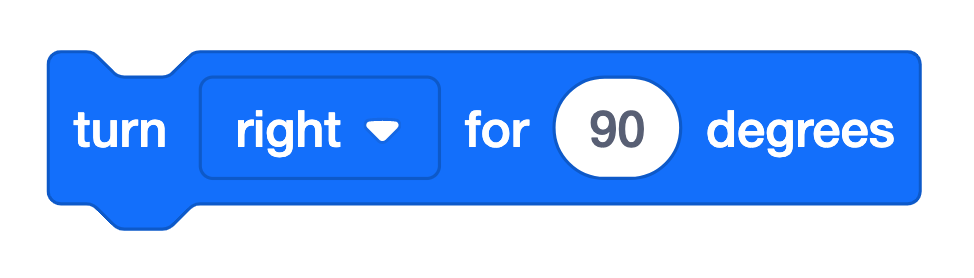 |
The [Turn for] block turns the 123 Robot in place to the left or right for a specified number of degrees. |
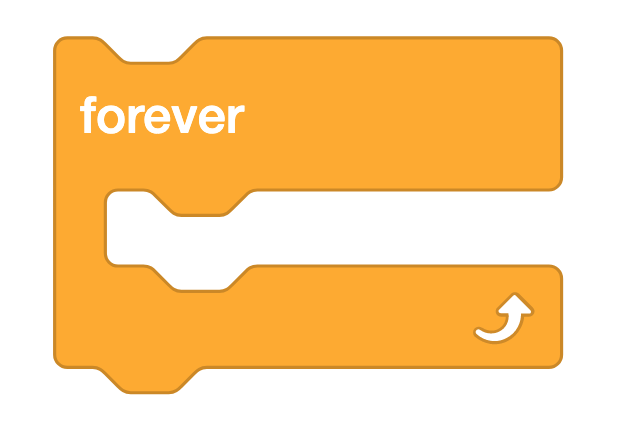 |
The [Forever] block repeats any blocks contained inside the ‘C’ forever. |
![[Wait] block](/stemlabs/sites/default/files/inline-images/%5BWait%5D.png) |
The [Wait] block waits for a specific amount of time before moving to the next block in a project. |
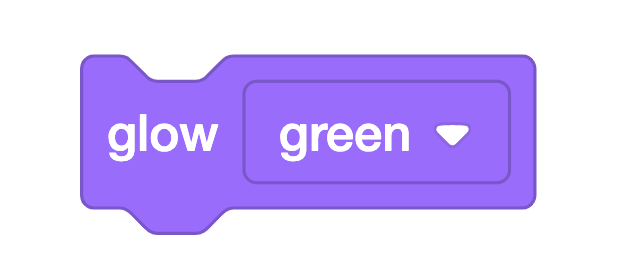 |
The [Glow] block sets the glow color of the indicator light in the center of the 123 Robot. |
How does the [Drive until] block work?
[Drive until] blocks repeatedly check a condition and control the project flow. A project will not move to the next block in the stack until the condition of the [Drive until] block is met. In the project shown below, the 123 Robot will drive forward and continuously check if the Eye Sensor has detected an object. Once an object is detected by the Eye Sensor, the 123 Robot will stop driving and move to the next block, a [Glow] block.
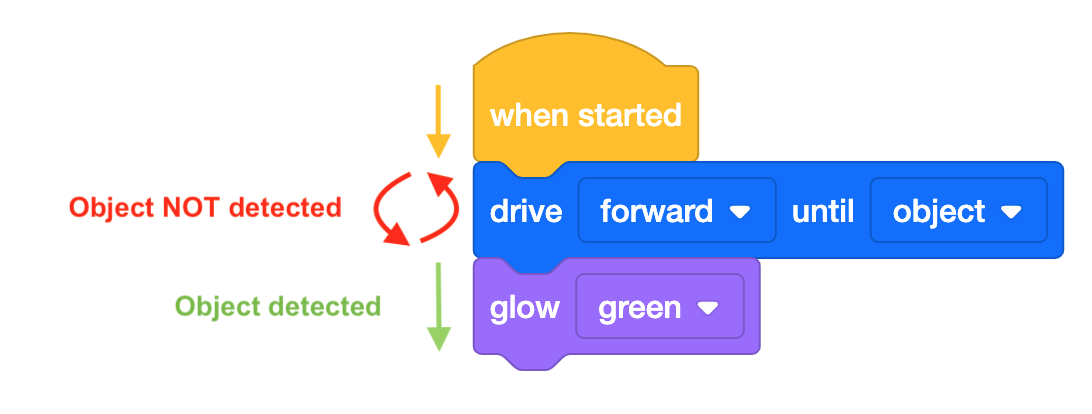
The condition that will stop the 123 Robot driving can be set. This Unit uses the “object” parameter so that the robot will stop driving when the Eye Sensor on the front of the 123 Robot detects an object.
![[Drive until] block with the parameter drop down shown. The choices are object, crash and line. The object choice is highlighted with a black checkmark.](/stemlabs/sites/default/files/inline-images/Drive%20until%20with%20parameters.png)
Preparing for Open-Ended Challenge in this Unit
In this Unit, students will be asked to use what they have learned previously to create a project to solve a challenge. Because it is important to regularly challenge students to problem-solve and apply the skills that they have been learning in a new way, we encourage you to challenge your students and use these strategies to build resilience and help guide them through the challenge. Here are a few suggestions to help students as they experiment with their projects:
Give feedback without giving the solution - Making errors while working through a challenge is expected and encouraged. “Errors in learning can create opportunities, [and] can help realize connections.”1 Creating a familiar problem-solving process with your students can help them to know how to identify a problem and move forward when they make an error, thereby minimizing disruption and frustration. Try using the following problem-solving cycle with your students to help them troubleshoot their projects and come up with their own solutions.

- Describe the Problem
- Ask the student to explain what is wrong. Students should be able to relate the error back to the shared goal or the challenge at hand.
- How is the 123 Robot moving in their project? How should the robot be moving?
- Ask the student to explain what is wrong. Students should be able to relate the error back to the shared goal or the challenge at hand.
- Identify When and Where the Problem Began
- Ask the student when they first noticed the problem.
- What part of the project was being executed?
- If students are having difficulty determining where in the project the error is, encourage them to use the Project Stepping feature in VEXcode 123. The visual cues provided with the Project Stepping feature can be used to help students troubleshoot their project by having the ability to see the blocks being executed one at a time. This will give them a better visual of which blocks may be causing the error, so debugging can become a more targeted and efficient process. For more information on how to use the Project Stepping feature, see the Stepping Through a Project in VEXcode 123 VEX Library article.
- Ask the student when they first noticed the problem.
- Make & Test Edits
- As students find an error, they should make edits to their project. Students can test the project with each edit made. If the project is successful, then they can move onto the next step in the problem-solving cycle. If the project is not successful, they can go back to the beginning of the process and try again.
- Reflect
- Ask students to think about the error they made and overcame during the process.
- What was the mistake? What did you learn from this mistake? How can it help you when coding the 123 Robot next time?
- Encourage students to recognize their mistakes and what they learned from the process to help encourage a growth mindset. A strong emphasis on a growth mindset can help students to learn when and how to persist and also when to ask for help.2 If students can see their process as a precursor to new learning, then they can use the steps here to further their own learning as well as furthering the learning of their classmates. As students come across these issues and reflect upon their errors, encourage them to share their errors and process with fellow students. In this way, students can become “learning resources for one another.”3
- Ask students to think about the error they made and overcame during the process.
Clear the Landing Area (Lab 2) is designed to be an open-ended exploration that will ask your students to persevere to solve a challenge. In this Lab, we introduce loops with the [Forever] block and ask students to experiment with using loops in their project to have the 123 Robot drive to and detect all the obstacles on the landing area (VEX 123 Field). If using loops in a project is new for your students, it may take several iterations of their projects to use loops effectively. Use the suggestions outlined in this section to prepare students for the trial and error process, and to help them troubleshoot their projects to achieve the goal of the challenge. The Facilitation section of Play Part 1 and 2 contain additional instructional supports for guiding students through the Lab 2 challenge. Having a plan for how you will provide support for the problem-solving and trial and error that is required in this Lab can help you meet the individual needs of your students.
See the Building Resilience in STEM Labs VEX Library article for more information on how effective feedback can help students build resilience and a growth mindset while working through STEM Labs.
1 Hattie, John, and Shirley Clarke. Visible Learning: Feedback. Routledge, Taylor & Francis Group, 2019.
2 Ibid.
3 Ibid, p. 121