
Lesson 2: Using Comparison Blocks and Driving Until Near
In this Lesson, you will create a project that navigates the VR Robot to the letter ‘A’ using the Distance Sensor with the <Less than> Boolean reporter block. In the mini-challenge, you will apply these skills to navigate from the beginning of the Wall Maze to the number '1.'
Learning Outcomes
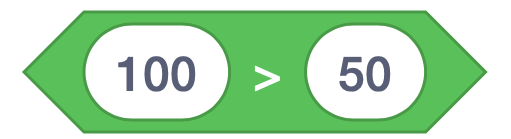
- Identify that the <Greater than> block is a Boolean block that reports if the first value is larger than the second value.
- Identify that the <Less than> block is a Boolean block that reports if the first value is less than the second value.
- Identify that the <Greater than> or <Less than> blocks report a TRUE or FALSE value in a [Wait until] block.
- Describe how to create a project that has a VR Robot drive forward until the value of the Distance Sensor is less than a threshold value of 50 millimeters (mm).
Name and Save the Project
- Start a new project in VEXcode VR and name the project Unit5Lesson2. Remember that you may use VEXcode blocks, Switch blocks, or a combination of both block types for your project.

Use the Distance Sensor to Avoid Walls
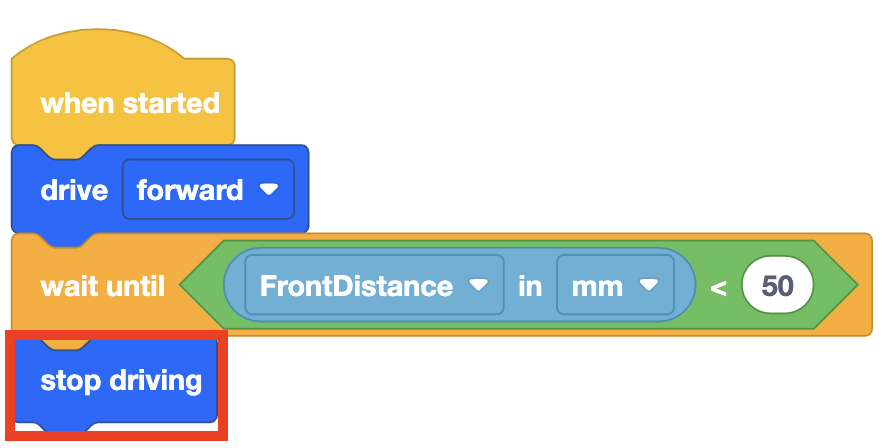
- Drag the [Drive] block into the workspace.
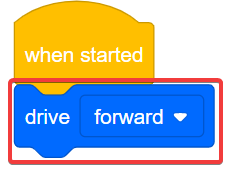
- Attach a [Wait until] block beneath the [Drive] block.
This project will use the Distance Sensor to navigate through the Wall Maze Playground without bumping into walls. You will use the (Distance from) block inside of the <Less than> Boolean block in this project.
The <Less than>, <Greater than>, and <Equal to> are comparison blocks - they compare values. They are also Boolean reporter blocks that report a TRUE value when the comparison condition is met, and FALSE when the condition is NOT met.
- <Less than> reports TRUE when the first value is smaller than the second value and FALSE when the first value is greater than or equal to the second value.
- <Greater than> reports TRUE when the first value is larger than the second value, and FALSE when the first value is smaller than or equal to the second value.
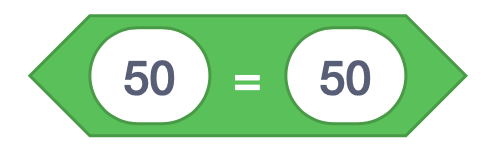
- <Equal to> reports TRUE when the two values are exactly the same, and FALSE when they are not.
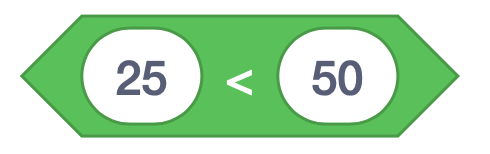
Comparison blocks can accept decimals, integers, or numeric blocks. They also accept round reporter blocks, such as the (Distance from) block. The (Distance from) block can be with a comparison block when using the Distance Sensor in a project.
In this example, the block will report TRUE when the distance from an object and the Distance Sensor on a VR Robot is less than 50 millimeters (mm).

- Drag the <Less than> Boolean block into the [Wait until] block.
- Place the round (Distance from) block inside the Boolean reporter block
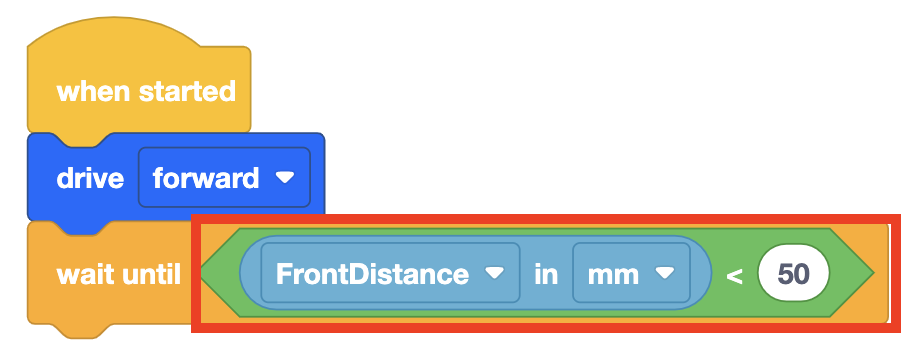
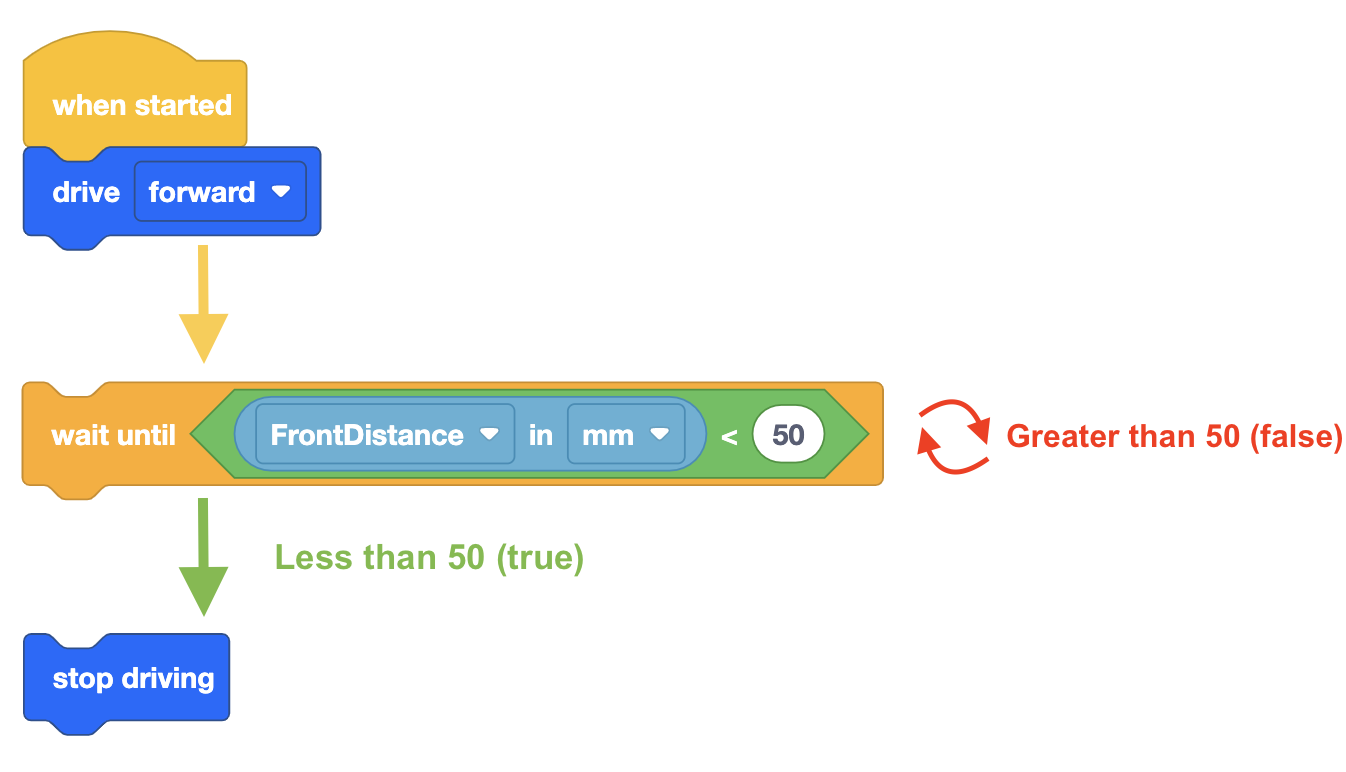
- The [Wait until] block will keep the VR Robot driving forward until the condition is met, and the distance reported is less than 50 millimeters (mm). Then, the project will move on to the next block in the stack, which will be the [Stop driving] block.
- A [Stop driving] block is needed after the [Wait until] block because the VR Robot will continue to drive until it is instructed to stop. Add a [Stop driving] block to the project.
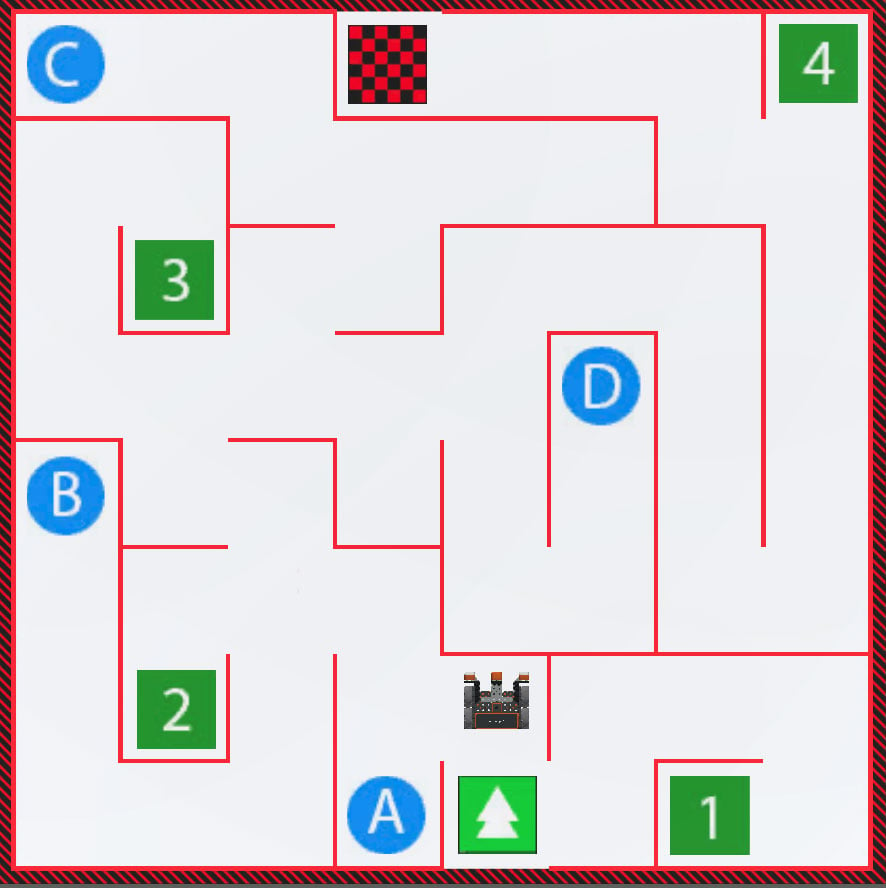
- Launch the Wall Maze Playground if it is not already open and run the project.
- Watch the VR Robot drive from the start of the Wall Maze and stop when the Distance Sensor reports that it is less than 50 millimeters (mm) from the wall.
- Using the <Less than> block with the (Distance from) block inside of the [Wait until] block, instructs the VR Robot to wait until it is less than 50 millimeters (mm) from the wall before stopping.
- Reset the Playground to move the VR Robot back to the starting position.
Using Switch Blocks
In this lesson, you learned about the <Greater than>, <Less than>, and <Equal to> Boolean blocks. The image below shows the Switch Boolean comparison blocks. For a Switch Boolean block to function as intended, the Switch Python functions must be entered with the correct spelling and punctuation.
Note that the Switch <Equal to> block uses two equal signs (==). This is because in Python, one equal sign (=) represents an assignment of a value (for example, x = 10), while two equal signs (==) check whether two values are equal. Be sure to use two equal signs when using the Switch <Equal to> block. 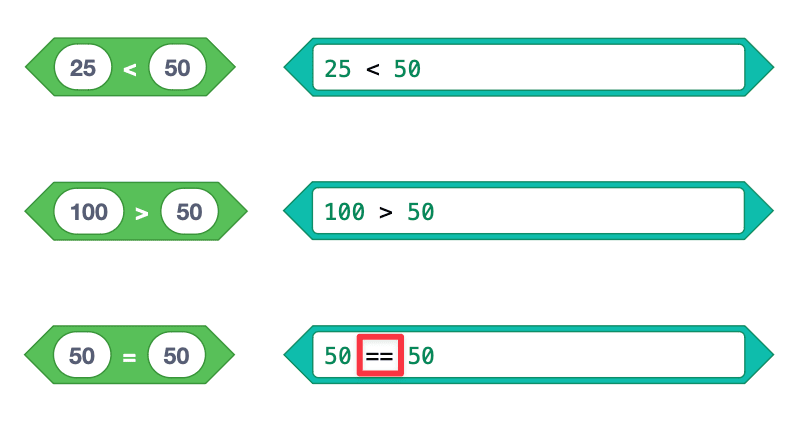
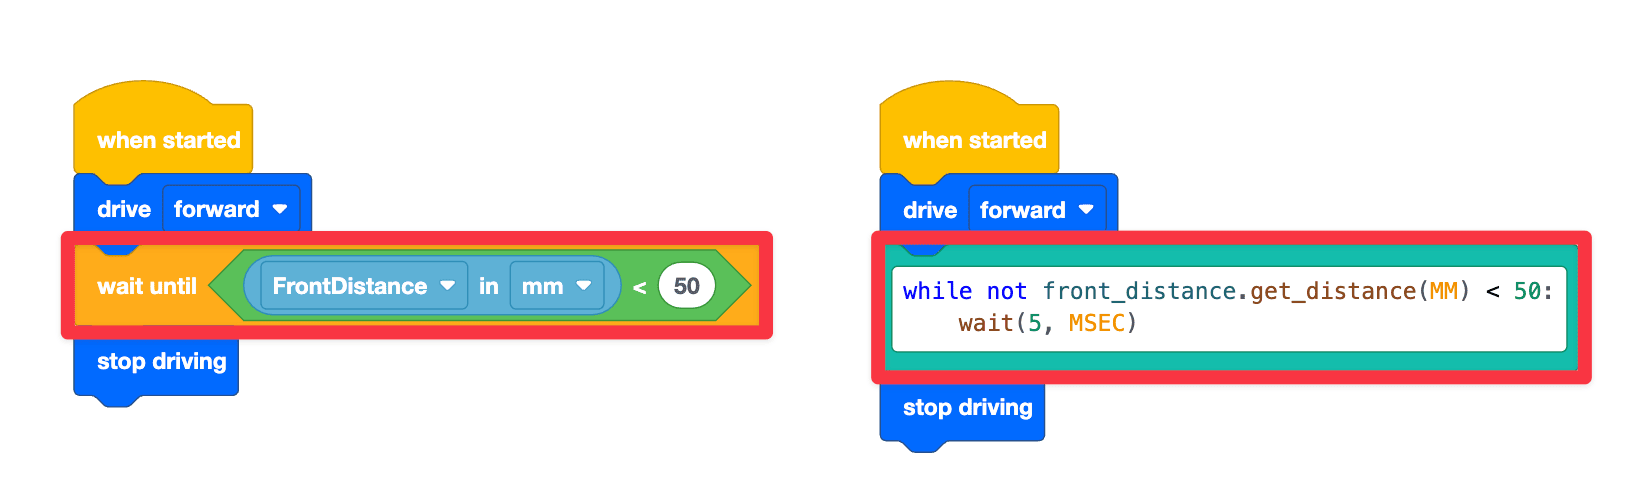
You also saw an example project in which the VR Robot will drive forward until the distance reported is less than 50 millimeters (mm) from an object. Then, the VR Robot will stop. The project on the right shows the corresponding Python commands inside a Switch block. The command, while not front_distance.get_distance(MM) < 50 tells the robot to check whether the distance reported is less than 50 MM from an object.
The next indented line of code, wait (5, MSEC), pauses the code for 5 milliseconds. The command that checks whether the distance reported is less than 50 MM from an object will wait for 5 MSEC before checking the condition again.
Select the Next button to continue with the rest of this Lesson.