
Lesson 2: Drive to the Letter ‘A’
Drive to the Letter ‘A’
Now that you have created and tested a project that has the VR Robot stop once the Distance Sensor detects a wall, you will build a project that navigates the VR Robot to the letter ‘A’ on the Wall Maze Playground.

- To drive to the letter ‘A’, the VR Robot will need to detect two walls, and turn left when these walls are detected. Then, the VR Robot will stop when it detects the third wall, located behind the letter ‘A.’
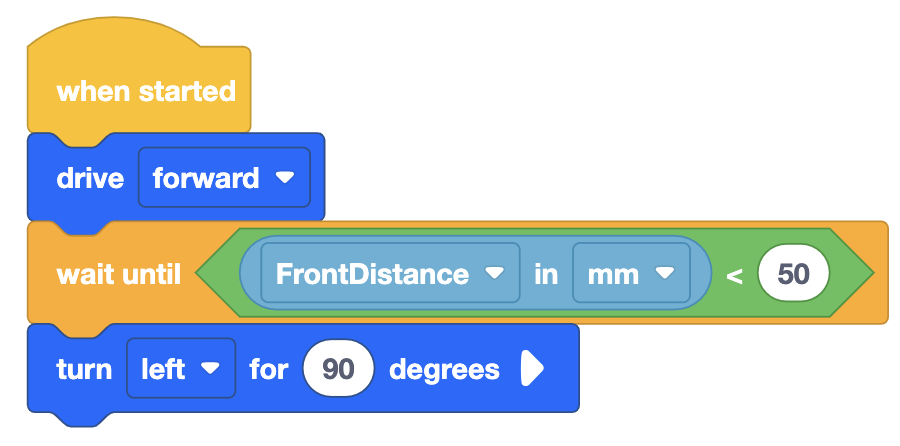
- Begin by modifying the previous project or create a new project to match this base project. Note that the [Turn for] block is needed because once the Distance Sensor is within 50 millimeters (mm) of a wall, the VR Robot will turn left to continue toward the letter ‘A.’ Remember that you can use VEXcode blocks, Switch blocks, or a combination of both block types.
-
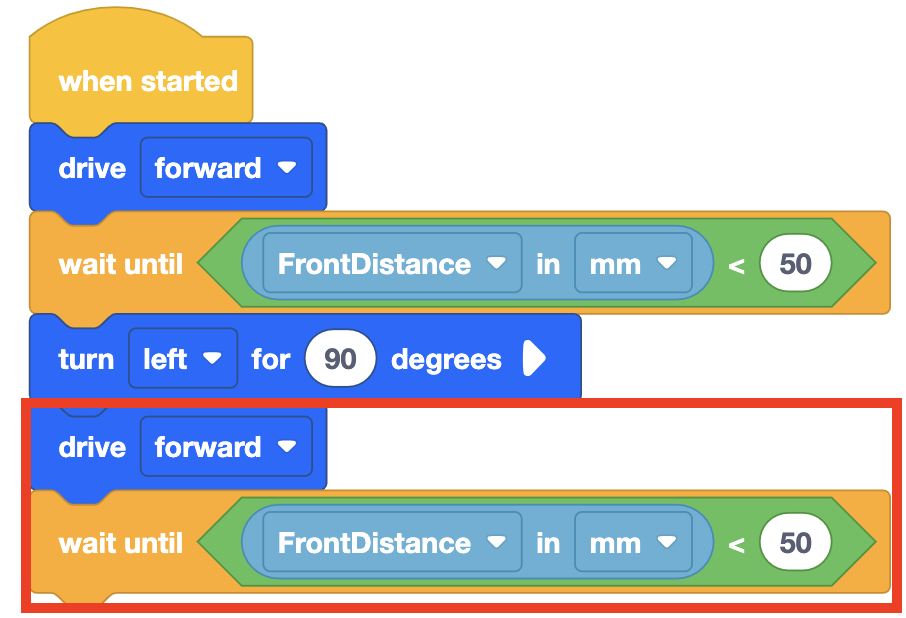
Add another [Drive], and [Wait until] block with the <Less than> block set to 50 millimeters (mm), and the (Distance from) inside the <Less than> block.
For Your Information
Use the Duplicate tool for sections of code that repeat in a project. This allows you to save time. For more information on how to duplicate blocks, view the Context Menu - VR Blocks article.
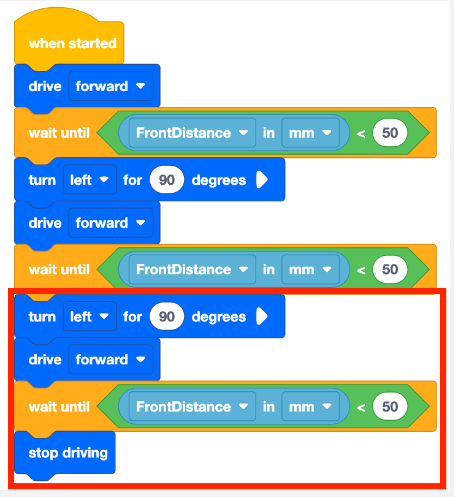
- Finally, add the following blocks to instruct the VR Robot to detect the final wall behind the letter ‘A’ then stop driving.
- Launch the Wall Maze Playground if it is not already open and run the project.
- Watch the VR Robot drive from the start of the Wall Maze to the letter ‘A,’ and then stop.
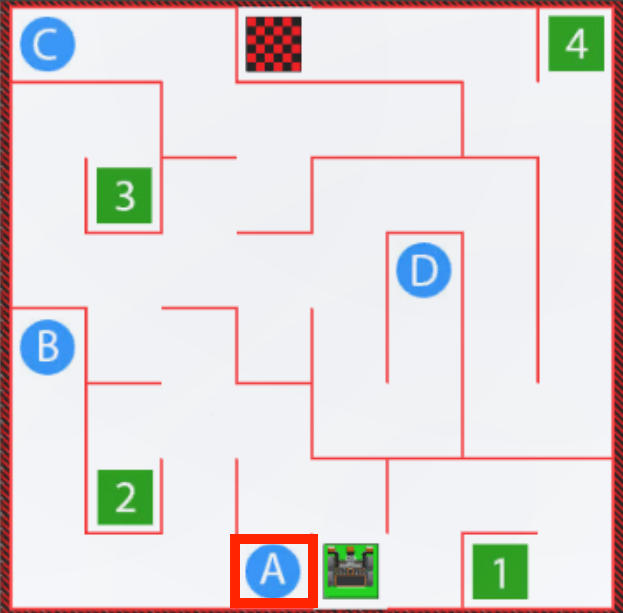
- Notice that the VR Robot does not bump into any walls as it drives to the letter ‘A.’ When the Distance Sensor value reports that the VR Robot is less than 50 millimeters (mm) from the wall, the VR Robot is instructed to turn or stop in the project.
Select the Next button to continue with the rest of this Lesson.