
Lesson 4: Wall Maze Challenge
In previous Lessons within this Unit, you have learned how to use the Distance Sensor to navigate to certain areas in the Wall Maze Playground. In the previous Unit, you solved the Wall Maze Challenge using the Bumper Sensors. Now, you will combine all of these concepts to create a project to solve the Wall Maze Challenge from start to finish again, but this time with the Distance Sensor!
Learning Outcome
- Apply blocks from the Drivetrain, Sensing, and Control categories in the correct sequence in order to successfully navigate the Wall Maze using the Distance Sensor.
Putting It All Together
In the previous Unit, you solved the Wall Maze using the Bumper Sensor. In this Unit, you will solve the same Wall Maze, but instead use the Distance Sensor. The Wall Maze Challenge can be solved using either sensor, but there are advantages to each.
| Advantages of Each Sensor | |
|---|---|
|
Bumper Sensor
|
Distance Sensor
|
Wall Maze Challenge
In this challenge, create a project where the VR Robot navigates the Wall Maze Playground from start to finish using the Distance Sensor.
Follow these steps to complete the challenge:
-
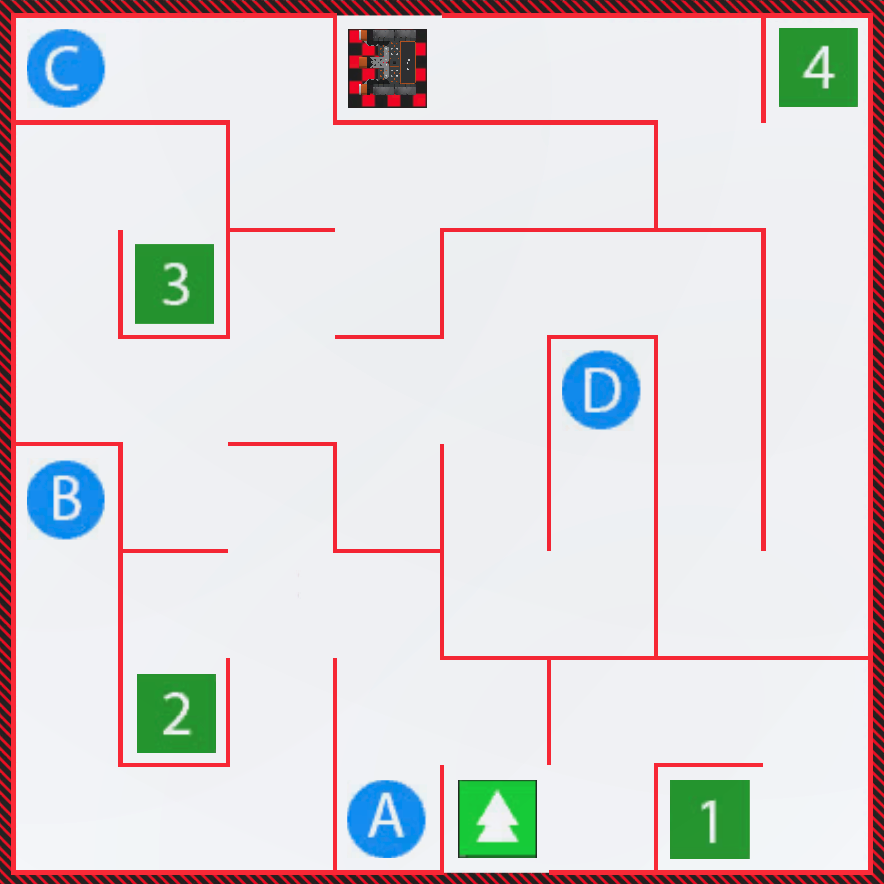
In the video clip below, the VR Robot begins driving as it did to reach the number 3 previously. When the robot faces the wall with the number 3 behind it, the robot turns right to head to the right hand side of the maze. It drives forward to the walls surrounding the letter D. The robot navigates left, then drives forward and turns right to stay on the clear path. An the next wall, the robot turns left and drives forward twice to follow the path along the far left wall. The robot stops about 300mm from the upper right corner wall, turns left and drives forward twice to reach the finish.
- Create a new project or load a project from previous Lessons in this Unit. If creating a new project, select the Wall Maze Playground when prompted. Remember that with a VR Premium account, you may use a combination of both VEXcode blocks and Switch blocks to create your project.
- Rename the project Unit5Challenge.
- Launch the Playground window.
- Load the Wall Maze Playground.
- Add the blocks necessary to navigate the VR Robot from the start to the finish of the Wall Maze.
- Start the project to test if it works.
- If the project is not successful, edit and try again. Continue to revise and run the project until the VR Robot successfully drives from start to finish.
- Save the project once the VR Robot successfully drives to the finish.
Congratulations! You have successfully completed the Wall Maze Challenge!