
Lesson 3: Turn Left to Reach the Letter ‘B.’
For Your Information
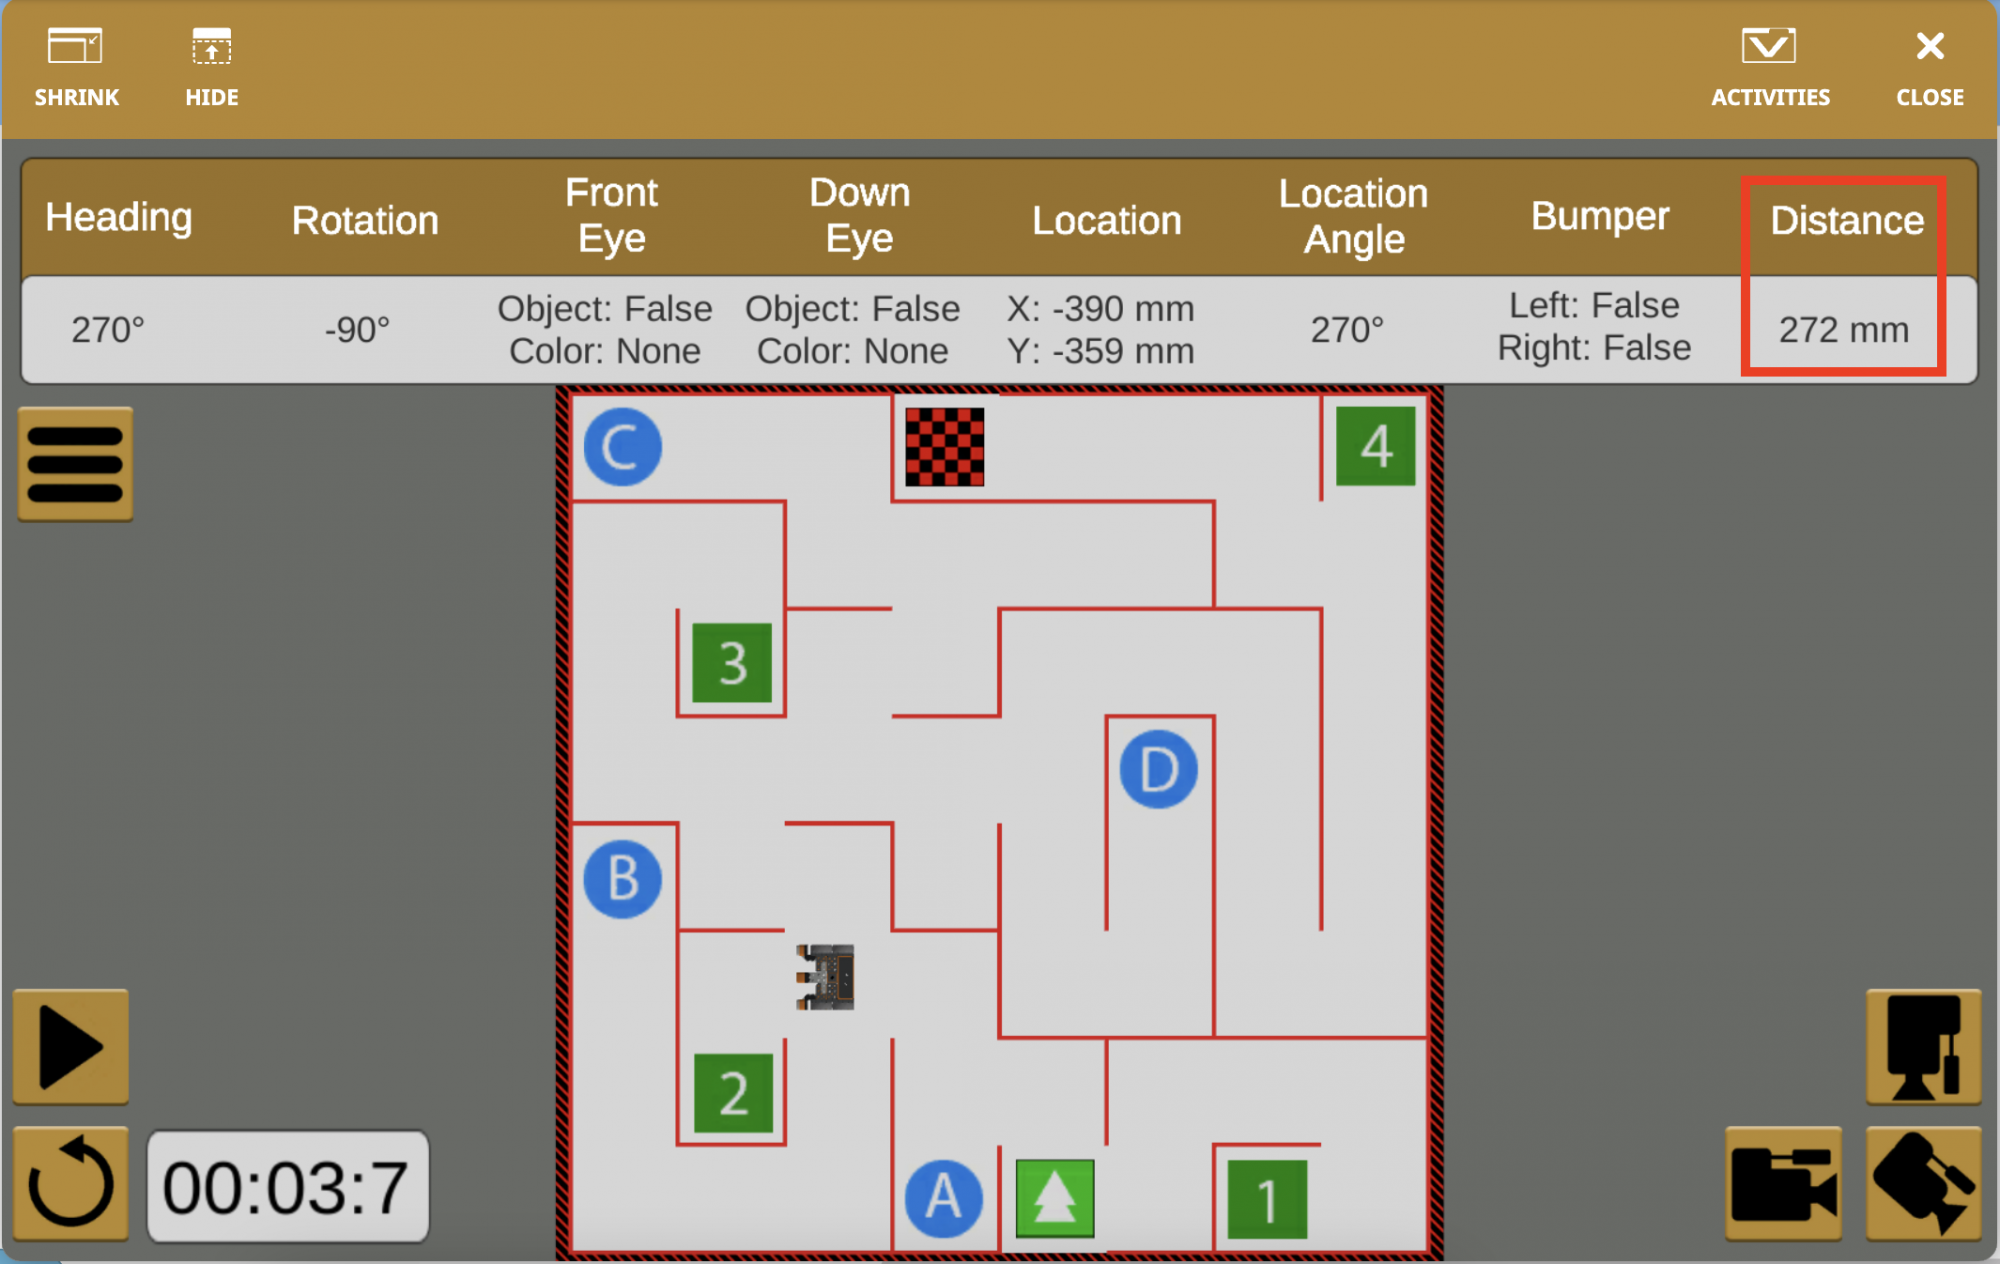
A VEXcode VR project can be stopped while running. Once stopped, the values in the Dashboard will display the sensor values from the VR Robot at the time it was stopped. This can be used to observe sensor values as well as visualize the distance between the VR Robot and an object at a certain point in time.
-
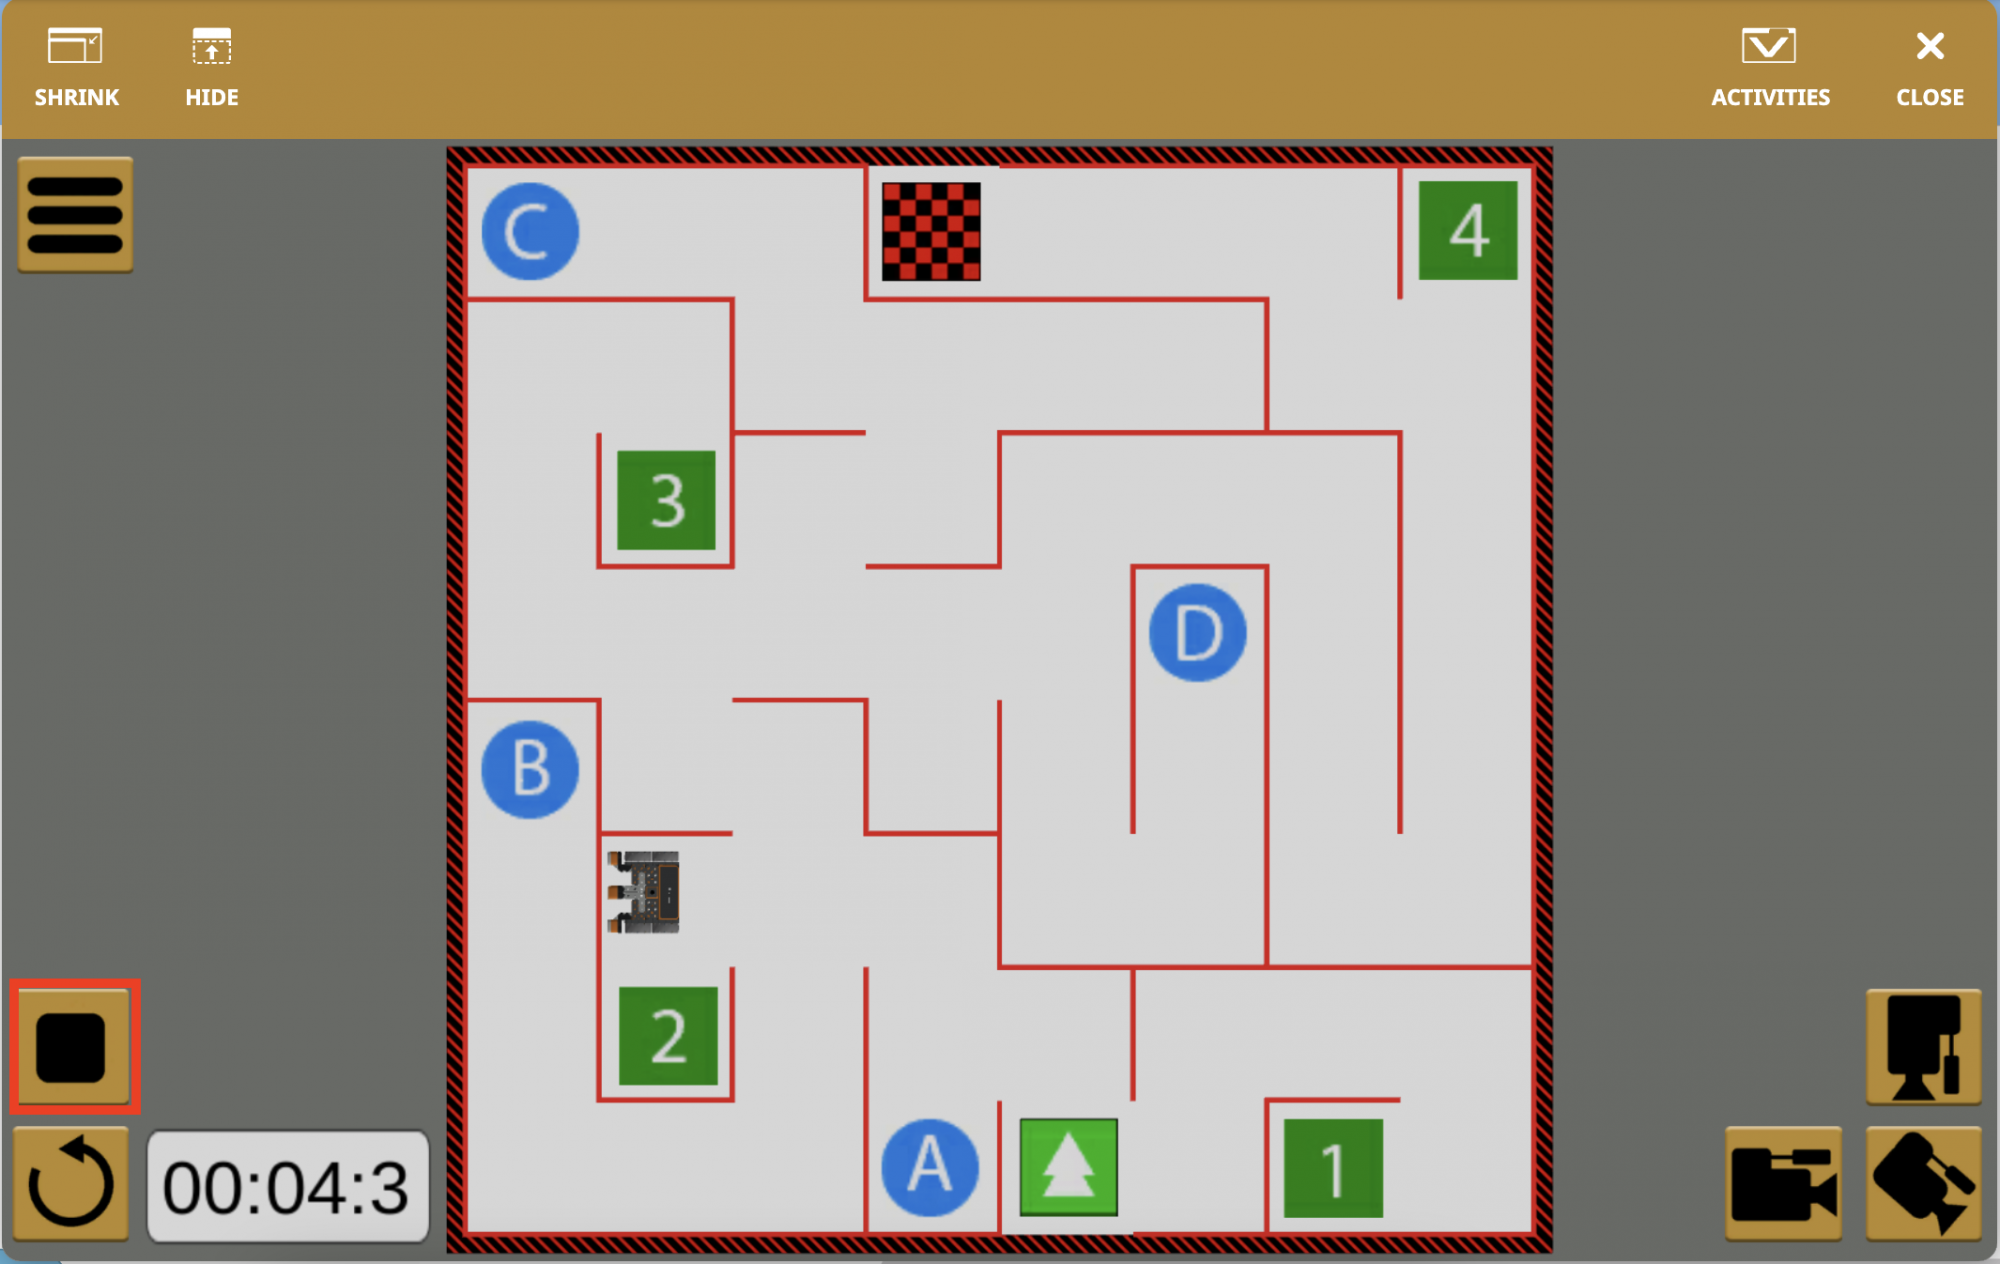
Stop the project when the VR Robot reaches the error point to see what new value should be set in the <Less than> block.
-
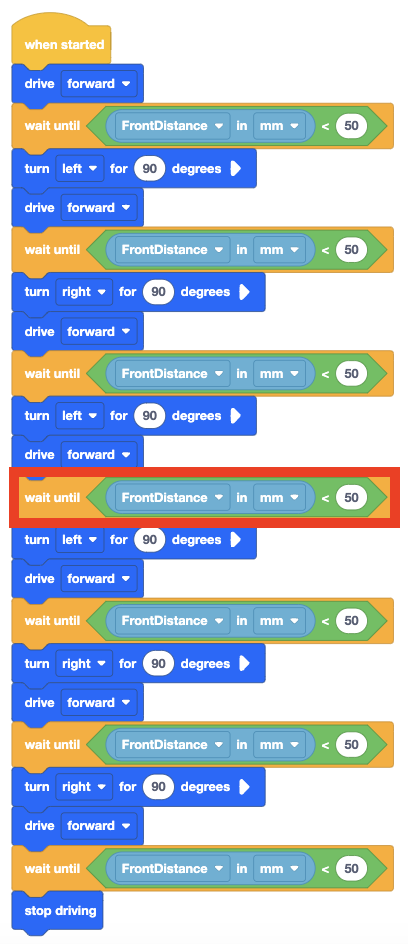
The value of this [Wait until] block will need to change for the VR Robot to successfully drive to the letter ‘B.’
For Your Information
The values reported by the Distance Sensor can also be monitored in the Monitor Console. Monitoring sensor values in the Monitor Console allows the user to view real-time reports of a specific value (or multiple values) in a project. Access the Monitor Window by selecting the Monitor icon next to the Help.

In this project, the Monitor Console can be used to view the values being reported by the (Distance from) block to help determine when the VR Robot needs to turn to successfully drive through the Wall Maze Playground. Watch the video below to see an example of using the Monitor Console to view live distance data from the VR robot.
Blocks from the Sensing category in the Tool Box can be added to the Monitor Console by selecting and dragging the block to the Monitor Console icon in the Workspace. To remove sensor values from the Monitor Console, select the 'X' icon. Watch the video below to see how you can drag and drop sensing blocks onto the Monitor Console icon to add them to the list of sensors.
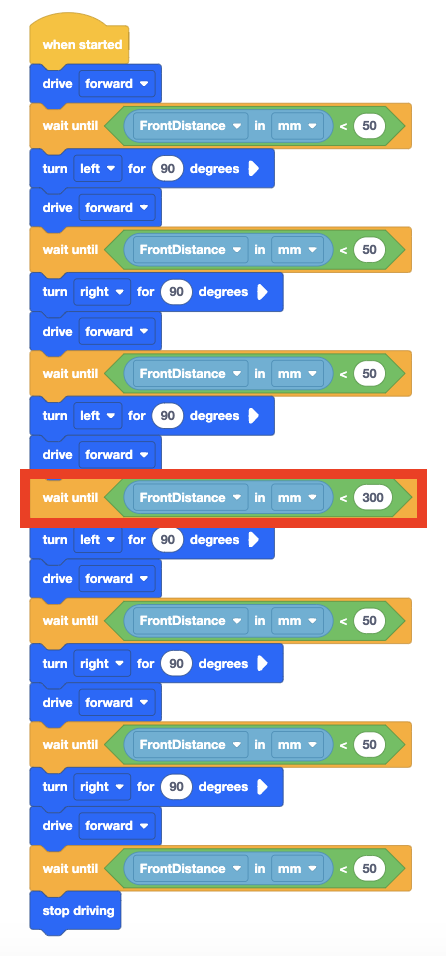
- Changing the <Less than> block parameter to 300 will instruct the VR Robot to turn left once the Distance Sensor reports that the VR Robot is less than 300 millimeters (mm) away from the next wall.
-
Launch the Wall Maze Playground if it is not already open and run the project again.
- The VR Robot now drives from the start of the Wall Maze Playground and stops on the letter ‘B.’
- Notice that changing the <Less than> block parameter to 300 millimeters allowed the VR Robot to turn at a distance farther from the wall, which was necessary to turn at the correct location.
- The distance value reported in the Dashboard was used to observe how far the VR Robot was from a wall when it needed to turn to get to the letter ‘B.’

Select the Next button to continue with the rest of this Lesson.