Range of Motion
Let's explore range of motion!
This exploration will allow you to see the minimum and maximum degrees that the arm and claw can extend.
- Make sure you have the hardware required and your engineering notebook.
| Quantity | Materials Needed |
|---|---|
| 1 |
VEX IQ Super Kit |
| 1 |
VEXcode IQ |
| 1 |
Engineering Notebook |
Step 1: Preparing for the Exploration
Before you begin the activity, do you have each of these items ready? The Builder should check each of the following:
-
Are all of the motors and sensors plugged into the correct ports?
-
Are the smart cables fully inserted into all of the motors and sensors?
-
Is the Brain turned on?
-
Is the battery charged?
Step 2: The Device Menu
Begin by turning on the Robot Brain and selecting the X Button to navigate to the Settings menu.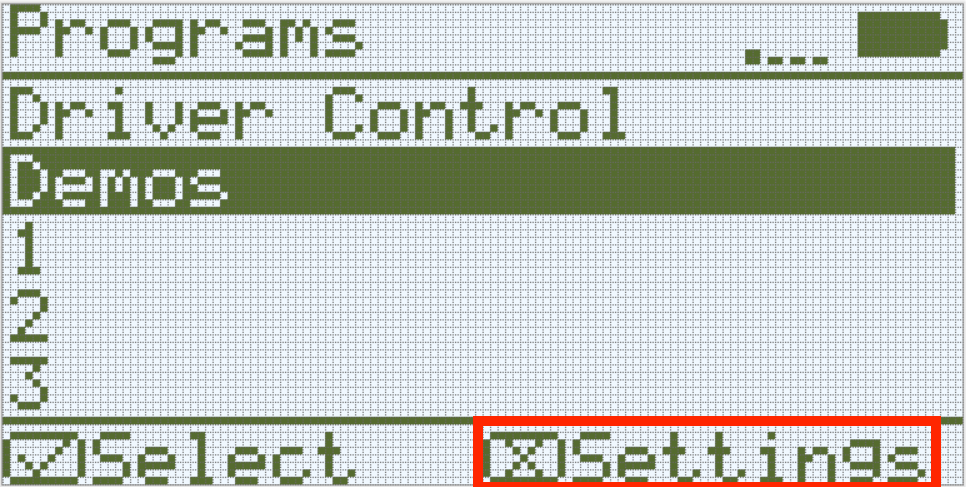
Gently open the Clawbot's Claw fully by using your fingers.
Once the Settings menu is open, use the Up and Down buttons on the Brain to select Device Info to open the Device Menu.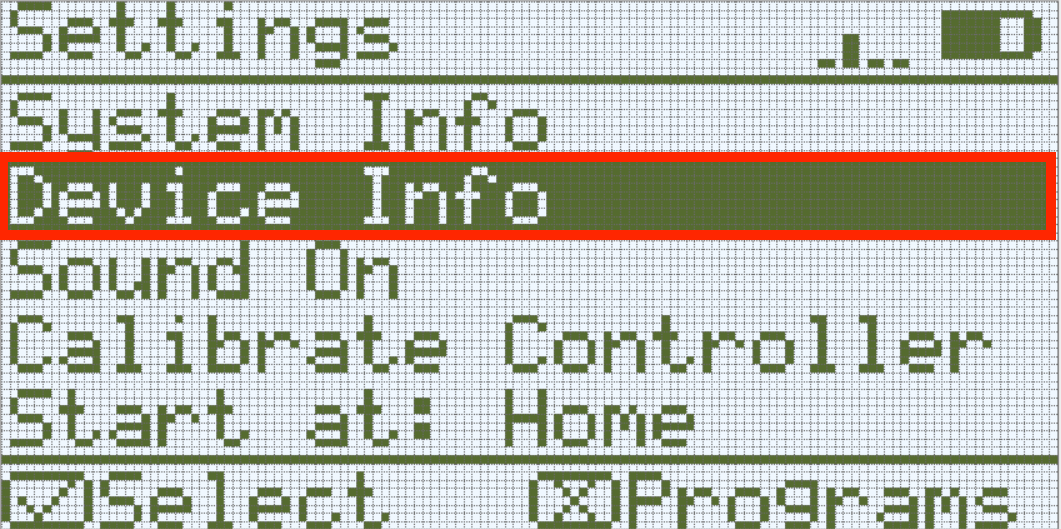
The Device Menu screen displays information about the device that is connected to that port. There are 12 ports on the IQ Brain.
Use the arrows to go to the Port 11 Motor, which is the Claw Motor.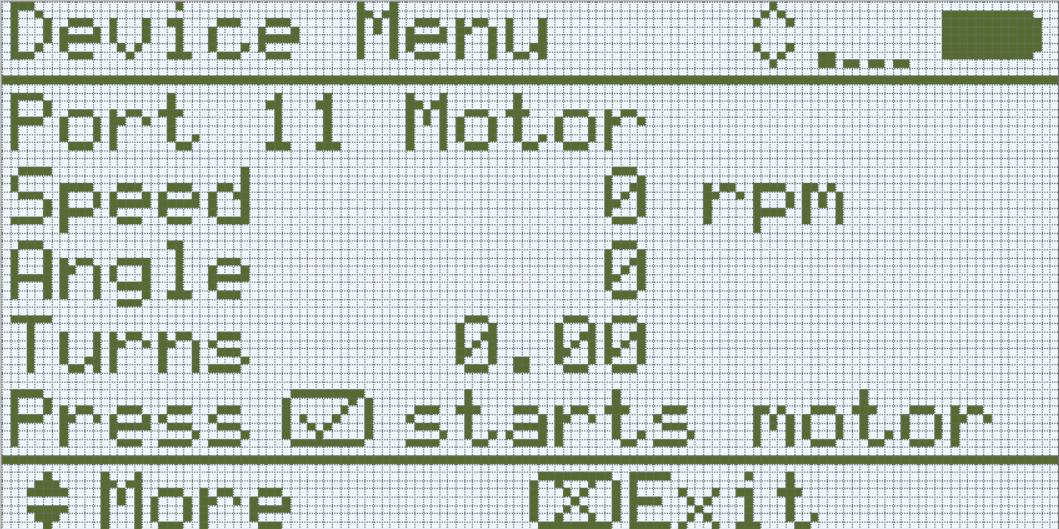
- Port 11 Motor: The Claw Motor.
- Speed: Displays how fast (in revolutions per minute) the motor is spinning.
- Angle: Displays the current position of the motor in degrees.
- Turns: Displays how many turns the motor has rotated.
- Press the Check Button to start and stop the motor. The Claw can also be open and closed manually .
Step 3: Exploring the Claw and Arm's Motion
-
If you opened your claw fully before opening the Device Menu, then the Claw Motor considered its fully opened position to be 0 degrees - as it displayed in the Device Menu.
In your engineering notebook, predict what the values of the Port 11 Motor (Claw Motor) will be when you close the claw by gently pushing the sides together. What will the Angle value in degrees be when the claw is closed?
-
Hint: The value reported will not be the same one shown in the image below.
-
-
Test your prediction by gently pushing the claw closed. What angle is now shown in the Device Menu for the Claw Motor?
- Continue using your hands to gently open and close the claw so that you can see the angle changing.
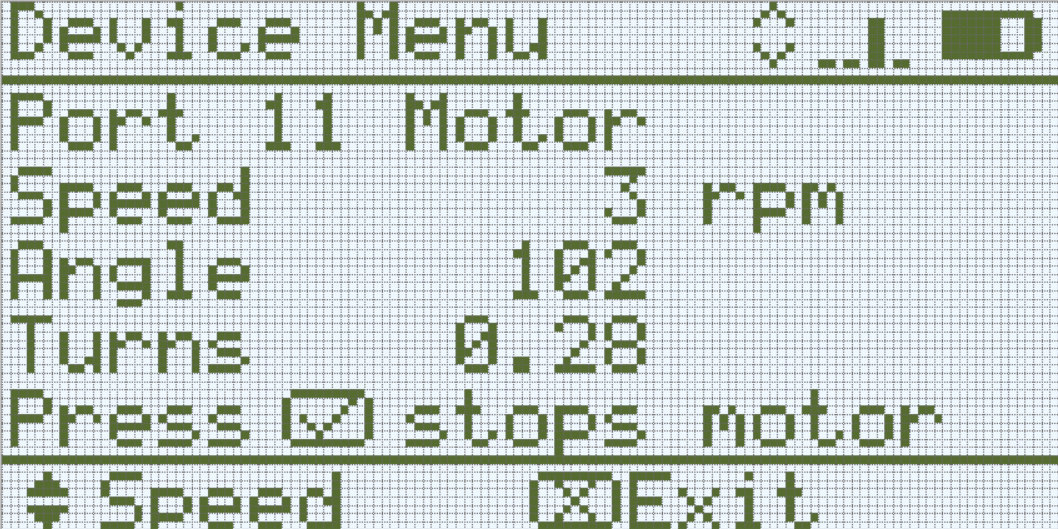
- What do you notice about the range of the angle in degrees for the Claw Motor? Do the Angle values continue to increase, or do they have limits?
- Write down the range of the Angle value for the Claw Motor: the Angle value when fully opened to the Angle value when fully closed.
- Are the Angle values for when the claw is open always the same? Are the Angle values for when the claw is closed always the same? Why do you think that is?
Step 4: Programming with a Range of Motion
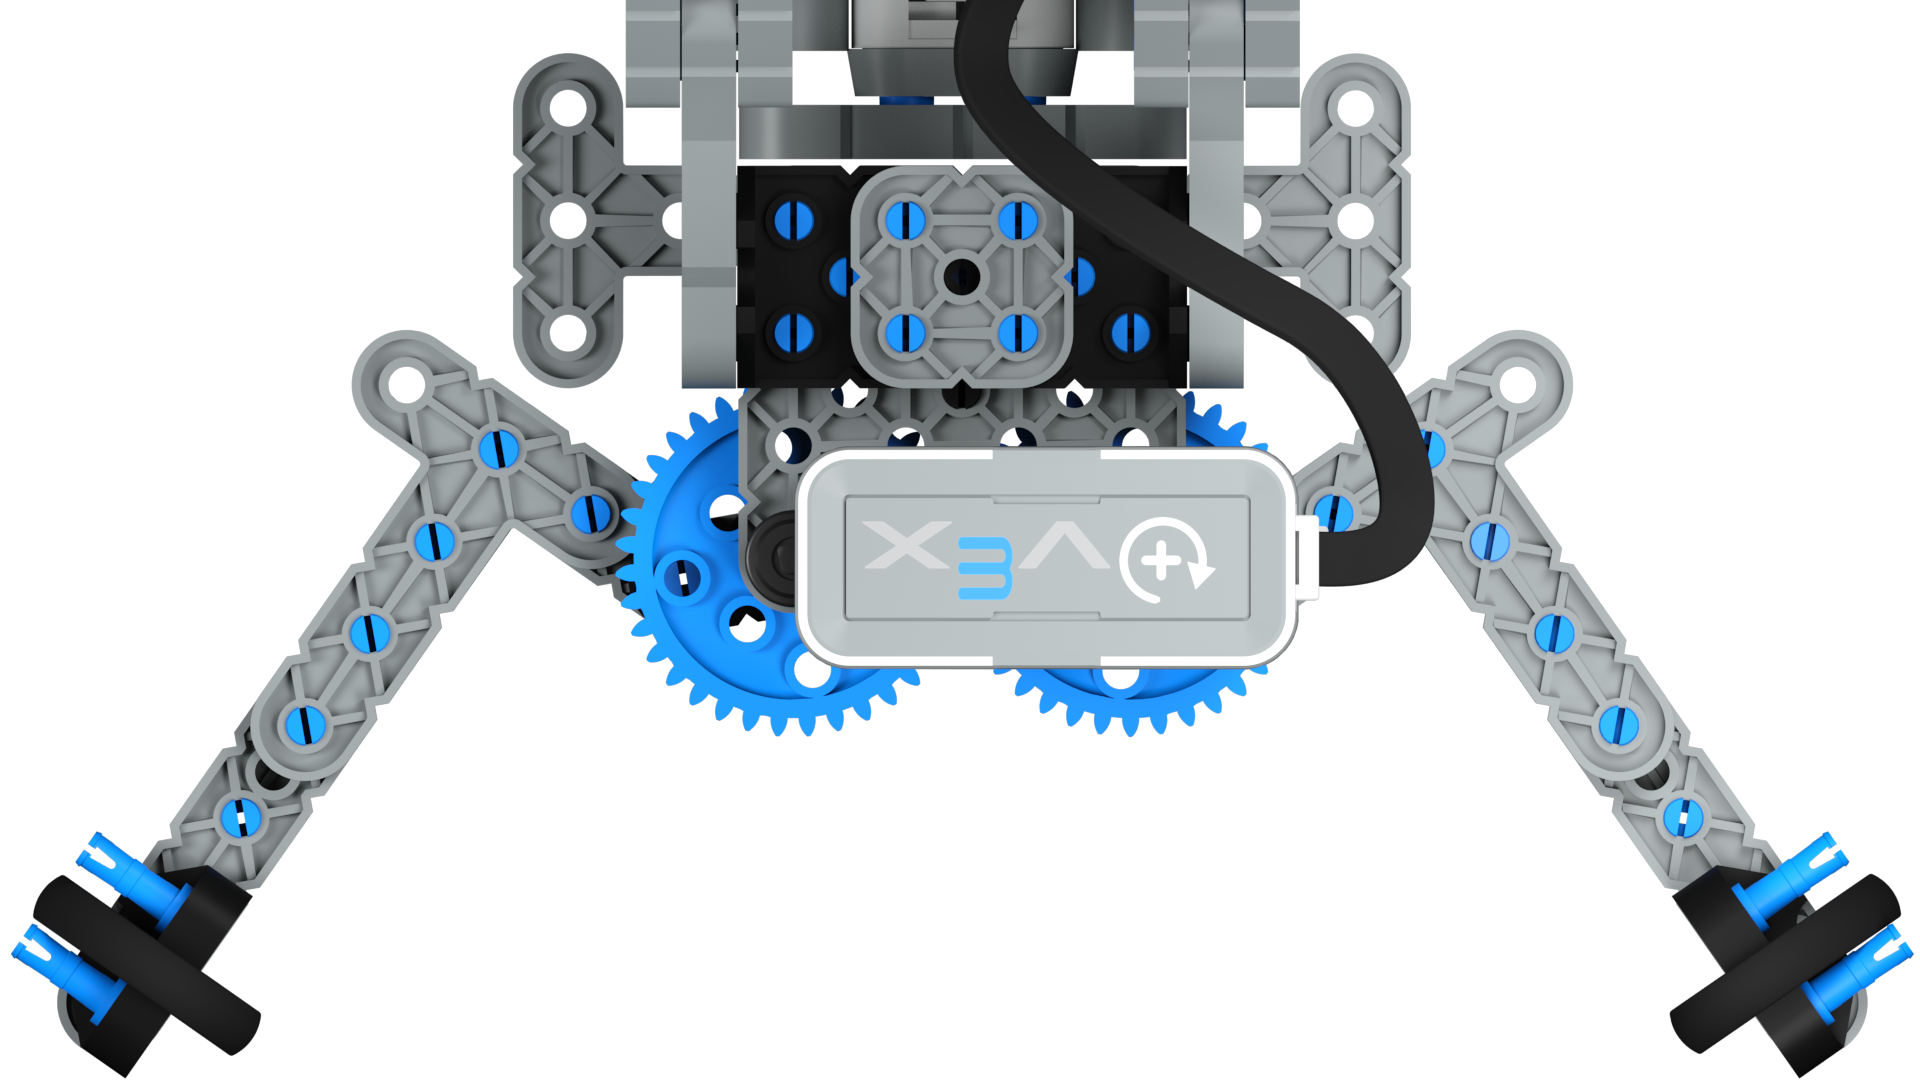
Subsystems such as claws or arms usually have a limited range of motion, which prevent them from spinning continuously. Claws can only open or close so much before reaching a mechanical limit. Likewise, the range of motion of an arm is often limited by the ground or the body of the robot itself. When working with subsystems with a limited range of motion, it is very important to stay within that range, regardless of whether you are remote controlling the robot or programming it to move autonomously. Continuing to provide power to the motors once a subsystem has reached a limit will cause unnecessary stress on the motor and any connected components.
Before learning how to adjust for the claw's and arm's limited ranges of motion, let's look at the blocks used to program the claw and arm.
There are two blocks in VEXcode IQ that can be used to raise and lower the arm and open and close the claw to a specific position.
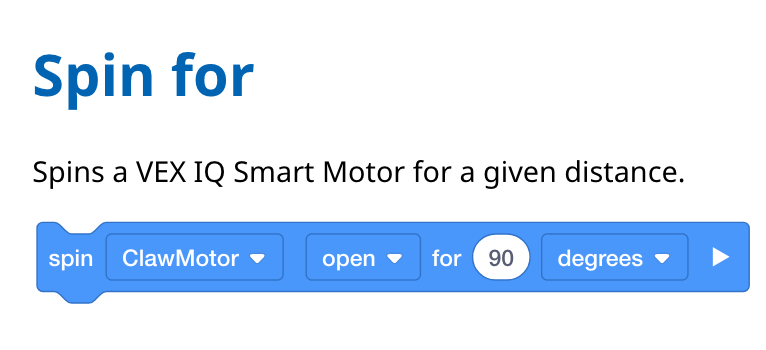
The [Spin for] block and the [Spin to position] block.
- The [Spin for] block spins a motor in a selected direction for a selected distance from where it is currently located.
- The [Spin to position] block spins a motor to a selected position based on the current position of the motor. The [Spin to position] block determines the best direction to rotate in order to get to the position.
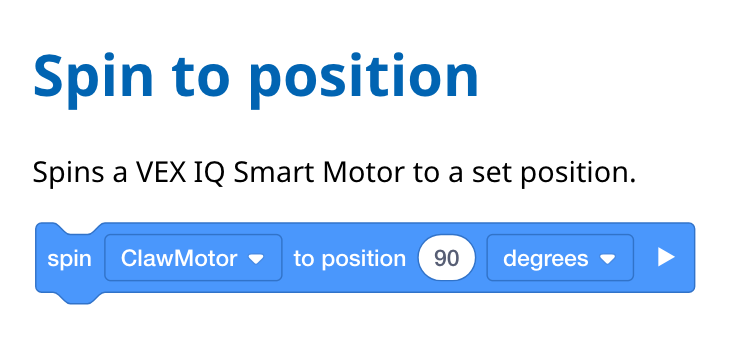
When would these blocks be used? Imagine that you program your arm to raise and lower, but when it lowers, it doesn't fully lower back down to its starting position of zero degrees. Instead, it lowers back to 15 degrees. If you then use the [Spin for] block to raise it 90 degrees - the arm will raise 90 degrees from where it currently is and really be raised up to 105 degrees.
However, in the same situation, if the arm is at 15 degrees and the [Spin to position] block is used to raise it to 90 degrees, the arm will raise 75 degrees to reach the desired position of 90 degrees.
This is important to understand, because if the [Spin for] block is used and the arm is not fully lowered or the claw was not fully closed, the arm or claw could approach its limit for how far it can move.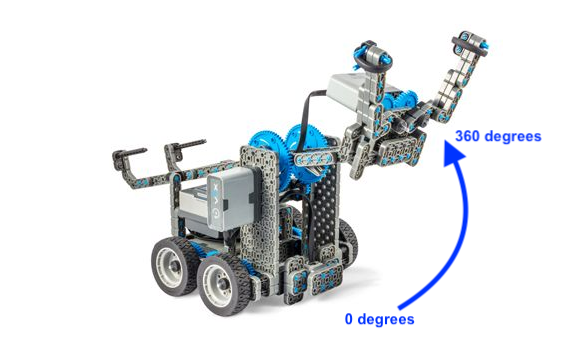
Let's look at blocks to use with the [Spin for] and [Spin to position] blocks that help them to program your robot more precisely.
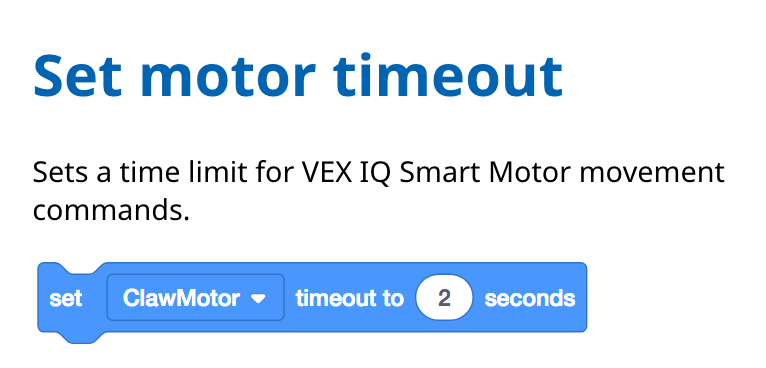
- The [Set motor timeout] block is used to prevent motion blocks that do not reach their position from preventing other blocks in the stack from running. An example of a motor not reaching its position is an arm or claw that reaches its mechanical limit and cannot complete its movement.
- What happens if a [Spin for] block is used and the claw or arm reaches its limit for its range of motion? Will the project stop because the arm or claw cannot move any further?
The project will not stop until the block has completed its task. If the claw is trying to open 100 degrees but starts from 50 degrees and is trying to spin beyond its range of motion, the claw will continue to try to open even though it cannot. This is not a good situation because this can strain the parts and drain the battery.
In this case, the [Set motor timeout] block can be used. This block acts as a fail-safe so that if a motor reaches its mechanical limit, it can continue on with the rest of the project after a certain amount of time.
In the following example, the robot will drive forward after the claw has opened the full 200 degrees or reached the timeout of three seconds.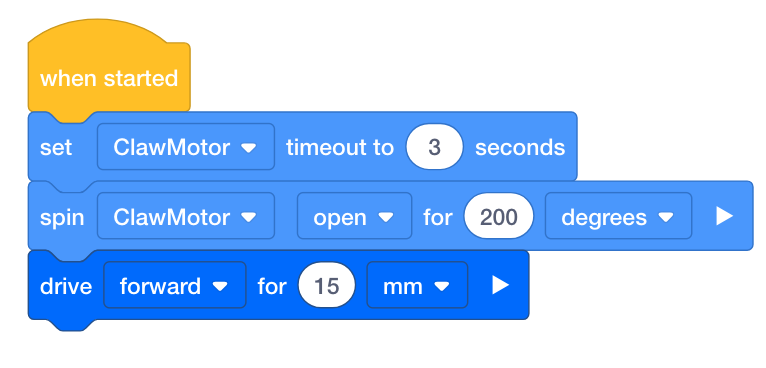
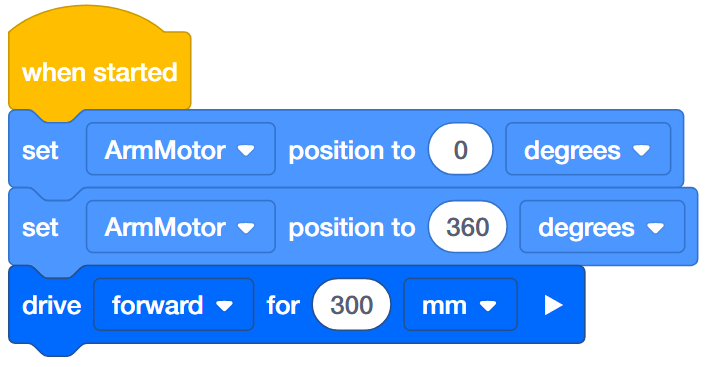
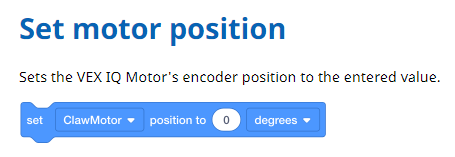
- The [Set motor position] block is used to set the motor's Angle value (its position) to a selected value. It can also be set to 0 degrees to reset the motor's position.
- A [Spin to position] block is easier to program with when you know what the motor's angle currently is. But sometimes, the arm might look like it's fully down when it is actually raised a few degrees.
The [Set motor position] block lets you set the degrees that you want the motor's Angle to be at. This is very useful for resetting the motor's position to 0 degrees.
In the following example, the robot's Arm Motor is reset to 0 degrees no matter where it currently is before it spins to the 360 degrees position and drives forward.