
In the previous Lesson, you learned how to code the 6-Axis Arm to pick up and place a Cube on the pallet. In this Lesson, you will build on what you learned to move multiple Cubes to the pallet. You will learn how to:
- Plan out the drop off locations of the Cubes you will place on the pallet.
- Code the 6-Axis Arm to move two Cubes successfully to the pallet.
By the end of the Lesson, you will build onto your project to pick up and place four Cubes on the pallet in the Activity.

Thinking About Positioning on the Pallet
In the previous Lesson you moved one Cube to the pallet, and placed it in the center. One of the benefits of shipping large quantities of items using a pallet is that many objects can be transported at one time. In order to do this effectively, those objects need to be arranged in an efficient way to enable companies to pack more onto each pallet that they ship.
A pallet would be an inefficient and expensive way to move one or two small objects, like the situation of placing one Cube in the center of the pallet. Placing more Cubes on the pallet, however, makes shipping more efficient and cost-effective. 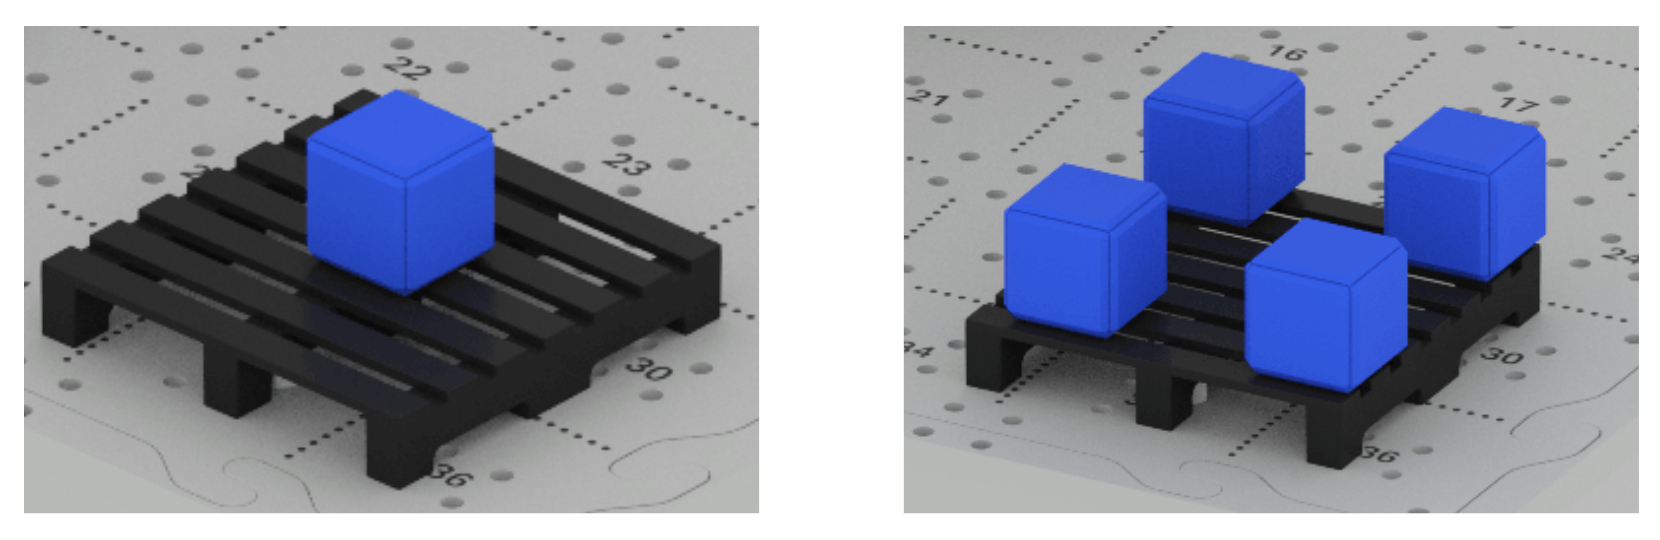
In order to do this, we will need to think about where each of the Cubes will be placed on the pallet. Throughout this Lesson you will learn about how to code the 6-Axis Arm to move multiple Cubes and place them effectively on the pallet together.
Place the First Cube
Your project from Lesson 2 moved one Cube to the center of the pallet. The first step to placing multiple Cubes is to adjust the drop off location for the first Cube – placing it on the corner of the pallet.
Open your project from Lesson 2 in VEXcode EXP.
Rename the project to Unit 7 Lesson 3, and save it to your device.

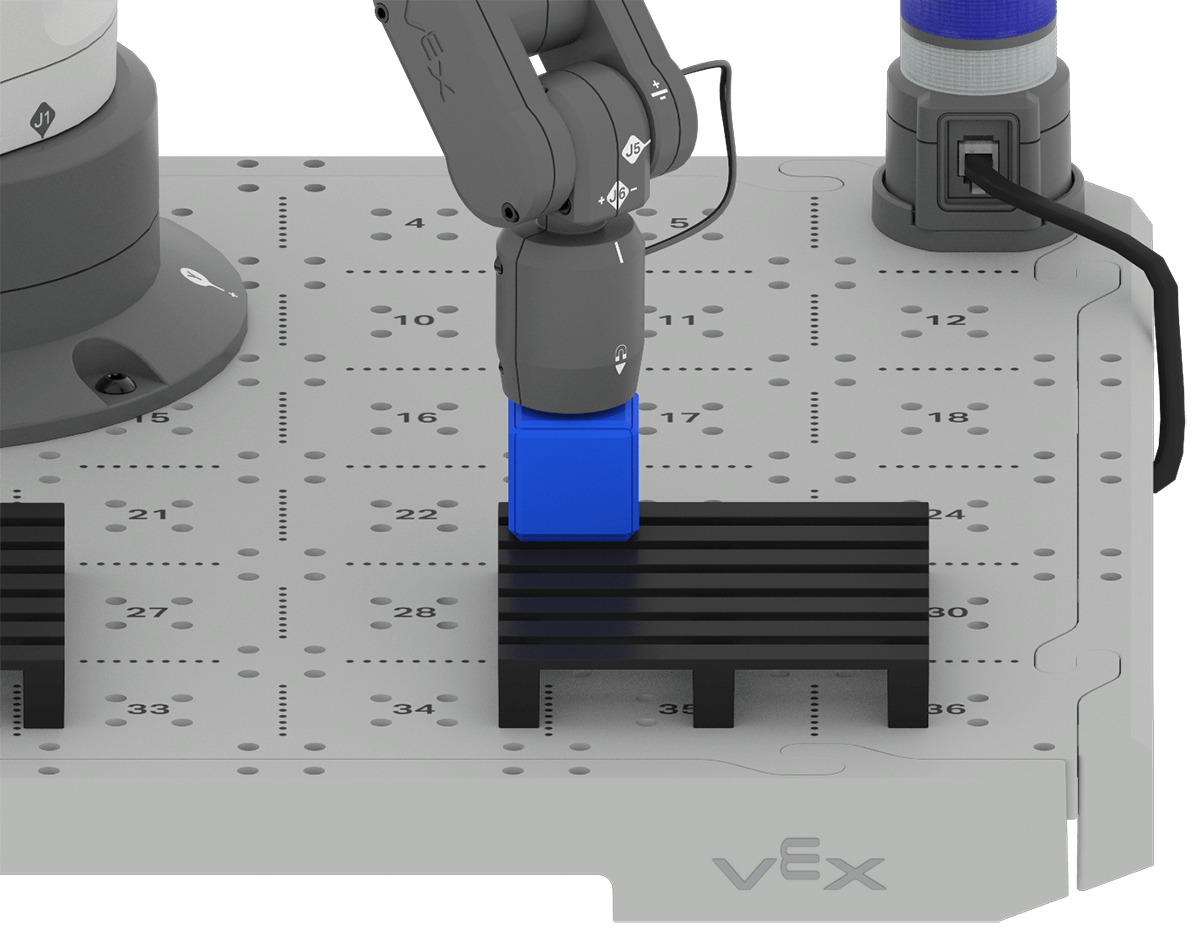
Place the Cube on the corner of the pallet.
Manually move the 6-Axis Arm so that the Magnet is touching the top of the Cube.
Be sure the 6-Axis Arm is connected to VEXcode.
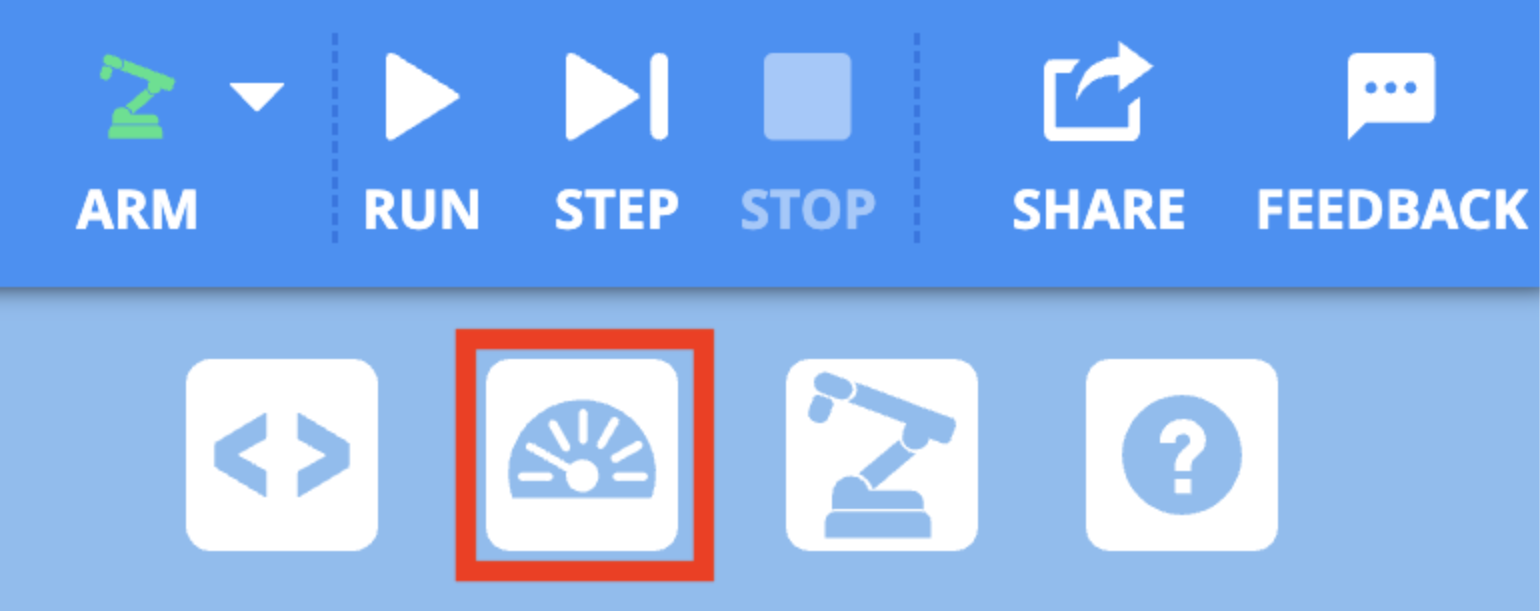
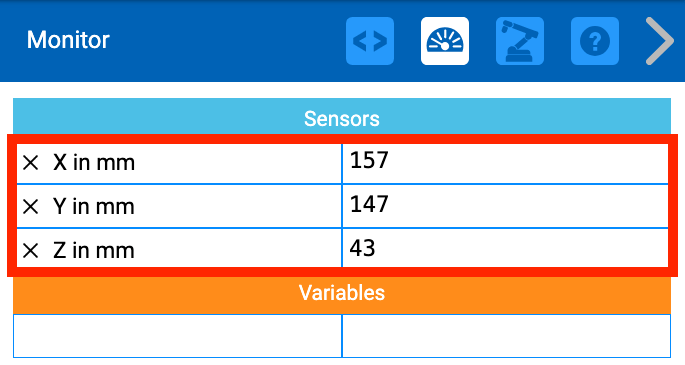
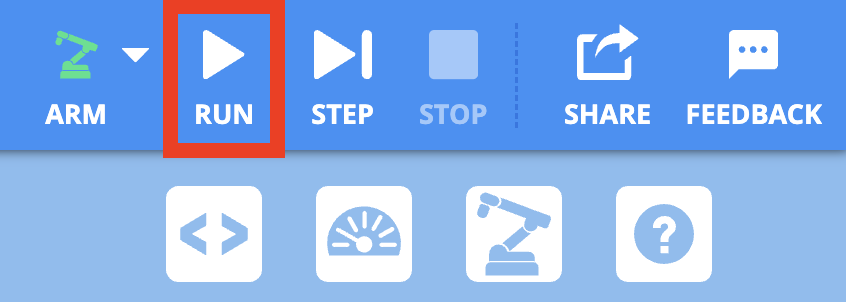
Select the Monitor icon in the Toolbar to open the Monitor.
Record the x and y-coordinates from the Monitor Console in your engineering notebook. This will be the x and y-coordinates of drop off location for the Cube.
Remember that the 6-Axis Arm is going to move above the drop off location before moving the Cube down to the pallet. This means you do not need to record the z-value.
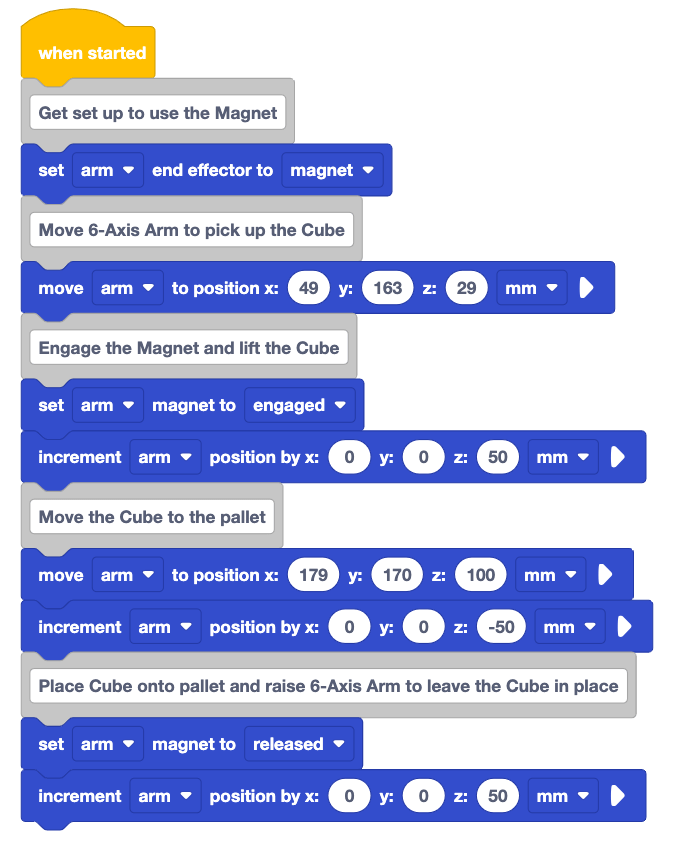
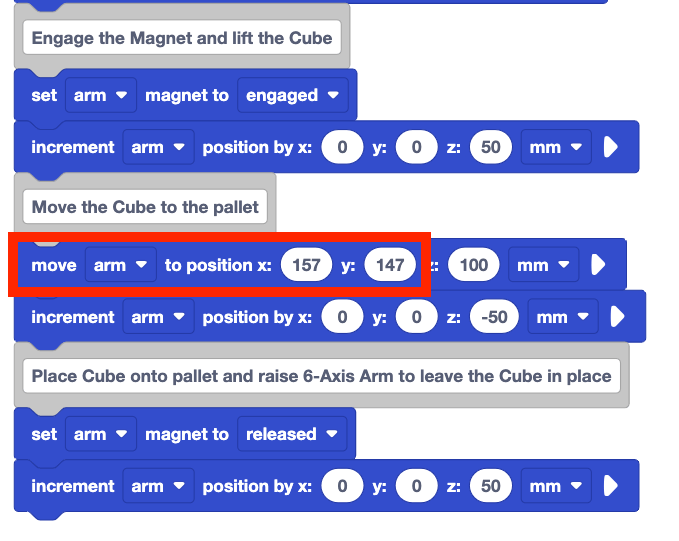
Input the x and y-coordinates of the new drop off location into you project. The z-coordinate should remain the same, so that the 6-Axis Arm stays above the drop off location.
Be sure to use your coordinates, as the ones shown here are an example, and may vary from your own recorded coordinates.
Be sure the 6-Axis Arm is connected to VEXcode and the Cube is placed in the loading zone.
Run the project to test it. Observe the behaviors of the 6-Axis Arm. Does it pick up and place the Cube on the corner of the pallet as intended? Why or why not?

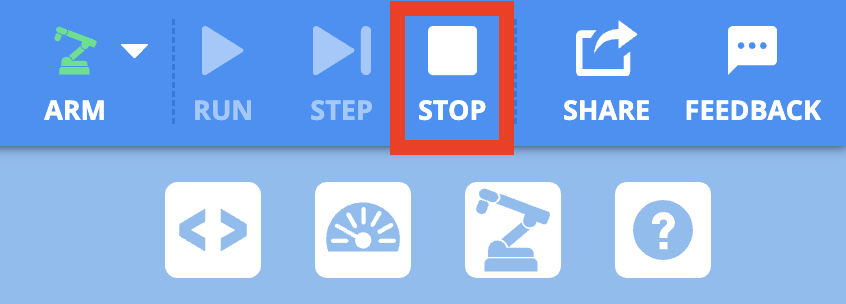
Stop the project when the 6-Axis Arm has stopped moving. Record your observations in your engineering notebook.
Moving a Second Cube
Now that the first Cube is in the new drop off location, there is room on the pallet to place additional cubes. The same behaviors used to move the first Cube will be repeated in order to move a second. The 6-Axis Arm will need to move to the same pick up location, engage the Magnet, move the Cube to the pallet, and release the Cube.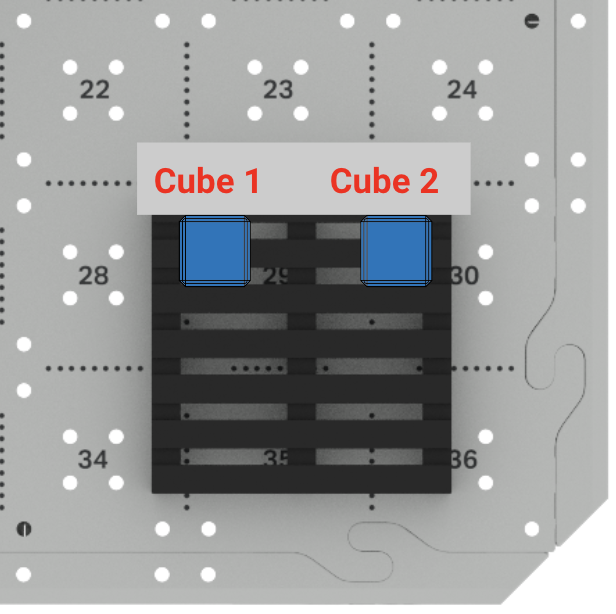
There are several coding strategies that you can try to help move both Cubes successfully.
Adding a Repeat Block
Knowing that a sequence of behaviors are going to be repeated, the first strategy to try is using a Repeat block. As you learned in the previous Unit, a Repeat block is useful for repeating blocks or a stack of blocks in a project.
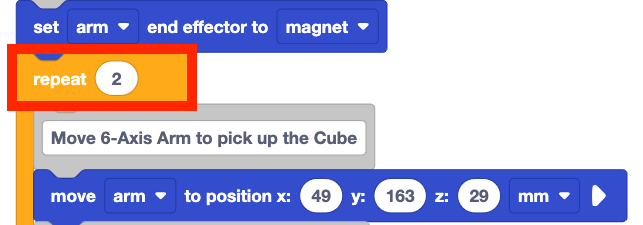
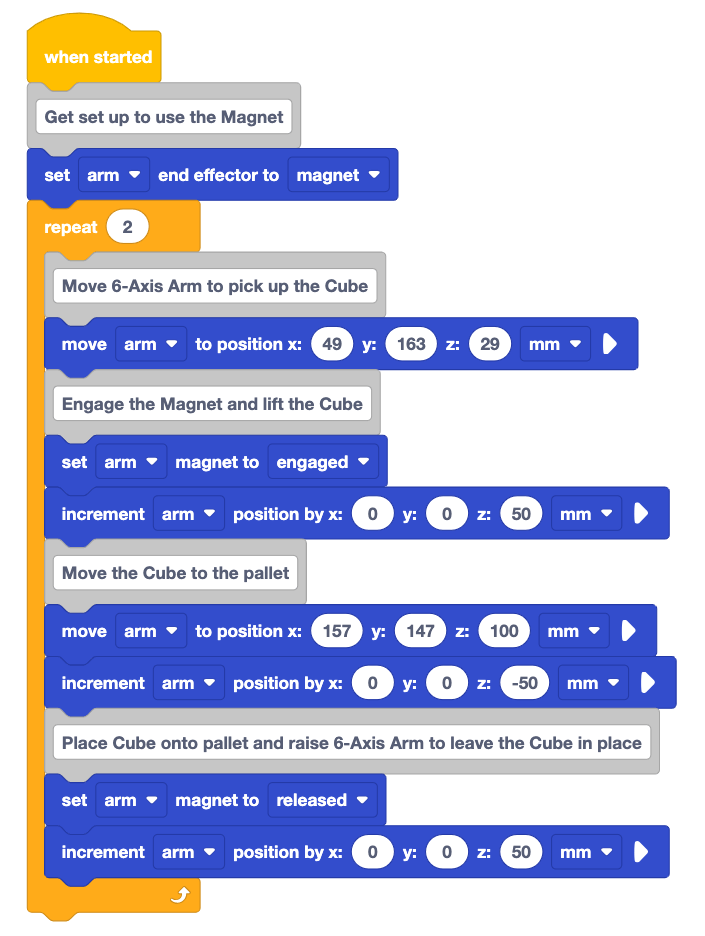
Add a Repeat block to your project beneath the Set end effector block, as shown in this video.
Drag the Move the Cube to the pallet Comment block into the Repeat block, as shown in this video. This will drag all of the subsequent blocks into the Repeat block as well.
Now, all of the blocks needed to pick up and place a Cube from the pick up location to the corner of the pallet can be repeated.
Set the parameter in the Repeat block to 2.
Since you are trying to move two Cubes to the pallet, the behaviors will be repeated two times.
Read the code you have built, and predict what the 6-Axis Arm will do when the project is run.
Record your prediction in your engineering notebook. You may want to sketch the path of the 6-Axis Arm, or draw where the Cubes will be placed on the pallet.
Be sure the 6-Axis Arm is connected to VEXcode.
Run the project to test it. Observe the behaviors of the 6-Axis Arm when the project is run.

Stop the project when the 6-Axis Arm finishes moving. Record your observations in your engineering notebook.
Did the 6-Axis Arm move both Cubes to the pallet successfully? Why or why not?

This did not move the second Cube as intended, and caused an error. Since the first Cube was placed in that position, the second Cube cannot also be placed in the same location. The 6-Axis Arm could not reach the location, so an error occurred.
To place the second Cube on the pallet, we will need to shift this Cube to an open position on the pallet.
Move the Second Cube Relative to the First
Knowing the position of the first Cube on the pallet, means that the next Cube can be placed relative to the first. You learned about relative movement in the previous Unit, and now can apply those concepts to help place the second Cube.
To reach the next corner of the pallet, the 6-Axis Arm will move in the positive direction along the y-axis. 
Using what is known about the size of the Cube, the offset needed to place the second Cube can be determined. The offset is the difference between the current location and the desired location of an object. On the pallet, the offset for the second Cube is the distance between the center of the first Cube and the center of the second Cube in its desired location.
Given that a Cube is 25mm wide, we can approximate that the offset is 50mm.
Now that you know the distance and direction of the relative movement needed, this information can be added to the project.
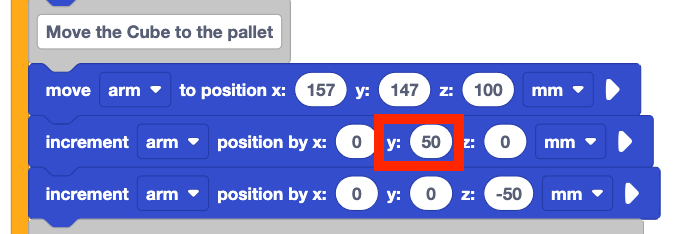
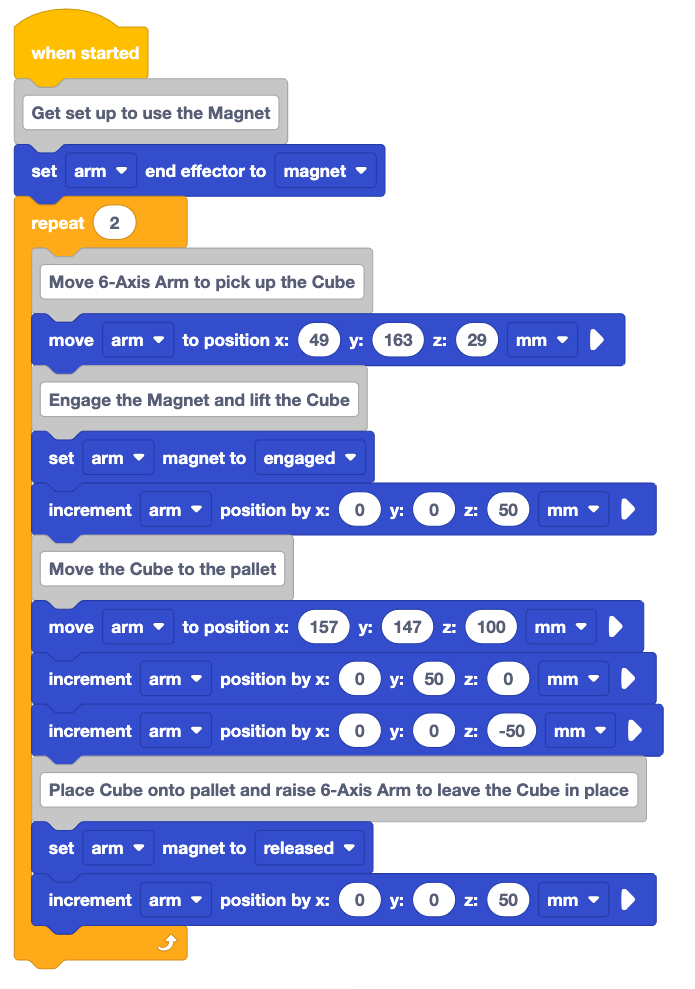
Add an Increment position block by dragging it from the Toolbar and in the middle of the Move the Cube to the pallet comment section of blocks, as shown in this video.
Set the y-parameter to 50. This indicates a relative movement of 50mm along the y-axis.
Read the code, and predict the behavior of the 6-Axis Arm.
Record your prediction in your engineering notebook. Do you think this project will successfully place both Cubes in the desired locations? Why or why not?
Be sure the 6-Axis Arm is connected to VEXcode. Run the project to test it.
Observe the behavior of the 6-Axis Arm.
Stop the project when the 6-Axis Arm is finished moving. Record your observations in your engineering notebook.
Did your observation match your prediction? Are the two Cubes moved to the intended locations on the pallet? Why or why not?

As you may have predicted, this project also does not move both Cubes to their intended locations. The Increment position block correctly moved the 6-Axis Arm to the desired position for the second Cube. However, because all of the behaviors were repeated, both Cubes were moved to this location. This created the same error as the previous project, just in a different location on the pallet.
The goal is to place the first Cube in the first location and the second Cube in the second location on the pallet. To do this successfully, the project needs to keeps track of which Cube is being moved. If the first Cube is being moved, it should go to the first location. If the second Cube is being moved, it can be placed in the second location.
Moving Two Cubes Using Variables and an If then Block
To keep track of which Cube is being moved, a variable can be created and used in the project to essentially 'count' the Cubes as they are being manipulated. A variable can be used to store information about which Cube is being moved. This information can then be used to make a decision within the project – if the 6-Axis Arm is moving the second Cube, then it should move it to the second location on the pallet.
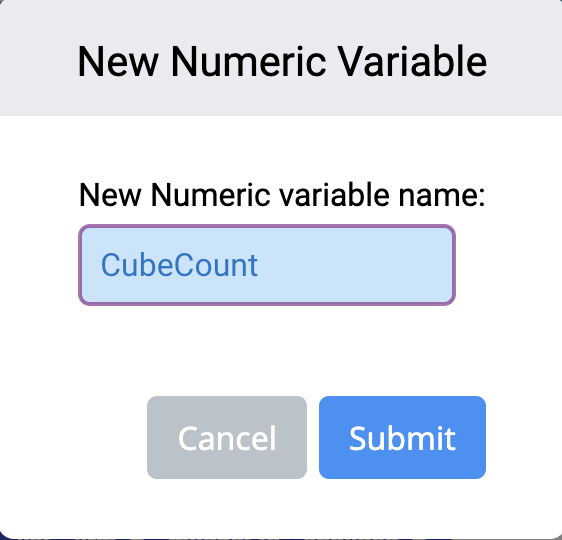
Make a variable and name it CubeCount. Select Submit to create the variable.
You can revisit Unit 6 Lesson 2 for reminders on how to create a variable in VEXcode.
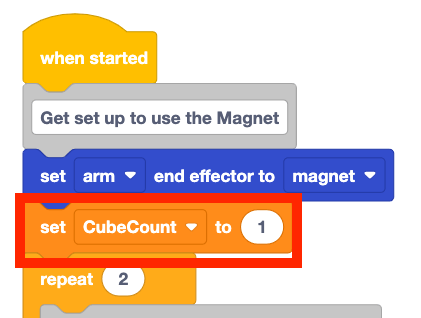
Add the Set variable block to the project above the Repeat block, as shown in this video.
Set the parameter to 1. Be sure the CubeCount variable is selected in the dropdown.
When the project is started, the first Cube will be picked up. Since the purpose of this variable is to number the Cube that is being moved, it needs to be set to '1' to begin.
Previously an Increment position block was added to move the 6-Axis Arm to the second drop off location. In order to move the first Cube to the drop off location, this block needs to be deleted.
Right click on the Increment position block and delete it, as shown in this video.
Add a Change variable block to the bottom of the Repeat block, as shown in this video.
When the project is run, the first Cube will be moved to the drop off location. Adding the Change variable block here will cause the CubeCount to increase after the first Cube is delivered. When the Repeat block loops back to pick up the second Cube, the variable is increased '2', indicating that the second Cube is being moved.
Now that the project is storing information about the number of Cubes, we can use that information to make a decision. An If then block enables us to ask a question within a project, and use information (like the value of a variable) to make a decision. 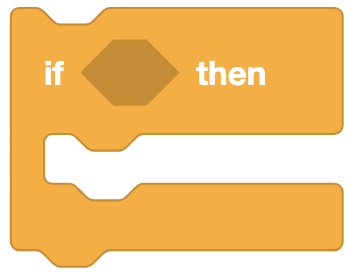
The If then block is a C block that accepts Boolean reporter blocks as a condition. A Boolean block returns a condition as either TRUE or FALSE, and fits inside any block with a hexagonal input. If the condition reports as TRUE, then the blocks within the C-block will run. If the condition reports as FALSE, the If then block will be skipped in the project.
In this instance, the condition we are looking for is for the CubeCount variable to be 2. If the CubeCount variable is 2, then the 6-Axis Arm needs to move to the second position on the pallet.
Let's think about where in the project that decision needs to be made. The project will pick up the Cube in the loading zone, then move above the drop off location. If the CubeCount is 2, then the 6-Axis Arm will need to perform an extra behavior to move to the second pallet position. 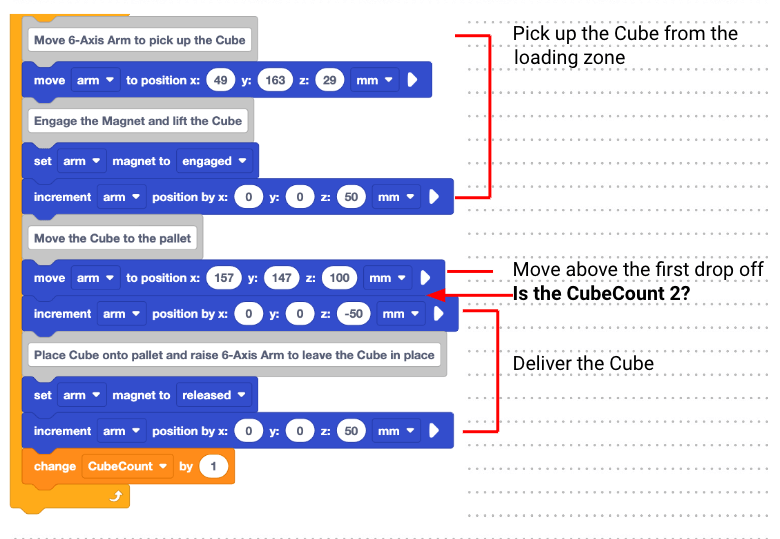
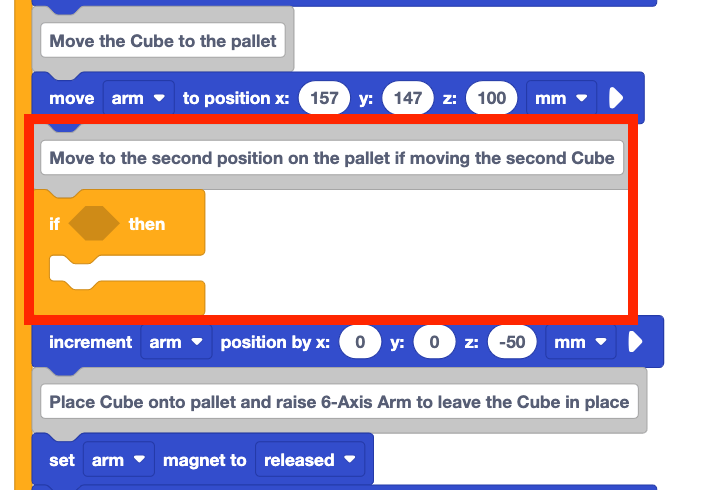
Add an If then block to the project as shown here.
Add an Equal to block into the hexagonal space in the If then block, as shown in this video.
Add the CubeCount variable into the left side of the Equal to operator. Set the right side of the Equal to operator to 2, as shown in this video.
If the CubeCount variable is equal to 2, the Boolean condition will report as TRUE. If the CubeCount is not 2, then the Boolean condition will report as FALSE.
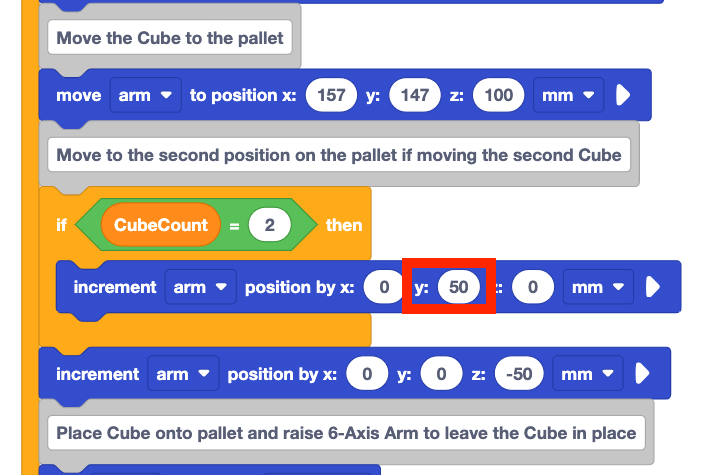
Add an Increment position block inside the C block as shown in this video.
Set the y-parameter of the Increment position block to 50.
When the condition of the If then block is met, the Increment position block inside the If then block will be executed. This means that if the CubeCount is 2, then the 6-Axis Arm will make the relative movement to the second position on the pallet.
Read the code and predict what the 6-Axis Arm will do when the project is run.
Record your prediction in your engineering notebook.
Be sure the 6-Axis Arm is connected to VEXcode. Run the project to test it.
Observe the behavior of the 6-Axis Arm as the project runs.

Stop the project when the 6-Axis Arm has finished moving. Record your observations in your engineering notebook.
Did the 6-Axis Arm move as you predicted? Did both Cubes get moved to the pallet as intended? Why or why not?

For Your Information
You may want to run the project multiple times, so that you can pay attention to the blocks that are running as the 6-Axis Arm is moving. Look for the highlight around the blocks as they are run in the project, to help you better understand when the If then block is run. You can also use the Step feature to run the project one block at a time, to help you see the project flow with the If then block more clearly. 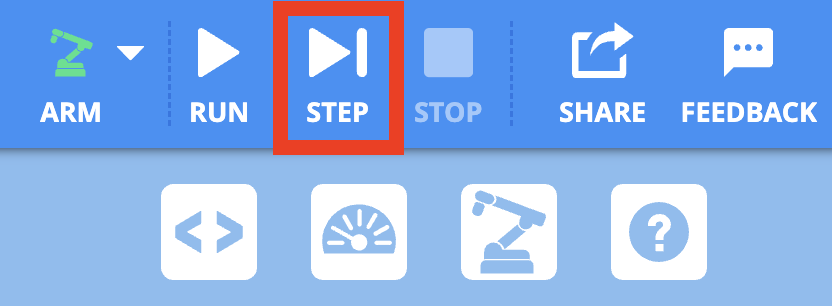
Remember that you can add a variable to the Monitor, to help see the CubeCount value as the project is running. To add a variable to the Monitor, drag the variable into the Monitor icon in the Workspace, as shown in this video. As you run the project, be sure to watch the variable in the Monitor, to help you see the connection between the variable value and the project flow.
Reviewing the Project
Let's review the problem solving process that was used to solve the challenge of placing two Cubes on the pallet. There were several iterations of the project to get the 6-Axis Arm to move both Cubes as intended:
- A Repeat block was added to repeat the behaviors needed to pick up, move, and deliver a Cube to the pallet.
- An Increment position block was added to move the second Cube to an open position on the pallet.
- A variable was added to count the Cubes, so that a decision could be made based on which Cube was being moved.
- An If then block was added to make a decision based on the value of the variable.
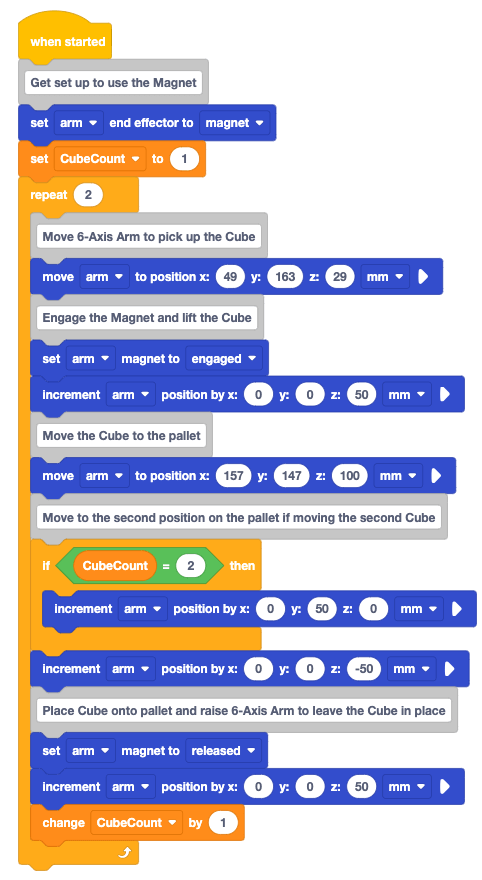
All of these iterations together created a project that picked up and delivered both Cubes successfully. When the second Cube was picked up, the 6-Axis Arm again moved the Cube above the original drop off location on the pallet. Then a decision was made. 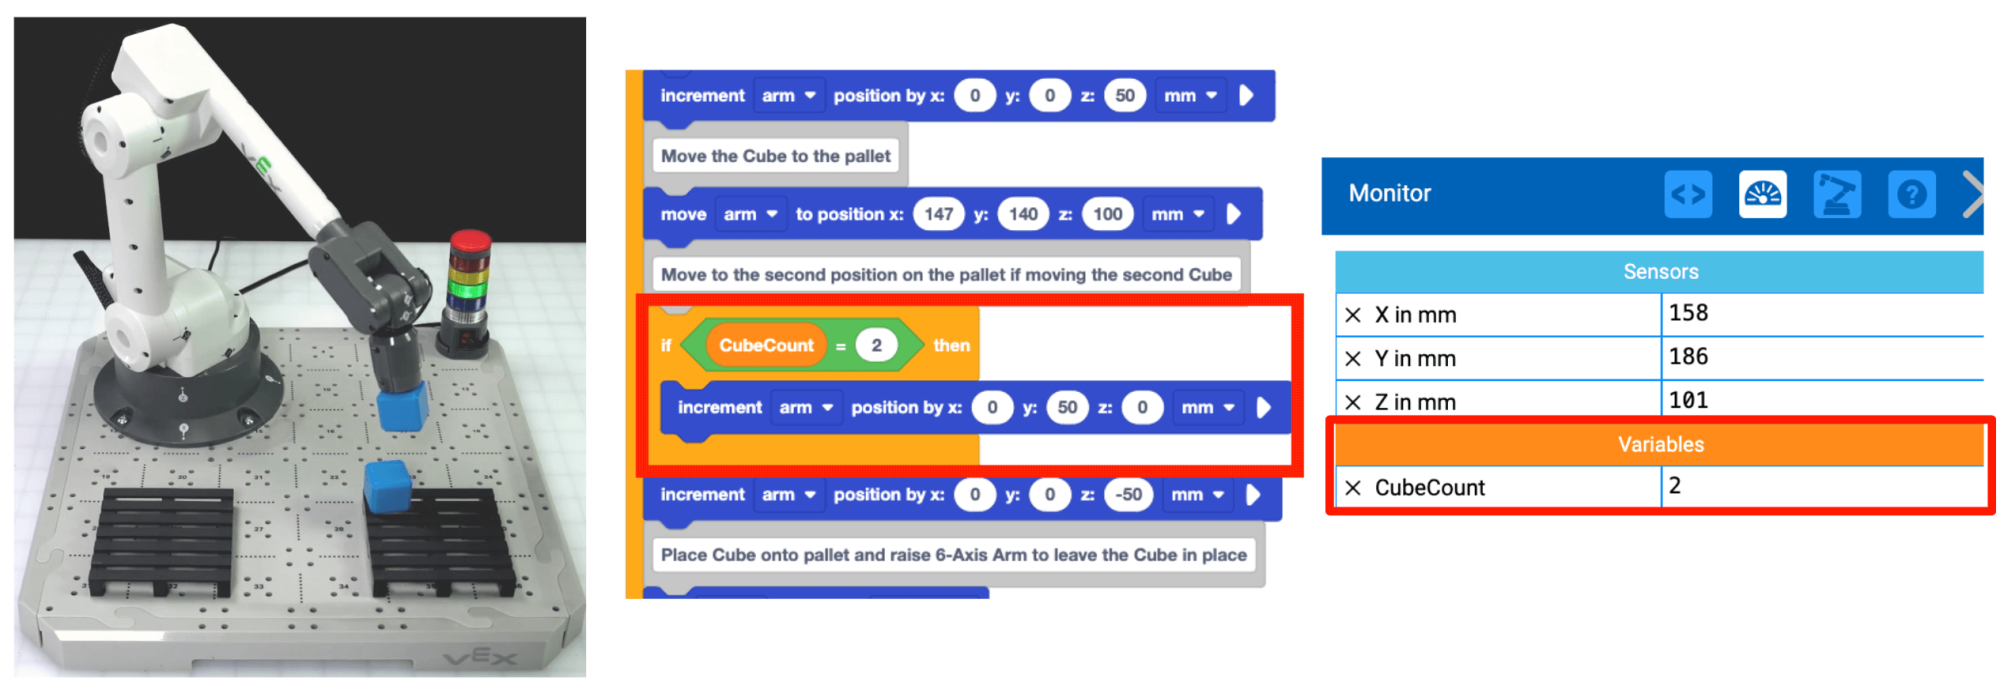 Since the CubeCount is '2', the block inside the If then block runs, moving the Cube along the y-axis to the desired position the pallet.
The iterative process you engaged in throughout this Lesson is something you will continue to do each time you solve a challenge with the 6-Axis Arm. It is important to remember that most coding challenges will not be solved perfectly on the first try. This process of planning, building, testing, and evaluating is one that can lead your group to find creative solutions. Most challenges can be solved in multiple ways, so by engaging in this process collaboratively, you can find the strategy that works best for your group.
Activity
Now that you have moved two Cubes from the loading zone to the pallet, you will practice these skills. In this activity, you will build on your project from this Lesson to code the 6-Axis Arm move four Cubes to the pallet.
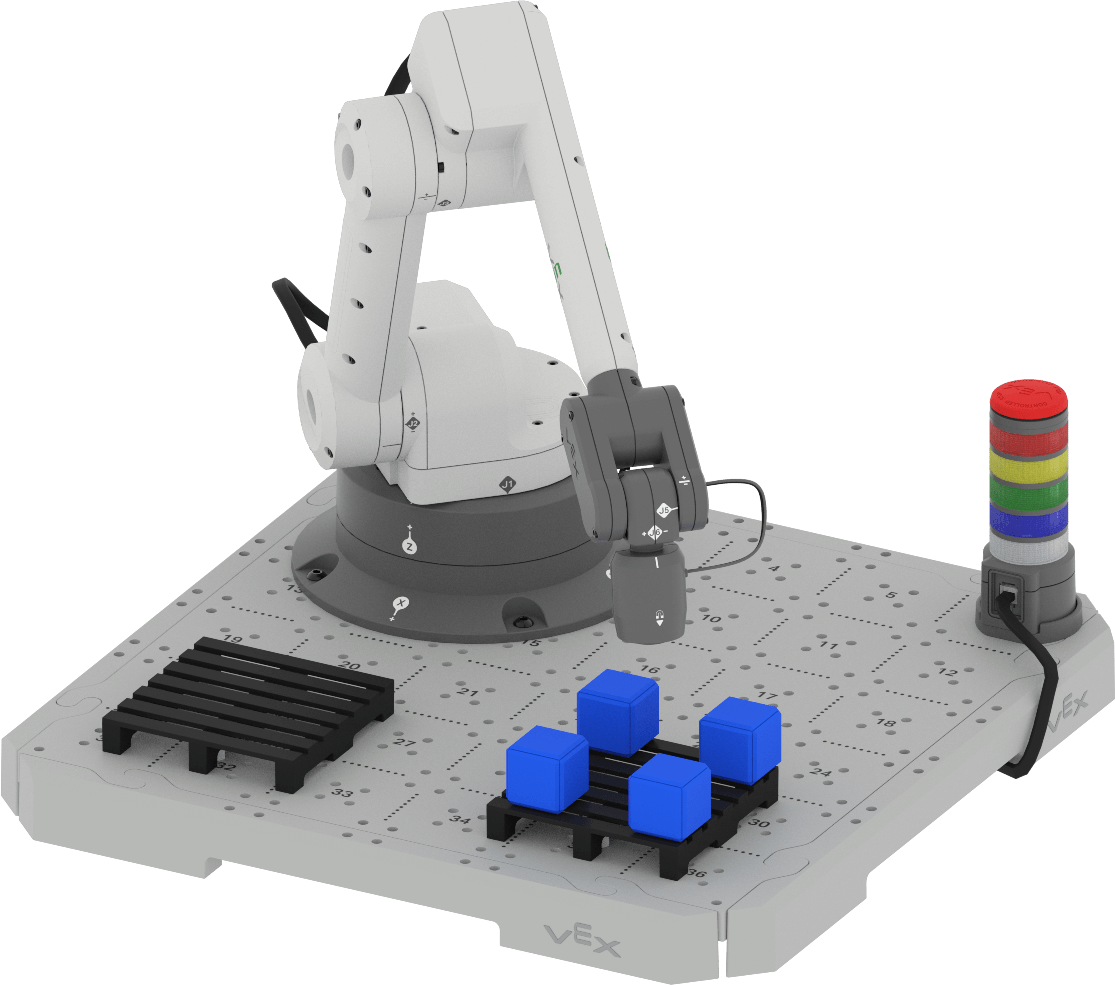
Activity: Code the 6-Axis Arm to place four Cubes on one pallet.
- Plan how you will build onto your project to code the 6-Axis Arm to pick up the additional Cube from the loading zone and place it on the pallet with your group. Be sure that you are all agreed on your approach before you begin editing the project.
- Document your plan in your engineering notebook.
- Rename your project Unit 7 Lesson 3 Activity and save it to your device before you begin editing the project.
- Edit the project in VEXcode to match the plan your group agreed upon.
- Run the project to test it. Manually place the second, third, and fourth Cubes at the loading zone once each Cube has been placed.
- Does the 6-Axis Arm successfully move the Cubes as you intended? There should be four Cubes on the pallet. If not, continue to edit the project until you have successfully placed all four Cubes.
Check Your Understanding
Before moving on to the next Lesson, ensure that you understand the concepts in this Lesson by answering the following questions in your engineering notebook.
Check Your Understanding questions > (Google Doc / .docx / .pdf)
Select Next > to move on to the Putting It All Together Activity.