
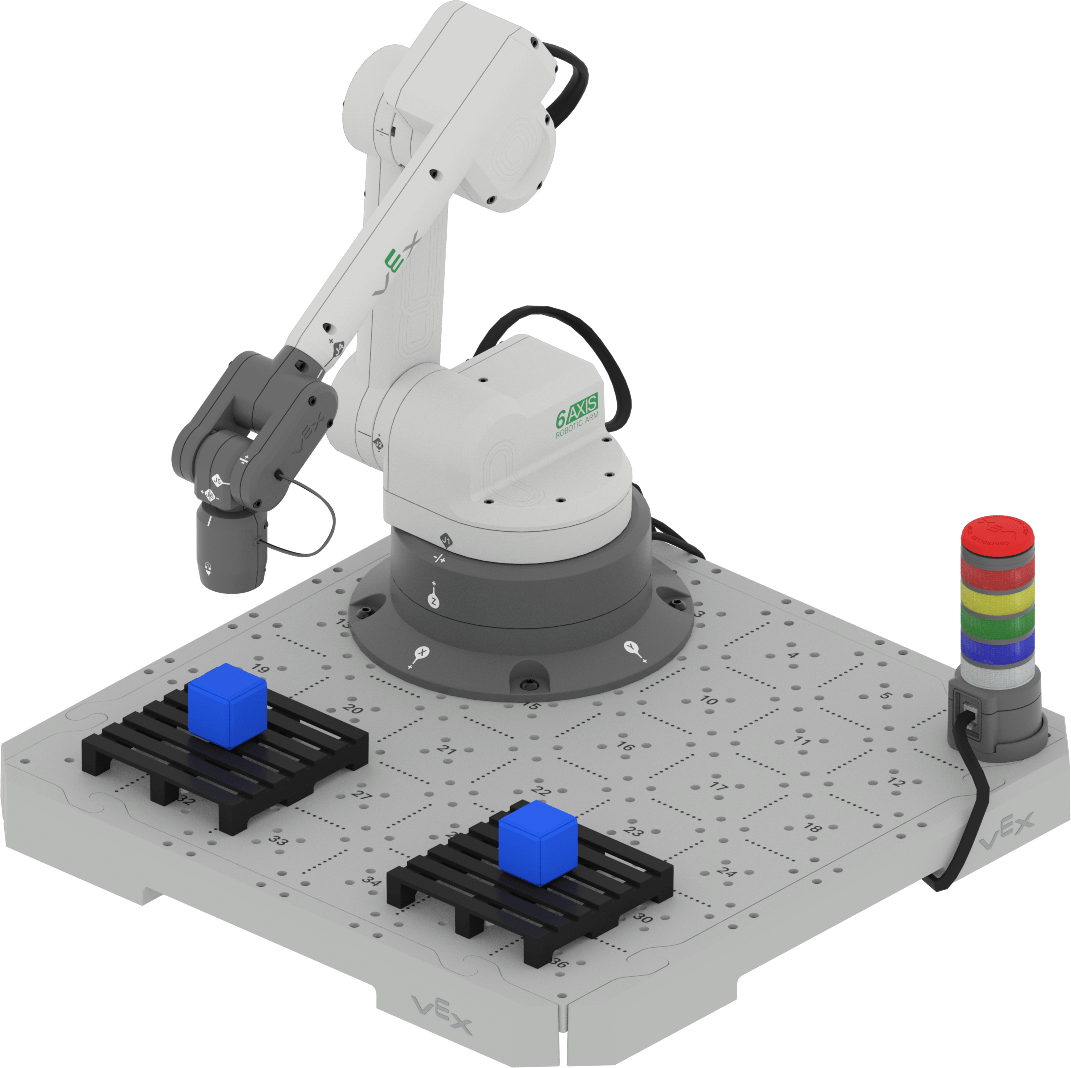
In the previous Lesson, you learned about pallets and how they work in conjunction with robotic arms to ship products in an organized and efficient way. Now that you know what a pallet is and how it functions, it is time to learn how to code the 6-Axis Arm to pick up and place an object onto a pallet. To move a Cube, you will need to use the Magnet Pickup Tool.
In this Lesson, you will learn about:
- Using the Set magnet block in a project to pick up and release a Cube with the Magnet.
- Finding the coordinates of a Cube in the loading zone and on the pallet.
- Coding the 6-Axis Arm to pick up and place a Cube on a pallet.
By the end of this Lesson, you will move a Cube to another pallet, applying your learning about coding the Magnet on the 6-Axis Arm.
Picking Up and Placing a Cube with the 6-Axis Arm
In a previous Unit, you used the Magnet on the 6-Axis Arm to pick up and move Disks with the Teach Pendant. In this Lesson, you will build on what you learned to code the 6-Axis Arm to move, engage the Magnet, pick up a Cube, move it to a new location, and release the Magnet to place the Cube onto a pallet.
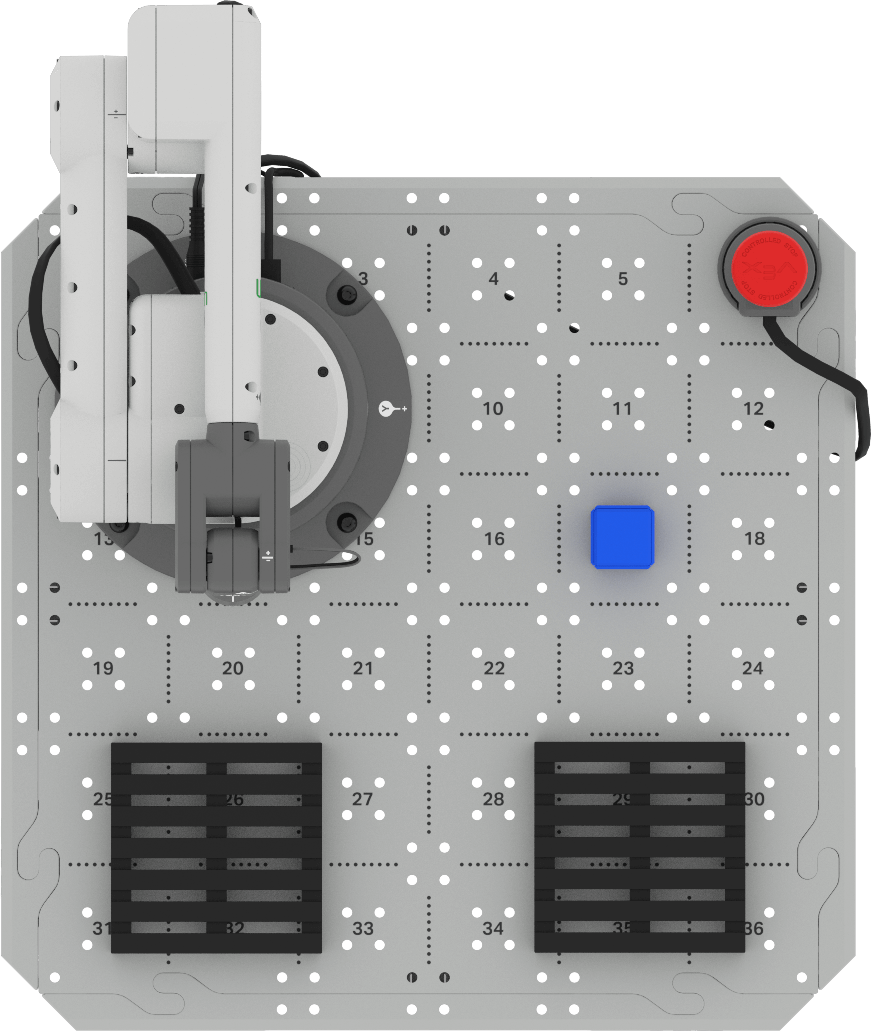
To begin, place a Cube on Tile location 17, as shown in this image. This will be the loading zone for the Cube. Document this setup in your engineering notebook.
Gather Coordinates with the Monitor
Before you can code the 6-Axis Arm to pick up a Cube, you need to know the coordinate location of the Cube. These coordinates can be found using the Monitor.
Be sure the 6-Axis Arm is connected to VEXcode.
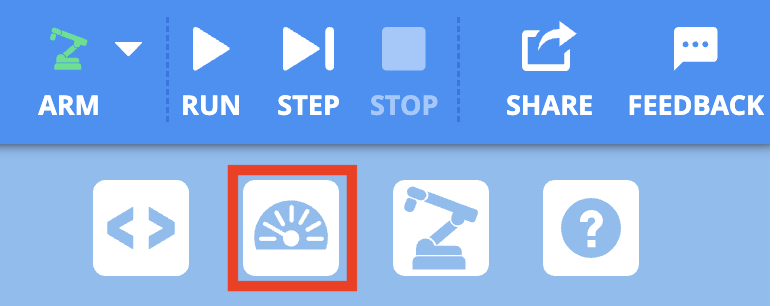
Select the Monitor icon in the Toolbar to open the Monitor.
Manually move the 6-Axis Arm so that the Magnet is touching the top of the Cube in the loading zone.
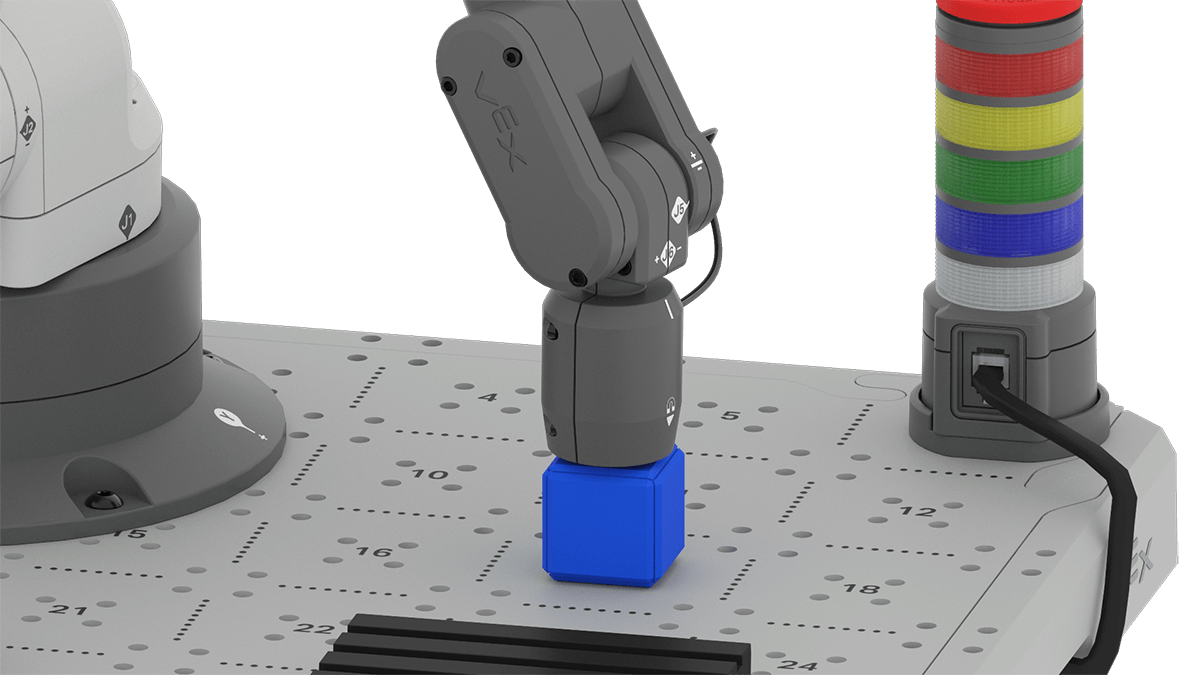
Record the x, y, and z-coordinates from the Monitor Console in your engineering notebook.
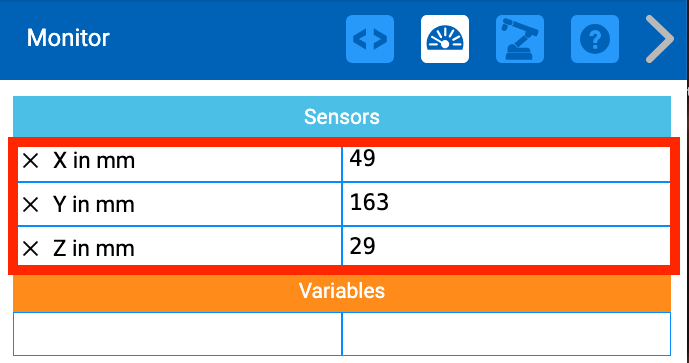
Let's break down the (x, y, z) coordinate we just gathered. The x, y, z-values show where the Cube is located on the CTE Tile. You used the x and y-coordinate locations to move the Pen to draw in previous Units. However, in that case, the z-value was 0, because the Pen was flat on the surface of the Tile.
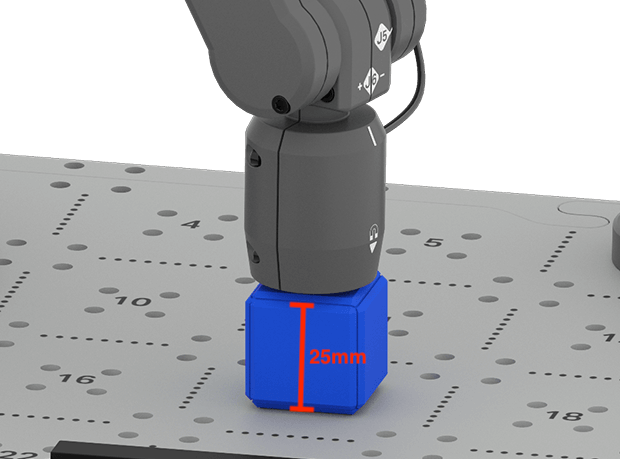
In order to pick up the Cube, we need the Magnet to touch the top of the Cube. This means we need to know where along the z-axis the top of the Cube is. If we do not account for the height of the Cube when coding the 6-Axis Arm, the Magnet will not pick up the Cube effectively.
The Monitor is reporting the location of the end of the Magnet, when it is touching the top of the Cube. The value in the Monitor may not be exactly the same the height of the Cube when you manually move the 6-Axis Arm. With manual movement, there may be some variability to the values. Be sure you are using the values you see in the Monitor in your projects.
Now that we know where we are picking up the Cube, we need to find out the coordinates of where we will place the Cube.
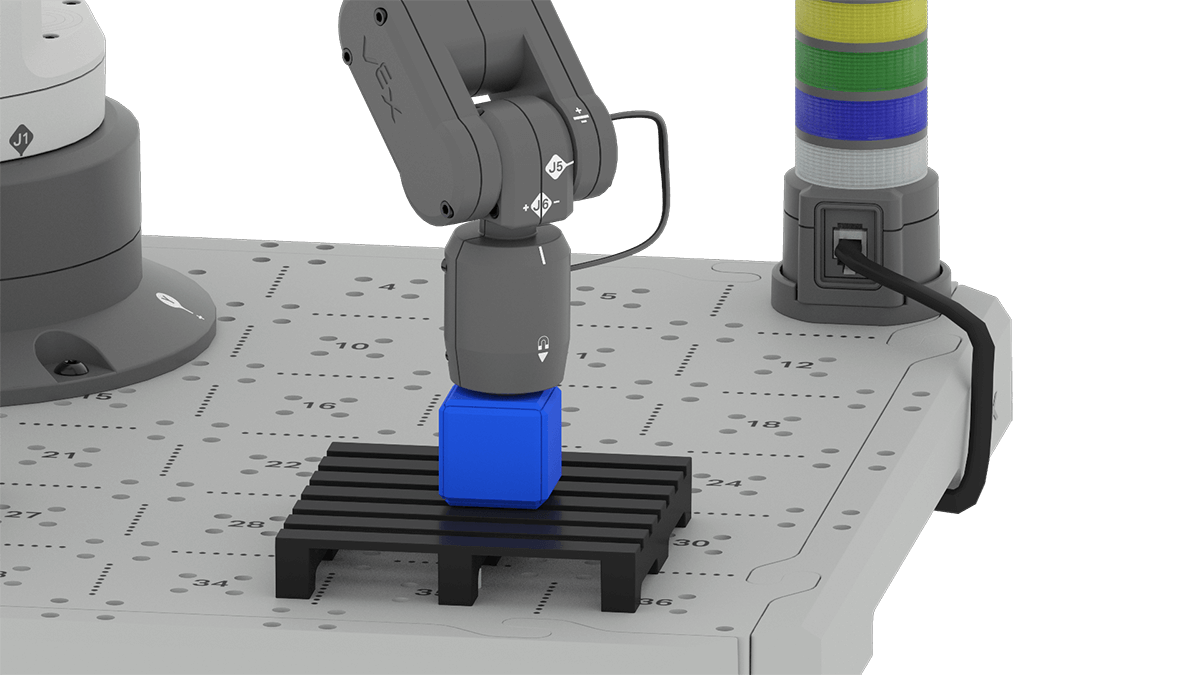
Place the Cube on the center of the pallet.
Manually move the 6-Axis Arm so that the Magnet is touching the top of the Cube.
Look at the x, y, z-values in the Monitor Console.
Record the (x, y, z) coordinates of the Cube on the pallet in your engineering notebook. This is the drop off location.
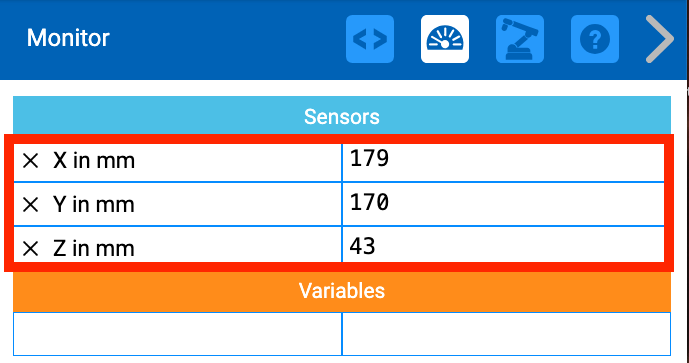
Notice that the z-value in the Monitor Console has changed. This is because the Cube is now on top of the pallet. That means the location of the Magnet when the Cube is placed on the pallet is further along the z-axis than when the Cube was resting on the surface of the Tile.
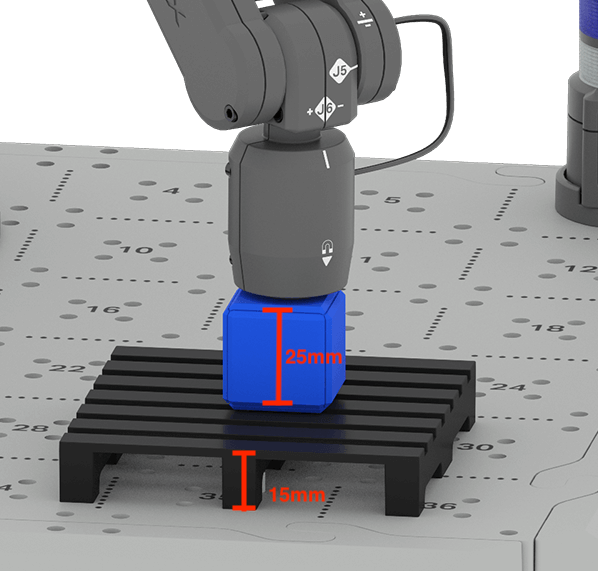
It is important to note this z-value so that you can effectively place the Cube onto the pallet in a controlled way. Again, the z-value in the Monitor may be slightly different than what you see in this image. This is due to the variability when moving the 6-Axis Arm manually. Be sure to use the values you see in the Monitor in your project.
Pick Up the Cube in the Loading Zone
Now that we know where we are picking up the Cube and where we will drop it off, we can begin to code the 6-Axis Arm. First, the 6-Axis Arm needs to move to the Cube in the loading zone. Then, the Magnet will be engaged to pick up the Cube.
Open a New Blocks Project by following the steps in this video, where the File Menu is used to select New Blocks Project.
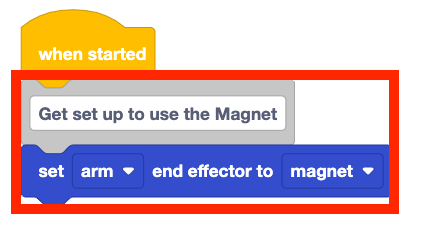
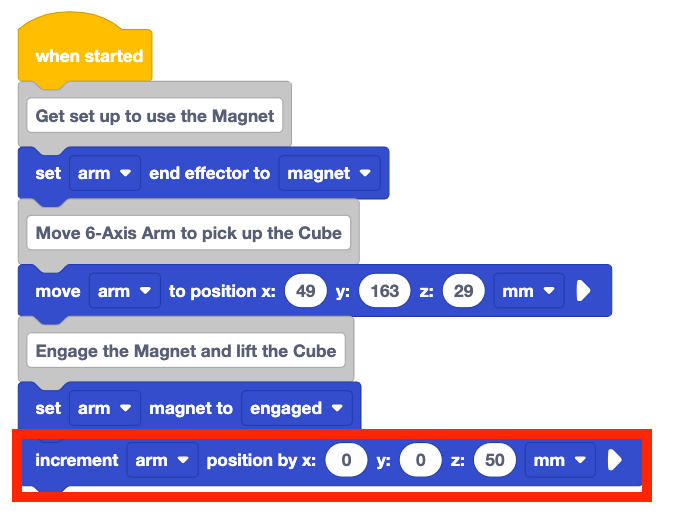
Add a Set end effector block to your project, and set the parameter to magnet.
Remember that adding comments to your project as you build it can help you stay organized, and make it easier to keep track of the behaviors in your project.
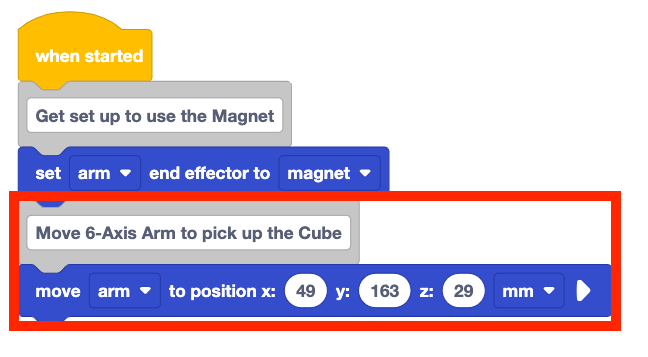
Add a Move to position block to the project. Set the x, y, z-parameters to the coordinates of the loading zone location you recorded in your engineering notebook.
Note that the (x, y, z) coordinates shown here are an example. Yours may be slightly different based on the position of the Cube and the 6-Axis Arm when you manually gathered the values. Be sure to use your coordinates in your project.
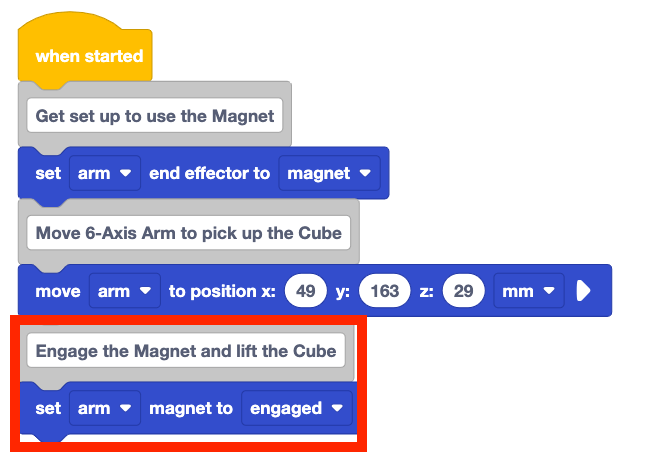
Add a Set magnet block to the project. Be sure the parameter is set to engaged.
You must use a Set magnet block to engage the Magnet in order to attract the Cube to pick it up.
Add an Increment position block to your project and set the z-parameter to 50.
This will cause the 6-Axis Arm to lift along the z-axis, picking up the Cube from its starting location on the Tile.
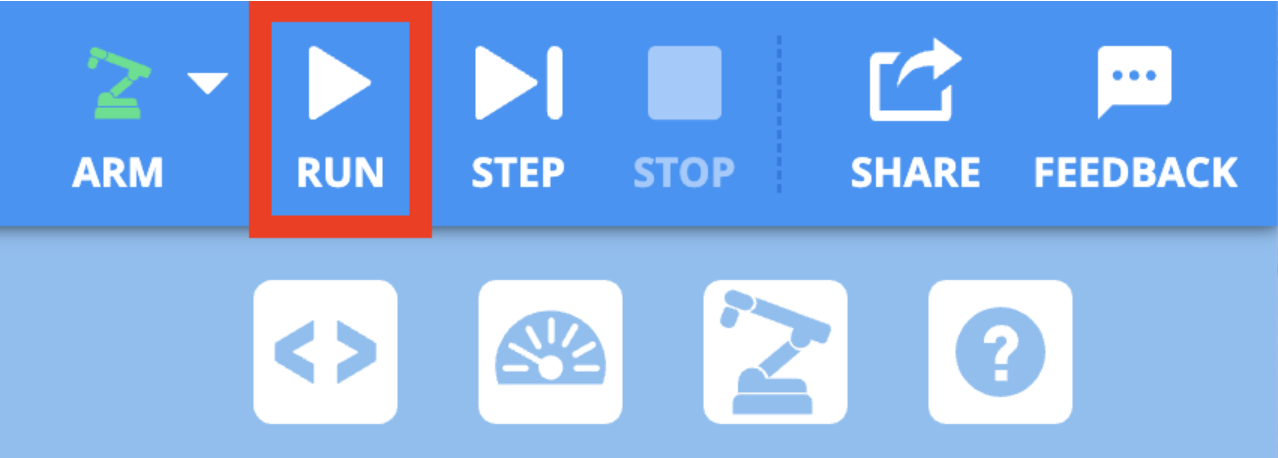
Be sure the 6-Axis Arm is connected to VEXcode. Run the project and observe the behaviors of the 6-Axis Arm.
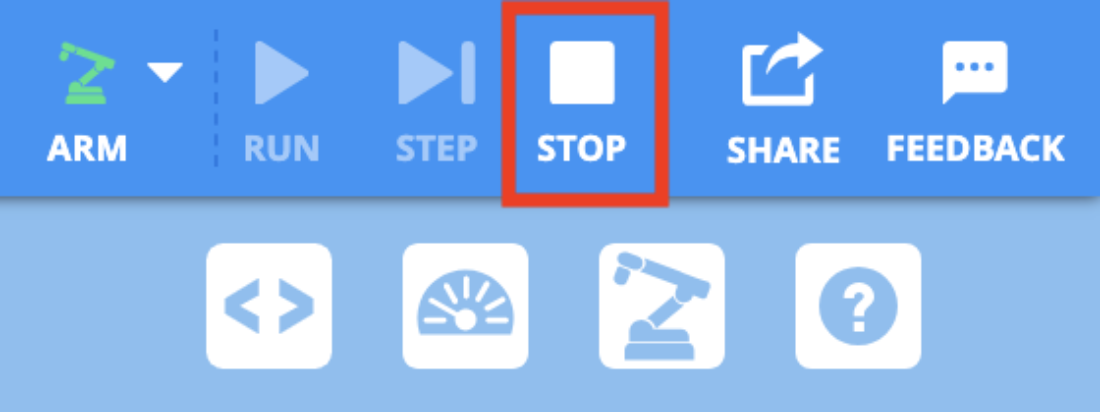
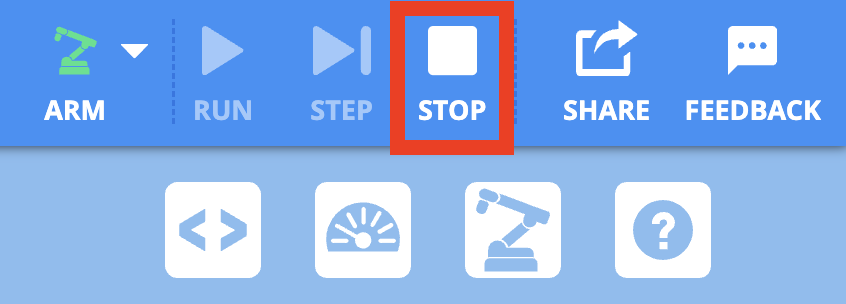
Stop the project when the 6-Axis Arm is finished moving.
Does it pick up the Cube from the loading zone as intended? Why or why not?

Place the Cube on the Pallet
Now that the Cube is picked up by the 6-Axis Arm, it can be moved to the pallet. First, the 6-Axis Arm will move the Cube above the drop off location on the pallet. Then it will lower the Cube to the pallet and release the Magnet to place the Cube.
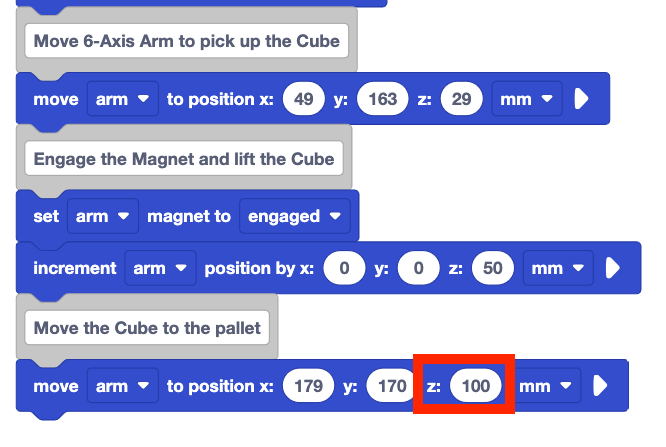
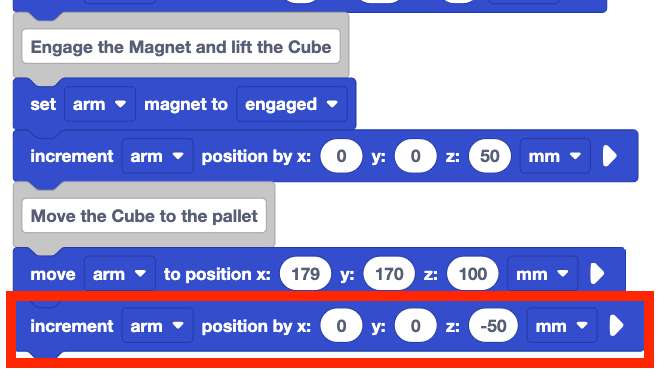
Add a Move to position block to the project. Set the x, y, z-parameters to the coordinates of the drop off location recorded in your engineering notebook.
Be sure to use your coordinates, as the ones shown here are an example, and may vary from your own.
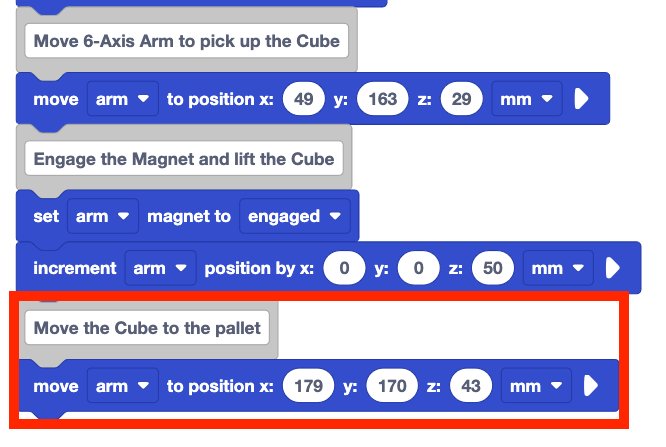
Add approximately 50 to your z-coordinate in the Move to position block.
This is being added because the 6-Axis Arm needs to move the Cube above the drop off location. By increasing the z-coordinate, you can ensure that the Cube is positioned over the correct location. This also ensures that the Arm avoids any obstacles that may be present.
Be sure the 6-Axis Arm is connected to VEXcode, and the Cube is placed in the loading zone.
Run the project to test it. Where is the Cube's ending position when the project is run?
Stop the project. Record what happened when the project was run in your engineering notebook.
You should have observed the 6-Axis Arm move to the Cube, pick it up using the Magnet, and move the Cube directly above the center of the pallet. This movement ensures your Magnet is directly on top of the correct spot before lowering to drop off the Cube.
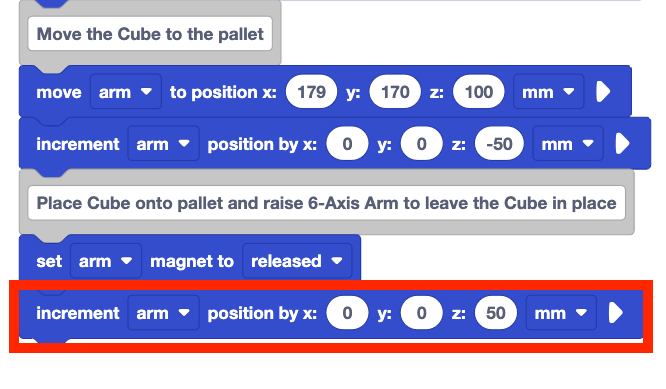
Add an Increment position block to the project. Set the z parameter to -50.
This will move the 6-Axis Arm down 50mm to place the Cube on the pallet.
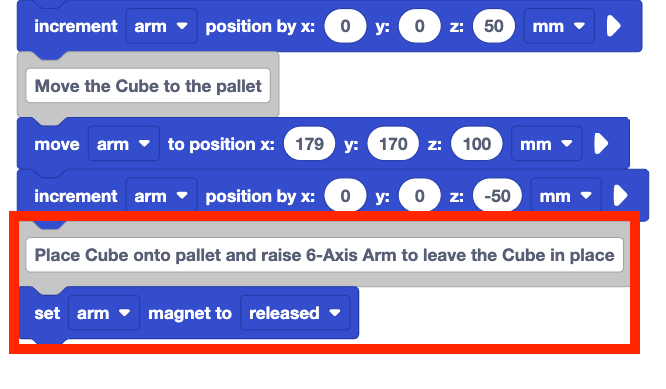
Add a Set magnet block to the project. Set the parameter to released.
This will disengage the Magnet so that the Cube is released on the pallet.
Add an Increment position block to the project. Set the z-parameter to 50.
This will raise the 6-Axis Arm to place the Cube on the pallet.
Be sure the 6-Axis Arm is connected to VEXcode, and the Cube is placed in the loading zone.
Run the project to test it. Observe the behaviors of the 6-Axis Arm.

Stop the project when the 6-Axis Arm is finished moving.
Does it pick up and place the Cube on the pallet as intended? Why or why not?
Be sure to rename and save your project.

Now that you have built and tested the project, you should have seen the following actions from the 6-Axis Arm:
- Move to the Cube at the loading zone.
- Move up along the z-axis.
- Move to the drop off location.
- Move down along the z-axis.
- Drop the Cube.
- Move back up along the z-axis to ensure the Cube has been placed.
Watch the video below to see the 6-Axis Arm perform these actions in order.
Moving along the z-axis with the Increment position blocks is an important part of the process. This allows you to ensure the Magnet has picked up the Cube. The z-axis movements also allow you to ensure the positioning of the Cube above the pallet is correct. This is similar to a crane game at an arcade. You want to move the crane itself above the drop off or pickup location before moving directly down.
Pallets will rarely leave a warehouse with only a single package loaded. As you continue to build projects and move Cubes onto pallets, you will need to ensure each placement is precise. This way you can deliver as many packages (Cubes) as possible to the final destination. You will explore moving multiple Cubes onto the pallets in Lesson 3 of this Unit.
Activity
Now that you have moved one Cube from the loading zone to the pallet, you will practice these skills. In this activity, you will build on your project from this Lesson to code the 6-Axis Arm to pick up a second Cube from the loading zone and place it on the second pallet.

Activity: Code the 6-Axis Arm to place one Cube on each pallet.
- Plan how you will build onto your project to code the 6-Axis Arm to pick up a second Cube from the loading zone and place it on the second pallet with your group. Be sure that you are all agreed on your approach before you begin editing the project.
- Document your plan in your engineering notebook.
- Rename and save your project to Unit 7 Lesson 2 Activity before you begin editing the project.
- Edit the project in VEXcode to match the plan your group agreed upon.
- Run the project to test it. Manually place the second Cube at the loading zone once the first Cube has been placed.
- Does the 6-Axis Arm successfully move both Cubes as you intended? There should be one Cube on each pallet. If not, continue to edit the project until you have successfully placed both Cubes, one on each pallet.
Check Your Understanding
Before moving on to the next Lesson, ensure that you understand the concepts in this Lesson by answering the following questions in your engineering notebook.
Check Your Understanding questions > (Google Doc / .docx / .pdf)
Select Next > to move on to the Mid-Unit Reflection.