
Exploring Velocity - C++
Speedbot is ready to drive at different velocities!
This investigation will help you to learn more about programming the Speedbot to drive at speeds that are best suited for the task. In the Strike Challenge at the end, you will need to find a velocity for the Speedbot that allows it to be fast and have great momentum but remain in control in order to hit the ball at a good angle and with great force.
VEXcode V5 instructions that will be used in the first part of this investigation:
- Drivetrain.setDriveVelocity(50, percent);
- Drivetrain.driveFor(forward, 200, mm);
-
To find out more information about the instruction, select Help and then select the question mark icon next to a command to see more information.

Make sure you have the hardware required, your engineering notebook, and VEXcode V5 downloaded and ready.
Each group of students should get the hardware required and the group’s engineering notebook. Then open VEXcode V5.
| Quantity | Materials Needed |
|---|---|
| 1 |
Speedbot Robot |
| 1 |
Charged Robot Battery |
| 1 |
VEXcode V5 |
| 1 |
USB Cable (if using a computer) |
| 1 |
Engineering Notebook |
| 1 |
Ball (the size and shape of a soccer ball) |
| 1 |
3m x 3m clear space |
| 1 |
Meter stick or Ruler |
| 1 |
Roll of tape |
| 1 |
Step 2: Start a New Project
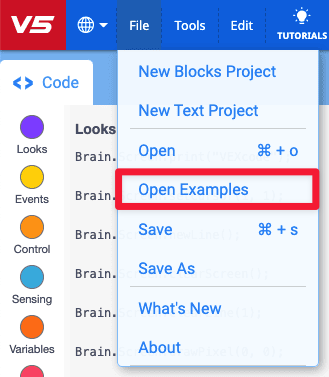
Complete the following steps to begin the project:
-
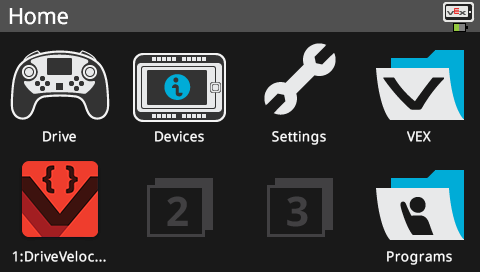
Open the File menu and select Open Examples.
-
Select and open the Speedbot (Drivetrain 2-motor, No Gyro) template project. The template project contains the Speedbot's motor configuration. If the template is not used, your robot will not run the project correctly.

-
Since you will be working on exploring velocity, you will name your project DriveVelocity. When finished, select Save.
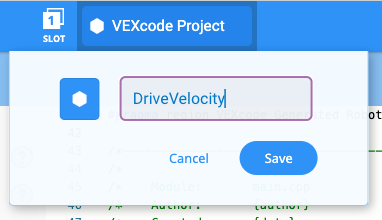
-
Check to make sure the project name DriveVelocity is now in the window in the center of the toolbar.

Step 3: Drive Forward for 150 mm at Different Velocities
You are now ready to begin programming the robot to drive forward at different velocities!
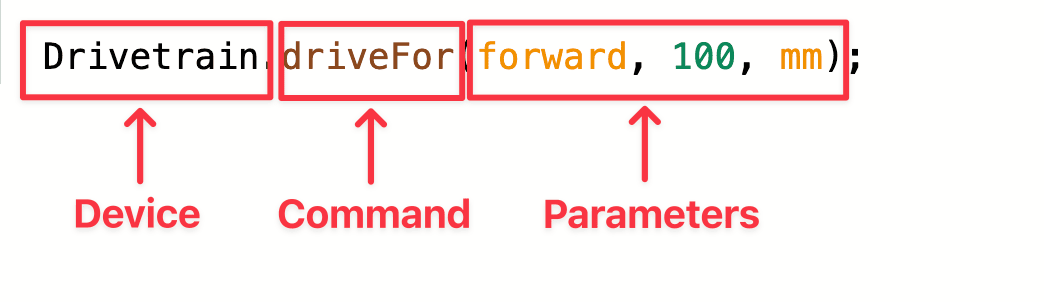
-
Before we begin programming, we need to understand what an instruction is. There are three parts to an instruction.
-
Add the instructions to the project, so that your project looks like this:
int main() {
  // Initializing Robot Configuration. DO NOT REMOVE!
  vexcodeInit();

  // Begin project code
  Drivetrain.driveFor(forward, 150, mm);
  Drivetrain.setDriveVelocity(25, percent);
  Drivetrain.driveFor(forward, 150, mm);
  Drivetrain.setDriveVelocity(75, percent);
  Drivetrain.driveFor(forward, 150, mm);

}
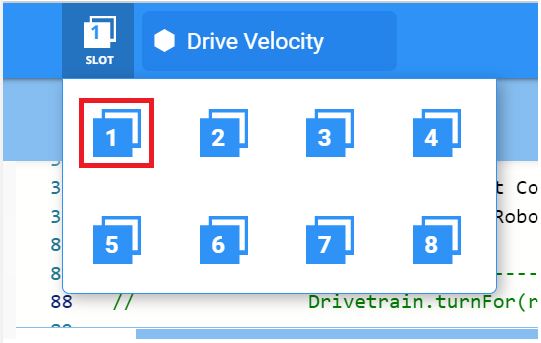
-
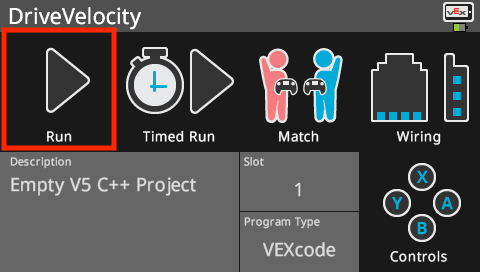
Select the Slot icon to choose one of the eight available slots on the Robot Brain and select slot 1.
-
Connect the V5 Robot Brain to the computer using a micro USB cable and power on the V5 Robot Brain. The Brain icon in the toolbar turns green once a successful connection has been made.

-
Select Download to download the project to the Brain.

-
Check to make sure your project has downloaded (C++) by looking at the Robot Brain’s screen. The project name DriveVelocity should be listed in Slot 1.
-
Run(C++) the project on the robot by making sure the project is selected and then press the Run button on the Robot Brain. Congratulations on creating your first project!
Step 4: Drive Forward and Reverse for 150 mm at Different Velocities
Now that you have programmed your robot to drive forward at different velocities, program it to now drive forward and in reverse at different velocities.
-
Change the parameter in the second driveFor instruction to reverse, so your project looks like this:
int main() { // Initializing Robot Configuration. DO NOT REMOVE! vexcodeInit(); // Begin project code Drivetrain.driveFor(forward, 150, mm); Drivetrain.setDriveVelocity(25, percent); Drivetrain.driveFor(reverse, 150, mm); Drivetrain.setDriveVelocity(75, percent); Drivetrain.driveFor(forward, 150, mm); } -
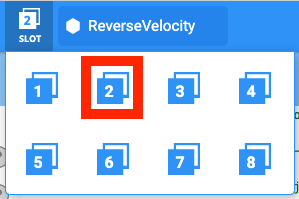
Select the Project Name to change it from DriveVelocity to ReverseVelocity.

-
Select the Slot icon to choose a new slot. Select slot 2.
-
Download (C++) the project.

-
Check to make sure your project has downloaded (C++) by looking at the Robot Brain’s screen. The project name ReverseVelocity should be listed in Slot 2.

-
Run (C++) the project on the robot by making sure the project is selected and then press the Run button on the Robot Brain.

Step 5: Setting Up Your Testing Area

Example testing area layout
- Use tape and a meter stick, to create a 3m line on the floor like the horizontal line shown in the image above.
- After the line is created, use tape and your meter stick once more to create 1m lines across the 3m line like the vertical lines in the image above. Tape a 1m line at every 50cm mark on the vertical line by starting at 0cm.
- The shorter horizontal lines should be centered on the longer vertical line.
- While the area is being set up, one or two members of your team should create a new project named Momentum. Set the velocity at 50% and have the Speedbot drive forward to the first line at 50 cm. Keep in mind 1 cm = 10 mm, so the robot will travel forward for 50 cm or 500 millimeters.
Step 6: Testing the Transfer of Energy during Collisions

Bowling challenge test area with robot and ball
Center the ball on the horizontal line at 50cm and place your robot so that the front of it is centered on the horizontal line at 0cm. Make sure the front of the robot is facing the direction of the ball. Run your first Momentum project that has the velocity set to 50% and pay close attention as the robot collides with the ball.
Record the set velocity, the distance driven, and the distance the ball traveled in this Data Table (Google / .pdf). The first row of the table has been started for you based on the Momentum project you worked on in the previous step. Continue to add data to this table as you try setting different velocities. You can then add other teams' data as you discuss your findings as a class.

Think about and respond to the questions below in your engineering notebook as you collect your data:
- How can you tell that the momentum of the robot transferred energy to the ball during the collision? Explain with details.
- Repeat the test at least twice more. Try a velocity less than 50%. Reset the ball in its position and record in the table how far the ball travels. Also, try a velocity more than 50%. Reset the ball in its position and record in the table how far the ball travels.
- When all groups have completed their three tests, discuss the velocities that the other groups chose and how far the ball traveled in their tests. As teams share their data, add their findings to your table.
- Look for pattern(s) in the data. Does the distance traveled by the ball increase or decrease as the set velocity increases?