
Using the Vision Sensor - Python
Get the hardware required, your engineering notebook, and open VEXcode V5.
| Quantity | Materials Needed |
|---|---|
| 1 |
VEX V5 Classroom Starter Kit |
| 1 |
VEXcode V5 (latest version, Windows, macOS) |
| 1 |
Engineering Notebook |
| 1 |
Configuring a Vision Sensor (VEX Library) |
| 1 |
Tuning the Vision Sensor (VEX Library) |
| 1 |
Detecting Objects (Vision) example project |
This activity will give you the tools to use the Vision Sensor.
You can use the Help information inside of VEXcode V5 to learn about the commands.
Step 1: Open an Example Project
VEXcode V5 contains many different example projects. You'll use one of them in this exploration.
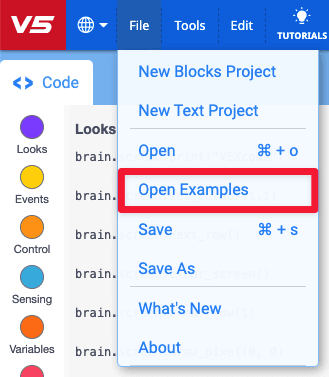
Open the Detecting Objects (Vision) example project by completing the following steps:
- Open the File menu.
- Select Open Examples.
- Use the filter bar at the top of the application and select "Sensing."
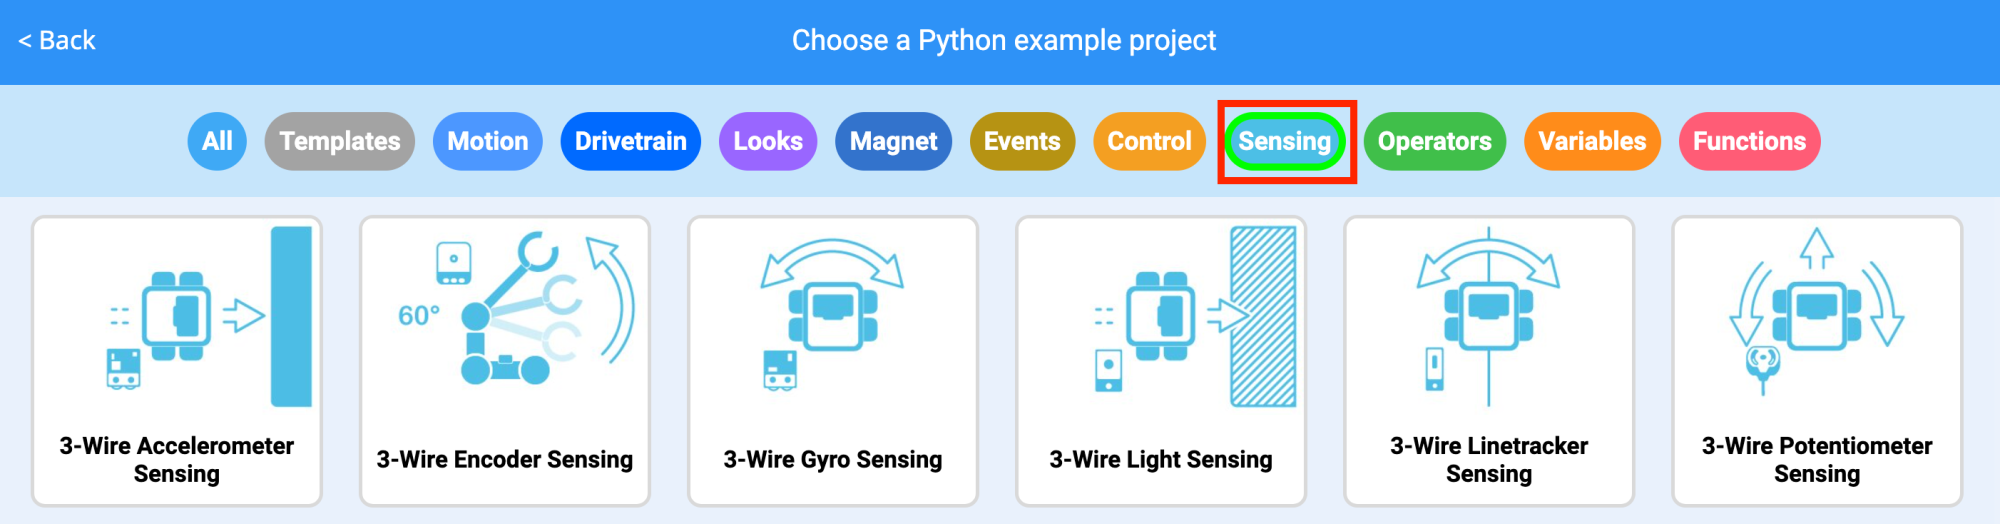
Select and open the Detecting Objects (Vision) example project.

Save your project as Detecting Objects.
- Check to make sure the project name Detecting Objects is now in the window in the center of the toolbar.
Step 2: Configuring and Using the Vision Sensor
- Begin by reading Vision Sensor - Robot Config - VEXcode V5.
- Then, read Vision Sensor Adjustments-Robot Config-VEXcode V5
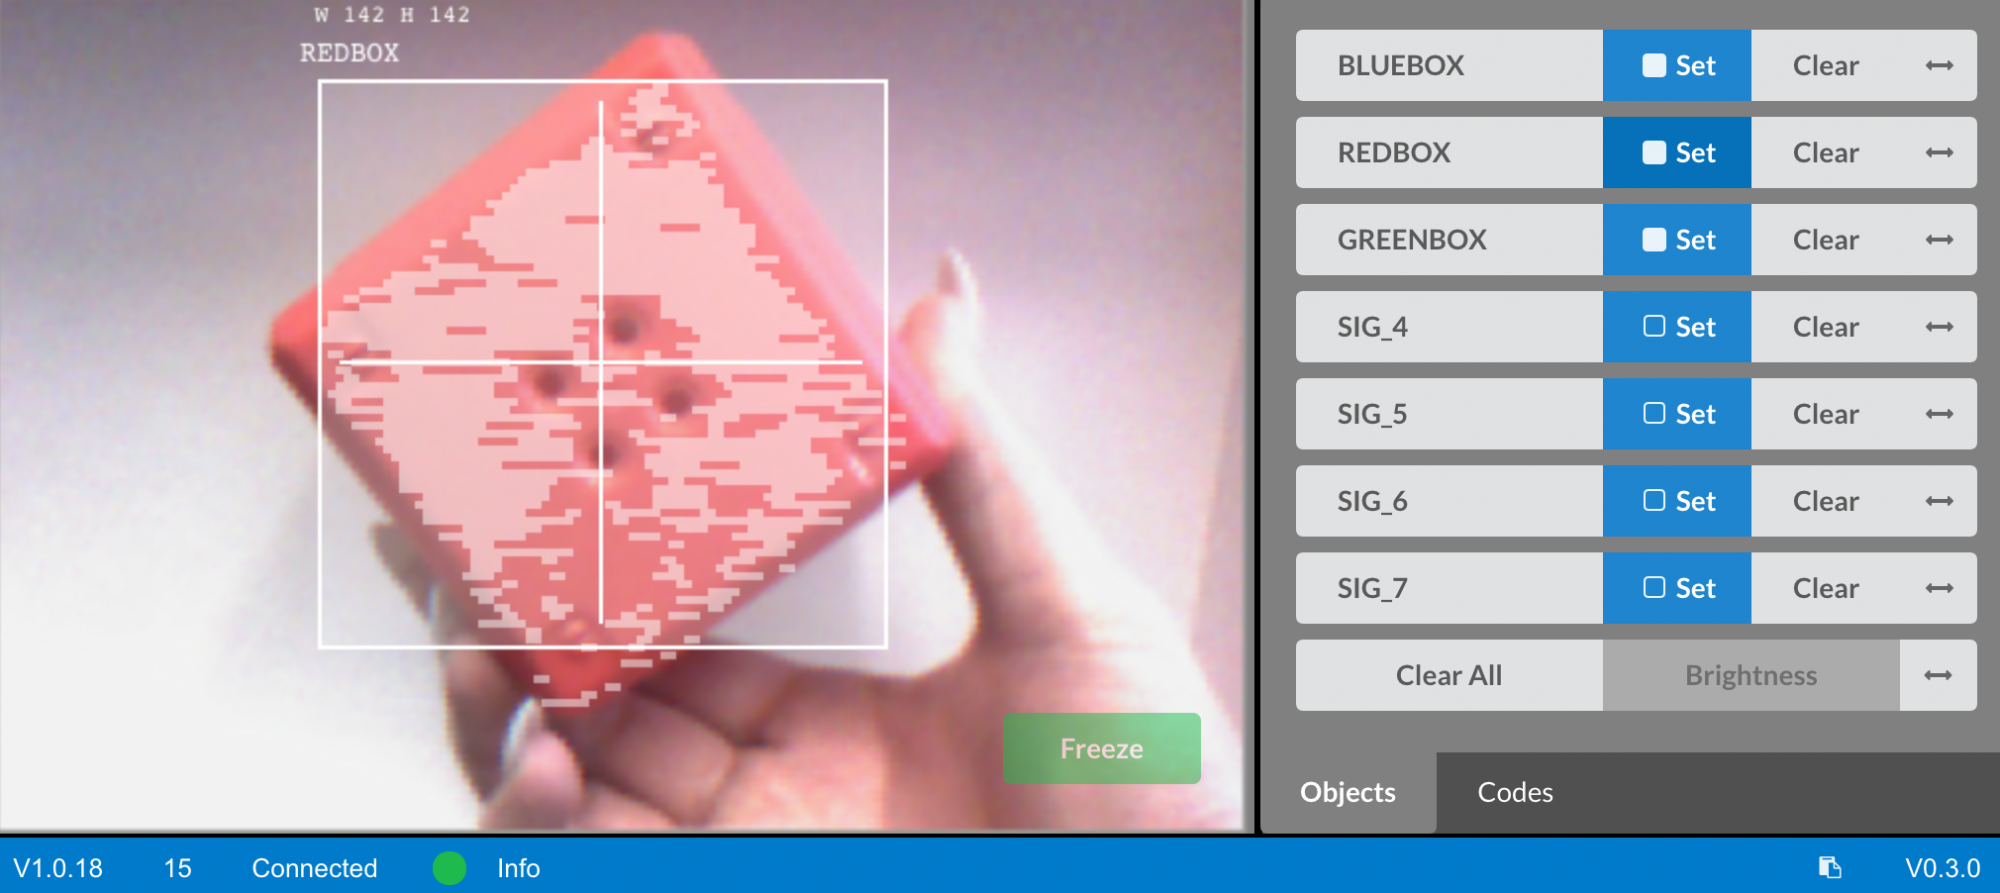
- Next, configure the Vision Sensor for three colored objects: red, green, and blue.
Open the previously saved Detecting Objects (Vision) example project.
How is the Vision Sensor being used in this project? Predict what will happen when the project is run and write down the predictions in your engineering notebook.
  # Library imports
from vex import *

# Begin project code

check_red = Event()
check_blue = Event()
check_green = Event()

# Will check to see if there is a blue object in view of the vision
# sensor and display the result on line 1 on the V5 Brain's screen
def has_blue_callback():
    brain.screen.clear_row(1)
    brain.screen.set_cursor(1, 1)
    vexcode_vision_5_objects = vision_5.take_snapshot(vision_5__BLUEBOX)
    if vexcode_vision_5_objects and len(vexcode_vision_5_objects) > 0:
        brain.screen.print("Blue Object Found")
    else:
        brain.screen.print("No Blue Object")

# Will check to see if there is a red object in view of the vision
# sensor and display the result on line 3 on the V5 Brain's screen
def has_red_callback():
    brain.screen.clear_row(3)
    brain.screen.set_cursor(3, 1)
    vexcode_vision_5_objects = vision_5.take_snapshot(vision_5__REDBOX)
    if vexcode_vision_5_objects and len(vexcode_vision_5_objects) > 0:
        brain.screen.print("Red Object Found")
    else:
        brain.screen.print("No Red Object")

# Will check to see if there is a green object in view of the vision
# sensor and display the result on line 5 on the V5 Brain's screen
def has_green_callback():
    brain.screen.clear_row(5)
    brain.screen.set_cursor(5, 1)
    vexcode_vision_5_objects = vision_5.take_snapshot(vision_5__GREENBOX)
    if vexcode_vision_5_objects and len(vexcode_vision_5_objects) > 0:
        brain.screen.print("Green Object Found")
    else:
        brain.screen.print("No Green Object")

# register event handlers
check_blue(has_blue_callback)
check_red(has_red_callback)
check_green(has_green_callback)

# small delay to ensure that the event handlers are ready to be used
wait(15, MSEC)

# set the print font for all future prints to the V5 screen
brain.screen.set_font(FontType.MONO40)

# constantly runs to check for new sensor data
while True:
    check_blue.broadcast_and_wait()
    check_red.broadcast_and_wait()
    check_green.broadcast_and_wait()
wait(0.1, SECONDS)- Download and run the project. Place different colored objects in front of the Vision Sensor and observe the robot's behavior. Record in your engineering notebook how your prediction was different or correct compared to what you actually observed from the project.
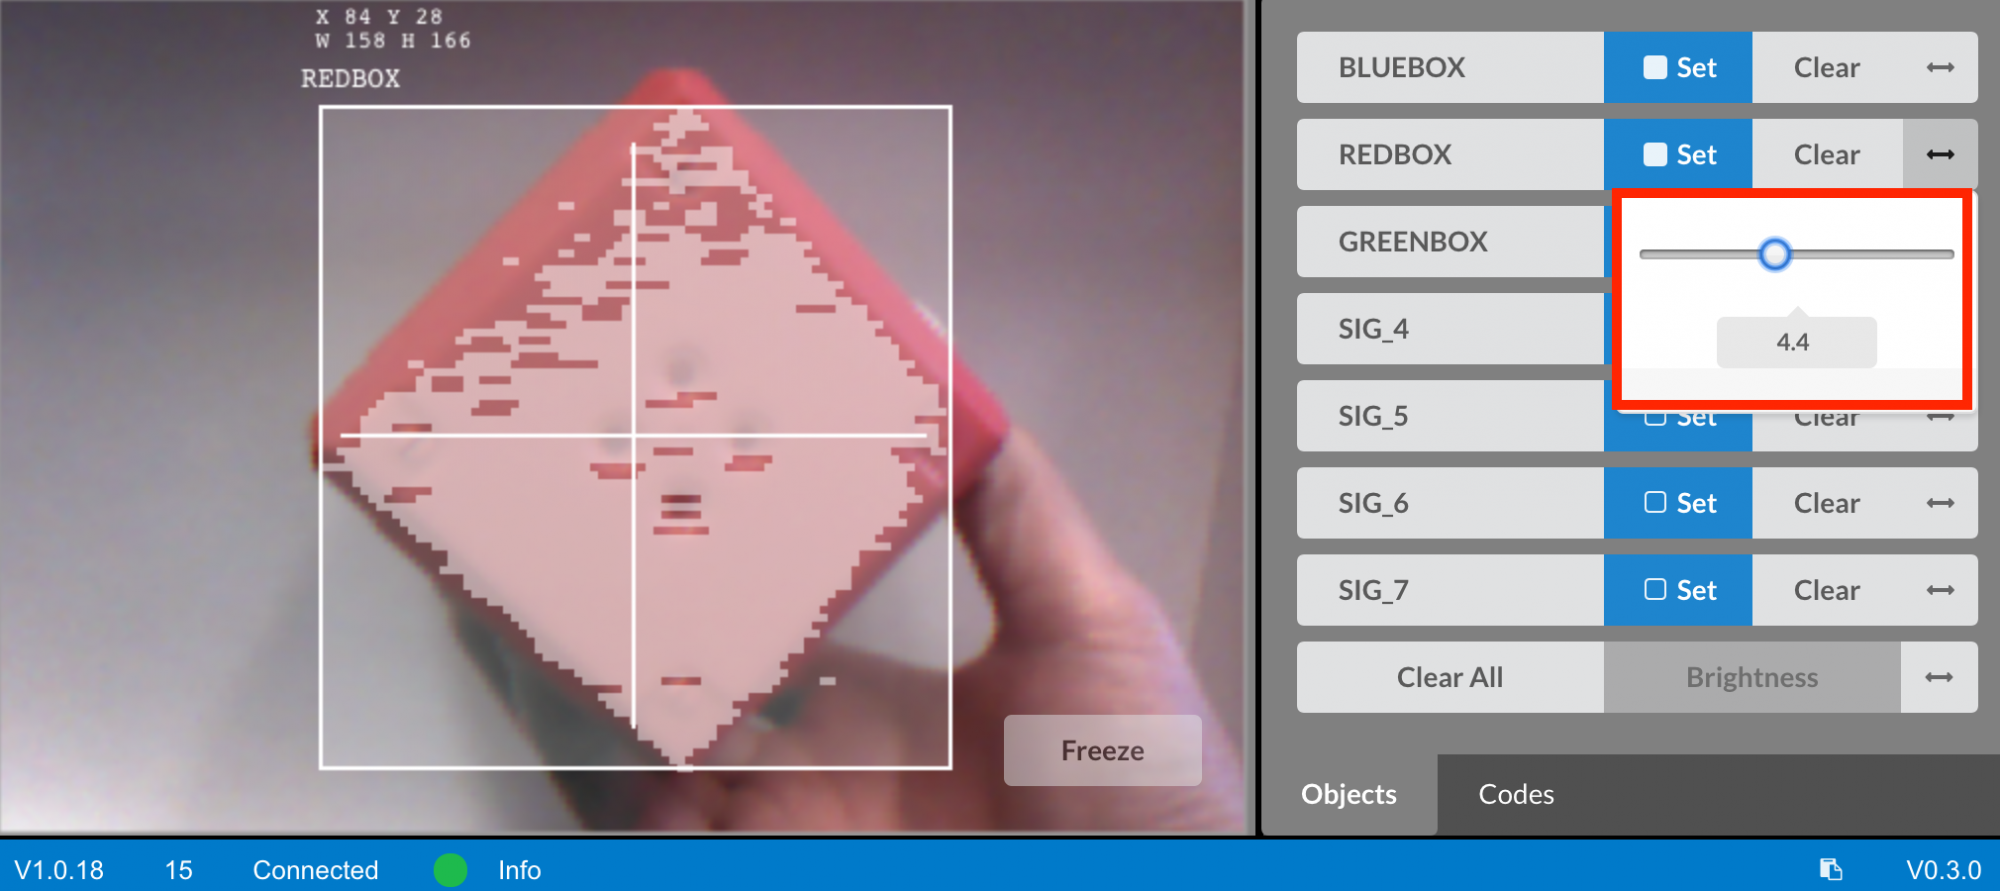
Step 3: Tuning the Vision Sensor
Often times an object is configured to be recognized by the Vision Sensor in one environment, for example, in a classroom. When the Vision Sensor is then taken into a different environment, such as a competition setting, the object may not be recognized by the Vision Sensor. This is often due to a change in lighting after the Vision Sensor has already been configured. To solve this problem, you may have to tune your Vision Sensor.
- Begin by reading Adjusting the V5 Vision Sensor in VEXcode V5.
- Next, adjust the Vision Sensor for the three colored objects: red, green, and blue.
Open the previously saved Detecting Objects (Vision) example project.
How will tuning the Vision Sensor affect how well it can detect objects? Take the Clawbot to a different part of the room with more or less light.
- Download and run the project. Place different colored objects in front of the Vision Sensor and observe the robot's behavior. Document in your engineering notebook how well the Vision Sensor detects objects. Does the Vision Sensor need tuned after it changed locations?
- Tune the Vision Sensor as necessary. Test the Vision Sensor after it has been tuned to determine if it can detect objects better and make adjustments as needed.