
Lesson 3: Using [If then] blocks
In the Disk Maze Challenge, the VR Robot is checking the condition of the Front Eye Sensor to see what color is being reported. Each of the colors matches to a different behavior the VR Robot should perform.
-
Start a new project and name it Unit7Lesson3.

-
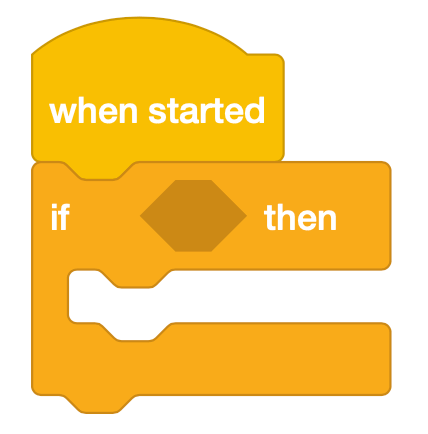
Drag an [If then] block into the workspace and attach it to the [When started] block.
For Your Information
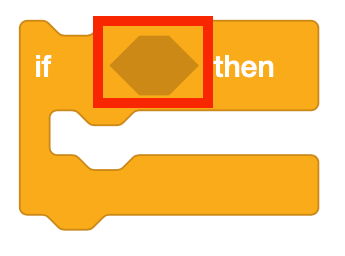
The [If then] block is a C block that accepts Boolean reporter blocks as input. Using the patterns observed while solving the Disk Maze in Lesson 2, a project can be created where the VR Robot makes a decision if the condition reports as TRUE or FALSE.
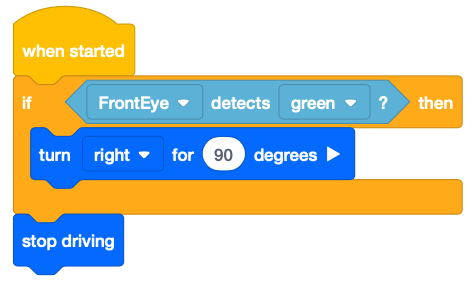
The [If then] block will run one time in a project. In this example, the Front Eye Sensor will report TRUE if a green object is detected, and execute the command inside the C block - turn right for 90 degrees. If a green object is not detected, the project will move to the next command in the stack.
Using Switch Blocks
The image below shows the Switch [If then] block statement for this Lesson's example project.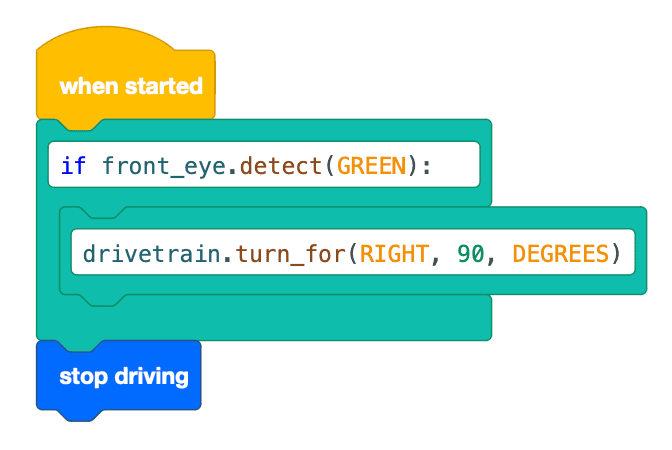
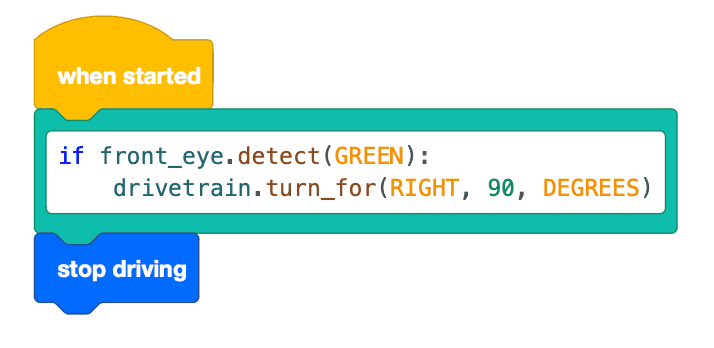
The project below includes the same commands converted into one Switch block.
The first line of code, if front_eye.detect(GREEN): is the conditional loop that checks whether the Front Eye Sensor detects the color green. Note that there should be a colon (:) at the end of this line.
The second line of code, drivetrain.turn_for(RIGHT, 90, DEGREES) tells the robot to turn right for 90 degrees when the Front Eye Sensor detects the color green. This line is indented at a default of 4 spaces because this is the specific behavior that will be performed if the Front Eye Sensor detects green.
-
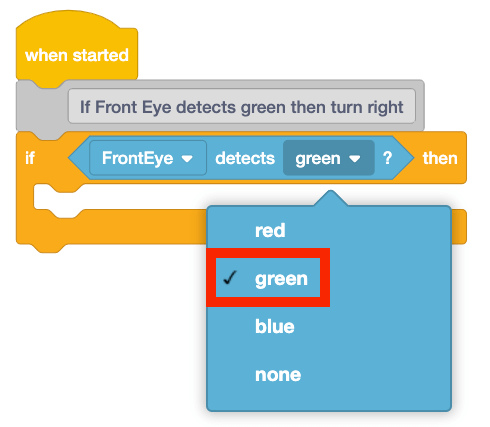
Drag a <Color sensing> block into the workspace into the hexagonal input of the [If then] block.

-
Change the parameter of the <Color sensing> block to ‘green.’
-
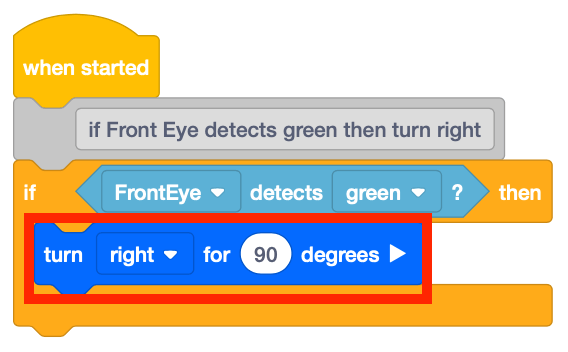
When the Front Eye Sensor detects a green disk, the VR Robot will need to turn right 90 degrees to begin solving the Disk Maze. Drag a [Turn for] block into the [If then] block.
-
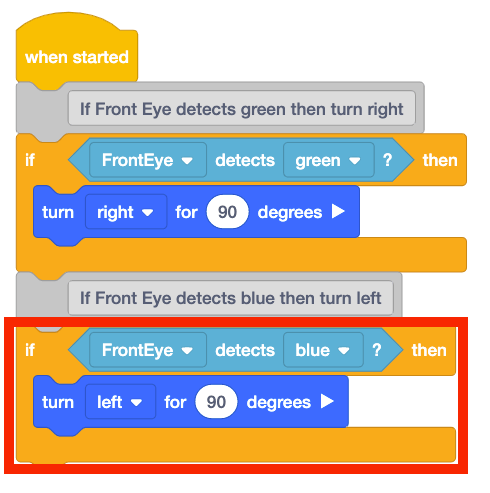
Follow these same steps to add another [If then] block for all three colors in the Disk Maze (green, blue, and red). Each color is associated with a different behavior. The blocks inside the [If then] block will need to match that intended behavior. Add the following blocks to the project. When the VR Robot detects the color ‘blue,’ the VR Robot will turn left 90 degrees.
-
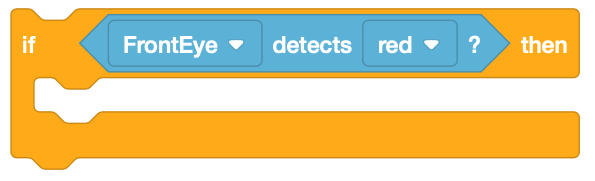
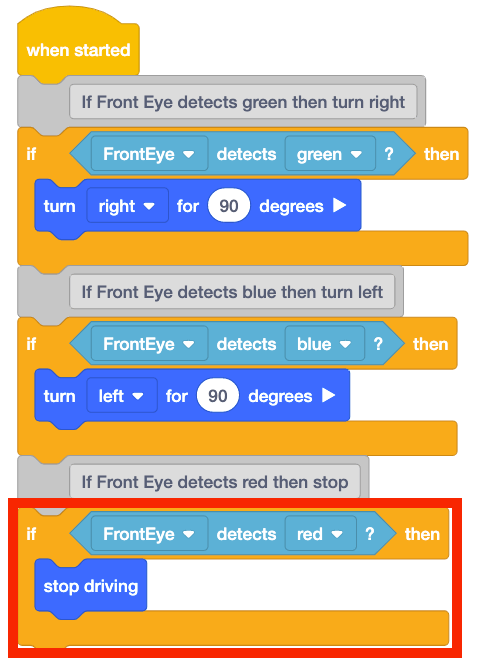
When the VR Robot reaches the end of the maze, the VR Robot will detect the color ‘red.’

-
To stop the VR Robot, another [If then] block needs to be added with instructions for what to do when the VR Robot detects ‘red.’ Add the following blocks to the project.
-
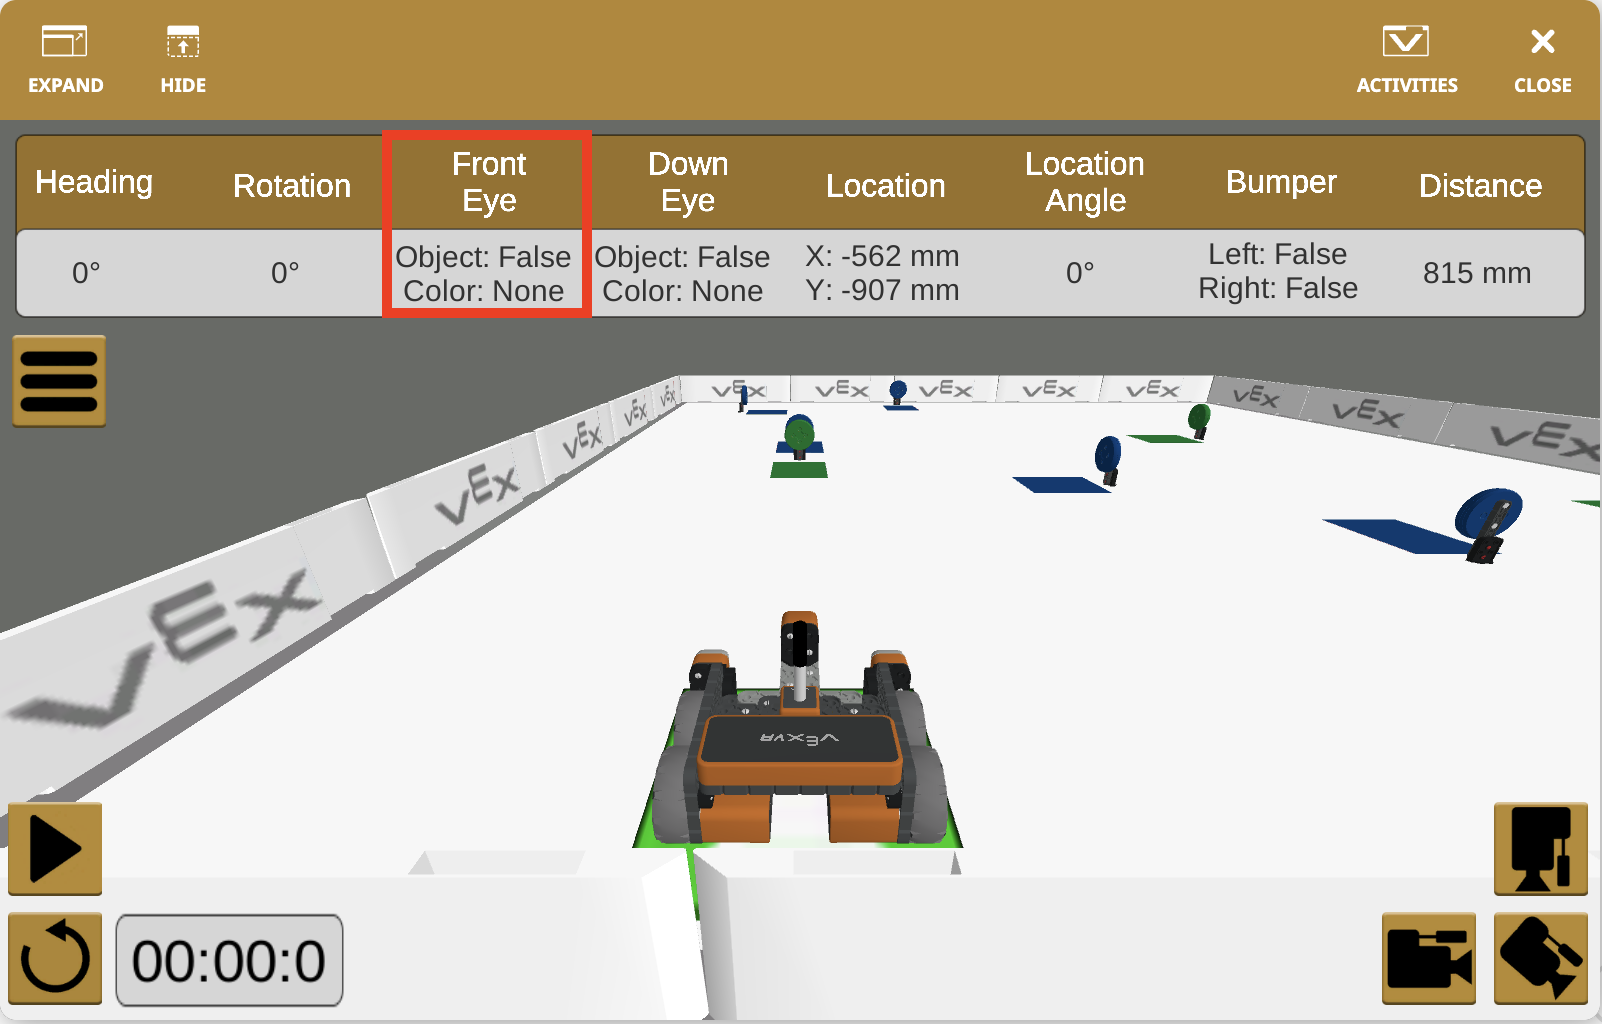
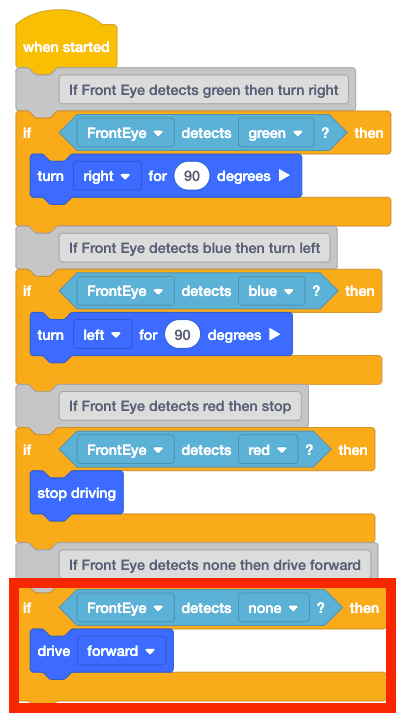
The VR Robot can also make a decision if it does not see a color by using the ‘none’ value. At the starting point of the Disk Maze, the VR Robot does not detect any colors.
-
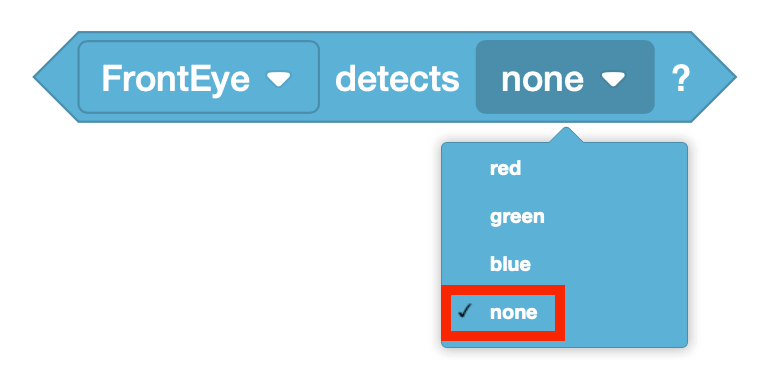
Because the Front Eye Sensor does not detect a color at the beginning of the Disk Maze, the VR Robot will need to drive forward until it detects the green disk. Another [If then] block can be added to instruct the VR Robot for what to do when no color is detected.
-
Add the following blocks to the project. When the VR Robot does not detect any color, the VR Robot will drive forward.
- The VR Robot now has instructions for each color detected by the Eye Sensor.
- Front Eye Sensor detects ‘green?’
- Turn right 90 degrees
- Front Eye Sensor detects ‘blue?’
- Turn left 90 degrees
- Front Eye Sensor detects ‘red?’
- Stop driving
- Front Eye Sensor detects ‘none?’
- Drive forward
- Front Eye Sensor detects ‘green?’
- Open the Disk Maze Playground and run the project.
Select the Next button to continue with the rest of this Lesson.