Play
Part 1 - Step by Step
- InstructInstruct each group to plan for their VEXcode project by writing pseudocode. They will create pseudocode to have their Code Base robot and extension navigate their challenge course. Watch the animation below to see how the Code Base could move through a course.
In the animation below, a course starts in the upper left corner, with a path that extends in a rectangular shape to the right, with several turns. Along the path are six scattered trash items. The robot drives forward, collecting the first two objects, then turns left and drives forward to collect the third. It then turns left, drives forward, turns right and drives forward to collect the fourth. Finally, the robot turns right, drives forward, turns left and drives forward three times to collect the last two items of trash and reach the end.Video file - ModelModel for students how to write pseudocode to plan their project, then transfer the pseudocode to [Comment] blocks, and finally create and test their projects. Ensure each group has a piece of paper and pencil to write out their pseudocode.
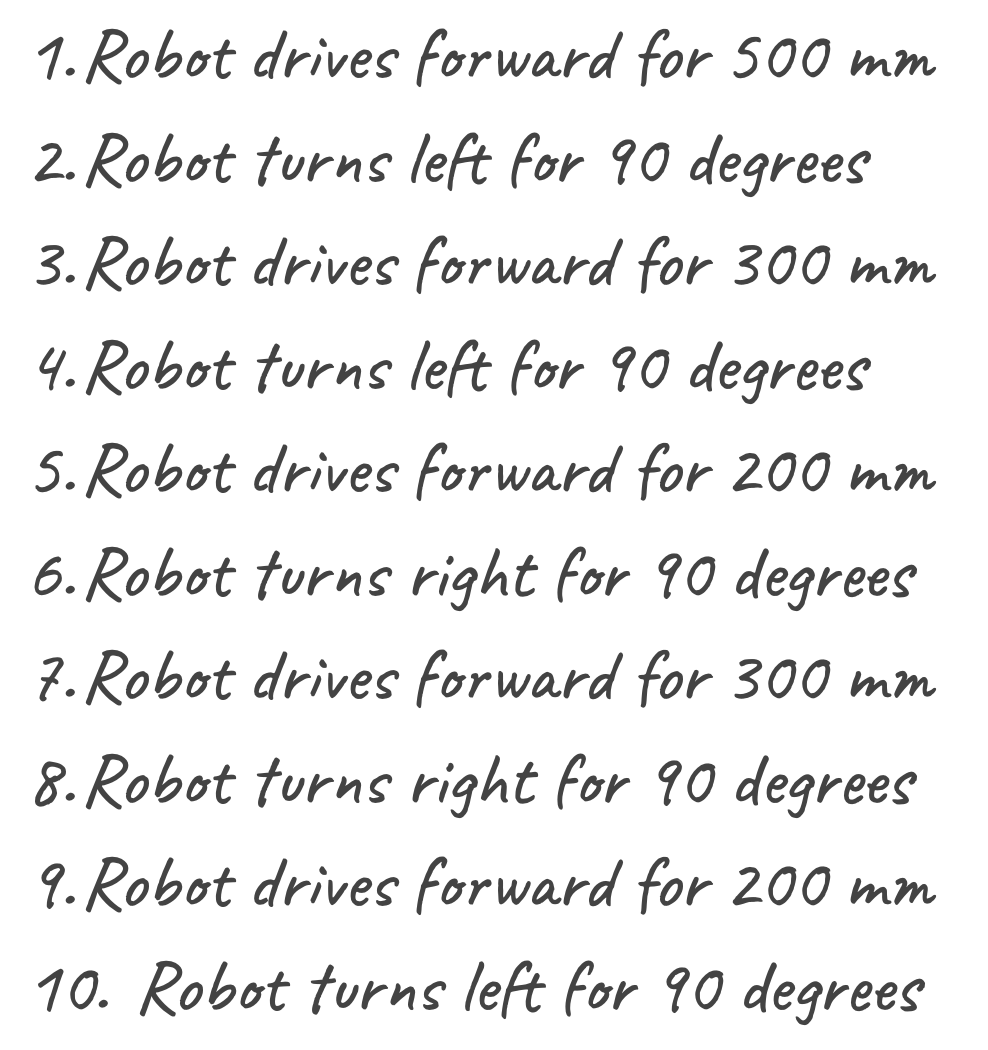
- Ask students to map out the path that the Code Base will have to travel in their challenge course from start to finish. Model how to be specific in pseudocode. Instead of “Drive forward,” students should be describing exactly how far forward using measurements and units.

Example Pseudocode - Once students have created the pseudocode, students can begin their VEXcode GO project. If students need assistance opening and saving a project, model the steps in the Open and Save a Project article, and have them follow along. Have students name their project Ocean Emergency.

Name Project - Next, students will have to connect their Code Base to their device. If necessary, model the steps in the Connect a VEX GO Brain VEX Library article for students.
- They will also need to configure VEXCode GO for the Code Base. If necessary, model the steps from the Configure a Code Base VEX Library article and ensure students can see the Drivetrain blocks in the Toolbox.
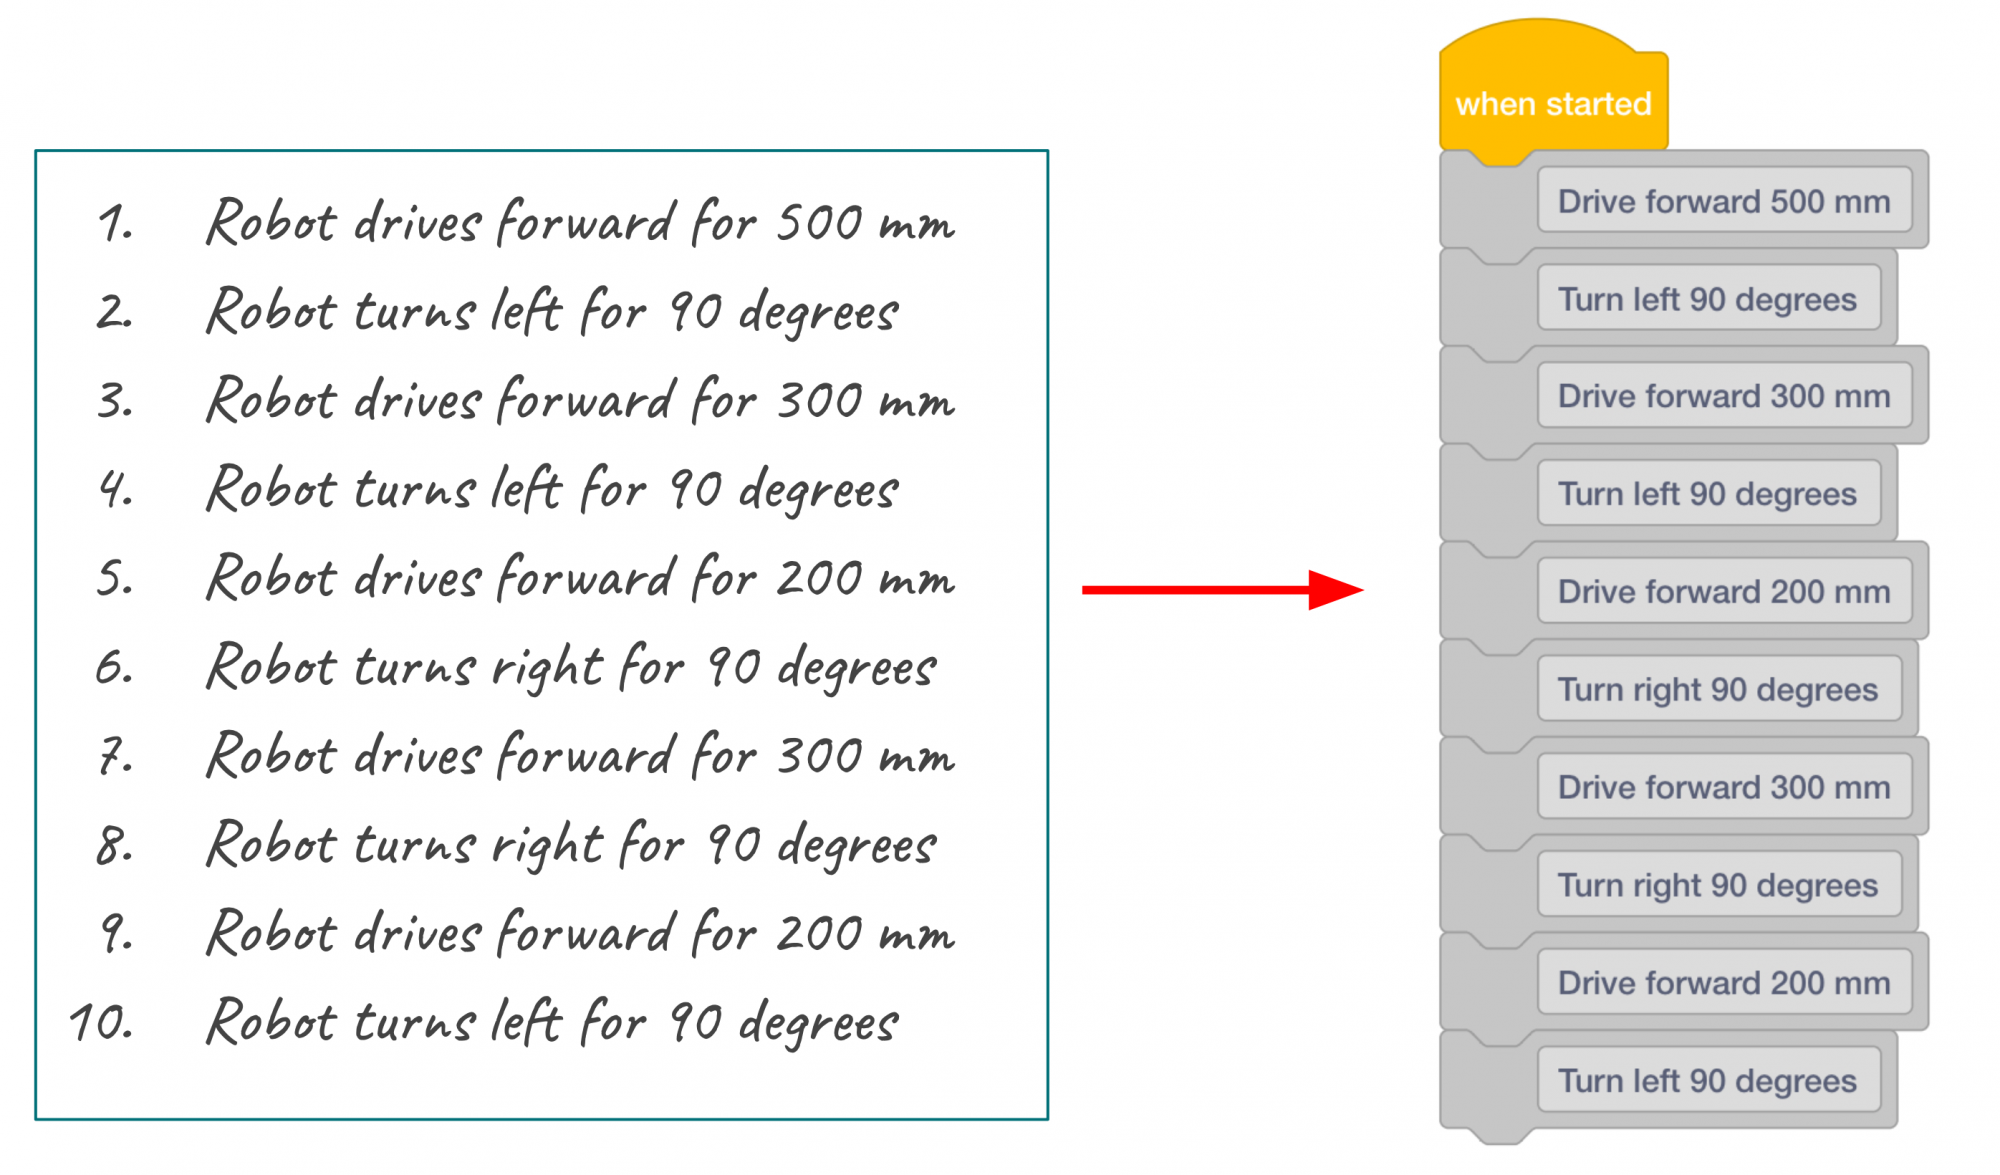
- Once the project is named, the Brain is connected, and the Code Base is configured, students are ready to transfer their pseudocode to comment blocks to organize their project. Remind students that they did this for the Drive in a Square project in Lab 2. If necessary, model transferring pseudocode to comment blocks.
- Note: each group will have different pseudocode, based on the movements necessary to navigate their challenge course.

Pseudocode to Comment Blocks - Remind students that the [Comment] blocks are used to organize their projects and they will not execute behaviors. They will need to add Drivetrain blocks to make their Code Base move. Once students have transferred their pseudocode, they will add Drivetrain blocks.
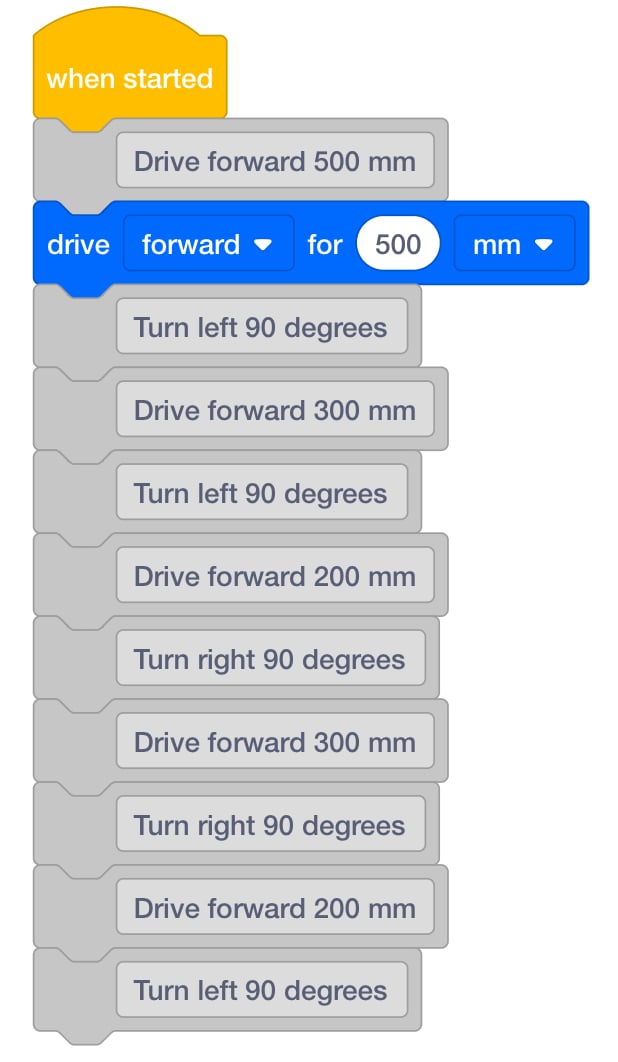
- If necessary, model adding the first Drivetrain block in the example project. Have students continue until they have added Drivetrain blocks for each of the [Comment] blocks.

Add Drivetrain Blocks and Change Parameters - Once students have added all of the Drivetrain blocks, they are ready to start their projects. Have students select the ‘Start’ button in the Toolbar to start the project, and observe the movements of the Code Base. If needed, model the steps to start a project for students.
- Students should test their project and the effectiveness of the extension. Encourage students to make changes to their project or even their extension if necessary in between test runs. Watch the video below to see an example of the Code Base driving to push an object forward and then driving in reverse back to its starting position.
Video file - FacilitateFacilitate a discussion with students by asking the following question:
- What direction does your robot have to move first?
- What piece of trash are you going to have your robot pick up first?
- Does your robot need to make any turns? If so, what directions?
- Is your Code Base and extension moving a way that you didn’t expect?
As students begin testing, have them check that the “trash” is big enough so that it does not fit under the Code Base or the extension. This will prevent the trash from being collected and possibly impede the movement of the Code Base.
- RemindRemind students to keep trying even when they fail at first. The students will have three opportunities to improve. Also, remind students to optimize the robot’s movements by noting that the first goal should be to collect one piece of trash successfully before collecting more.
- AskAsk students how they can help the environment? Are they a part of a recycling program or have they picked up a piece of trash they have seen in the cafeteria?
Mid-Play Break & Group Discussion
As soon as every group has created and tested their projects, come together for a brief conversation.
- Were your trials successful? Did your robot make it to the finish?
- How is your extension working?
- How can you improve your code?
Part 2 - Step by Step
- InstructInstruct students that they will use their challenge courses to complete three - one minute timed trials where their Code Base robot will collect three pieces of trash. The goal is to improve the time it takes their Code Base to complete the challenge. Watch the video below to see an example of the Code Base driving to push an object forward and then driving in reverse back to its starting position.
Video file
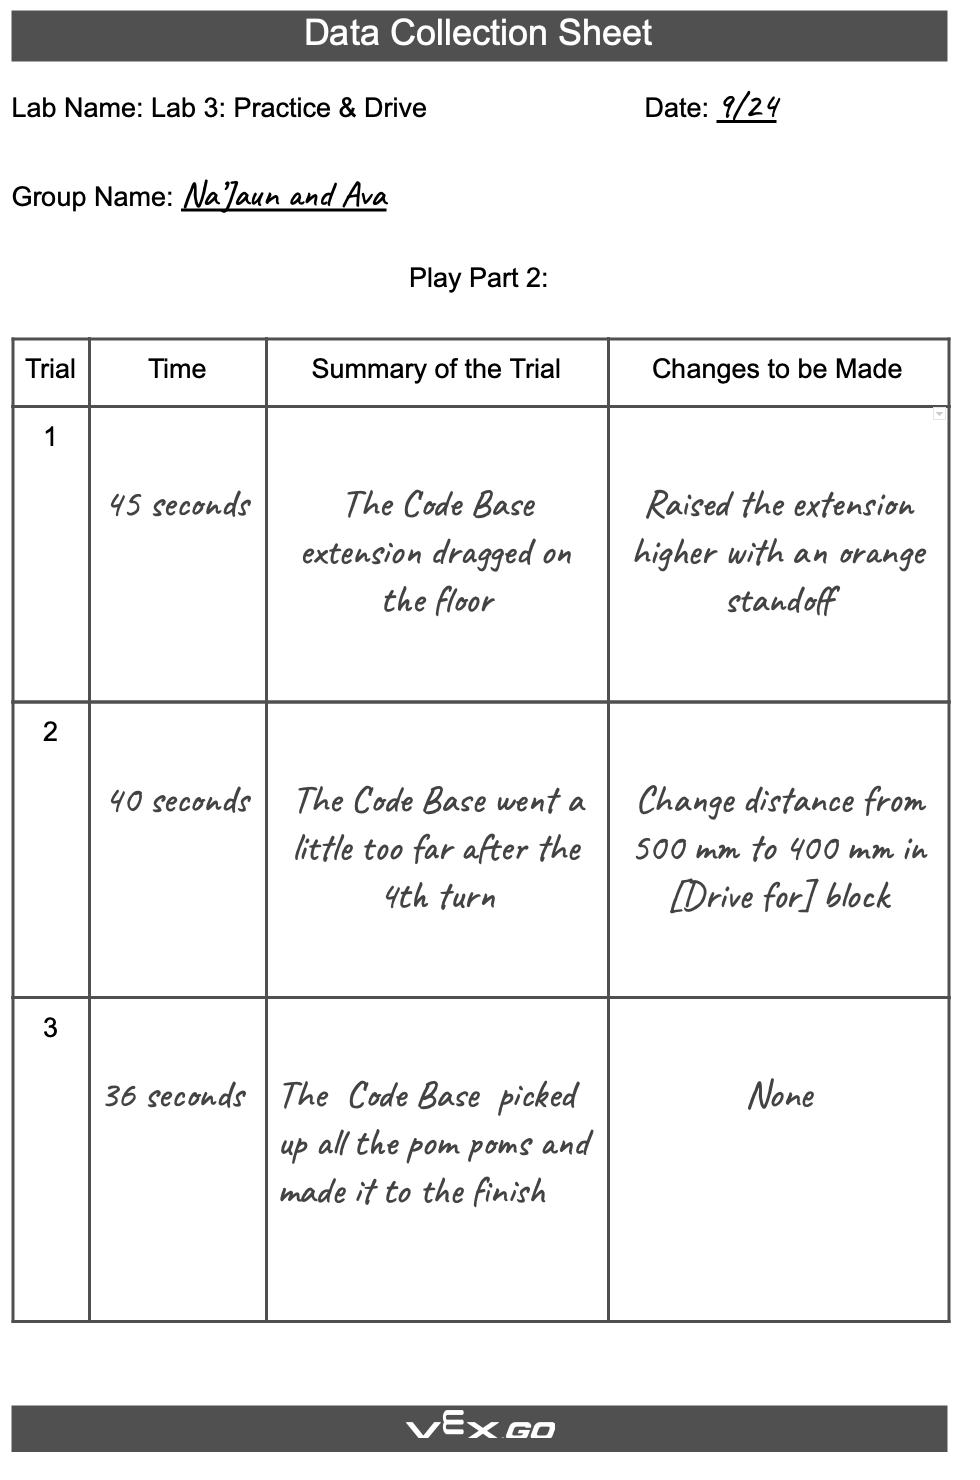
- Students should document the results on their Data Collection Sheet, and edit their VEXcode GO projects in between trials to improve performance.
- ModelModel for students the procedure for how to run timed trials and document results with the Data Collection Sheet.

Timed Trial Procedure - Encourage students to document a brief trial summary and changes to be made in the Data Collection Sheet.

Data Collection Sheet Example - FacilitateFacilitate a discussion about the timed trials:
- What challenges have you faced during the trials?
- How have you made edits to your Code Base and extension?
- How have you made changes to your Ocean Emergency project?

Teacher working with a small group.
- Ask students to switch roles throughout the trials. For example:
- Trials 1 & 3
- Builder - sets up the course and starts the project.
- Journalist - times the test trial and records data.
- Trial 2
- Builder - times the test trial and records data.
- Journalist - sets up the course and starts the project.
- Trials 1 & 3
- RemindRemind students to check that the “trash” is big enough so that it does not fit under the Code Base or the extension and possibly impede the movement of the Code Base. Also, remind students to check that the extension is stable and isn't dragging on the ground, which will also obstruct the movement of the Code Base. students to keep trying and reflect on how far they have improved over the course of three trials. There is always room for growth and improvement.
Guide students to think about how they have had success making adjustments and improving the performance of the Code Base over the course of three trials. Testing and making improvements is a vital part of the design process.
- AskAsk students to think about a time when they have had to try something multiple times before they got it right. Share with students a time when you have tried something multiple times before you got it right. Adults in all professions in the real world constantly have to rework ideas and projects daily to make things better.
Optional: Students can disassemble their builds at this point in the Lab.