Play
Part 1 - Step by Step
- InstructInstruct students that they are going to create a project where the Robot Arm waits until a disk is detected (using the Eye Sensor), then move the disk using the Electromagnet. Watch the video below to see how the Robot Arm can move the disk successfully by first sensing it and then sliding it to the right using the Electromagnet.
Video file
- ModelModel how to build a project using the [Wait until] block and the Eye Sensor. Have students follow along with you on a projected screen or through the Lab 4 Slideshow.
- Before beginning, ensure students have connected their device to their Robot Arm (2-Axis) and that the Robot Arm is configured. If needed, model the steps in this article Configure a Robot Arm to guide students in the process to Configure their Robot Arm.
Note: When you first connect your Robot Arm to your device, the Gyro built into the Brain may calibrate, causing the Robot Arm to move on its own for a moment. This is an expected behavior, do not touch the Robot Arm while it's calibrating.
- Have students open their Lab 3 Part 2 project. The new project will build on this project. Select “Save As” or "Save to Your Device" (depending on which VEXcode GO version you are using) and rename the project Lab 4 Part 1.

Rename the project - If there are any students who were not present for Lab 3 or cannot find their project, have them recreate the Lab 3 Part 2 solution from the Lab 4 Image Slideshow.
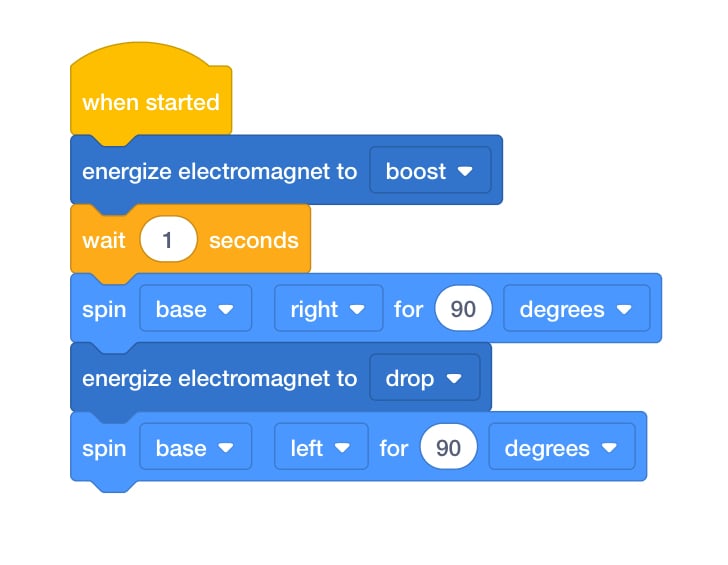
Lab 3 Part 2 Solution - Drag the [Wait until] block into the workspace. Explain that the [Wait until] block accepts Boolean conditions, and will stop the project from running until the block inside reports a condition as ‘True.’
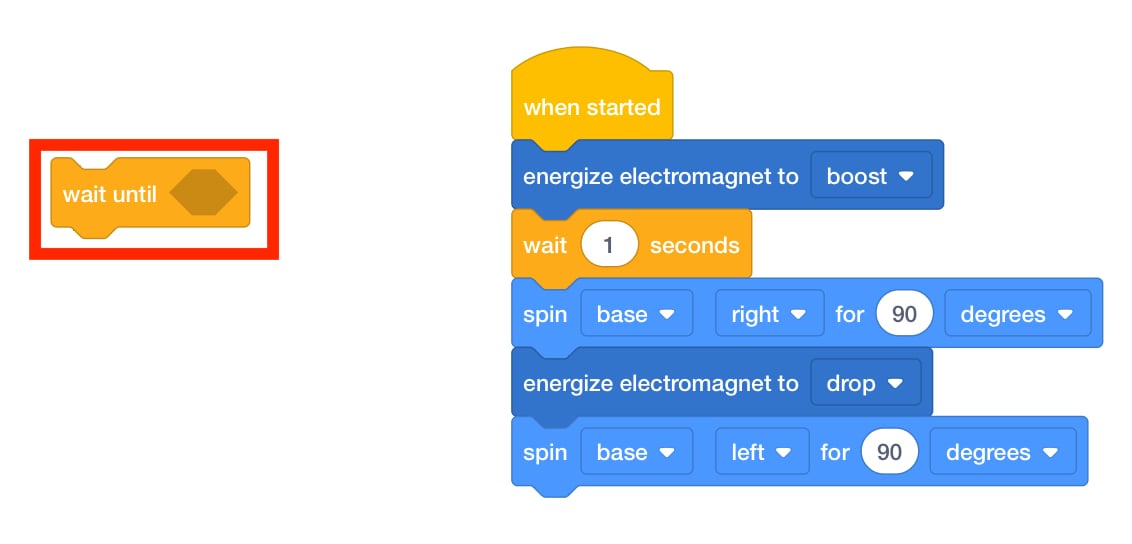
Add Wait Until Block -
This project will use the Eye Sensor to detect if an object is present, in order to pick it up. The Eye Sensor data is the Boolean condition we are waiting for.
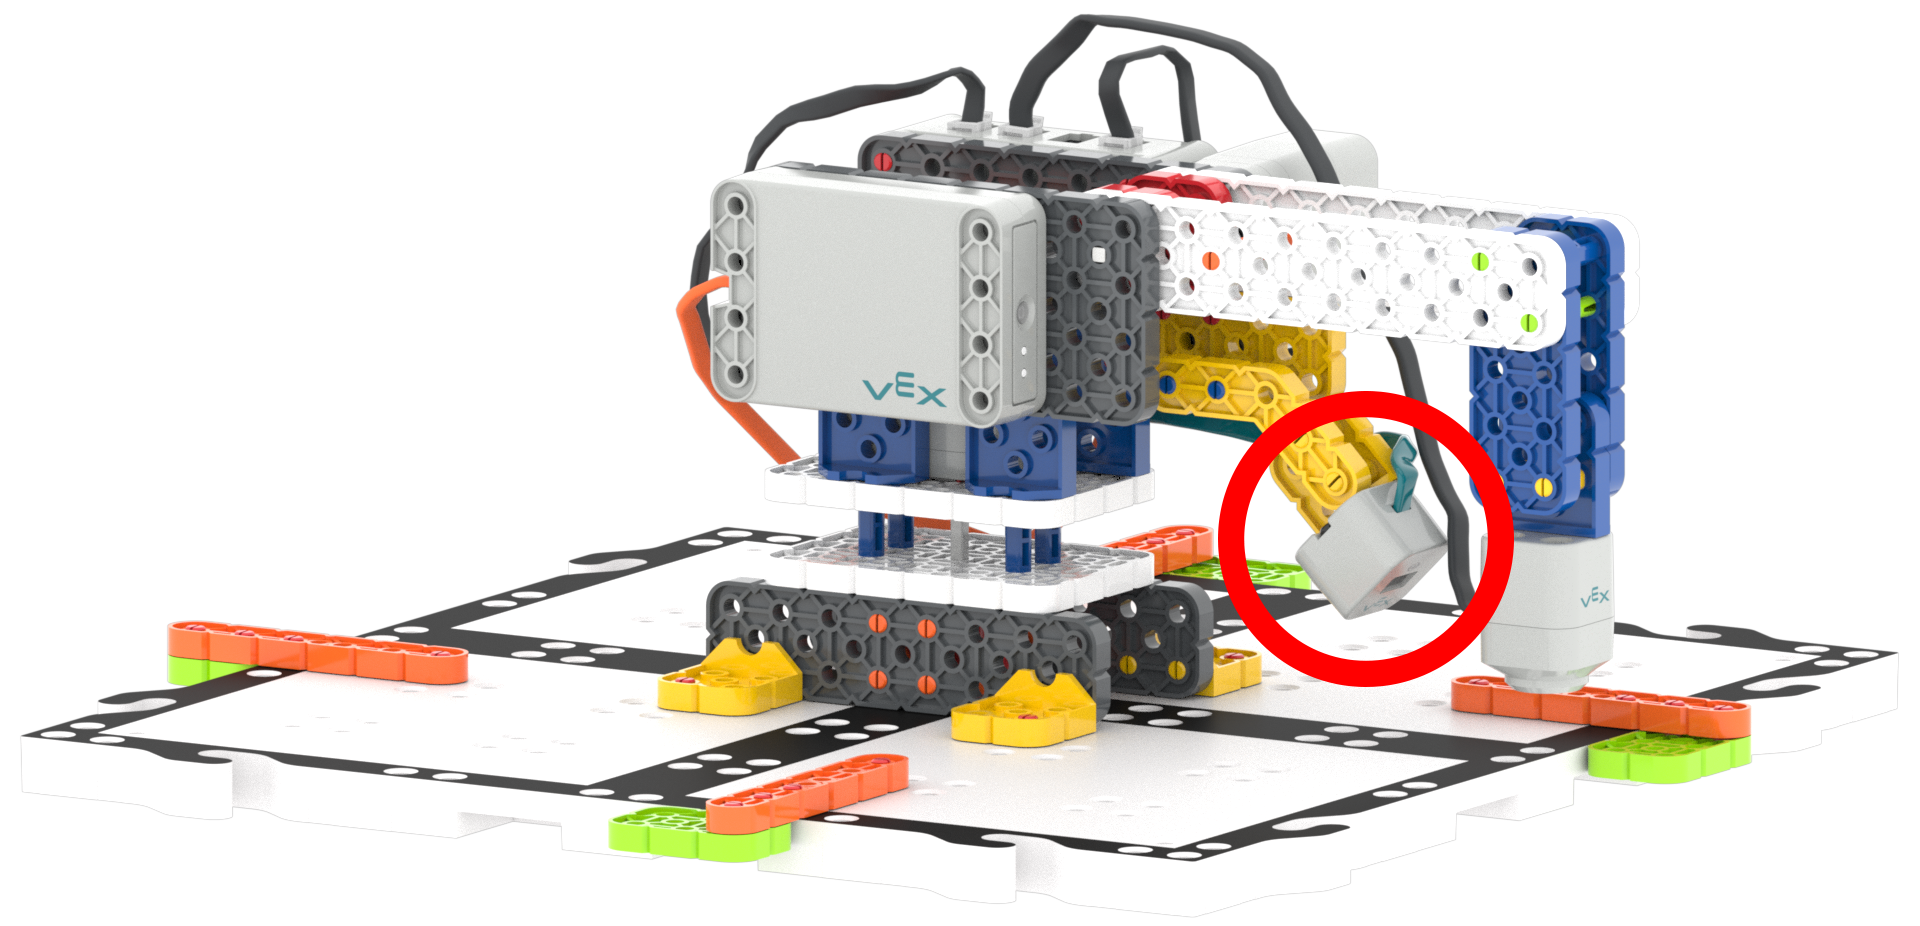
Eye Sensor -
Find the <Eye found object> block in the Toolbox under ‘Sensing.’ Explain that the <Eye found object> is a Boolean block that will report either True or False, so it can be used with the [Wait until] block.
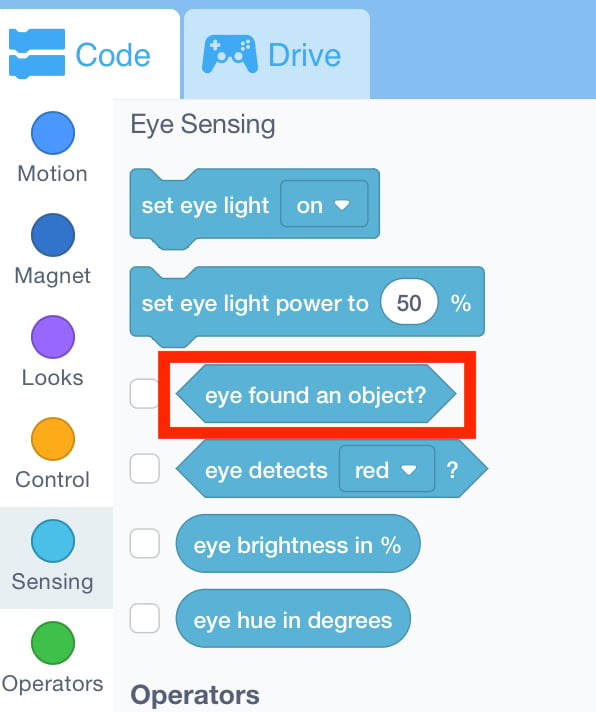
Eye Sensing Category - Drag the <Eye found object> into the [Wait until] block.
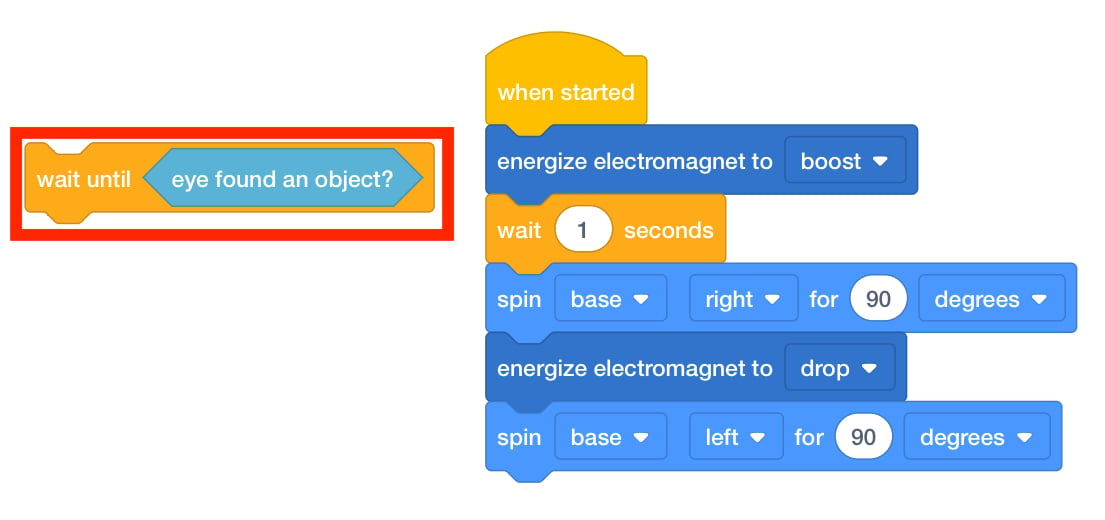
Add <Eye Found Object> to [Wait until] - Ask students where they want the Eye Sensor to check for an object? Drag the [Wait until] block to the start of the project.
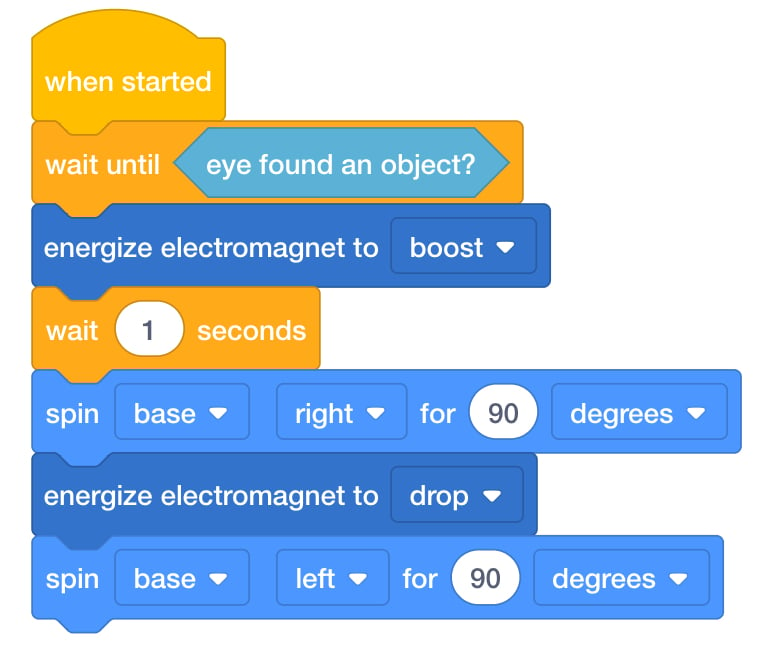
Lab 4 Part 1 Solution - Have students place a Disk on the Electromagnet and start the project and see how their Robot Arm moves. They should start the project with a Disk attached to the Electromagnet. If they have any problems using the Eye Sensor, have them follow these steps again. If needed, see the article Starting a Project in VEXcode GO, and model for students the steps in this article to start a project.
- FacilitateFacilitate conversations about project flow as students test their code. Use the solution provided in the Lab 4 Slideshow to check their projects as you circulate.
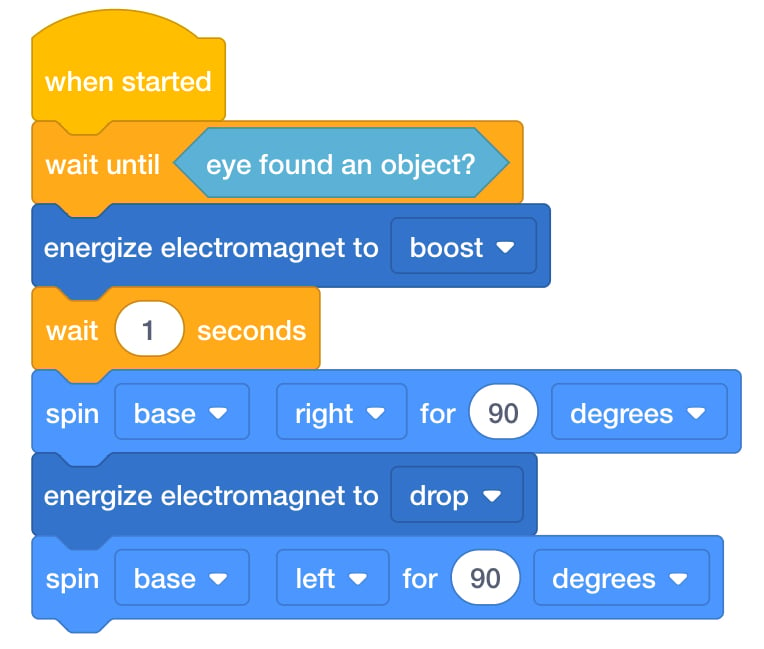
Lab 4 Part 1 Solution Ask them some of the following questions to spark a discussion.
- In your own words, how would you explain what a Boolean condition is?
- What do you think would happen if we moved the [Wait until] block to a different part of the project? How would the project flow change?
- If you wanted to move a second disk at the end of the project, what other blocks would you need to add?
- How is this project similar or different to the project you made in Lab 3?
- RemindRemind groups to ask questions if they get confused. Not every attempt will run properly. Each time they run the project, students should identify what went wrong and brainstorm ideas for how to fix it. Trial and error is expected.
If students are frustrated and need more assistance, have them reiterate the goal of the project to you.
- AskAsk students what devices they know that might use an Eye Sensor? (Vacuum robot, electronic doorbells)
If they have a hard time coming up with a list, have them come up with a list of devices they would want an Eye Sensor for.
- Example: I would want an Eye Sensor on my back door so every time the dog wanted to go outside, the Eye Sensor would tell us the dog was at the door.
Mid-Play Break & Group Discussion
As soon as every group has created a project using the Eye Sensor and the [Wait until] block, come together for a brief conversation.
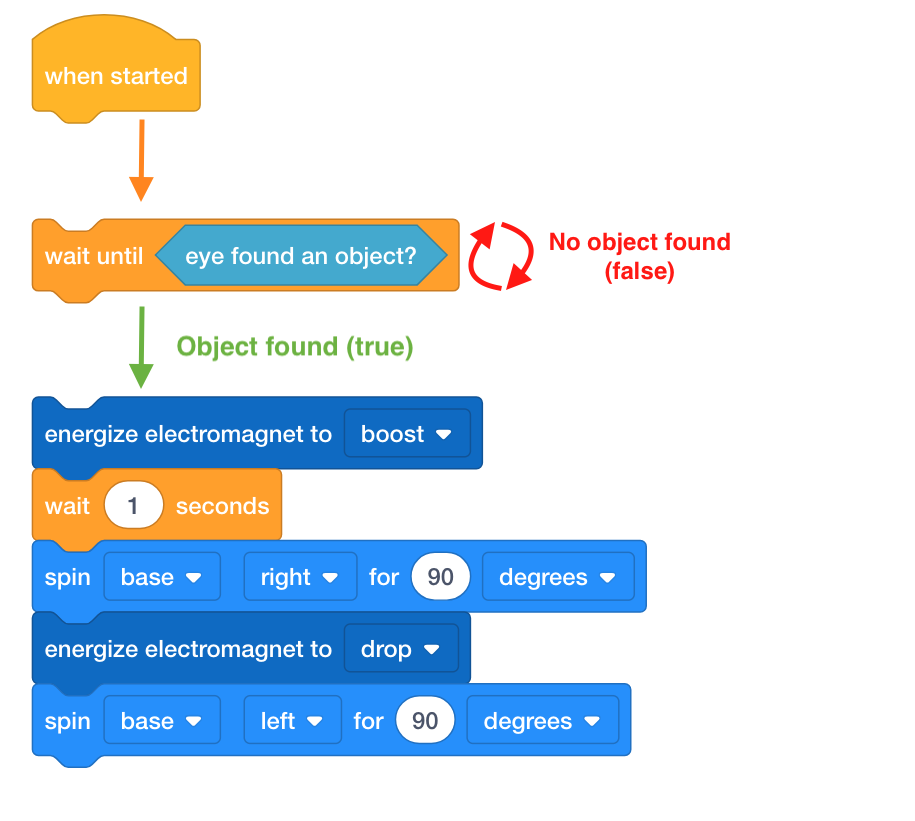
Let’s talk about the project flow with the [Wait until] block.
- Why was it important to put the [Wait until] block at the start of the project?
- What would happen to our project flow if the [Wait until] block was in a different place?
- Would our Robot Arm still work the way we wanted it to?
Part 2 - Step by Step
- InstructInstruct students that they are going to iterate on their project to make the Robot Arm wait until a disk is detected, lift the disk, move the disk to another part of the tile, drop the disk, and return back to the starting location. Watch the video below to see how the Robot Arm could move the disk successfully by first sensing the disk and then lifting it to move to another location using the Electromagnet.
Video file
- ModelModel for students how to change the [Spin for] block to control the Arm Motor.
-
Students should open their Lab 4 Part 1 project and rename it Lab 4 Part 2. Before beginning, ensure students have connected their device to their Robot Arm (2-Axis) and that the Robot Arm is configured.

Rename the Project - Drag the [Spin for] block into the Workspace. Ask the students if they remember how to change from ‘base’ to ‘arm.’
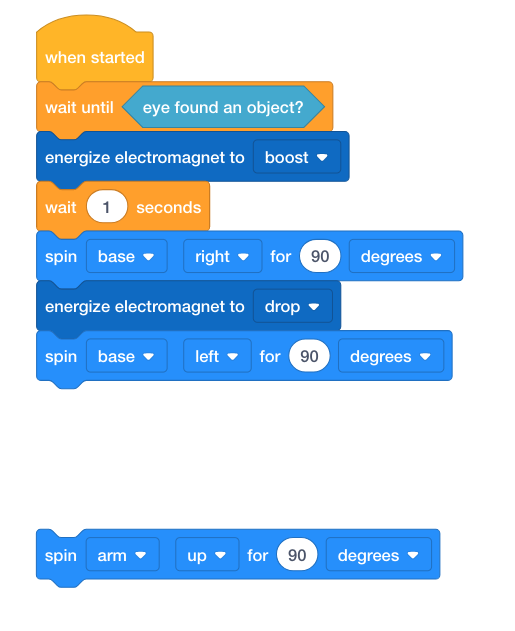
Add [Spin for] to the Workspace - Watch the animation in the Lab 4 Image Slideshow and ask students where additional [Spin for] blocks are needed to move the arm in the way it is shown.
- Students can use comment blocks to remind themselves what each step of the process is. Explain that comments are just for the coder, not for the robot; so they will not affect the project flow.
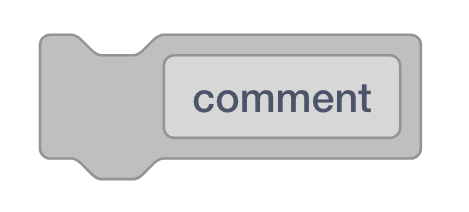
[Comment] block - Model dragging a comment block into the Workspace and type one of the steps into the block.
- Wait until a disk is detected
- Lift the disk
- Move the disk to another part of the tile
- Drop the disk
- Return back to the starting location
- Explain that comments are just for the coder, not for the robot; so they will not affect the project flow.
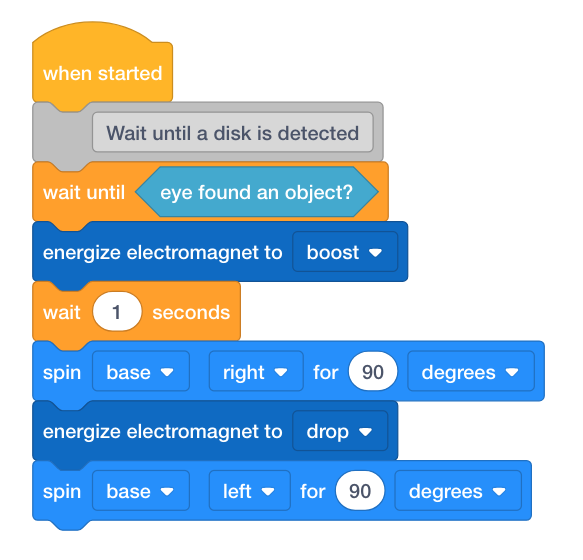
[Comment] block added - Have students place a Disk on the Electromagnet and start the project and see how their Robot Arm moves. They should start the project with a Disk attached to the Electromagnet. If needed, see the article Start a Project in VEXcode GO, and model for students the steps in this article to start a project.
-
- FacilitateFacilitate conversations about project flow as students begin to iterate on their projects.

Your Robot Arm Should... Ask questions like:
- What do you think would happen if the [Wait until] block was added after the Arm Motor was spun up? How would that change the flow of your project?
- Why do you think we want the Robot Arm to return to the starting location after dropping off the disk?
- How can comment blocks help you understand the flow of your project as you are coding?
- If you wanted to move a second disk to a brand new location, what other blocks would you need to add?
- RemindRemind groups to ask questions if they get confused. Not every attempt will run properly. Each time they run the project, students should identify what went wrong and brainstorm ideas for how to fix it. Trial and error is expected.
If students are frustrated and need more assistance, have them reiterate the goal of the project to you.
They should use their Lab 4 Part 1 project as a guide.
The Lab 4 Part 2 Solution is available for teacher reference as well.
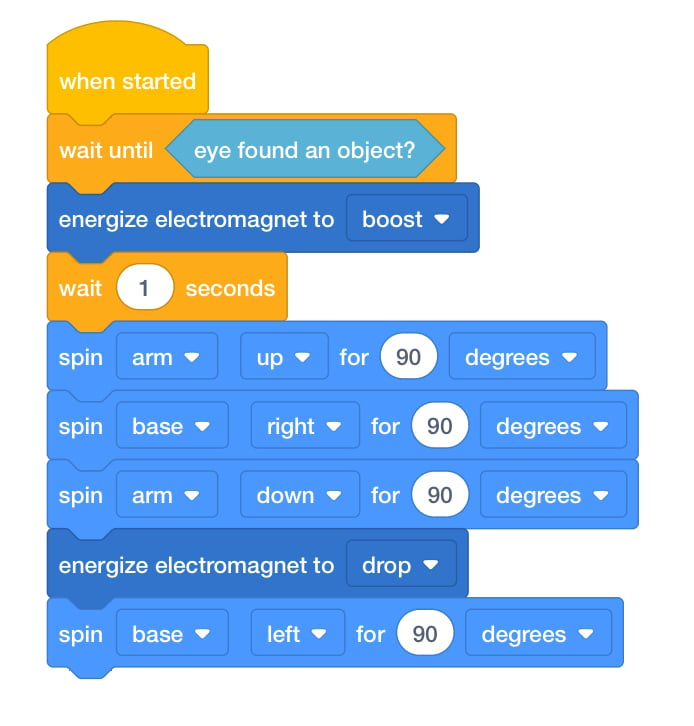
Lab 4 Part 2 Solution - AskAsk students what other tasks they might be able to complete using both the Arm Motor and Base Motor? What about on a bigger robotic arm?