
Build Instructions
![]() Teacher Tips
Teacher Tips
-
Ask students to gather these parts before beginning the build to make the build process faster and easier. If class time is a concern, another option would be to organize all the parts before students arrive.
-
Notice that the parts listed are not scaled 1:1. However, their scale is shown in comparison to other similarly sized parts.
-
Differentiate between different lengths of parts by consulting the parts poster included in the Super Kit.
-
Students can utilize the kit's beams as a measurement tool as they create their builds (Google / .docx / .pdf).
-
Also, removing pins (Google / .docx / .pdf) from the VEX beams and plates will require no additional tools.
![]() Teacher Toolbox
Teacher Toolbox
The build instructions will show students step-by-step instructions on how to build the Grabber. The Build Instruction Tips section will point out additional information for specific steps which will help students be successful with their build, so be sure to point out that section to students. There is an optional rubric to evaluate the build on this page (Google / .docx / .pdf). If any rubrics are used to evaluate students, review the rubric or pass out copies before students begin working so they are clear on how they will be assessed.
Before starting the build, consider how your students will be organized. Will each student have their own mechanism, or will they work in pairs or teams? If working in teams, each student could build a portion of steps or each student could be given a role. If students are working in groups, there is an optional collaboration rubric on this page (Google / .docx / .pdf).
For suggestions on dividing the build components among the students on a team, click here (Google / .docx / .pdf).
For ideas about how to engage students who complete a build more quickly than others, see this article.
Build the Grabber
Follow along with the build instructions to build the Grabber.
Open and follow the steps to build the VEX IQ Grabber. Google / .pptx / .pdf
Build Instruction Tips
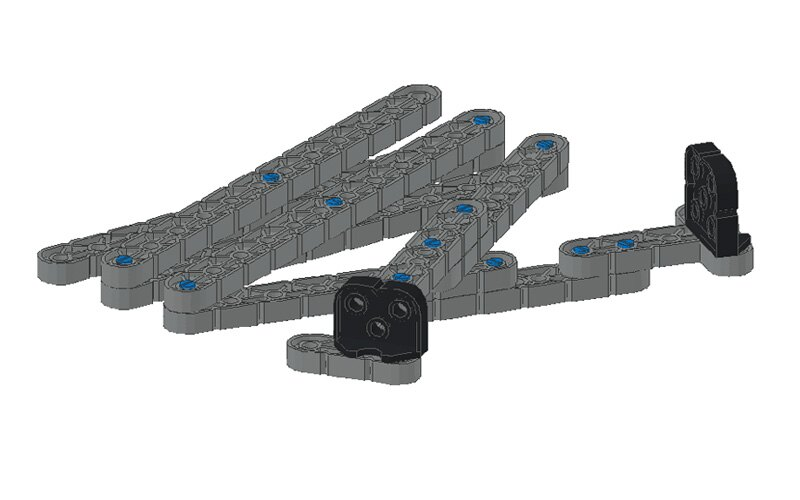
- All Steps: There is important information about which parts are needed for the step above the partition line. The number below the image of a part is the number of that part required in the step. There may be dimension information below the part to help identify which size to use.
- Step 1: Count all pieces before starting your build and have them readily available.
- Step 7: Insert 1x1 Connector Pins into the first and seventh hole in the 1x8 Beam.
- Step 9: Inter the 1x1 Connector Pins into the 1x8 Beam first, before attaching the 1x6 Beam.
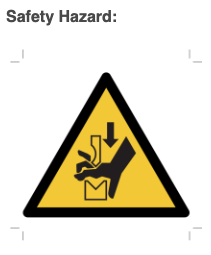
Pinch Points:
Be careful when attaching pieces, removing pieces, or manipulating the Grabber that nothing will be pinched in movement.
![]() Teacher Tips
Teacher Tips
There are many common part types students will engage with as they build with their VEX IQ Super Kit. Students may use the VEX Super Kit Contents and Build Tips Poster (included in their kit) to assist them with their build. Instruct students to take apart pieces by gently rotating and pulling off carefully in order to not disturb the rest of the build or damage pieces.
![]() Extend Your Learning
-
Sammy
Extend Your Learning
-
Sammy
Who is Sammy? Sammy is a VEX Robotics companion made out of only 9 VEX IQ pieces. Sammy is a great extension learning activity because students can create any accessory or setting for Sammy that they like. Students are only limited by the bounds of their imagination! Click this link (Google / .pdf) to see the build instructions for Sammy.
Ask students to build a Sammy when they have finished the build early, or as a fun, stand-alone extension activity. If students have already built a Sammy in previous labs, ask them to play a claw game with Sammy. A possible idea is asking the students to compare what objects can be picked up with the Grabber in a claw-like fashion.
Pose questions to the students such as, “What do you notice happening to the Grabber when you try to pick up a heavier object compared to a lighter one? What do you think could happen to the Grabber if you extended it even longer by adding more Beams? What would be the result if the Grabber were made of thin cardboard instead of plastic?” Ask the students to write down their findings in their engineering notebook. There is also the option to use the engineering notebook as an assessment. Click this page (Google / .docx / .pdf) to see the rubric for an engineering notebook.