
In the last Lesson, you learned about the Object Sensor and collected the reflectivity percentages of Disks and Cubes. Now, you will use those values to build a project in VEXcode to stop the Exit Conveyor when a Disk is detected by the Object Sensor.
In this Lesson, you will:
- Configure the Object Sensor in VEXcode.
- Learn how to use comparison operators in VEXcode.
- Create a project to move a Disk from the Entry Conveyor to the Exit Conveyor using feedback from the Object Sensor.
By the end of this Lesson, you will have built on your project from the previous Lesson to stop the Exit Conveyor when the Disk is detected by the Object Sensor.
Editing the Project
You will begin by editing your project from the Unit 4 Lesson 2 Activity to prepare for adding the commands related to the Object Sensor.
Open your Unit 4 Lesson 2 Activity project in VEXcode EXP, or recreate the project shown here.
Rename the project Unit 4 Lesson 4.
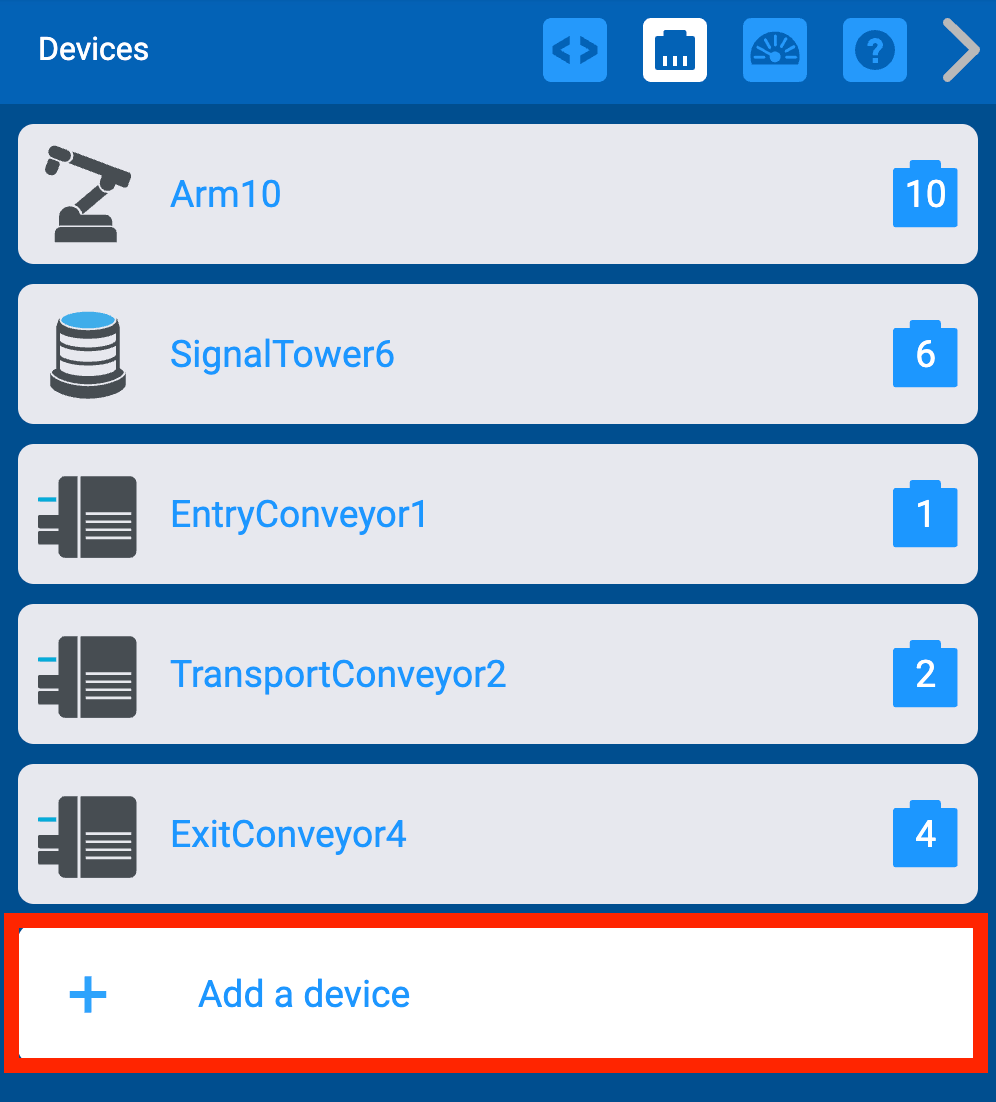
Configure the Object Sensor in VEXcode by opening the Devices Window and selecting Add a Device.
Select 3-Wire to open the list of 3-wire devices.
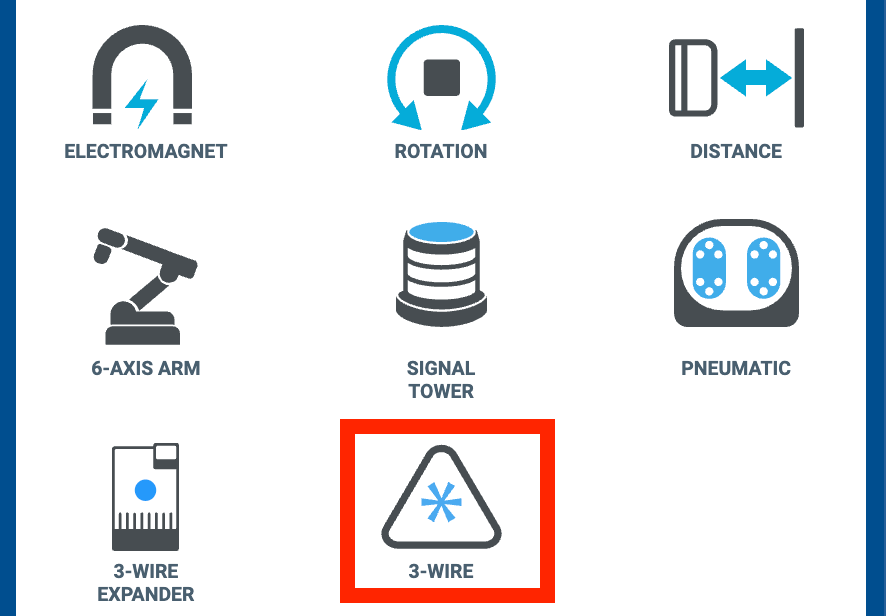
Then, select the Object Sensor.
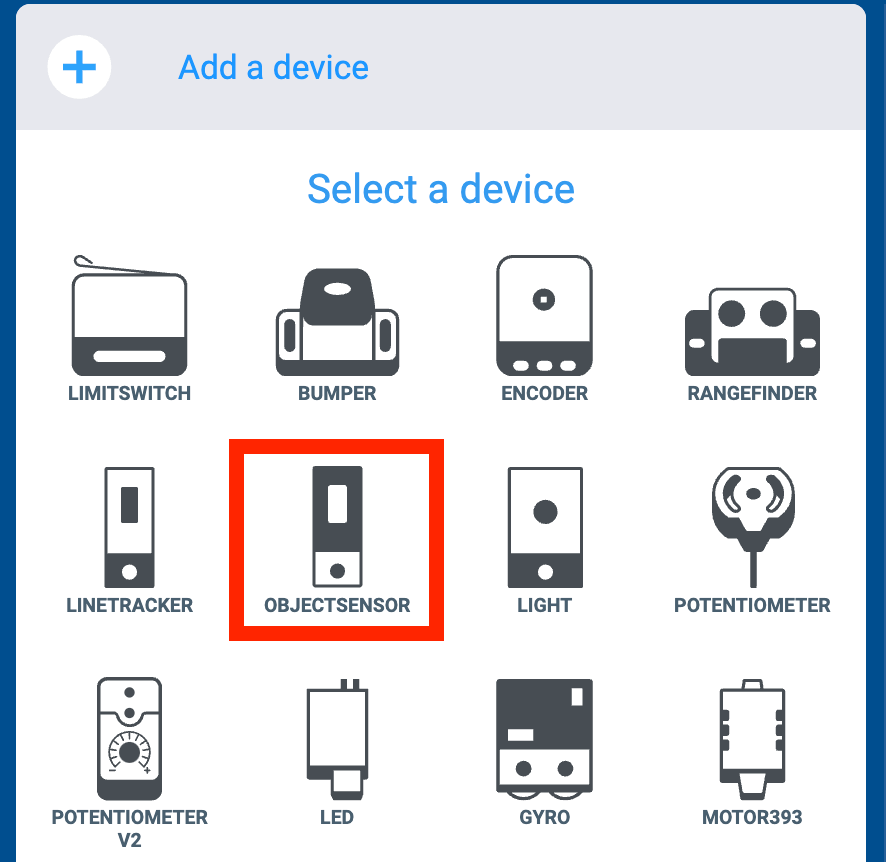
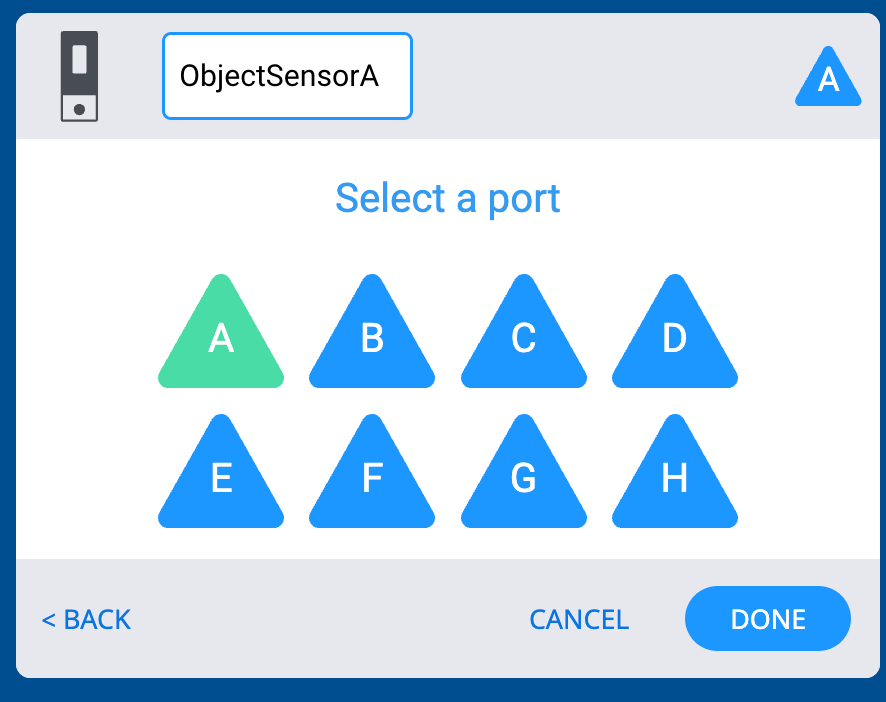
Select port A, then Done to complete the configuration.
Note: Be sure the Object Sensor is plugged into port A on the Brain.
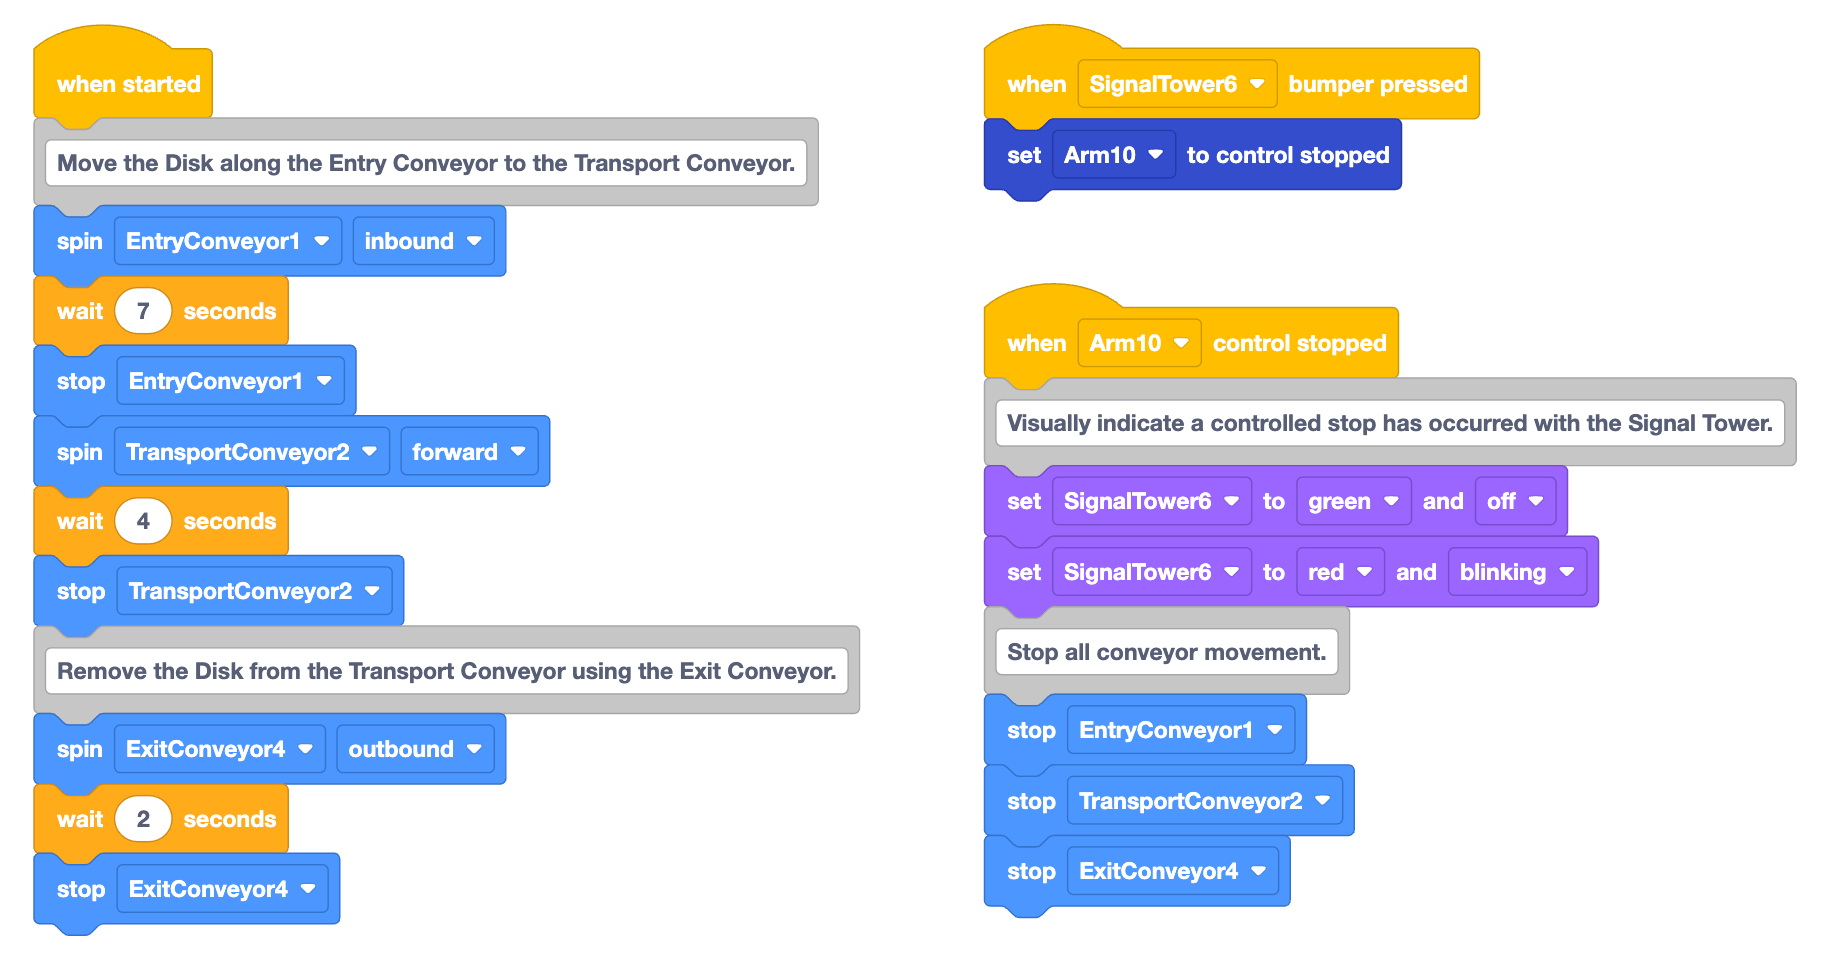
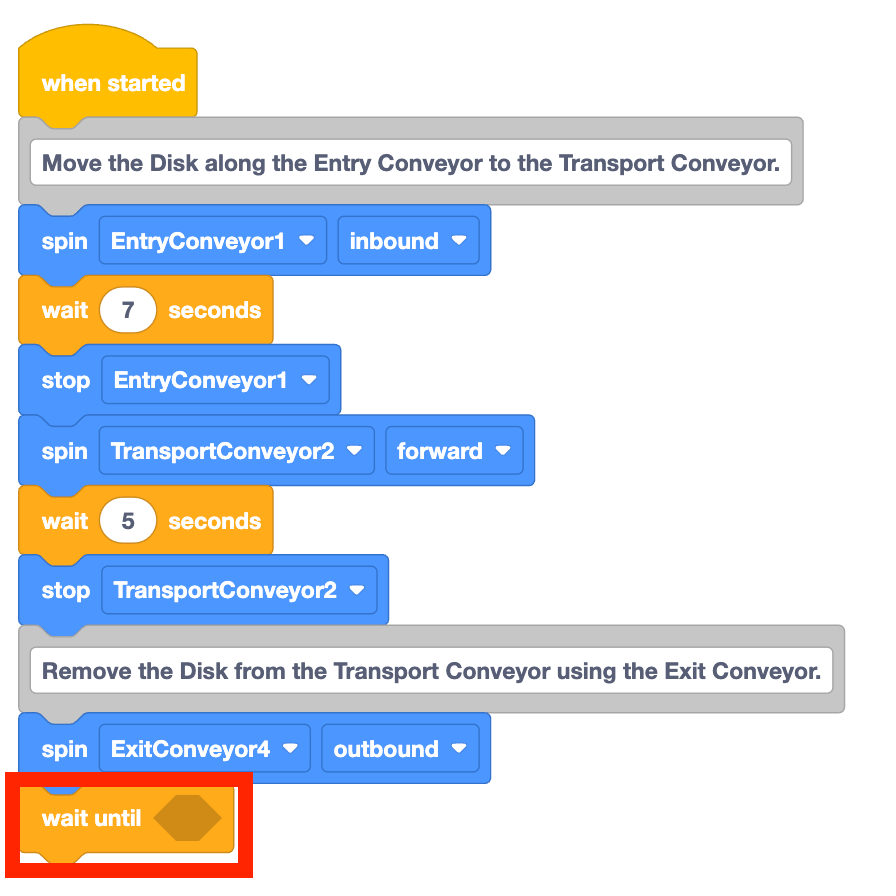
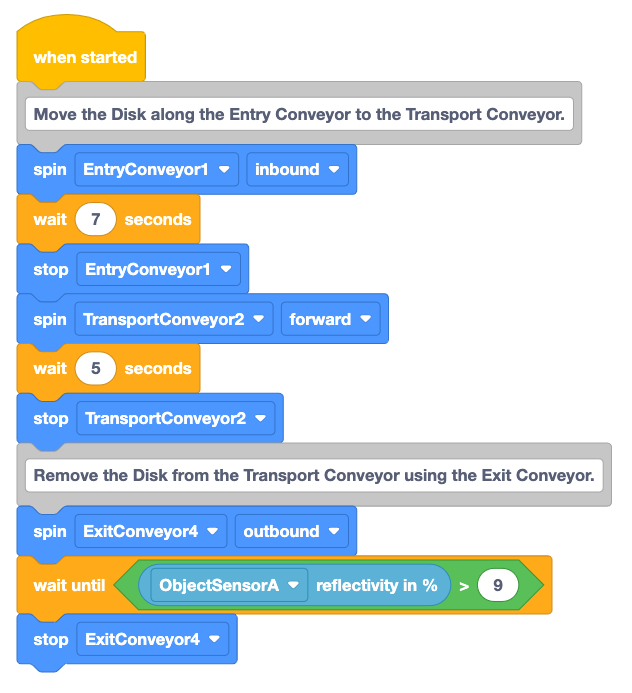
Remove the last two blocks in the project. This includes the Wait block and the Stop block for the Exit Conveyor, as shown in this video.
Add a Wait until block to the project.
The Wait until block is a block that waits for a Boolean condition to report as true before moving on to the next block in the stack.
Comparison Operators
Now that the Wait until block is added to the project, the condition to be checked by the block needs to be added.
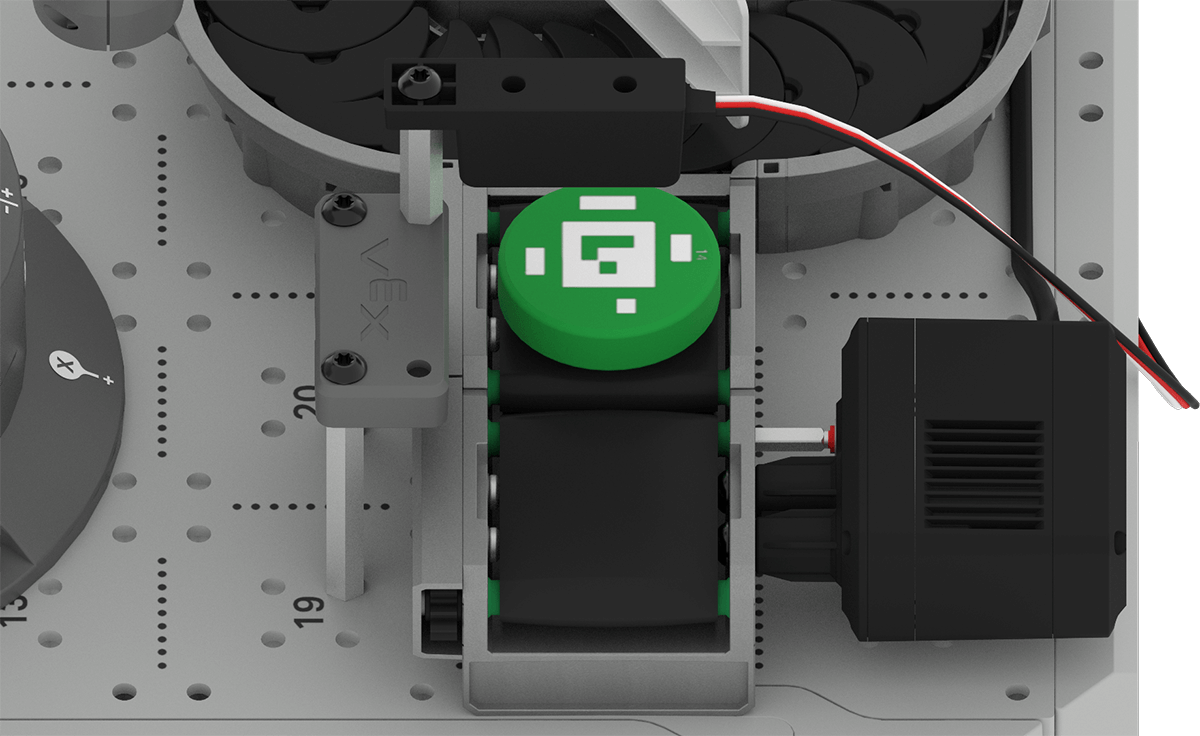
Previously, you learned about the reflectivity percentage reported by the Object Sensor and recorded those values in your engineering notebook. In this project, you need to the Exit Conveyor to run until that value is above a certain threshold. A threshold is something used to determine if a value is above, below, or within an acceptable range. Comparison operators can be used to check if the reflectivity is above a certain value, or above that threshold.
Add a Greater than block to the hexagonal space of the Wait until block.
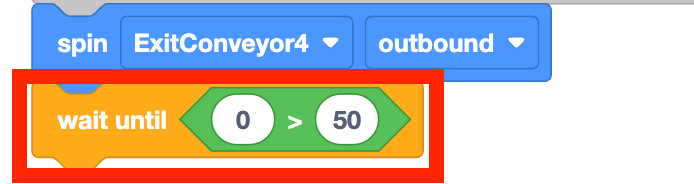
Add a Reflectivity block in the first opening of the Greater than block.
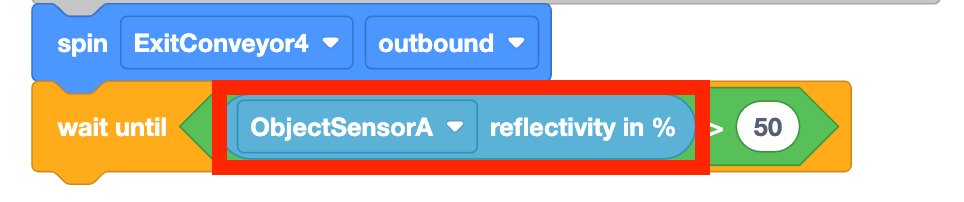
The Greater than block compares the first value to the second. The Greater than block currently in the project is comparing the reflectivity percentage reported by the Object Sensor to the parameter '50' before declaring the Boolean as True or False.

Think about the goals of this project. The Exit Conveyor needs to spin until the Object Sensor detects an object, then the conveyor needs to stop. The values collected in the previous Lesson can be used with this Greater than block to determine the threshold that needs to be exceeded before the project moves to the next block in the stack.
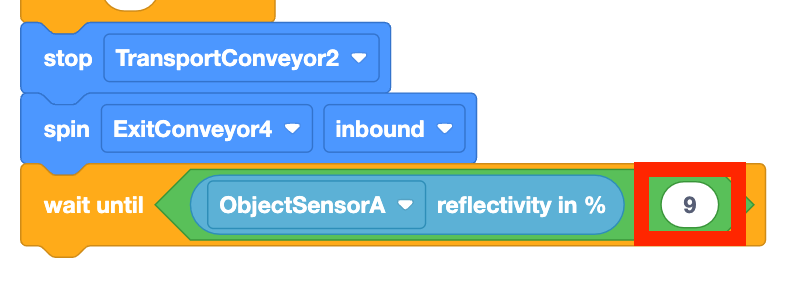
Change the second parameter of the Greater than block to '9.'
This number is based on the values collected in the previous Lesson's activity. The reflectivity was reported as 10% when the green Disk was under the Object Sensor, so anything greater than 9% should report as True.
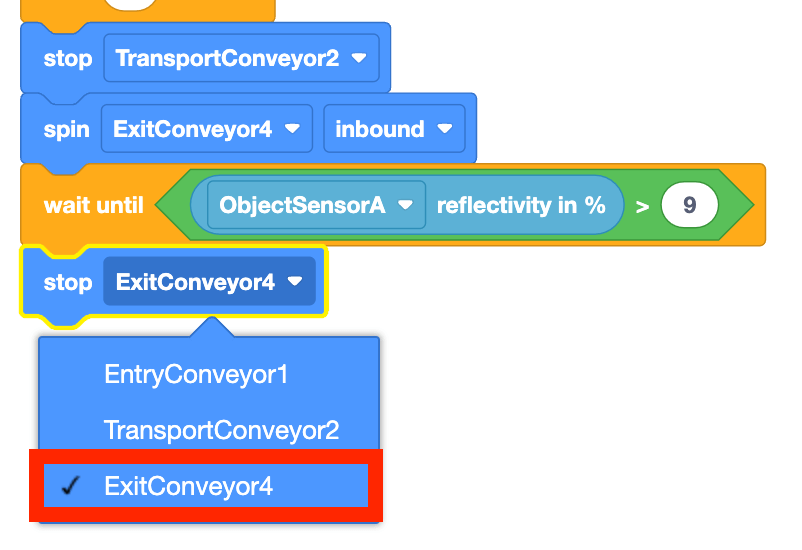
Add a Stop block to the end of the project. Be sure the parameter is set to 'ExitConveyor4.'
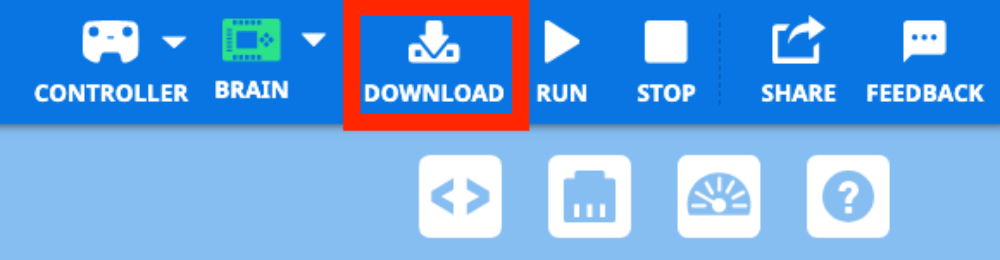
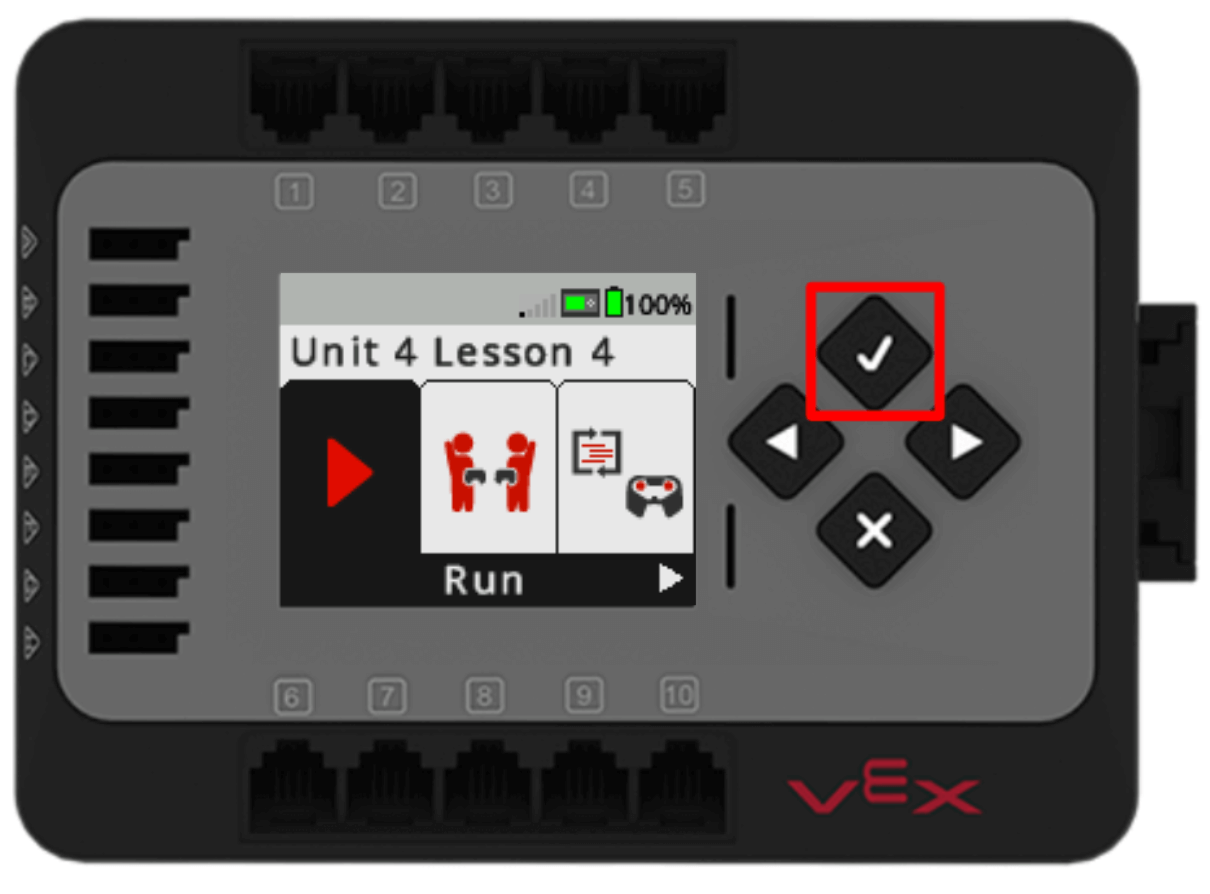
Be sure the Brain is connected to VEXcode and download the project.
Read the code and predict what the conveyors will do when the project is run.
Record your prediction in your engineering notebook.
Be sure a green Disk is placed on the Entry Conveyor. Press the Check button on the Brain to run the project to test it.
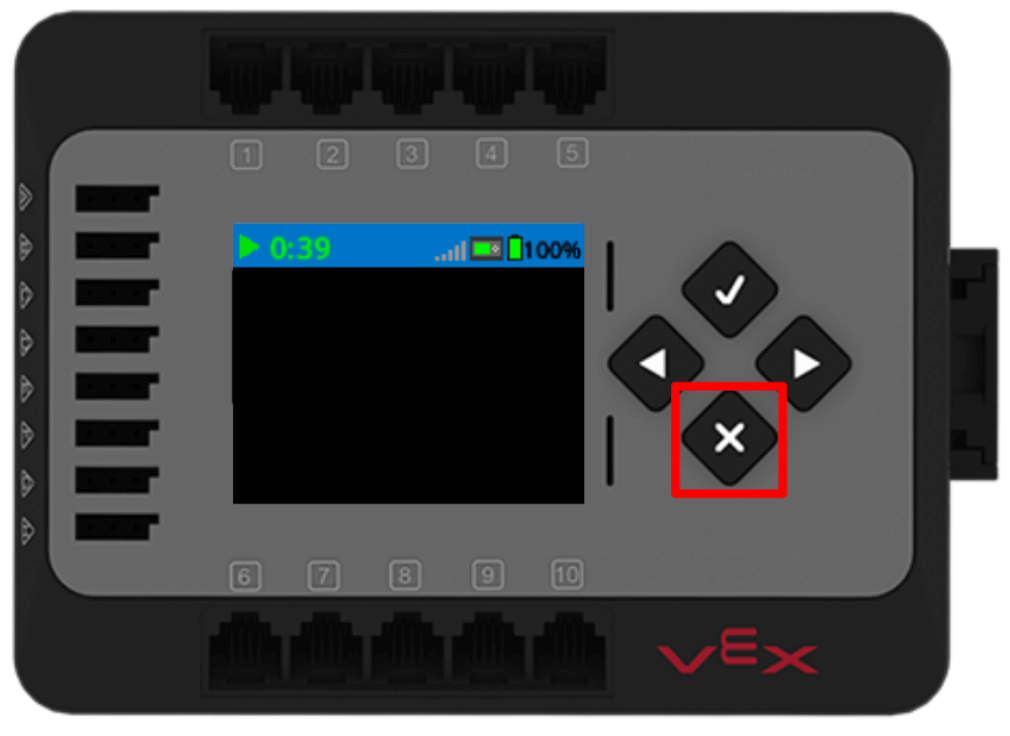
Observe the behavior of the conveyors as the project runs.
Press the X button on the Brain to stop the project when the conveyors have finished moving. Record your observations in your engineering notebook.
Did the conveyors move as you predicted? Did the green Disk get moved to the Exit Conveyor as intended? Why or why not?
Reviewing the Project
Let's review the project flow in this project that stopped the Exit Conveyor when the green Disk was detected by the Object Sensor. The Wait until block paused the project from moving forward until the condition within is reported as TRUE.

Because the Spin block is a non-waiting block, it allows the CTE Workcell to keep spinning the conveyor motor while checking the values from the Object Sensor and the condition of the reflectivity being greater than 9%. After the condition in the Wait until block reports as TRUE, the project moves to the next block in the stack, stopping the Exit Conveyor motor.
For Your Information
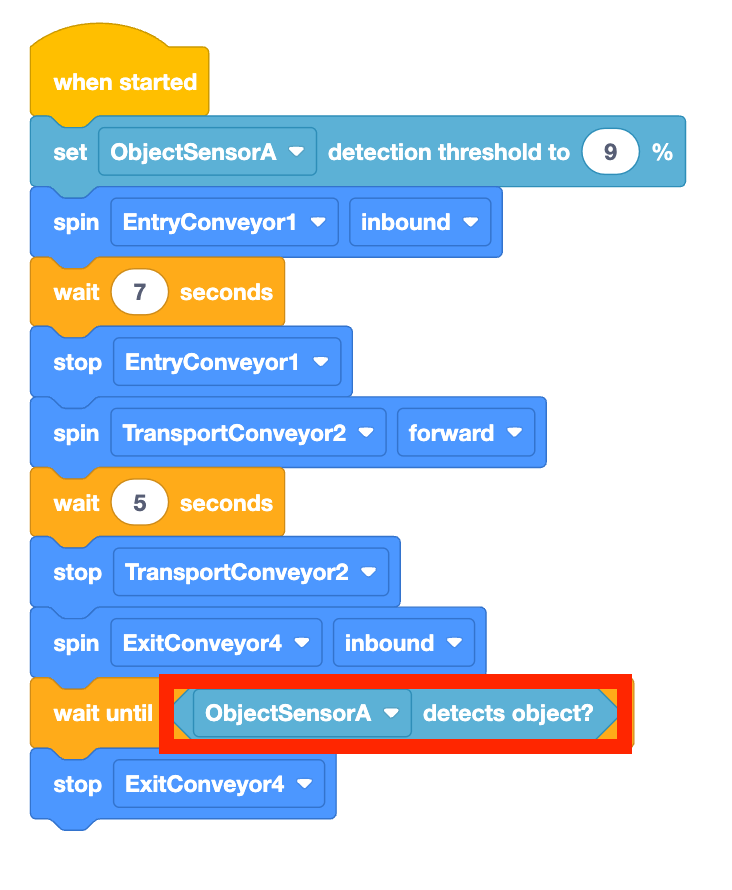
Another combination of blocks can be used in a project to stop the Exit Conveyor when an object is under the Object Sensor. The Set Detection Threshold block can be used at the beginning of a project to set the threshold, just as the Greater than block did in the project that was built above.

Once the threshold is set, the Boolean Detects object block can be used in any blocks with hexagonal spaces. This block will report TRUE when the detection threshold defined by the Set detection threshold block is met, or FALSE when the reflectivity percentage is below that threshold.

Because the Detects object block is a Boolean block, it can fit directly into the Wait until block.
Check Your Understanding
Before moving on to the next Lesson, ensure that you understand the concepts in this Lesson by answering the following questions in your engineering notebook.
Check Your Understanding questions > (Google Doc / .docx / .pdf )
Select Next > to move on to the Putting It All Together Activity.