
Play
Part 1 - Step by Step
- InstructInstruct students to create a project using VEXcode GO so that their Code Base float moves around the parade route. Students should use the poster or whiteboard list created during the Acts & Asks to remind them about the coding requirements for their project. Watch the animation below for an example of a robot moving along the parade route successfully. In the animation the parade route is marked as a square with pauses marked halfway from one corner to the next. The Code Base drives around the square clockwise, turning at each corner and stopping briefly at each stop sign. Video file
Parade Float Route - ModelModel for students how to begin writing pseudocode to plan for their movements around the parade route.
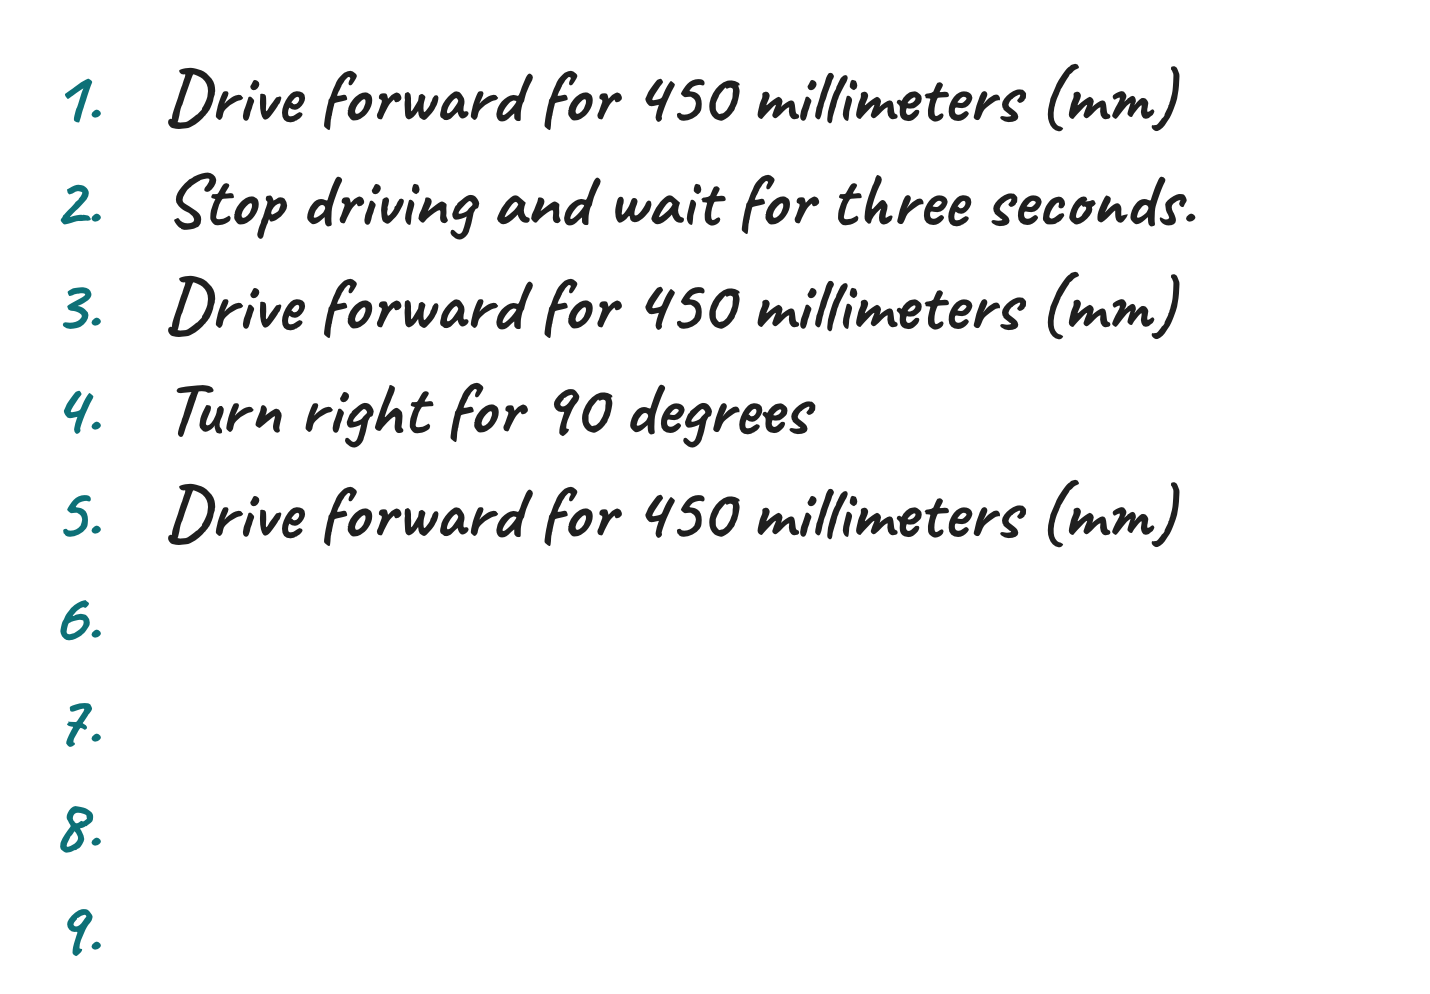
Pseudocode Example Once the students have completed their pseudocode, they will need to transfer their pseudocode into [Comment] blocks in VEXcode GO. Ensure students have completed the following steps:
- Launch VEXcode GO
- Connect their GO Brain to their device
Note: When you first connect your Code Base to your device, the Gyro built into the Brain may calibrate, causing the Code Base to move on its own for a moment. This is an expected behavior, do not touch the Code Base while it's calibrating.
- Name the project, Parade Route, and saved the project
- Configure a Code Base
Model for students how to add [Comment] blocks into the project. Students will need one [Comment] block for each line of pseudocode. So, if they have eight lines of pseudocode, they will need eight [Comment] blocks. Model for students the first three lines of the example.
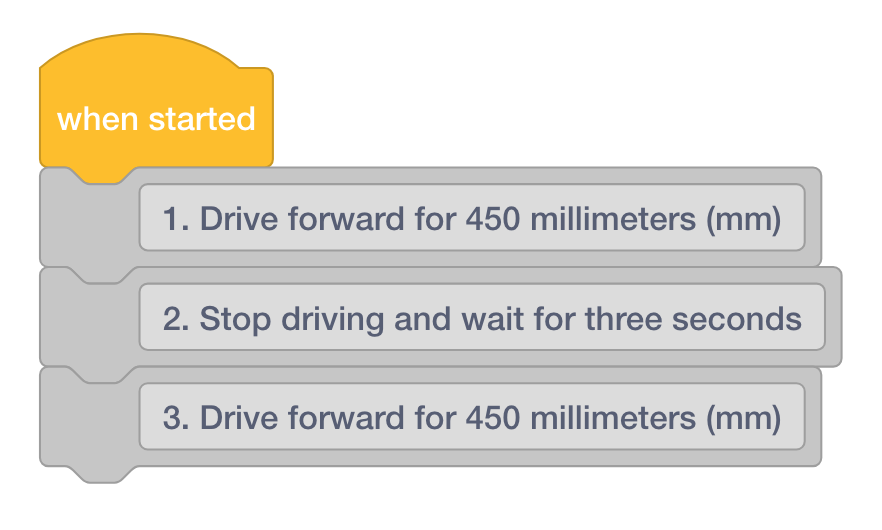
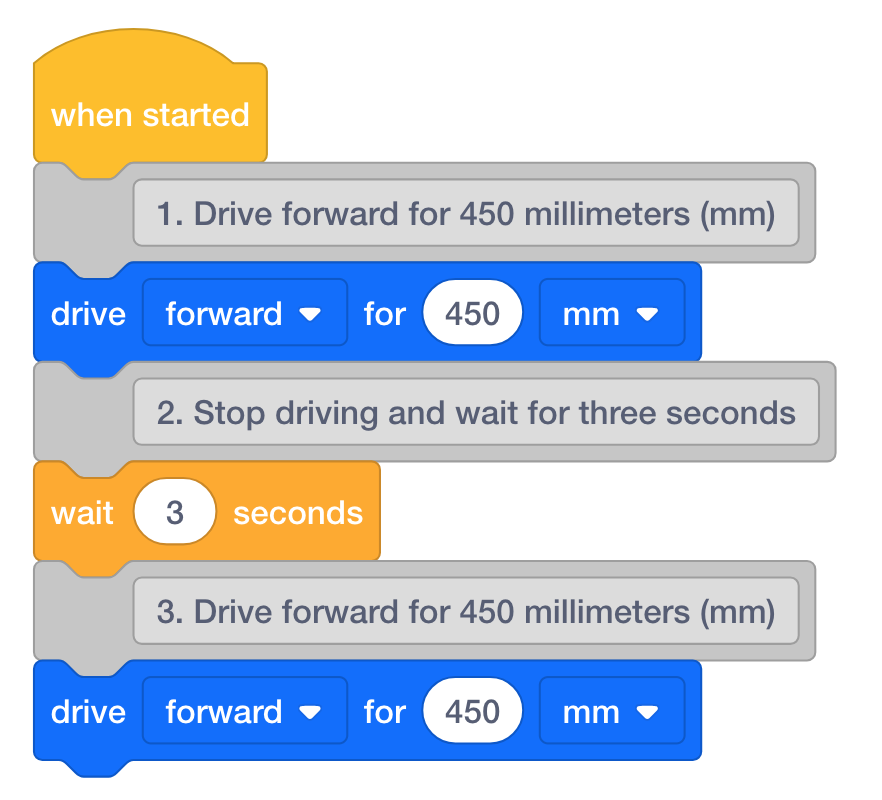
Transfer Pseudocode Into Comments Once students have transferred their pseudocode, they will add Drivetrain blocks. Remind students that the [Comment] blocks are used to organize their projects and they will not execute behaviors. They will need to add Drivetrain blocks to make their Code Base move.
- Have students add a [Drive for] block under the first [Comment] block.
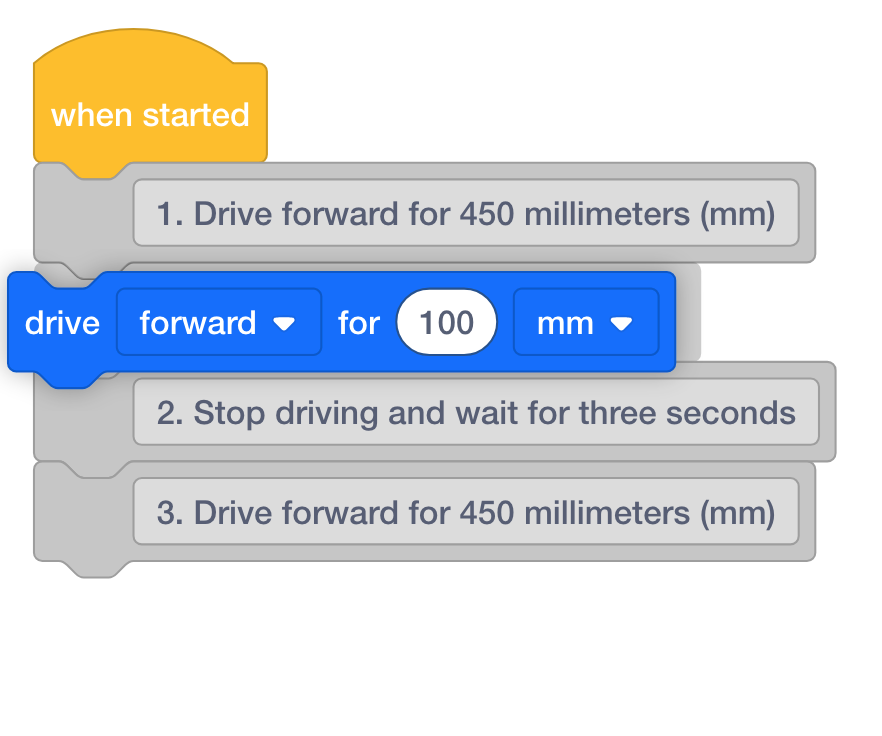
- Then, have students adjust the parameters to match what is called for in the [Comment] block. In this case, that is 450 millimeters (mm).
Adjust Parameters - Instruct students to continue adding the matching blocks throughout their pseudocode.
Example Project with Pseudocode - As students complete their projects, have them start and test their code on their test parade route setups.
- FacilitateFacilitate a discussion with the students by asking the following questions:
- Is the parade float able to move for the entire parade route?
- How far does your robot have to move for the entire parade route?
- Does your robot need to make any turns? If so, what direction?
- Can you explain what each command in your project is doing?
- Is your parade float moving in a way that you didn’t expect?
- RemindRemind groups that this is not a competition but a celebration of engineers solving a real problem.
- AskAsk about other times they have tried and had a project not work out. How did they solve the problem?
Mid-Play Break & Group Discussion
As soon as every group has tested their VEXcode project, come together for a brief conversation.
Students will take a quick gallery walk to see other teams floats and how they coded their Code Base.
Part 2 - Step by Step
- InstructInstruct each group that they will be showing off their floats on the classroom parade route.

- ModelModel using a group’s float, how to set the float on the correct starting point.
- Assign each group a position in the float lineups so groups know when it is their turn to run in the parade.
- Model for students, using a group’s float, where the first float needs to be before the next group starts their project. Once a float makes the first right turn, the next float can begin moving in the parade.
- One person from each group will need to collect their Code Base when it reaches the end of the parade route.
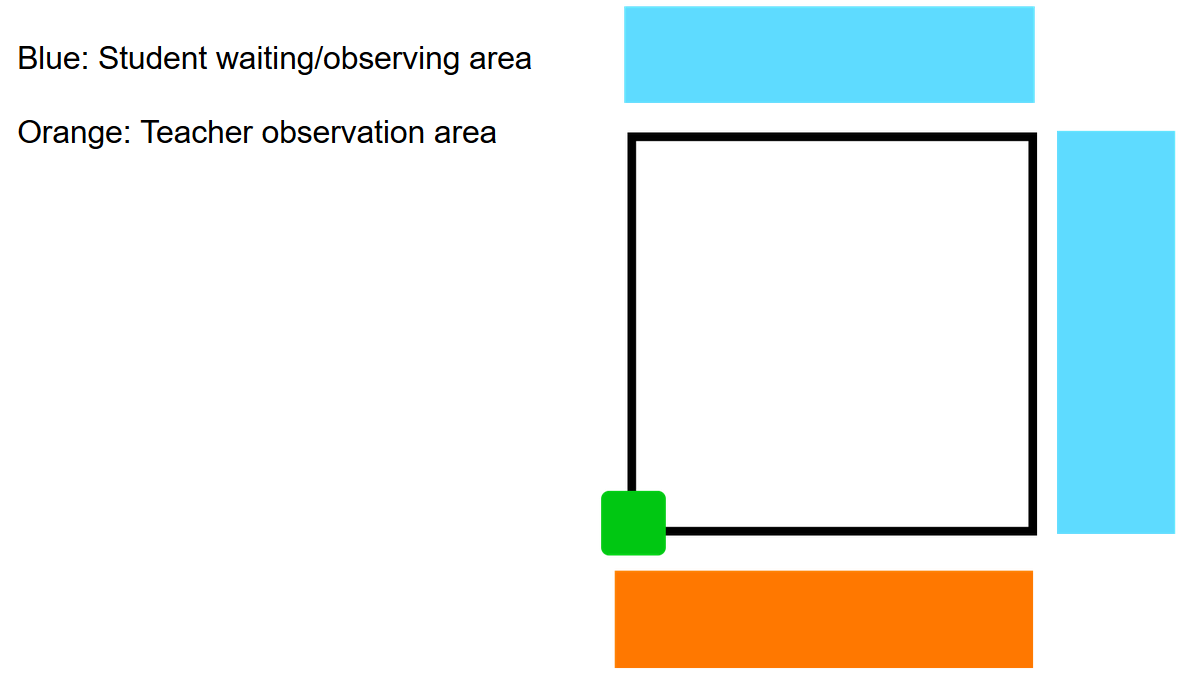
Class Parade set up - including a waiting area - FacilitateFacilitate a conversation during the parade by asking students questions.
- What is your favorite part about this float?
- What commands do you think this group used in their project?
- RemindRemind groups to keep space between themselves and the parade route. Only groups actively sharing their float should be near the route.
- AskAsk students what they thought about the parade.
-
How could we change our floats to make one classroom theme for the parade? (all types of flowers, a parade of holidays or countries, etc).
-
What if we ran the parade route in reverse? How would you need to change your project?
-
Optional: Teams may deconstruct their float if needed at this point in the experience.