
Play
Part 1 - Step by Step
- InstructInstruct students that they are going to be challenged to create a project to have the Code Base detect all the obstacles in the Mars Landing area. They will be encouraged to build onto their project from Lab 1.
The following animation shows one possible way that the Code Base could be coded for the Clear the Landing Area Challenge.
In the following animation, the robot drives forward two spaces, glows to clear the first obstacle, and then turns 90 degrees to the right before glowing to clear the second obstacle. Next, the robot continually drives forward and each time it senses a wall or obstacle it turns 90 degrees to the right until the third obstacle is finally reached and cleared.
Video file - ModelModel for students how to get started with their projects in VEXcode GO.
- If necessary, show students how to connect the Brain on their Code Base to their device in VEXcode GO. Because connection steps vary between devices, see the Connecting articles of the VEXcode GO VEX Library for specific steps to connect the VEX GO Brain to your computer or tablet.
- They will also need to configure VEXCode GO for the Code Base. If necessary, model the steps from the Configure a Code Base VEX Library article and ensure students can see the Drivetrain blocks in the Toolbox.
- Have students name their project as Clear Area and save it to their device. See the Open and Save section of the VEXcode GO VEX Library for device-specific steps to save a VEXcode GO project.
- Have students apply what they have learned in other Labs to build a project to have the Code Base clear all the obstacles in the Field. They will need to add blocks and change parameters, then test their projects on the Field.
If necessary, model for students how to test their project on the Field.
-
Show them how to place the Code Base on the starting point marked with the "X."
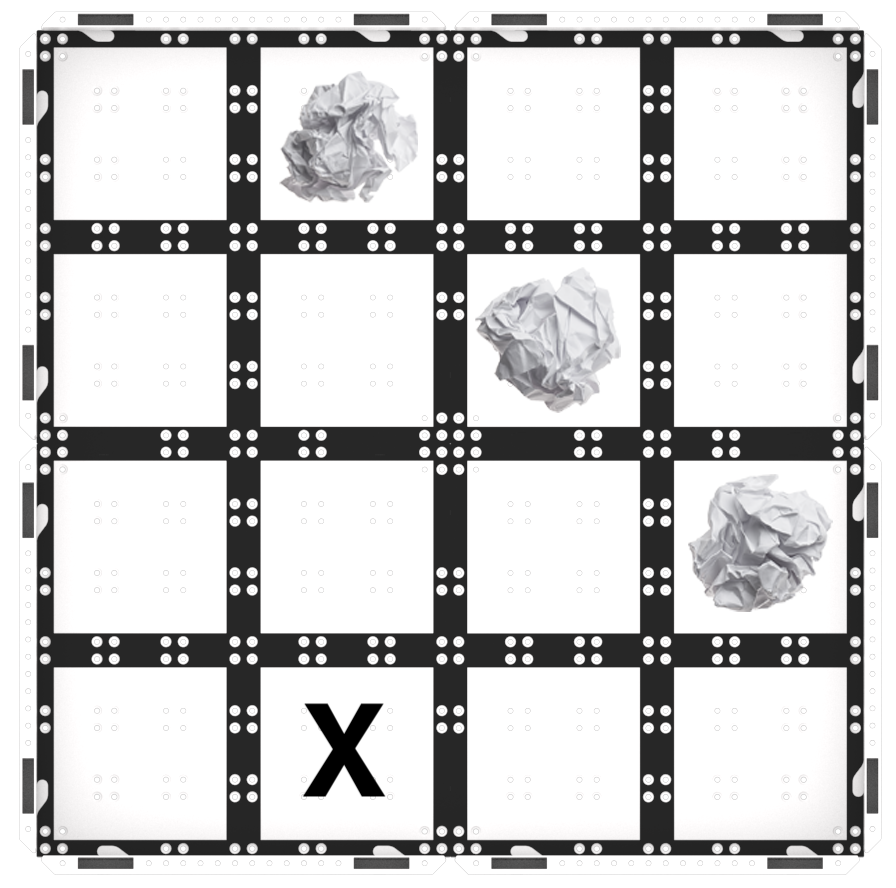
Play Part 1 Field Setup -
Ensure that the Eye Sensor, located on the front of the robot, is facing the first obstacle.
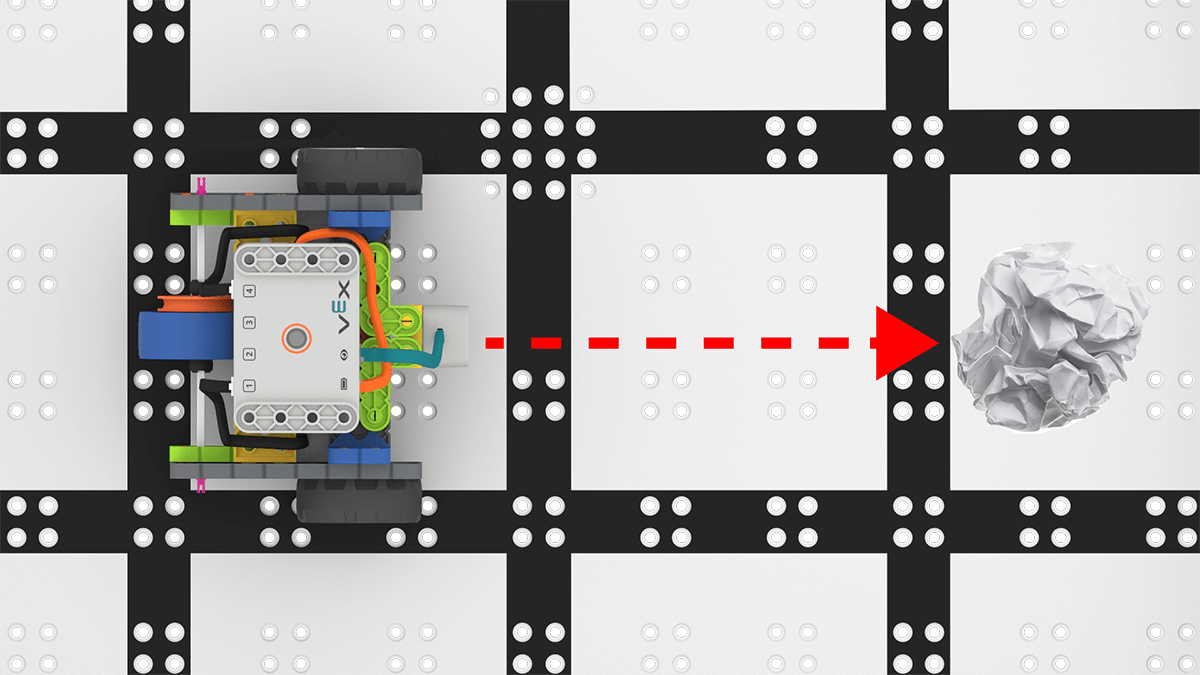
Eye Sensor faces the obstacle -
Place the Code Base on the Field and select 'Start' in VEXcode GO to test their projects.
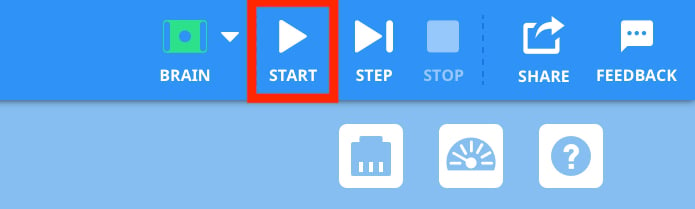
Select 'Start' to test the project - Students should remove the obstacles after they are detected by the Code Base.
-
Students will need to select the 'Stop' button in the VEXcode GO Toolbar to stop the project.
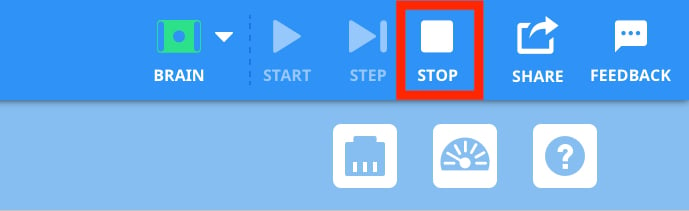
Select 'Stop' - Note: If students are using a forever loop, the Code Base will not stop until the Stop button is selected. In this scenario, have students stop their project when the Code Base has detected all the obstacles, has repeated a loop four times without detecting an obstacle, or if it gets stuck at the edge of the Field.
- For groups who finish early and need additional challenges, have them experiment with different starting points. Does their project still work?
- FacilitateFacilitate a conversation with students as they experiment with their projects.
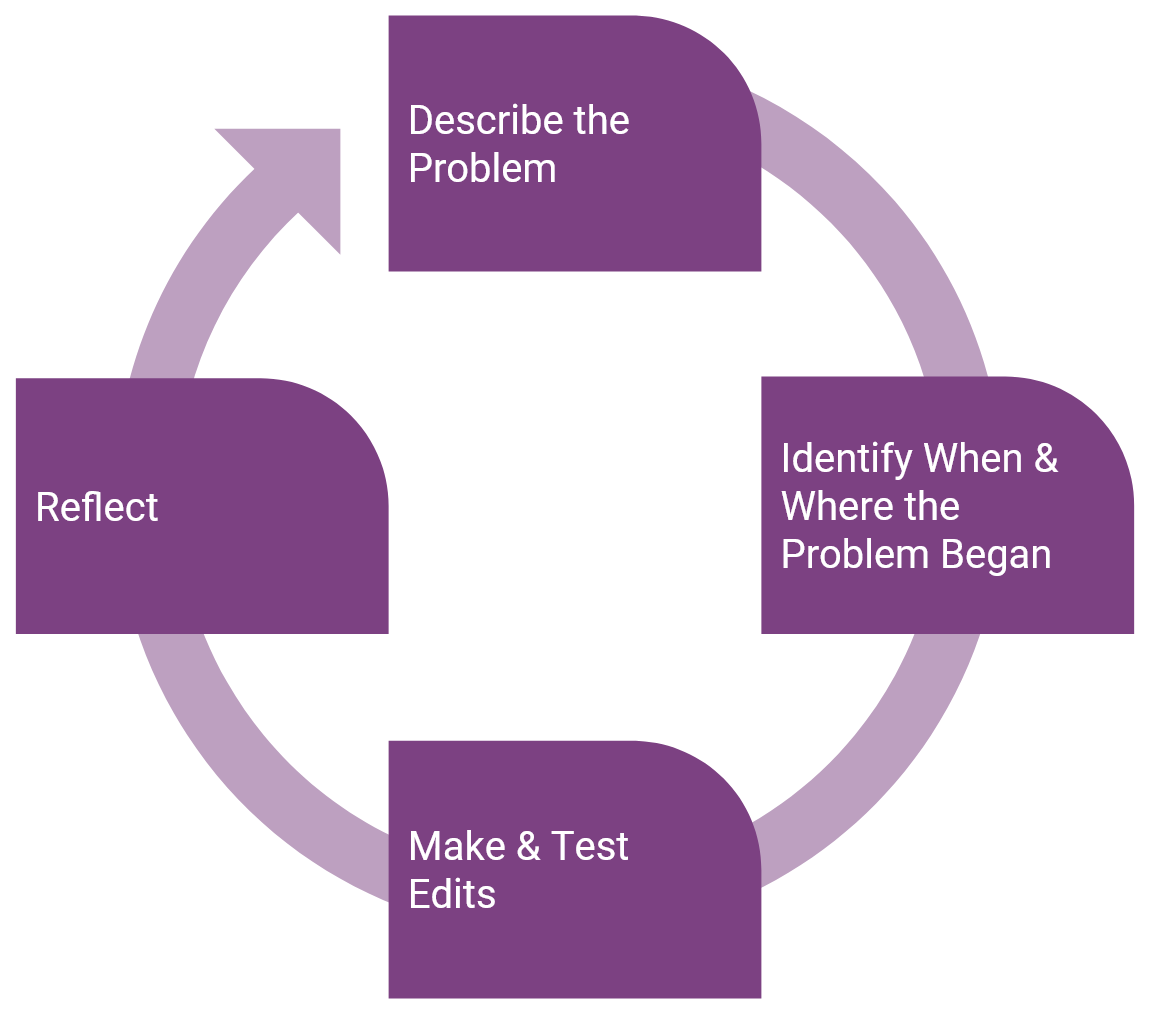
- Prepare students for the trial and error that is an intrinsic part of the experimentation that they will engage in with this challenge. You may want to use the Problem Solving Cycle graphic from the Background page as a visual aide to establish a structure for the problem-solving process with your students.
Student Problem-Solving Cycle - If students are using a loop in their project with a [Forever] block or [Repeat] block, but the Code Base is not moving as intended, they may not have all the necessary blocks inside the loop, or they may sequence the blocks inside the loop in a way that causes the Code Base to move in an unintended way.
- Use the Project Stepping feature to help students go through their project one block at a time to see how each block is being executed in their project. This will allow students to see how the loop functions in their project and will give them visual feedback to show which blocks may be causing the error, so debugging can become a more targeted and efficient process. For more information on how to use the Project Stepping feature, see the Stepping Through a Project in VEXcode GO VEX Library Article.
- Remind students that they can also use the Highlight feature to see which blocks are being executed and when as they run their projects. The following questions can be used to encourage students to identify how a loop affects the project flow with the Highlight feature.
- How does the highlight move when there is a loop in our project?
- Which VEXcode GO block creates the loop?
- Which blocks are repeated in your project?
- If the Code Base is not turning, students may not have added the [Turn for] block. Show students how to add the [Turn for] block so that the robot changes direction after it detects an obstacle, otherwise, the Code Base will just drive forward and stop. Since students may not be familiar with angles, you may want to provide several angles for them to experiment with such as 60, 90, 120 degrees.
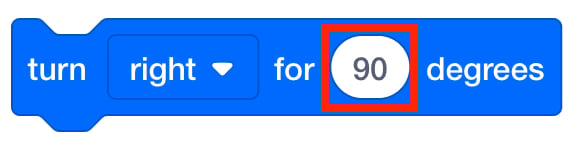
- Remind them that they can change the turn angles in the input oval in the [Turn for] block. If experimenting with turn angles, ask students how changing this parameter affects the movement of the Code Base. What would happen if we increase the turn angle? How does it change the movements of the Code Base? Does this change have the Code Base detect more obstacles? If not, try a different turn angle.

Change Turn Angle in the [Turn for] block - RemindRemind students that this challenge requires playful exploration and there will be cycles of trial and error. They will make mistakes in their projects as they experiment, and each time they make a mistake in their code, they have a chance to learn something new! Help students to identify where in the code there was a problem and tease out ideas for addressing the problem.
- Did something go wrong? Great! Where in the code is the problem? How can you change that block?
- Do you need a different block or do you need to change the parameters in this one?
-
What is your favorite mistake so far? What did you learn from it?
- AskAsk students how they think the real Mars rover could use a loop and eye sensor to detect obstacles on the ground before it lands.
Mid-Play Break & Group Discussion
As soon as every group has experimented with their projects to solve the challenge, come together for a brief conversation.
Ask students to show their projects and describe what the Code Base is doing. This is a chance to check in on the students' progress and troubleshoot.
- What was working well in your project?
- What challenges have you faced in your project?
Ensure that students understand that they can use a loop to have the Code Base repeatedly check for obstacles on the Field.
- Have they used a loop to have the Code Base detect multiple objects? If not, remind students about the [Forever] and [Repeat] blocks you talked about in the Engage section.
- If they are using a loop, how are they using it? What blocks are they using to create the loop in their project?
- How does the sequence of the blocks in the loop affect the behaviors of the Code Base?
- What happens if some of the blocks are not in the [Forever] or [Repeat] loop? Will those blocks be repeated?
Prepare for the challenge variation in Play Part 2:
- What if we change the location of the obstacles? Will this project still work? Why or Why not?
Part 2 - Step by Step
- InstructInstruct students that they are going to move the obstacles on the Mars landing area and continue to experiment with their projects. The goal is to have the Code Base detect all the obstacles on the Field, even if their location changes! Encourage them to use what they have learned about loops and the [Repeat] or [Forever] block to update their projects. View the animation below for one example of how a Code Base might complete this challenge.
In the following animation, the robot drives forward until it reaches a wall or an obstacle and then turns 120 degrees to the right and continues driving forward. Using this pattern the robot will eventually clear each obstacle no matter where it is, as shown in the animation with a new obstacle layout.
Video file- Note that the animation stops after all of the objects are detected and removed, but a [Forever] loop would make the Code Base run forever in that loop until the project is stopped.
- ModelModel for students how set up the Field and test their project.
-
First, show them how to place the obstacles in new locations on the Field, and choose a starting point and mark it with an “X.” The following is one possible way to set up the Field.
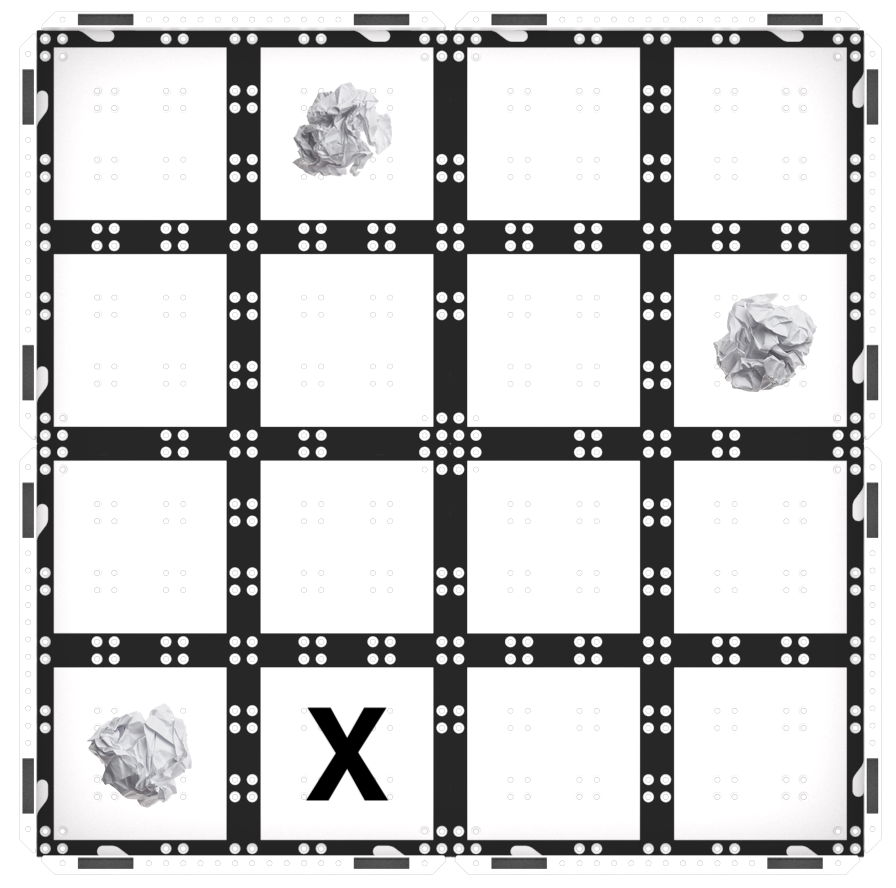
Play Part 2 Field Setup Example -
Once the obstacles and Code Base are in place, they can select ‘Start’ in VEXcode GO to test their projects.

Select 'Start' to test the project - Students will need to select the “Stop” button in the Toolbar to stop the Code Base.
-
There are many possible solutions for this challenge. The following is one example for reference.
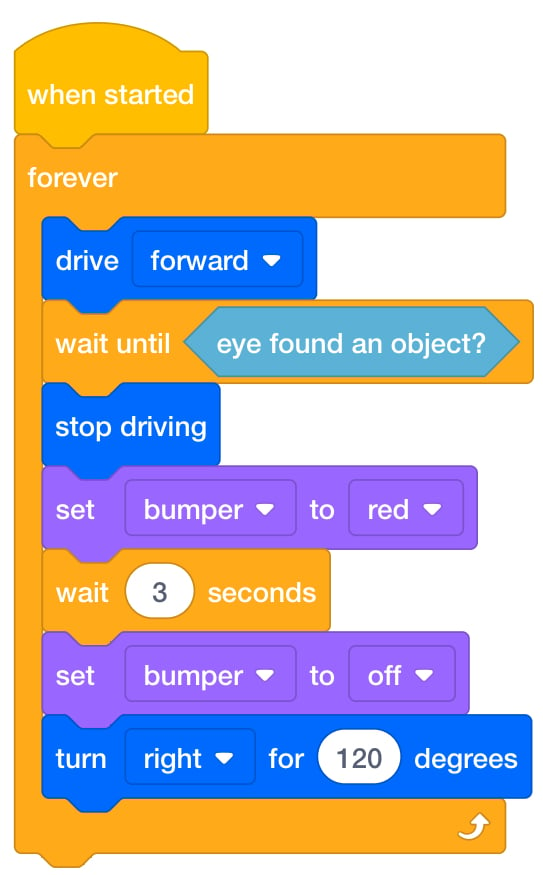
Possible Solution
-
-
- FacilitateFacilitate a conversation with students as they test their projects.
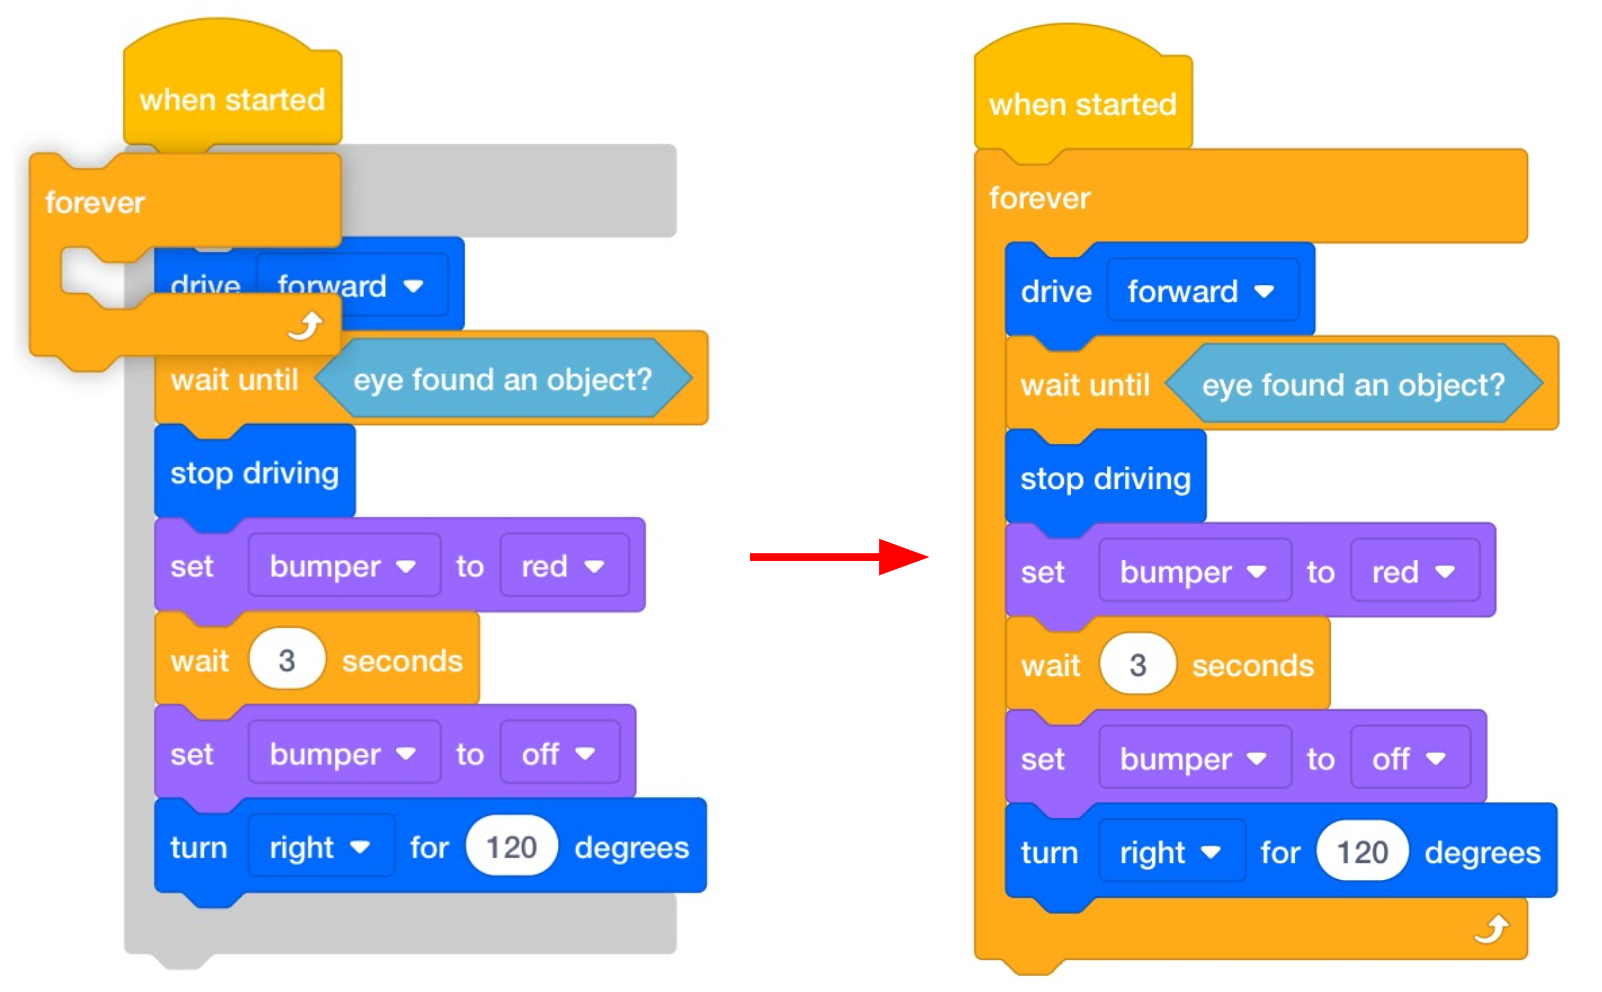
- If students need help making the Code Base repeat sections of code to detect all the obstacles on the field, suggest that they use a [Repeat] block or a [Forever] block as you talked about during the Engage section, and show them how to use it in their projects. Encourage them to check to make sure the entire project is inside the C-block, as shown below.
Add a [Forever] Block - If students have built a project, but it isn’t detecting all of the objects, encourage them to experiment with turn angles, give them the following turn angles to experiment with such as 60, 90, and 120 degrees. How do the turn angles affect the movement of the Code Base?
Changing the Turn Angle Engage students in further discussion as they build their projects to have them share their thinking as they iterate on and test their projects.
- Which obstacle does the Code Base detect first in your project?
- What does the Code Base do after it detects an obstacle? What blocks have you used to make it do this?
- What blocks have you used to have the Code Base move to the next obstacle after one is cleared?
- How does your project have the Code Base clear the entire landing area?
- RemindRemind students to start from the same point for the tests. They just want to change one variable — the location of the obstacles.
-
Also, remind students to start with the Eye Sensor on the Code Base facing the first obstacle, this will have the Code Base travel to the first obstacle quickly and will enable students to have immediate success with their projects.

Eye Sensor faces the obstacle
Remind students of troubleshooting strategies as needed.
- If the Code Base does not respond, try disconnecting and reconnecting the Brain and try again. This may happen if too much time passes between turns driving the Code Base.
- If students are having trouble connecting their Code Base to their computer or tablet, view the Connecting articles in the VEXcode GO VEX Library, to see details on how to connect the Code Base to the device being used.
- If groups are having trouble starting their project in VEXcode GO, refer to the Starting a Project in VEXcode GO VEX Library article, to see the steps necessary to successfully start a project.
- Review the Using the VEX GO Sensors and the Coding with the VEX GO LED Bumper articles for additional information on the Eye Sensor and the LED Bumper.
-
- AskAsk students to think about how their project has changed throughout the challenge.
- How has your project changed from the start of the lab until now?
- What did you change in your project to make it work better?
- What change did you make that made it less successful? How did you fix it?