
Engage
Launch the Engage Section
ACTS is what the teacher will do and ASKS is how the teacher will facilitate.
| ACTS | ASKS |
|---|---|
|
|
Getting the Students Ready to Build
First, we need to get our Code Base robots and VEXcode GO ready. (If students do not have a pre-built Code Base 2.0 - Eye Forward from the previous Lab, allow 10 - 15 minutes for students to build it prior to the Lab activities.)
Facilitate the Build
- InstructInstruct students that they are going to prepare to clear the landing site, by turning on the Brain on their Code Base robots, connecting and configuring them in VEXcode GO, and getting their projects ready.
-
DistributeDistribute
a Code Base 2.0 - Eye Forward robot and a computer or tablet to access VEXcode GO to each group. Groups can share access to the Field for testing their projects. It can be set up with a starting location marked, and obstacles in place, as pictured below, to be ready for the Play activity.
GO Field setup -
FacilitateFacilitate
student groups to get their Code Base and VEXcode GO ready.
-
Make sure that the LED Bumper is still attached to the Code Base, and connected to Port 2 on the Brain. Use the image below for reference, if students need to add the LED Bumper again.
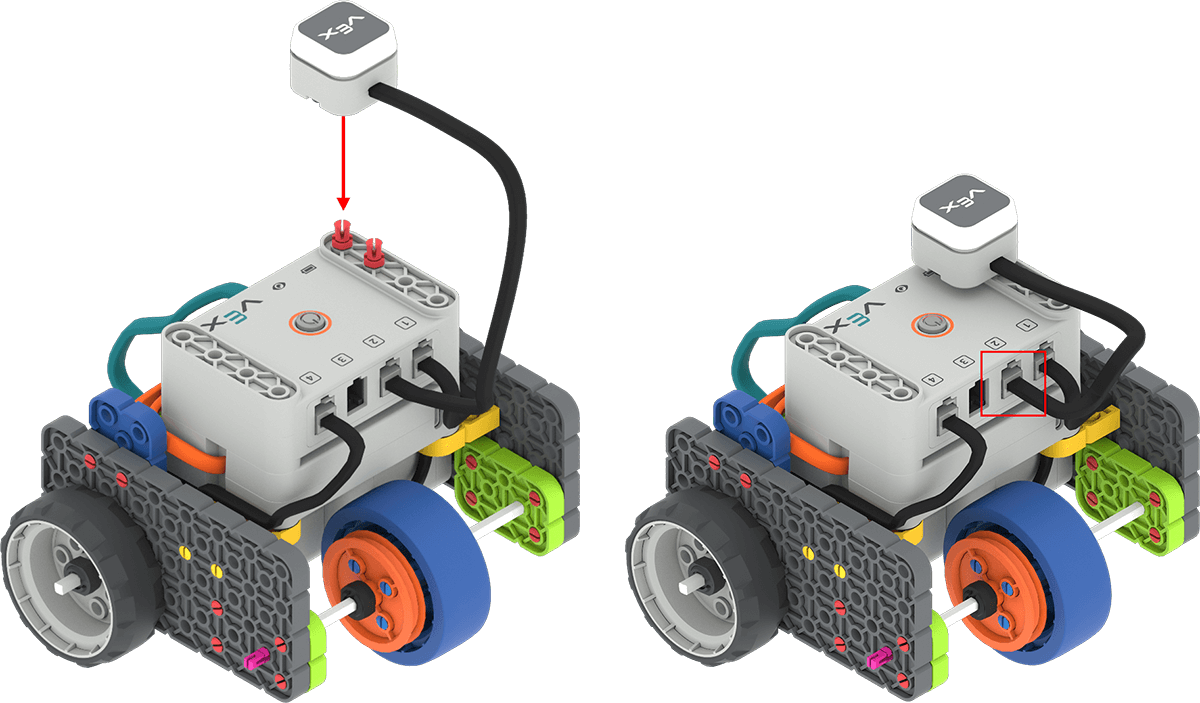
Attach LED Bumper to the Code Base, and connect to Port 2 on the Brain - Turn on the Brain, then connect the Brain on the Code Base to your device in VEXcode GO. Because connection steps vary between devices, see the Connecting articles of the VEXcode GO VEX Library for specific steps to connect the VEX GO Brain to your computer or tablet.
- Next, configure VEXcode GO for the Code Base. If necessary, model the steps from the Configure a Code Base VEX Library article and ensure students can see the Drivetrain blocks in the Toolbox.
-
Next, students can open their Drive until 2 project from Lab 1, or recreate that project, as seen here. If students need to open their Drive Until 2 project, model the device-specific steps, as shown in the VEX Library articles in the Open and Save section.
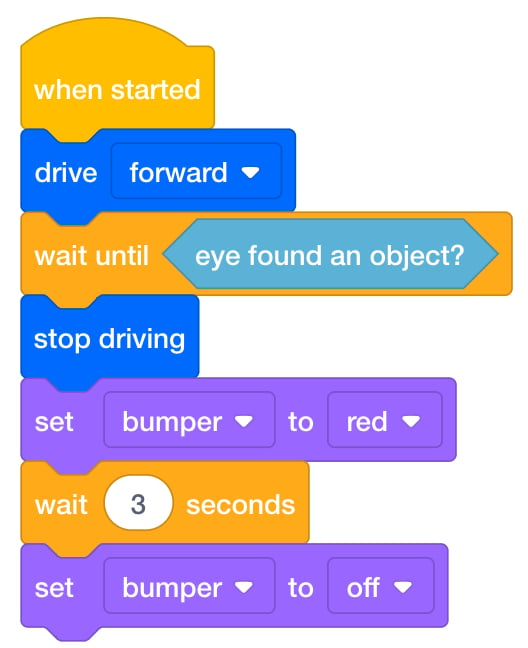
Drive Until 2 Project -
As students have their Code Base robots connected, configured, and their projects ready, you may want to show them the [Forever] block and the [Repeat] block that they may use to create a loop during the Lab.
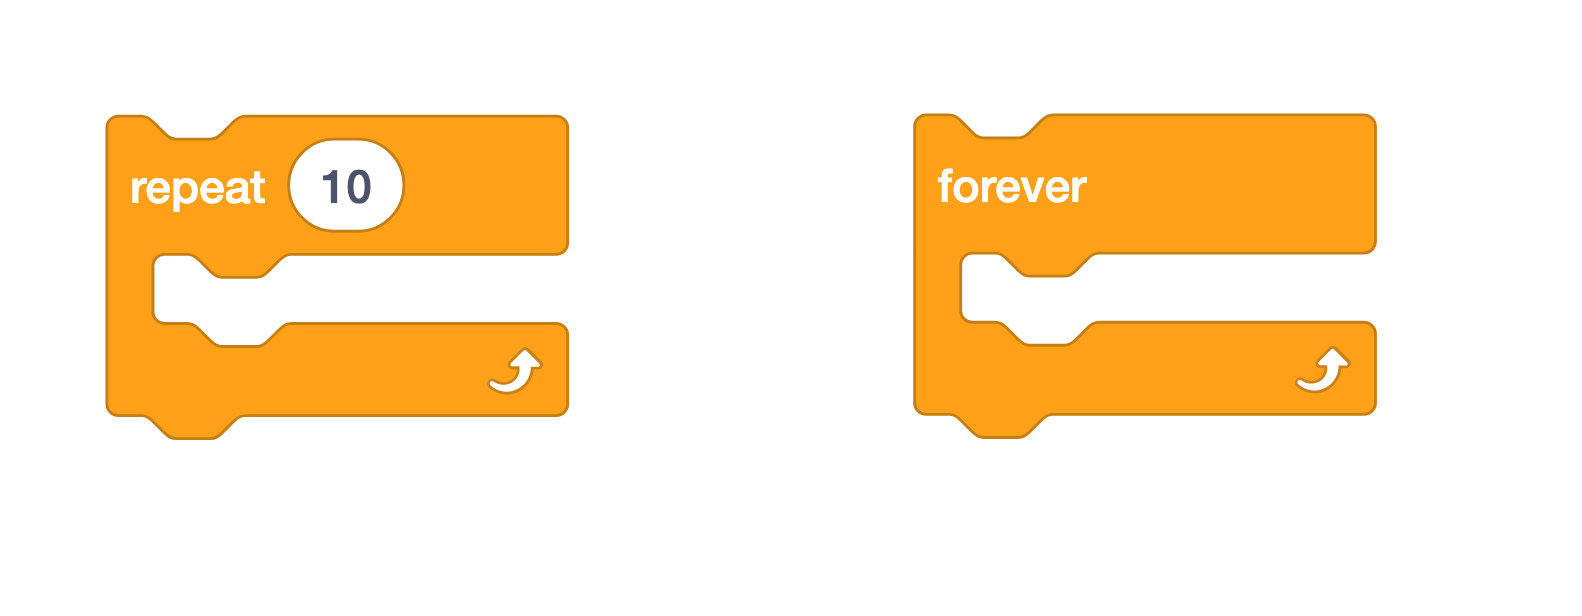
[Repeat] block and [Forever] block
-
- OfferOffer positive reinforcement for students turn taking and following directions in their groups.

Teacher Troubleshooting
- Check what blocks are inside the loop — When students add the [Forever] or [Repeat] block to their projects, only the blocks located inside the loop will be repeated. You can guide students to pay attention to where they are placing blocks (inside or outside of the loop) and how that affects the behavior of their Code Base when they test the project.
- Remember to use white or light-colored paper or objects as the obstacles — The Eye Sensor uses infrared light to detect objects, and since dark-colored objects absorb infrared light, it makes it very difficult for the Eye Sensor to detect them.
- Make sure that students reset the obstacles each time — After each group tests their project on the Field, make sure that they put the obstacles back in place for the next group. You can mark the locations of the obstacles with a dry erase marker on the Field, to make this process easier.
Facilitation Strategies
- Think about how your students will access VEXcode GO. Ensure that the computers or tablets that students will use have access to VEXcode GO. For more information about setting up VEXcode GO, see this VEX Library article.
- Gather the materials each group needs before class. For this Lab, each group will need a GO Kit, Build Instructions, a computer or tablet to access VEXcode GO, and balled up pieces of white or light-colored scrap paper to act as obstacles on the landing area. Students will also need access to a Field for testing.
- The Eye Sensor uses infrared light to detect objects. Light-colored objects reflect infrared light and are detected more easily by the Eye Sensor. Dark-colored objects absorb infrared light and the Eye Sensor does not detect them as well. During the Unit, use white or light-colored paper for the obstacles to ensure that the Eye Sensor will be able to detect these objects.
-
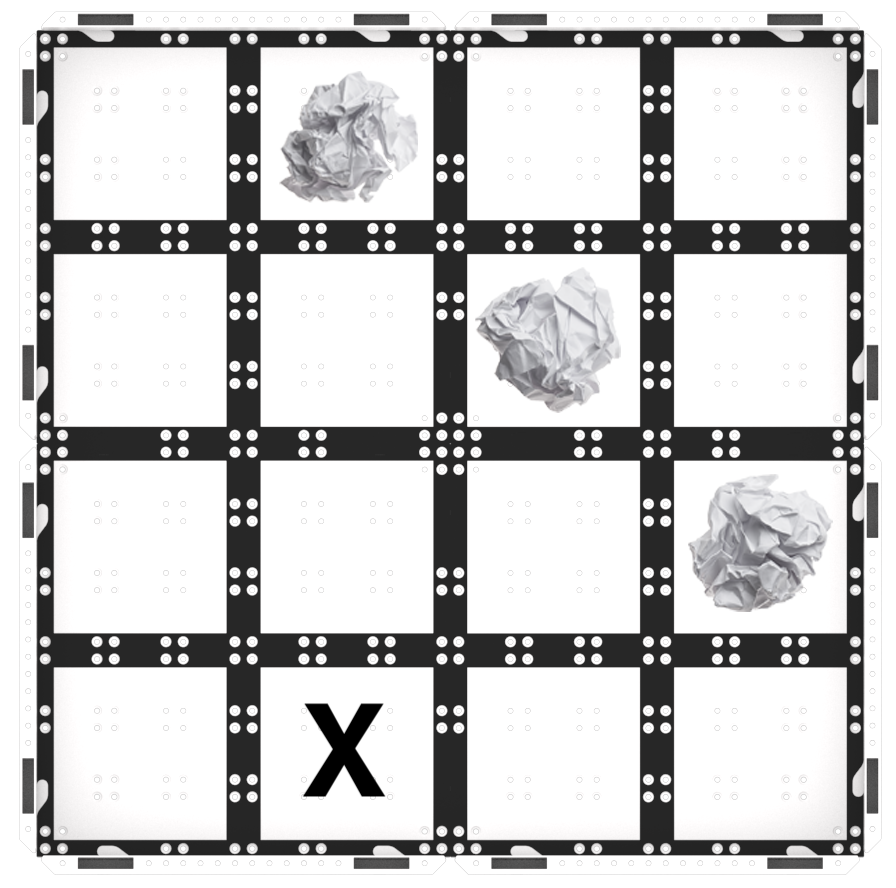
Set up your Fields ahead of time, as shown in the image below, to serve as a testing area for the Code Base. Have these spread out around the classroom to allow students ample space to test their projects. The balled-up paper is the obstacle to be detected, and the 'X' is the starting point for the Code Base in the Lab activities.

Field Setup - Prepare for the Open-Ended Challenge — Clear the Landing Area is designed to be an open-ended exploration that will ask your students to persevere to solve a challenge. Students will be asked to use loops in their projects, and it may take several iterations before they have success. Use suggestions outlined in the "Preparing for Open-Ended Challenges in this Unit" section in the Background to guide students through the trial and error process, and to help them troubleshoot their projects to achieve the goal of the challenge. The Facilitation section in Play Part 1 and 2 contain additional instructional supports for guiding students through the Lab 2 challenge.
- Use the Get Ready...Get VEX...GO! PDF Book and Teacher’s Guide - If students are new to VEX GO, read the PDF book and use the prompts in the Teacher’s Guide (Google Doc / .pptx / .pdf) to facilitate an introduction to building and using VEX GO before beginning the Lab activities. Students can join their groups and gather their VEX GO Kits, and follow along with the building activity within the book as you read.
- Use the Teacher’s Guide to facilitate student engagement. To focus on VEX GO connections in a more concrete or tangible way, use the Share, Show, or Find prompts on each page to give students an opportunity to get to know their kits in more depth.
- To focus on the habits of mind that support building and learning with VEX GO, like persistence, patience, and teamwork, use the Think prompts on each page to engage students in conversations about mindset and strategies to support successful group work and creative thinking.
- To learn more about using the PDF book and accompanying Teacher’s Guide as a teaching tool any time you are using VEX GO in your classroom, see this VEX Library article.