
It’s time to level up your challenge! In this lesson, you'll explore coding your VEX AIM Coding Robot in four directions using VEXcode AIM. You’ll build on what you learned in the previous lessons to code the robot to move left and right. Then you'll create a project to navigate the robot around the obstacles on the field, and back to its starting location!
Watch the video below to learn about:
- Changing the direction parameter to left and right in a Move for block.
- Sequencing multiple blocks based on your plan.
- Basic debugging such as finding and fixing an error in a project.
- Using measurements to determine parameters.
Now that you have watched the video, capture your thoughts in your journal. Answer these questions to guide your thinking and help you prepare for a whole-class discussion:
- What similarities or differences do you notice between using Move for block, Button Coding, and Drive mode to move the robot?
- What did you see in the video to support your ideas?
- What do you notice about the order and parameters of the blocks? Write at least three observations.
- List at least two questions you have about using VEXcode to move around the four barrels.
- What is a skill you have that you think will help you be successful with debugging in VEXcode?
Guided Practice
Now that you have learned about and discussed coding the robot to move in all four directions, it is your turn to practice!
Step 1: Set up the field as shown below.
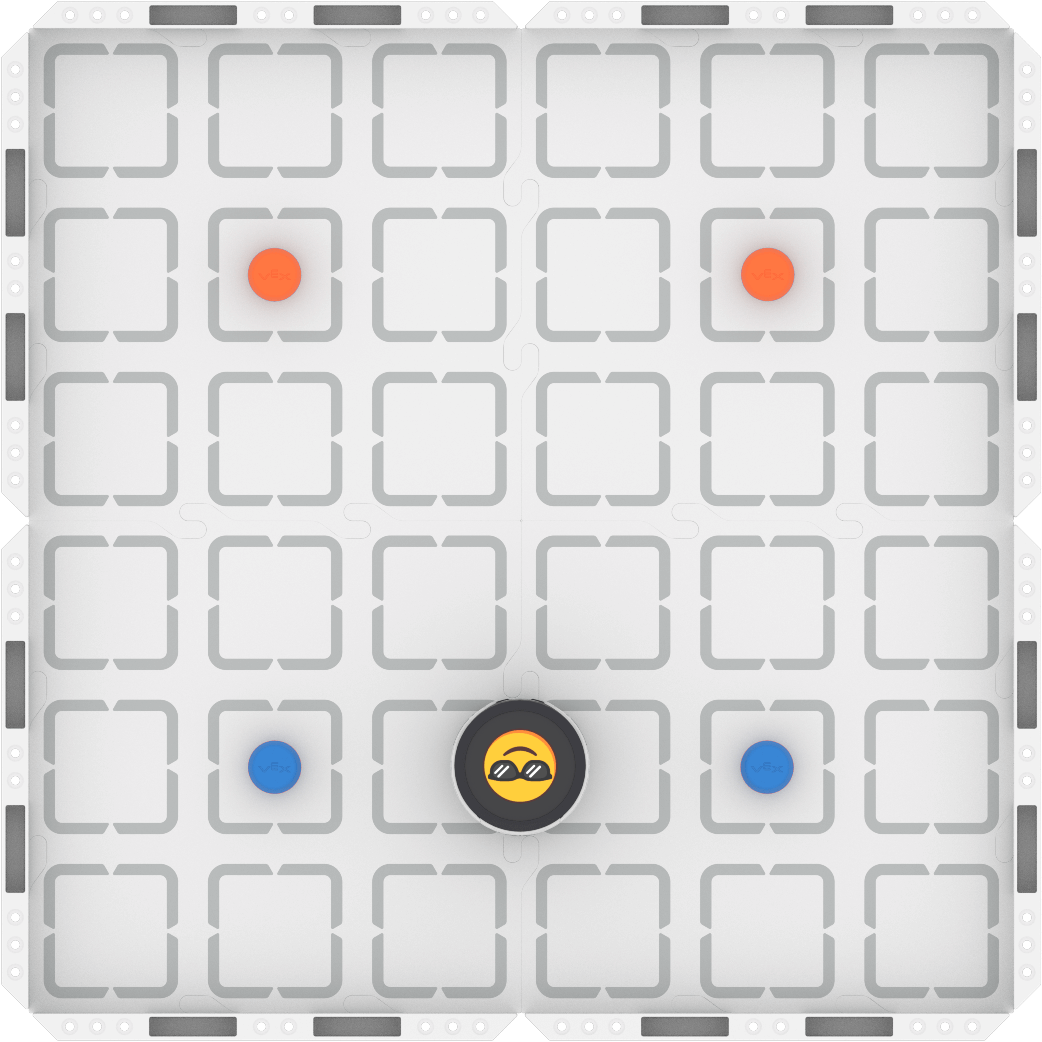
Step 2: Model the movements of the robot needed to complete the task using Drive mode.
- Your task is to drive the robot from the blue barrels to the orange barrels passing between each set, then navigate around the outside of all four barrels, and return to the starting position. Document your driving, then plan how to code that movement.
- Use this task card (Google / .docx / .pdf) to guide your practice.
- Pro Tip: Make sure that each member of the group has a turn to both drive and record, so that you can have meaningful collaborative discussions as you create a shared plan.
Step 3: Code the robot to complete the task.
- Your task is to use your planned path from Step 2 to code the robot in VEXcode AIM to move from the blue barrels to the orange barrels, then navigate around the outside of all four barrels, and then return to the starting position.
- Use this task card (Google / .docx / .pdf) to guide your practice.
- Pro Tip: Build and test your project in small chunks, to ensure the robot is moving as intended. This makes it much easier to find and fix errors in your project.
Step 4: Explore! Move between driving and coding to iterate on your project and improve your strategy.
- Together with your group, brainstorm ways to make your project better.
- Drive the robot to test out your ideas, and choose one to start with.
- Iterate on your project to make it match the new driven behaviors.
- Continue to move between driving and coding frequently to iterate on your project and find the best strategy to complete the task!
Resources for Practice:
The articles linked here are available if you need additional support while completing the activity.
Wrap-Up
Now that you have practiced, it is time to share what you learned. Answer the following questions in your journal to help you reflect on your learning and prepare for a whole-class discussion:
- What was your strategy for completing the task? Why do you think it was successful? Be specific in your answers.
- How did you use both Drive mode and VEXcode to complete the task? How did your group collaborate on both parts of practice?
- What is something you learned through practice that built onto what you saw in the video?
Select Next > to explore an example project.