
Now that you’ve explored how changing angle parameters can improve your coding projects, you’ll build on this knowledge by coding your robot to navigate around a set of barrels as quickly as possible. You’ll focus on adjusting angles to improve both the precision and speed of your robot’s movement.
Watch the video below to learn about:
- Using small angle adjustments for precision.
- Adjusting angles to navigate around obstacles placed at different distances from the robot.
Now that you have watched the video, capture your thoughts in your journal. Answer these questions to guide your thinking and help you prepare for a whole-class discussion:
- List at least two questions you have about how angle and distance parameters vary based on how far objects are from the robot.
- How would you use small angle adjustments for precision?
- What did you observe in the video that supports your thinking?
- What is something you’ve learned about coding or VEXcode that will help you in this lesson?
Guided Practice
Now that you have watched and discussed the video, it is your turn to practice!
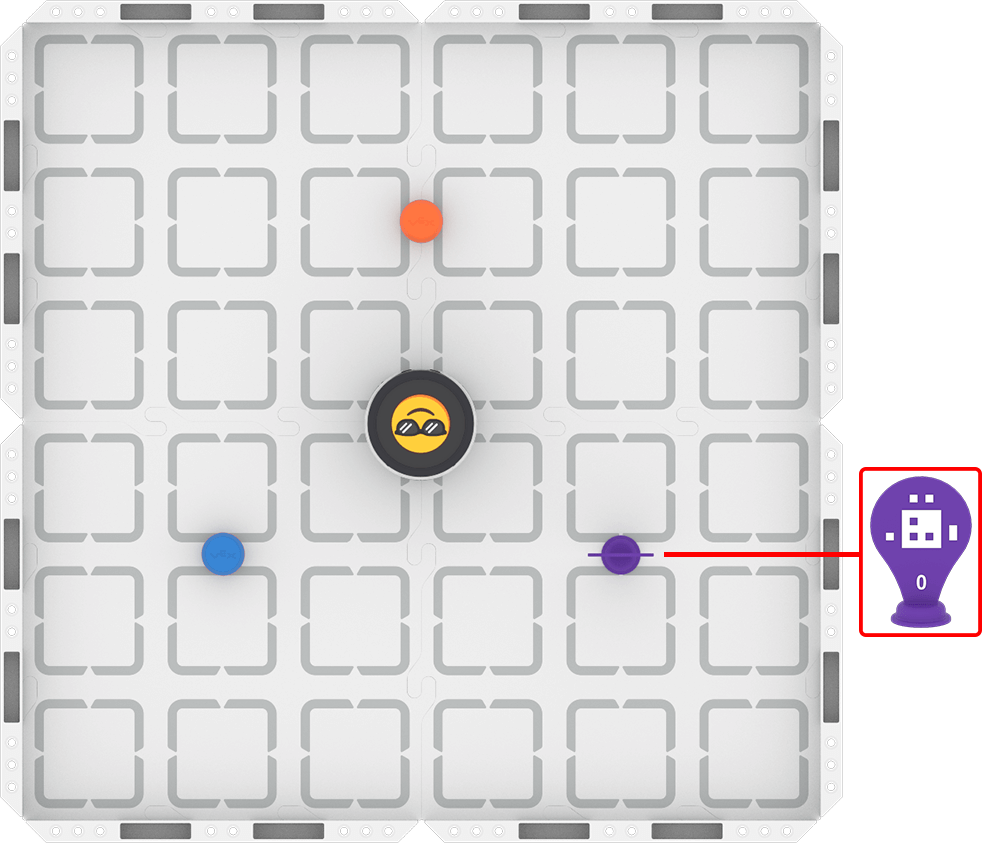
Step 1: Set up the field as shown below.
Step 2: Model the movements of the robot needed to complete the task using Drive mode.
- Your task is to drive the robot around the three obstacles as quickly as you can. Document your driving, then plan how to code that movement.
- Use this task card (Google / .docx / .pdf) to guide your practice.
- Pro Tip: Consider the details you used in the previous lesson to build your coding project. Pay attention to each angle and distance while avoiding the obstacles, and document your driving in detail to create you path plan.
Step 3: Code the robot to complete the task.
- Use your planned path from Step 2 to code the robot to move around the three obstacles as quickly as possible.
- Use this task card (Google / .docx / .pdf) to guide your practice.
- Pro Tip: Use the Robot Protractor and a ruler to help you get started determining your angle and distance parameters.
Step 4: Use the Predict-Drive-Measure-Code process to improve your robot's speed as it moves around both barrels:
- Predict
- Choose one angle to make a small adjustment to in order to improve your robot's speed. Make a group prediction about how to improve the angle using this sentence stem, and record it in your journal:
- We think the angle should be about ____________ degrees.
- Choose one angle to make a small adjustment to in order to improve your robot's speed. Make a group prediction about how to improve the angle using this sentence stem, and record it in your journal:
- Drive
- Test your prediction by driving your robot at your predicted angle. If it feels off, what do you think you need to change to make it more accurate? If not, what feels right about it?
- Measure
- Place your Robot Protractor under the robot. At what angle did you actually drive the robot?
- Code
- Use your new angle in your coding project! Adjust your project, then run it to test. Does the precision of the new angle improve your robot's speed? If not, use your Robot Protractor to help you change the angle and try again. Be sure to record your angle measurements and observations in your journal as you go.
Resources for Practice:
The articles linked here are available if you need additional support while completing the activity.
Wrap-Up
Now that you have practiced, it is time to share what you learned. Answer the following questions in your journal to help you reflect on your learning and prepare for a whole-class discussion:
- What is something you learned while driving that helped you in coding? How did you document that learning?
- What is something you learned about optimizing your time to complete the task?
- How did you collaborate with your group to determine the best angle and distance measurements?
Select Next > to move on to the Unit Challenge.