
Introduction
In this Lesson you will learn about the Distance Sensor, and how data from the Distance Sensor can be used in a project to detect objects. You will also learn about the [Wait until] block, and how that can be used in a VEXcode EXP project to have your robot make a decision. Then, you will apply your learning to detect and move Buckyballs with your BaseBot in the Sense and Sweep Challenge. Watch the animation below to see one way the BaseBot could move to turn, detect, and clear each cube from the Field.
Add a Distance Sensor
In this Lesson, you learn about the Distance Sensor, and how you can code your robot using sensor feedback.
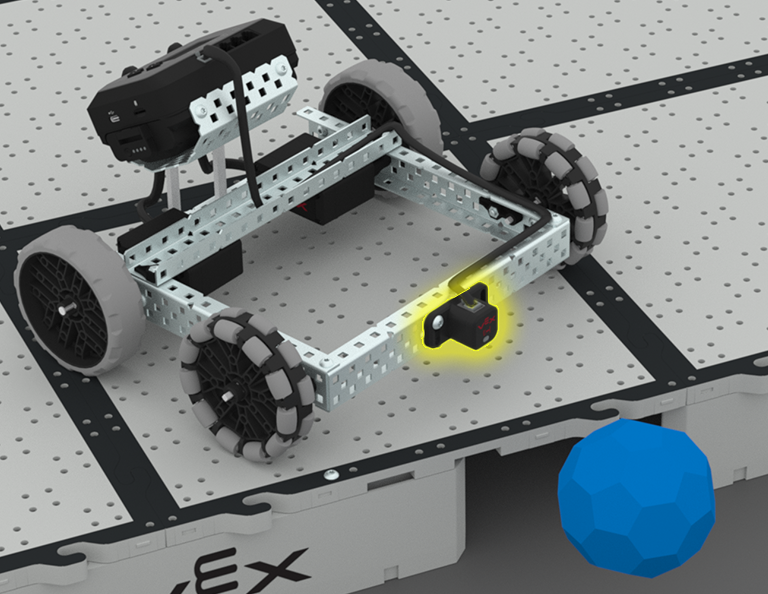
Add a Distance Sensor to your BaseBot as shown in this image.
- Add a 1x2x1x16 C-Channel to the front of the BaseBot.
- Then, mount the Distance Sensor to the C-Channel as shown in the image.
- The Distance Sensor should be plugged into Port 5.
Select < Return to Lessons to return to the Lesson Overview.
Select Next > to learn about the Distance Sensor and the [Wait until] block.