
Play
Part 1 - Step by Step
- InstructInstruct each group that they will be opening and starting the 'Avoiding Obstacles' example project in VEXcode GO to see how the Eye Sensor detects objects.
Code Base Avoiding Obstacles - ModelModel for students the steps to launch VEXcode GO.
- Model the steps to connect a Brain to your device.
Note: When you first connect your Code Base to your device, the Gyro built into the Brain may calibrate, causing the Code Base to move on its own for a moment. This is an expected behavior, do not touch the Code Base while it's calibrating.
-
Students will be using an example project to help them learn about commands related to the Eye Sensor in VEXcode GO. Model for students how to open the 'Avoiding Obstacles' example project.
Avoiding Obstacles Project - Model for students how to save the example project, and name it Avoiding Obstacles. Students should then place their Code Base in the Field and start the project.
- Note: If you do not have Walls for the Tiles, use classroom items such as books to set up a space for students to test the projects. The test area should be flat, and have objects on all fours sides if possible.
-
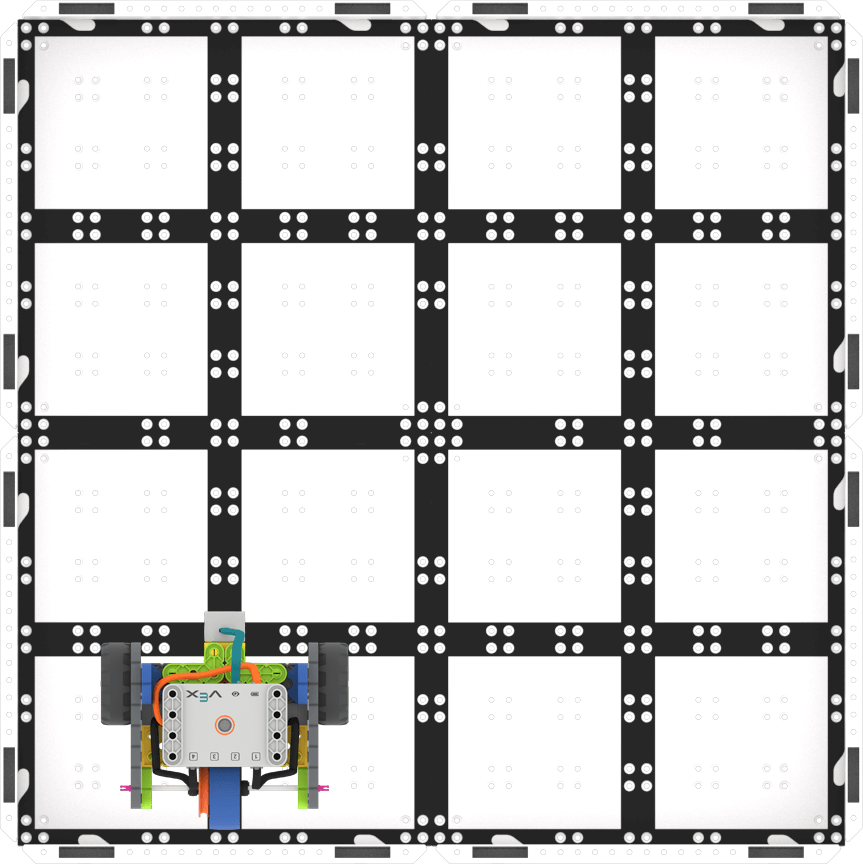
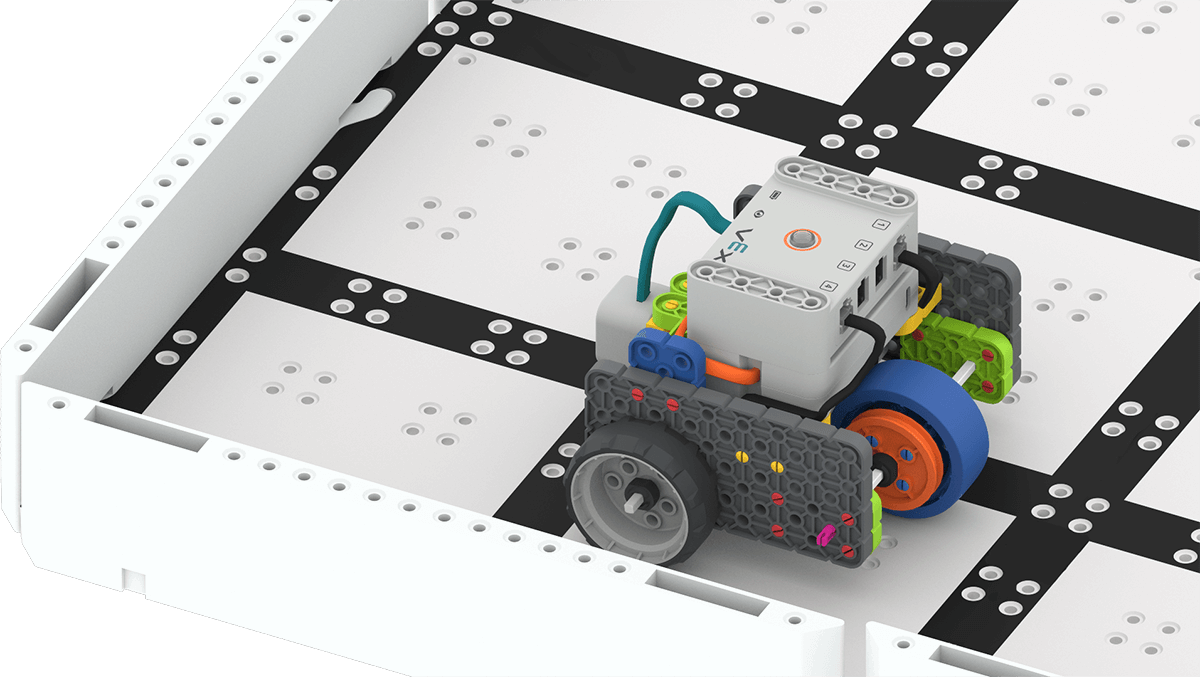
Code Base in the Field
-
This project has a [Forever] block around it. To make the project stop running after the Code Base detects a wall, students will need to be sure to select 'Stop' in the Toolbar.

Stop the Project - Students should observe that the Code Base detects a wall, backs up, then turns right. Have students start the project again and see how long the Code Base will repeat this pattern when a wall is detected.
- FacilitateFacilitate a discussion with students about the project and the Eye Sensor.
- How long do you think the Code Base will detect objects and then turn right? Point out to students the [Forever] block that goes around the main part of the project.
- Describe how the Code Base would move if it detected four walls. What shape would the Code Base move in?
- About how far away from a wall does the Code Base get before detecting it? Estimate or use your hands to explain how far.
- RemindRemind students that the Eye Sensor must be attached to the Brain before powering the Brain on in order to work properly. If the Eye Sensor is attached or removed after the Brain has already been powered on, the Brain must be power cycled (turned off and then back on) in order for the Eye Sensor to function properly.
Remind groups to open and observe the Monitor Console after the project is started. They will be able to observe when the <Eye found object> reports ‘TRUE.’
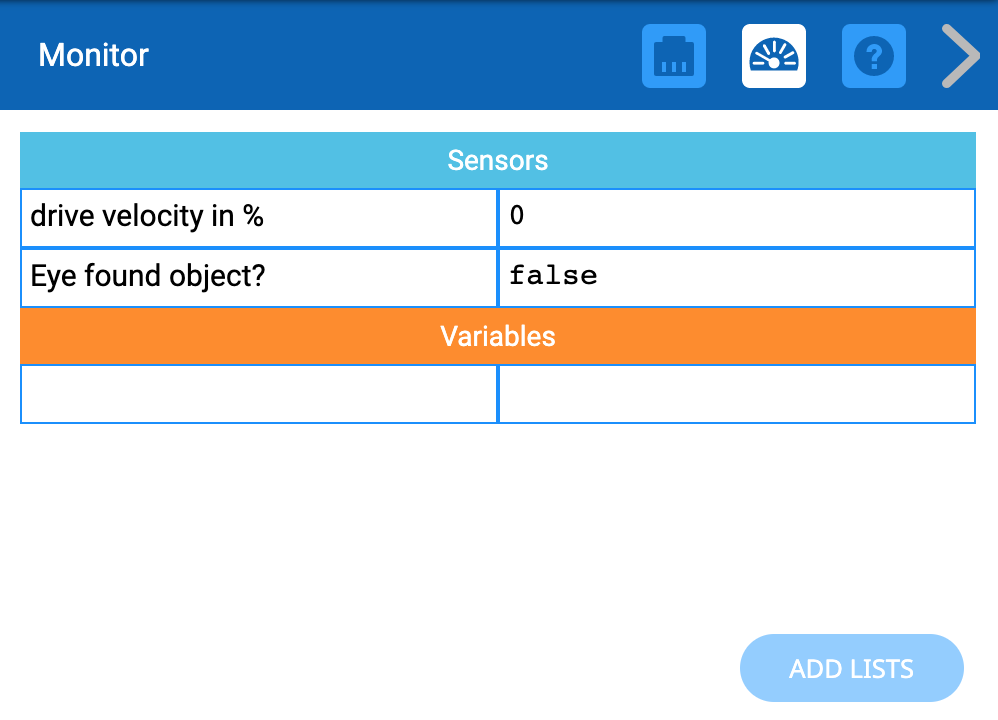
Monitor Console - AskAsk students how they could use object detecting in their everyday life.
For a silly example, if they wanted to walk backward down the hallways at school, they could use a sensor to tell them when they get too close to a wall or another person! What other ways to use the object detecting function of the Eye Sensor can they come up with?
Mid-Play Break & Group Discussion
As soon as every group has tested the ‘Avoiding Obstacles’ example project, come together for a brief conversation.
- What did the Eye Sensor detect in this example project?
- The Eye Sensor can also detect color! We will create a project next where if the Eye Sensor detects green, blue, or red, the Code Base performs different actions.
- Let’s practice first. When you see green, raise your right hand. When you see blue, raise your left hand. When you see red, raise both hands. (The teacher should then hold up 3 objects and see if the students can follow along with the pattern. Repeat the game as many times as needed.)
Part 2 - Step by Step
- InstructInstruct each group that they will be creating a project where the Code Base uses the color detection function of the Eye Sensor to navigate a color disk maze. Students will add Disks to their field to create the color disk maze. Then, they will create a project where the Code Base drives through the maze and turns right, left, or stops depending on the color of the Disk that is detected.
Watch the animation below to see how the Code Base will move to complete the maze. In this animation, the Code Base starts in the lower left corner of the Field, opposite the Green Disk on the Field. It drives forward until the Green Disk is detected, then reverses and turns right 90 degrees to face the next disk. The robot then drives forward until the Blue Disk is detected, then reverses and turns left 90 degrees to face the final disk. Lastly, the robot drives forward until the Red Disk is detected, then stops.
Video file - ModelModel using a group’s setup, how to launch VEXcode GO. If they already have VEXcode GO open from Play Part 1, model for students how to open the File menu and select 'New Blocks Project.'
- Once the project is open, have students save the project as Color Disk Maze.
- Students will need to configure the Code Base to see the blocks they need in the Toolbox.
- Model the steps to connect a Brain to your device.
-
Students will first build a project to detect the Green and Blue Disks in the maze. Model for students how to replicate the project in this image. They will need to add blocks and change parameters as needed to replicate the code.
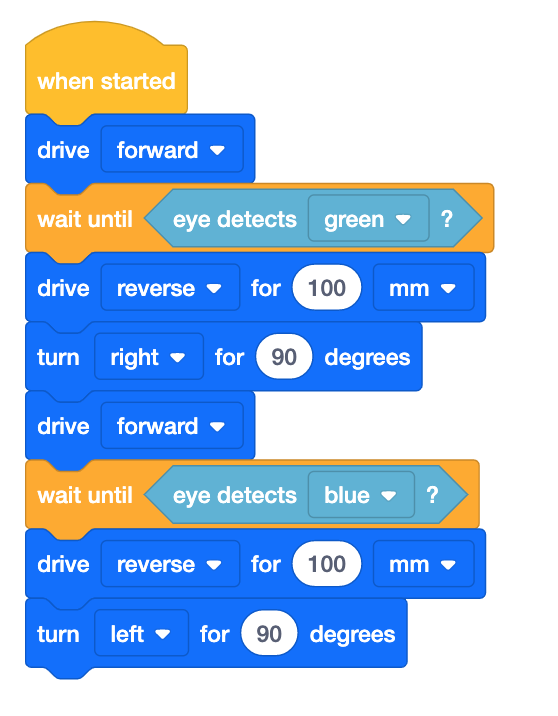
Color Disk Maze: Detect Green and Blue
NOTE: Students may need to change the parameters in the project depending on the placement of the Disks in the color disk maze set up. We suggest that you set up your 2x2 field before starting the Lab, and test the project. If possible. See the "Color Disk Maze " slide in the Lab 4 Image Slideshow for guidance in the placement of each Disk in the color disk maze. If you do not have enough Tiles or Walls for the color disk maze, set up colored Disks in a similar configuration on a smooth surface like the floor or a desk.
-
Now that the Code Base is configured, the Brain is connected, and the project is replicated, model for students how to save the project, and name it Color Disk Maze.

Name the Project -
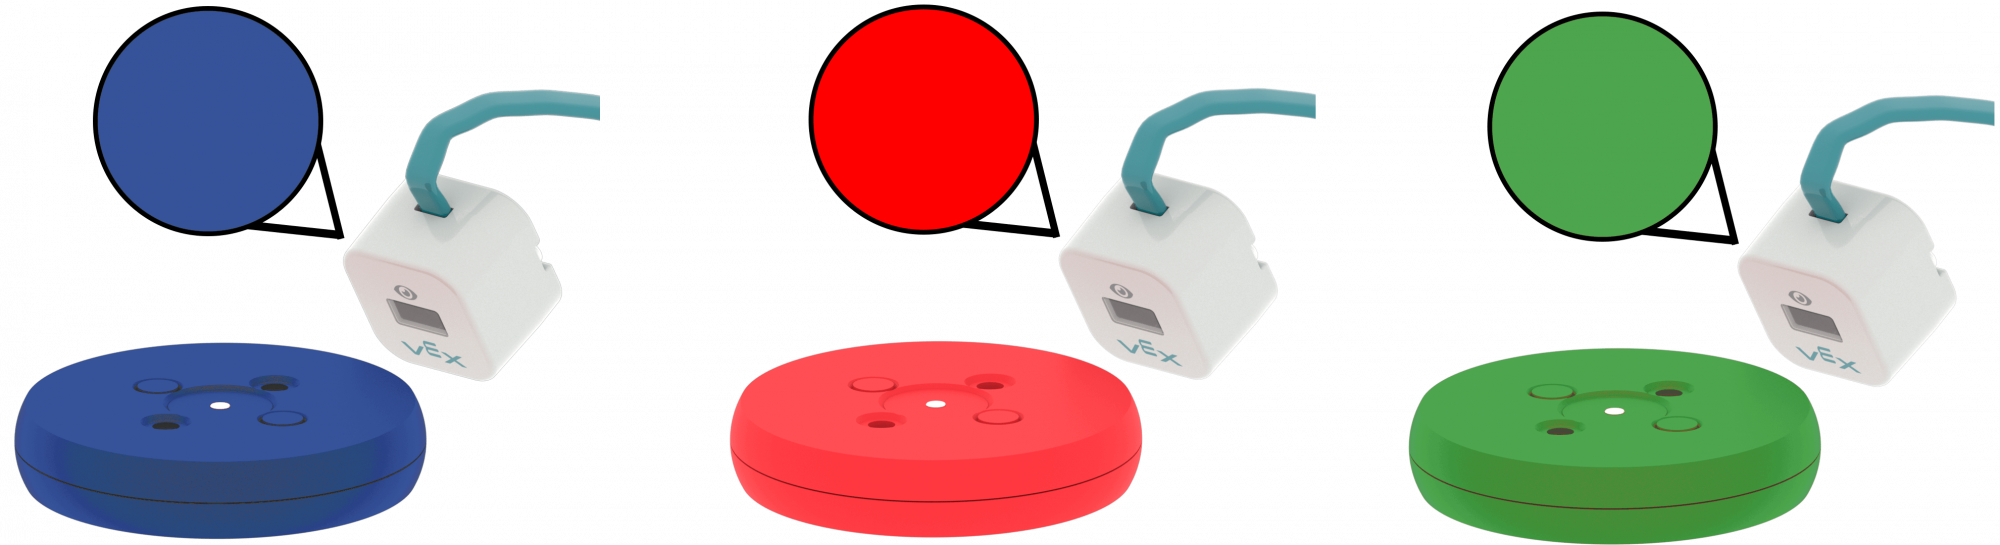
Students should add the three colored Disks to the Field to create the color disk maze.
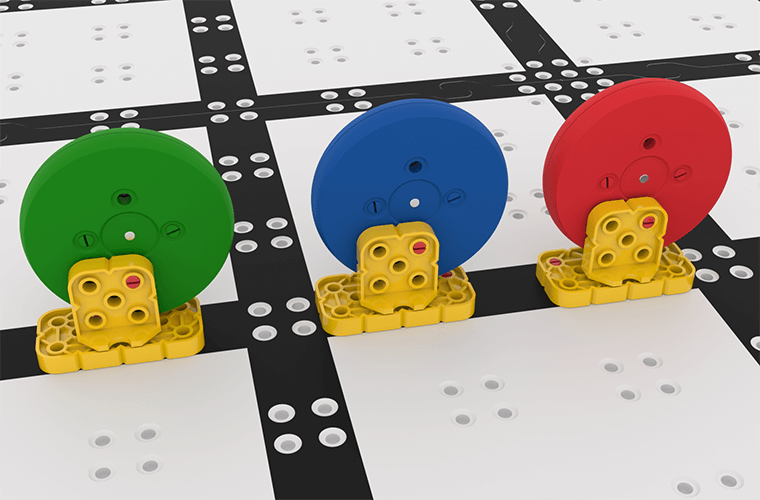
Disk Construction -
Once the Disks are added, students should then place their Code Base at the start of the color disk maze (with the Eye Sensor lined up on the black line of the Tile) and start the project. Have students observe how the Code Base responds when the Eye Sensor detects the colors green and blue. Once the project is done running, instruct students to stop the project.
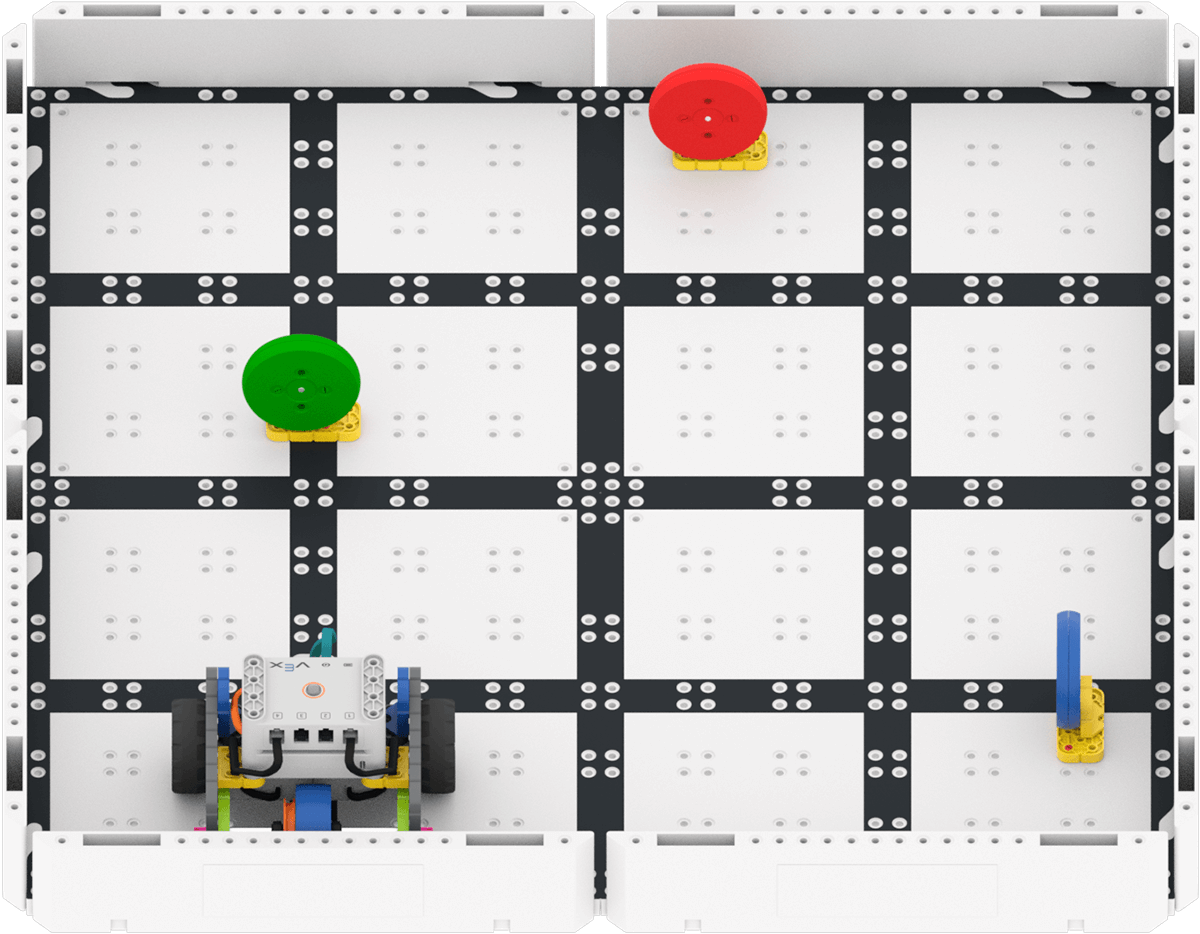
Color Disk Maze -
Students will now edit their code to include the Red Disk. Model for students how to add additional blocks to their project so the Code Base drives to the Red Disk and stops.
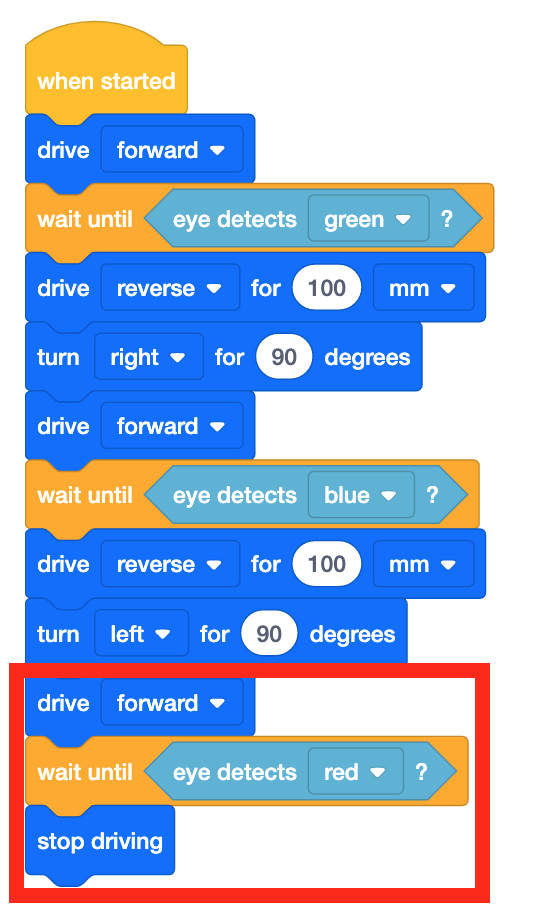
Color Disk Maze: Add Detect Red - Have students place their Code Base at the start of the color disk maze and once again start the project. Once the project is done running, instruct students to stop the project.
- FacilitateFacilitate a discussion with students while they edit and test their projects.
- About how far away from a Disk does the Code Base get before detecting the color? Estimate or use your hands to explain how far.
- What do you think would happen if the last block in the project was a [Drive] block? Would the Code Base know when to stop driving?
- RemindRemind students that the Eye Sensor must be attached to the Brain before powering the Brain on in order to work properly. If the Eye Sensor is attached or removed after the Brain has already been powered on, the Brain must be power cycled (turned off and then back on) in order for the Eye Sensor to function properly.
- Also, remind groups to check their parameters after recreating the project to ensure they match with the image of code.
- While the projects are running, remind students to open the Monitor window and to observe when the Eye Sensor detects a color.
Eye Sensor Detects Color - AskAsk students what devices or items they can think of that use eye sensors. Some examples could include smart doorbells or cameras with motion sensors.