Engage
Launch the Engage Section
ACTS is what the teacher will do and ASKS is how the teacher will facilitate.
| ACTS | ASKS |
|---|---|
|
|
Getting the Students Ready to Build
Let’s learn more about My Blocks in VEXcode GO together!
(If students do not have a pre-built Code Base 2.0 - Eye + Electromagnet from the previous Lab, allow 10 - 15 minutes for students to build it prior to the Lab activities.)
Facilitate the Build
-
InstructInstruct
students to join their groups, to get ready to learn about My Blocks in VEXcode GO together! First, the class is going to watch the My Blocks tutorial video in VEXcode GO, then you will build your own [My Block] together.
- Have students establish the roles they will have in the Lab. Use the Suggested Role Responsibilities slide in the Image Slideshow as a guide for students to complete this sheet. To save time, students can reuse the Roles & Responsibilities sheet from Lab 3, and you can decide which role will be building the [My Block] during Engage.
-
DistributeDistribute
a tablet or computer with VEXcode GO to each group. You may want to project your screen, so you can view the tutorial video in VEXcode GO as a class, and so students can follow along with building the [My Block] more easily.
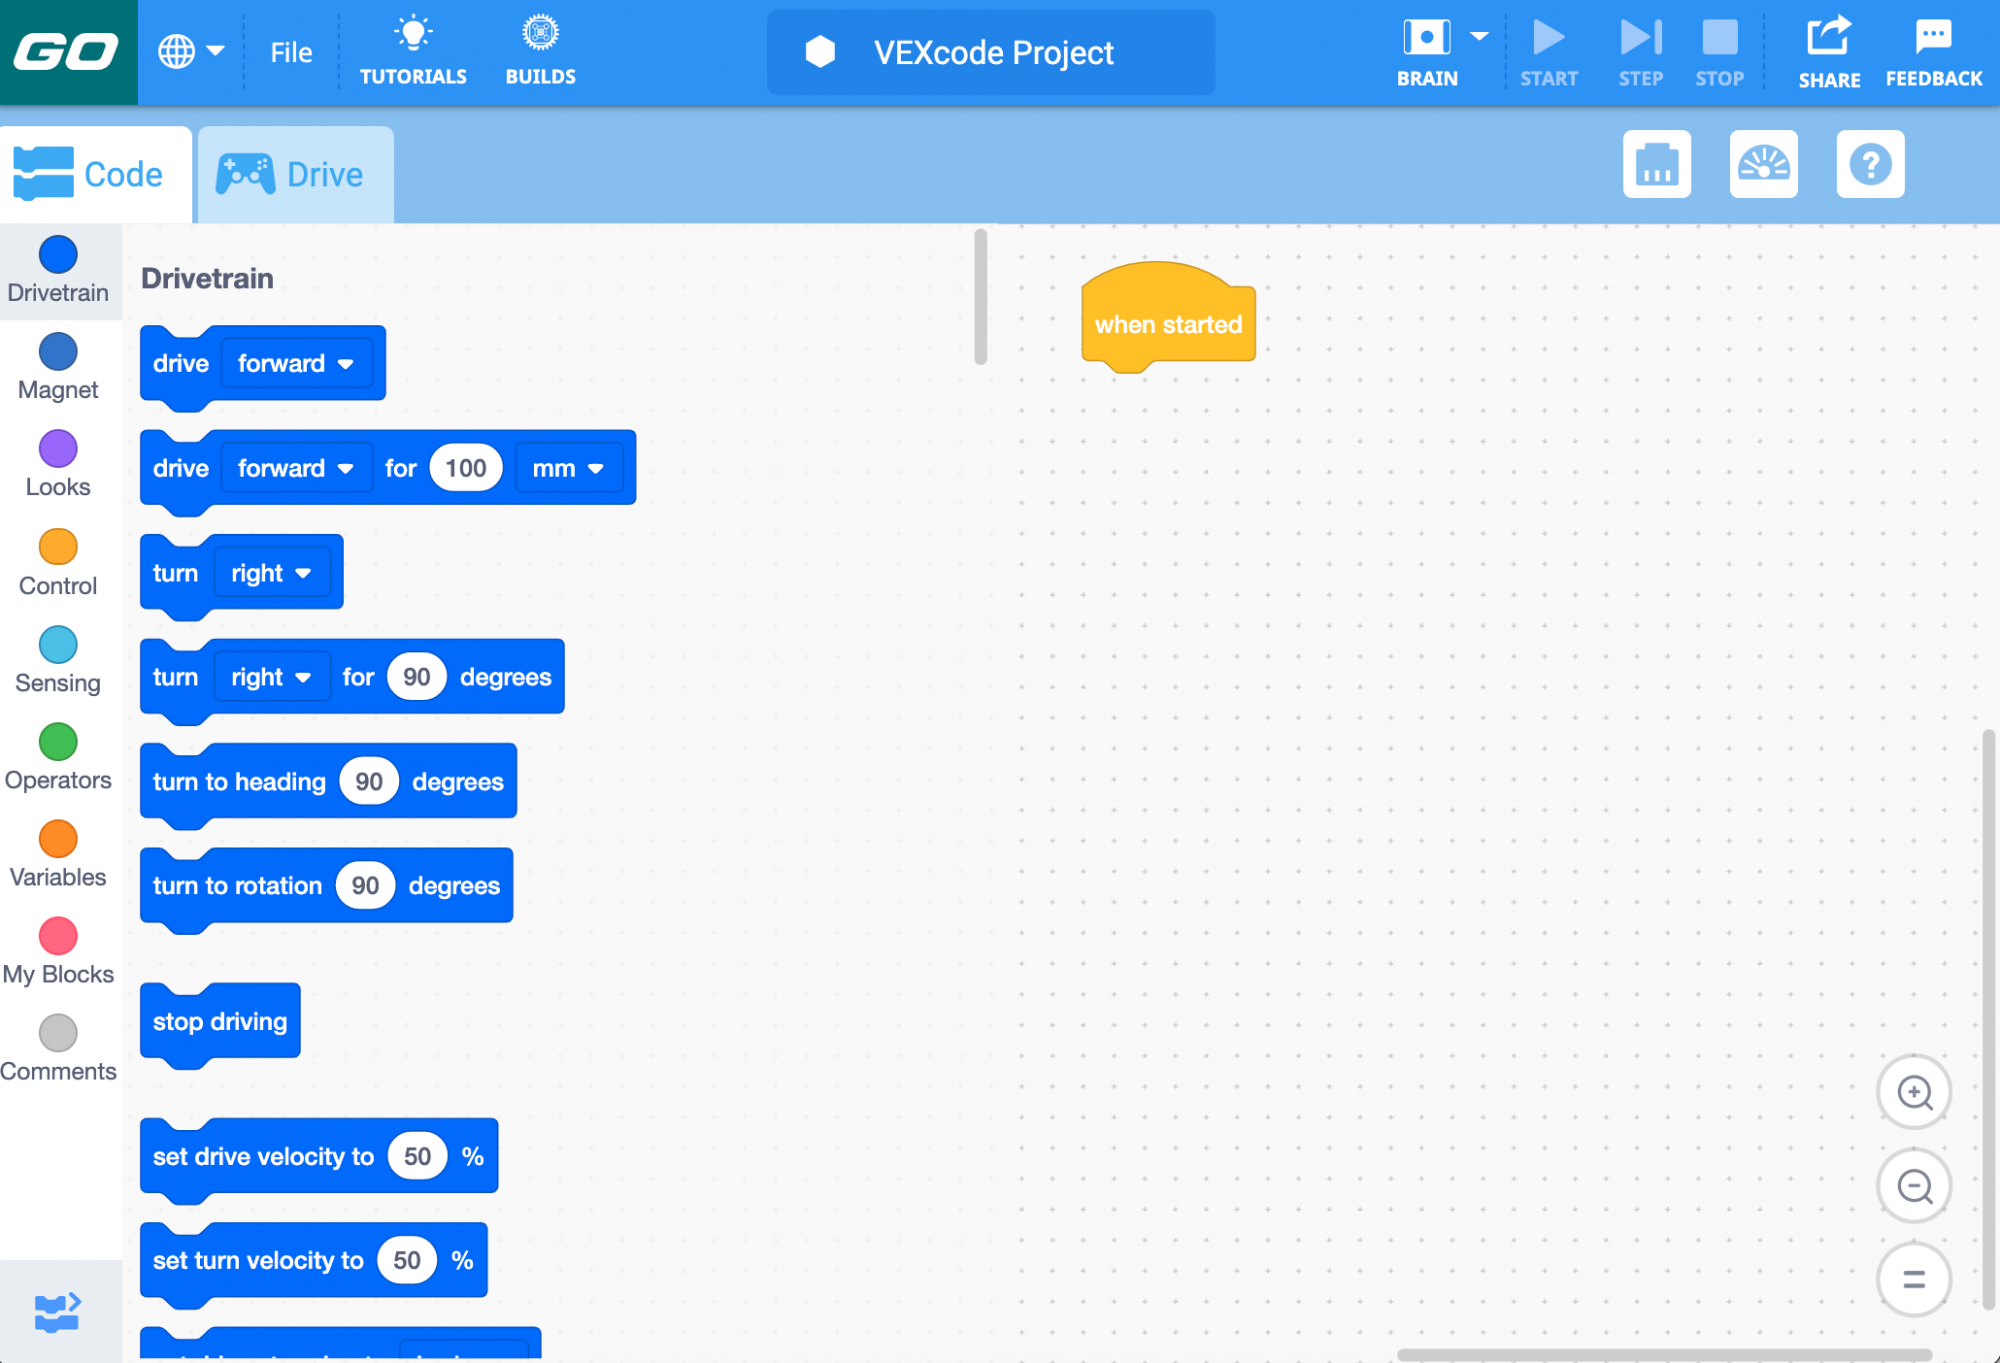
Open VEXcode GO - Students will collect their robots and Disks after the group instruction is complete.
-
FacilitateFacilitate
students getting VEXcode GO ready in their groups, and viewing the My Blocks tutorial video.
- Students should open VEXcode GO on their tablet or computer. They should then configure VEXcode GO for Code Base. If necessary, model the steps from the Configure a Code Base VEX Library article and ensure students can see the Drivetrain blocks in the Toolbox.
- Either as a class, or in their groups, select ‘Tutorials’ from the Toolbar, and select ‘My Blocks’. Have students watch the My Blocks tutorial video below.
After watching the tutorial, facilitate a conversation about how [My Blocks] are used with questions such as:
- What is a [My Block] used for in a VEXcode GO project?
- To use the same sequence of blocks multiple times in a project.
- What is one reason you might want to use a [My Block] in your VEXcode GO project?
- To break up longer projects to make them easier to work with.
- Why do you think a [My Block] could make our project to collect multiple Disks easier to work with?
- So that we only have to create the sequence to sort the Disks once, then we can reuse it.
Facilitate building the [My Block] in VEXcode GO.
- Have students open their Sort All project from Lab 3.
- If students do not have access to their project from Lab 3, you can share the Sort All - VEXcode GO Blocks File project with students, or download it on student computers or tablets. Then, have students open the file in VEXcode GO.
- Or, you can display the project and have students recreate it.
- Together with your students, identify the sequence of blocks that sort the Disk. This sequence is repeated, no matter where the Disk is located the Field, or what color the Disk is.
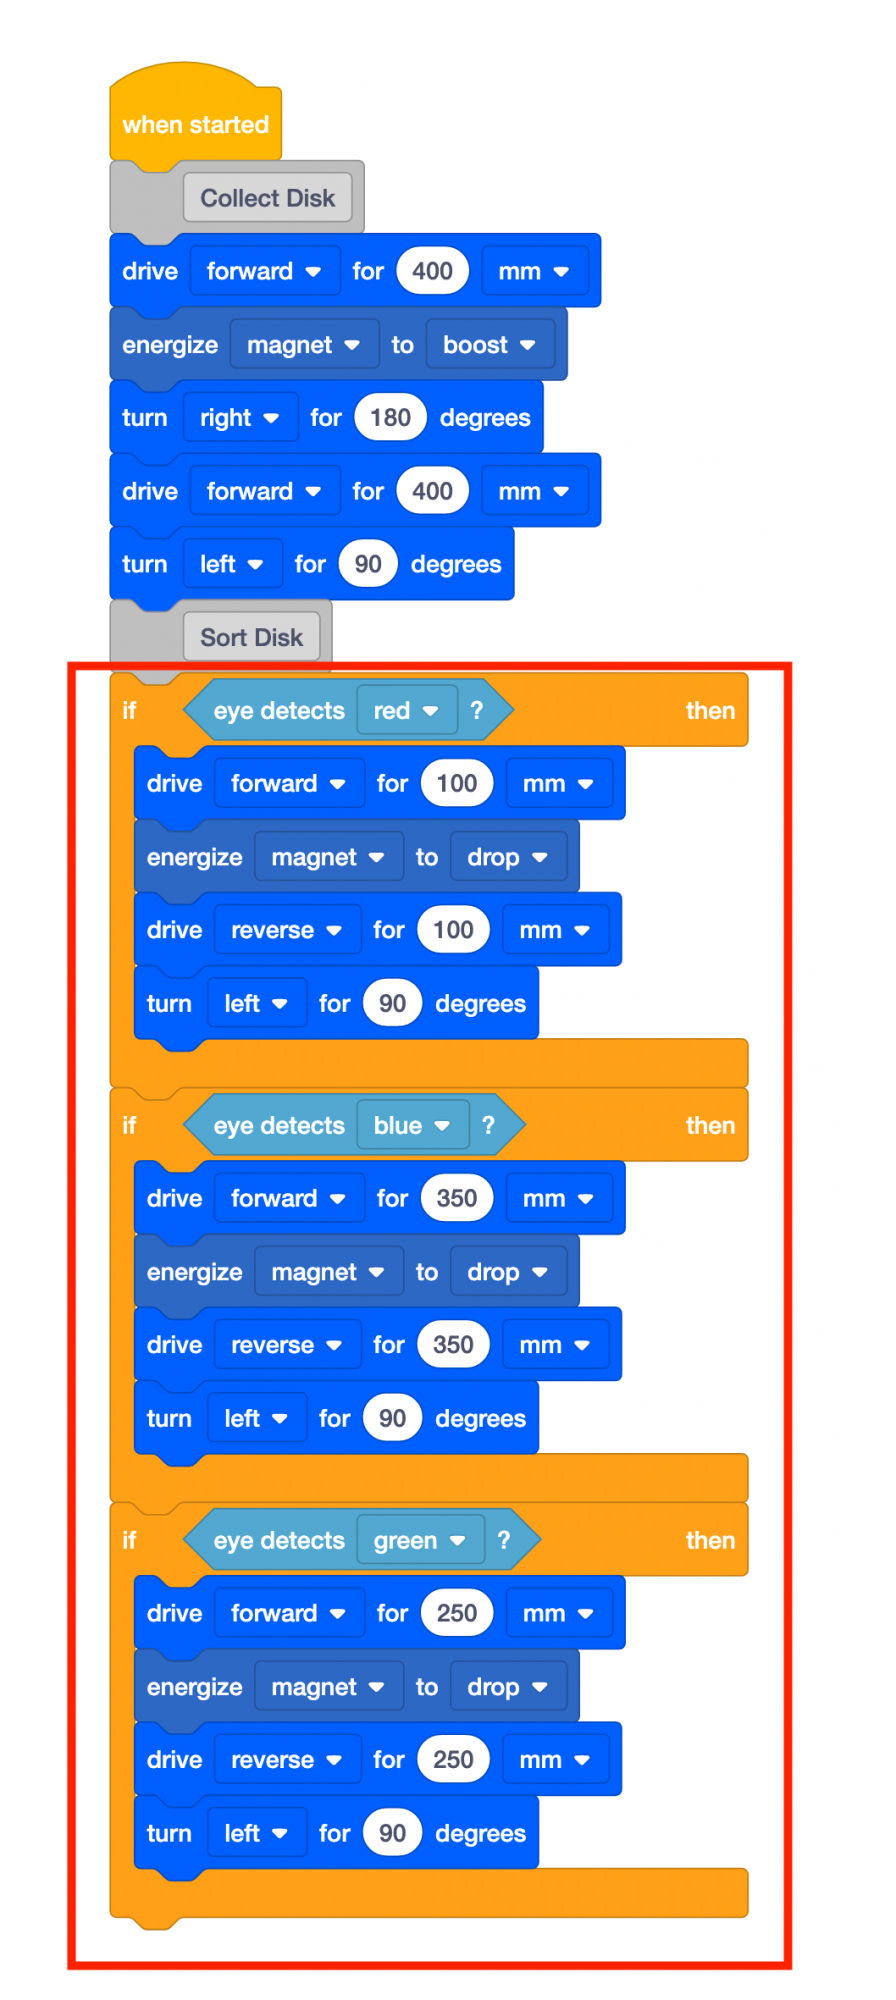
Identify the Sort Disk pattern - Explain that this sequence of blocks will be used multiple times in our project, so this is the code that we will use in our [My Block]. Now we will follow the steps we saw in the 'My Blocks' tutorial to make our [My Block]. First, select ‘My Blocks’ from the Toolbox. Then, select ‘Make a Block’.
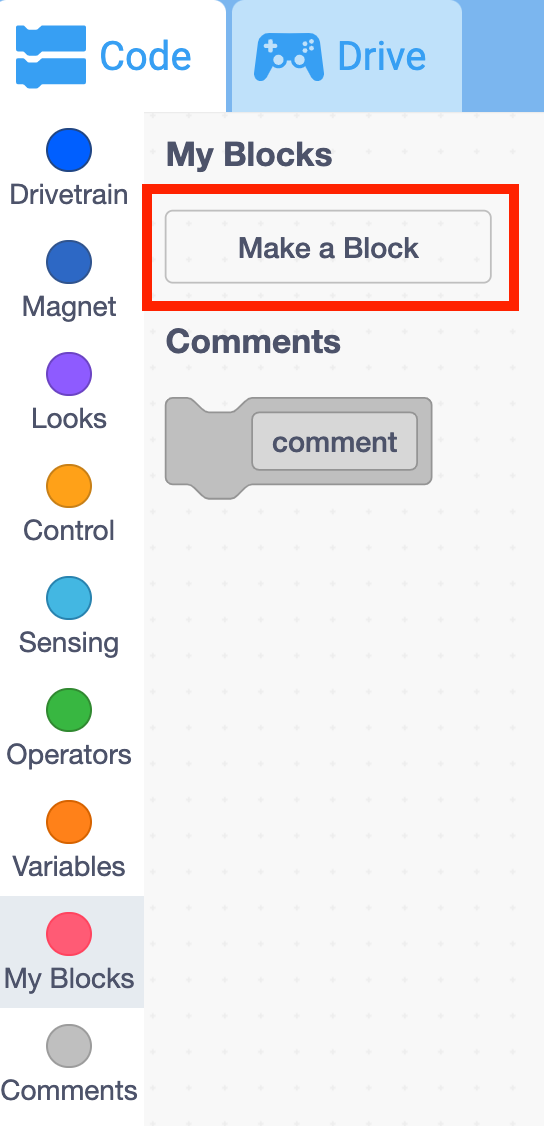
Select 'My Blocks' and "Make a Block" - Customize your [My Block] by selecting the ‘block name’, and rename it ‘Sort Disk’. Then select ‘OK’ to customize your [My Block].
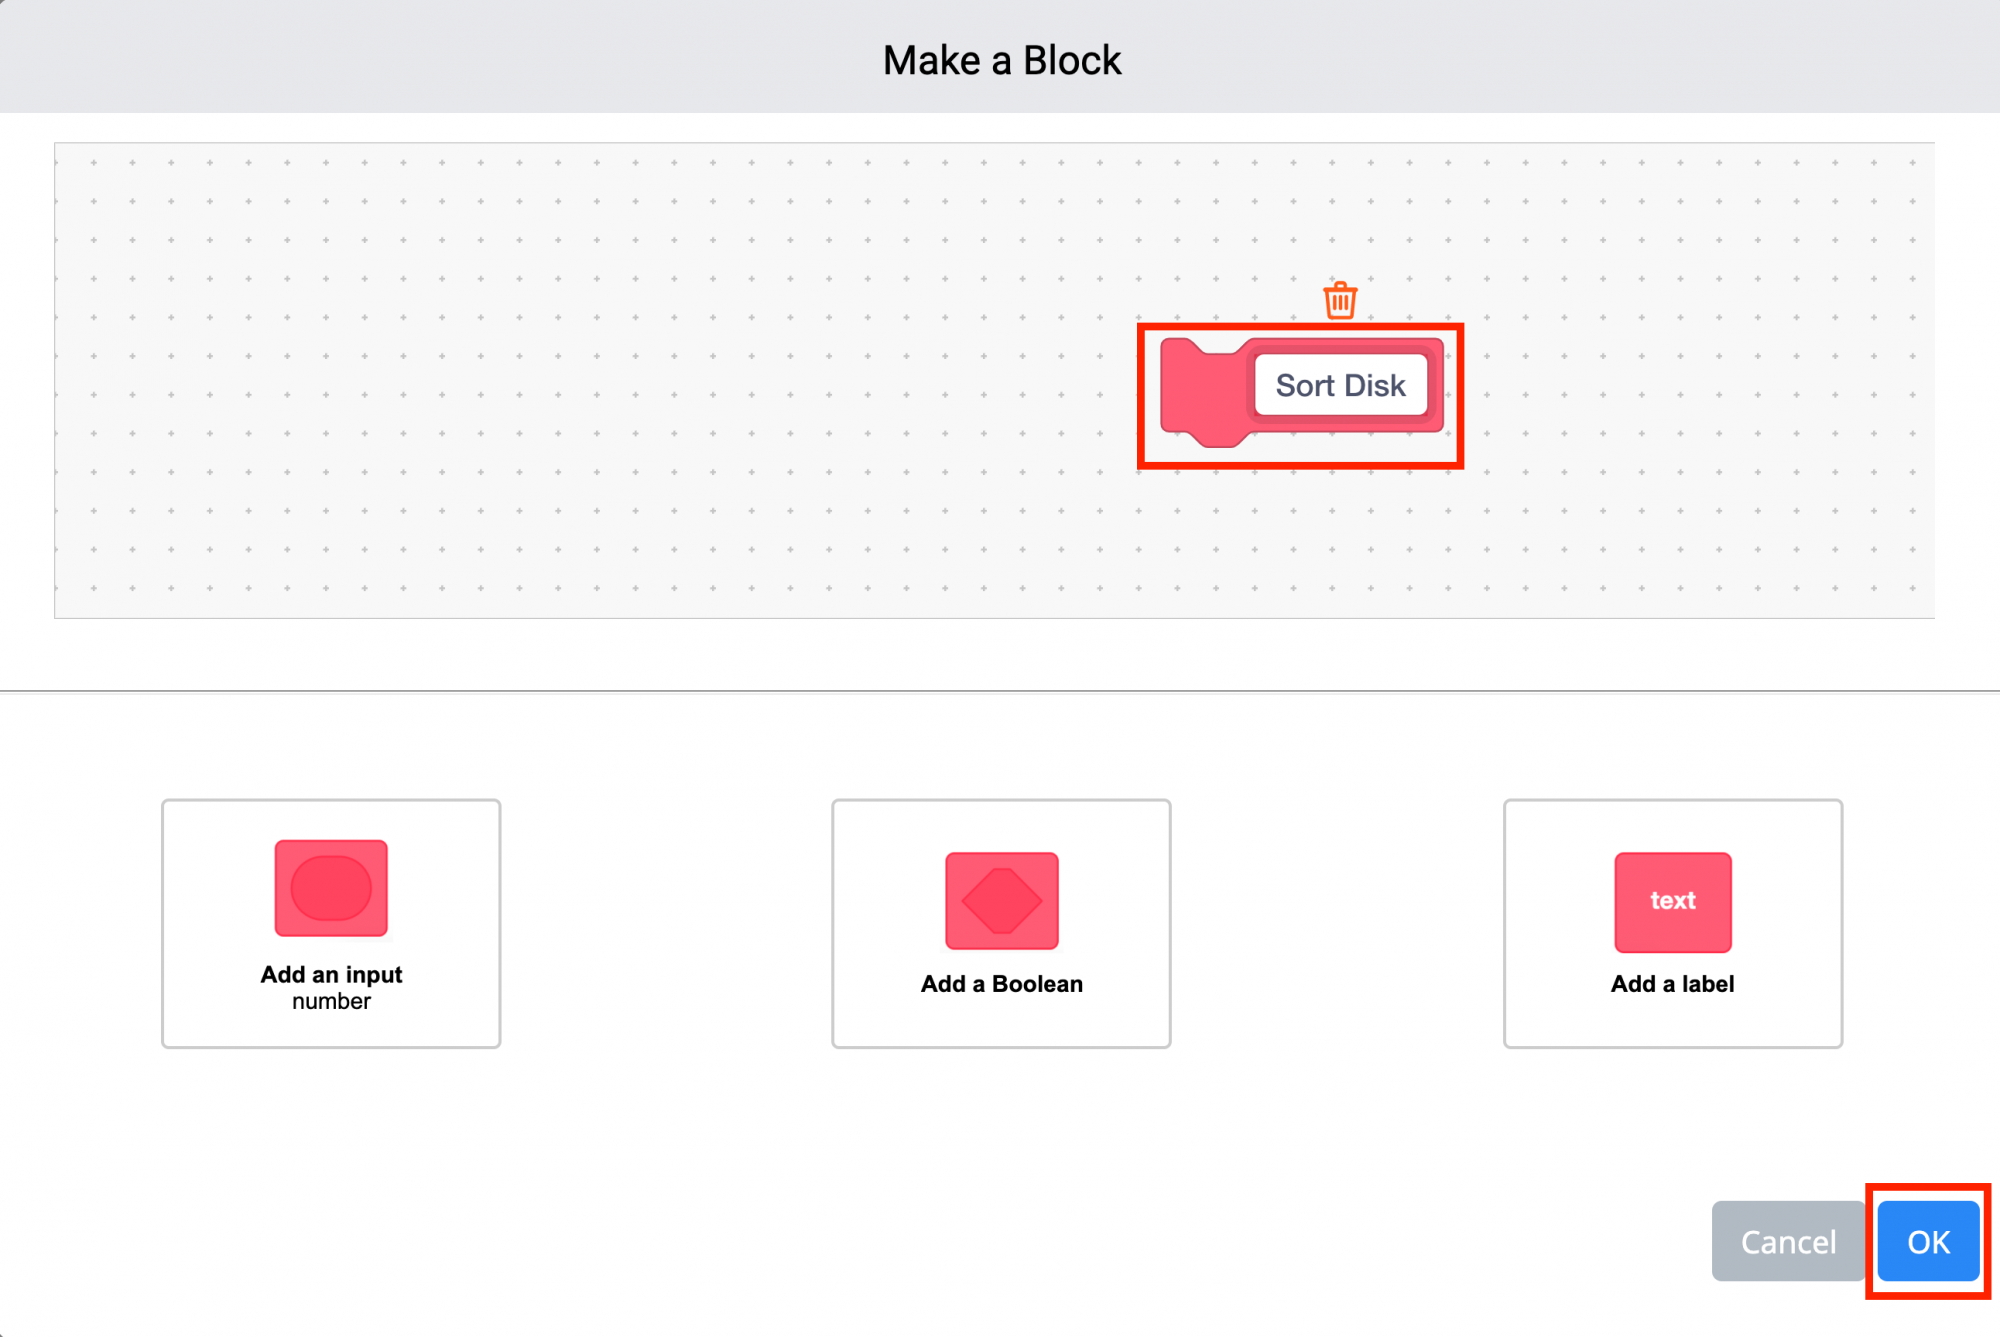
Customize your [My Block] - Now that the [My Block] has been created, the [Define] block will appear. (Drag this to the right of your project, if needed.)
- Check in with students to make sure that everyone can now see a new hat block, that reads 'define Sort Disks'. Call their attention to the fact that this is a hat block, and like the {When started} hat block, it can only have blocks attached beneath it. The blocks we add to the [Define] block, will be the sequence that we want to reuse in our project.
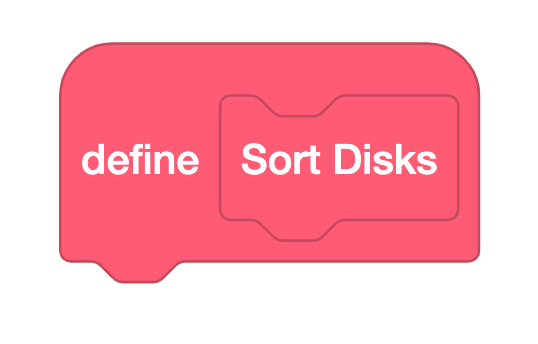
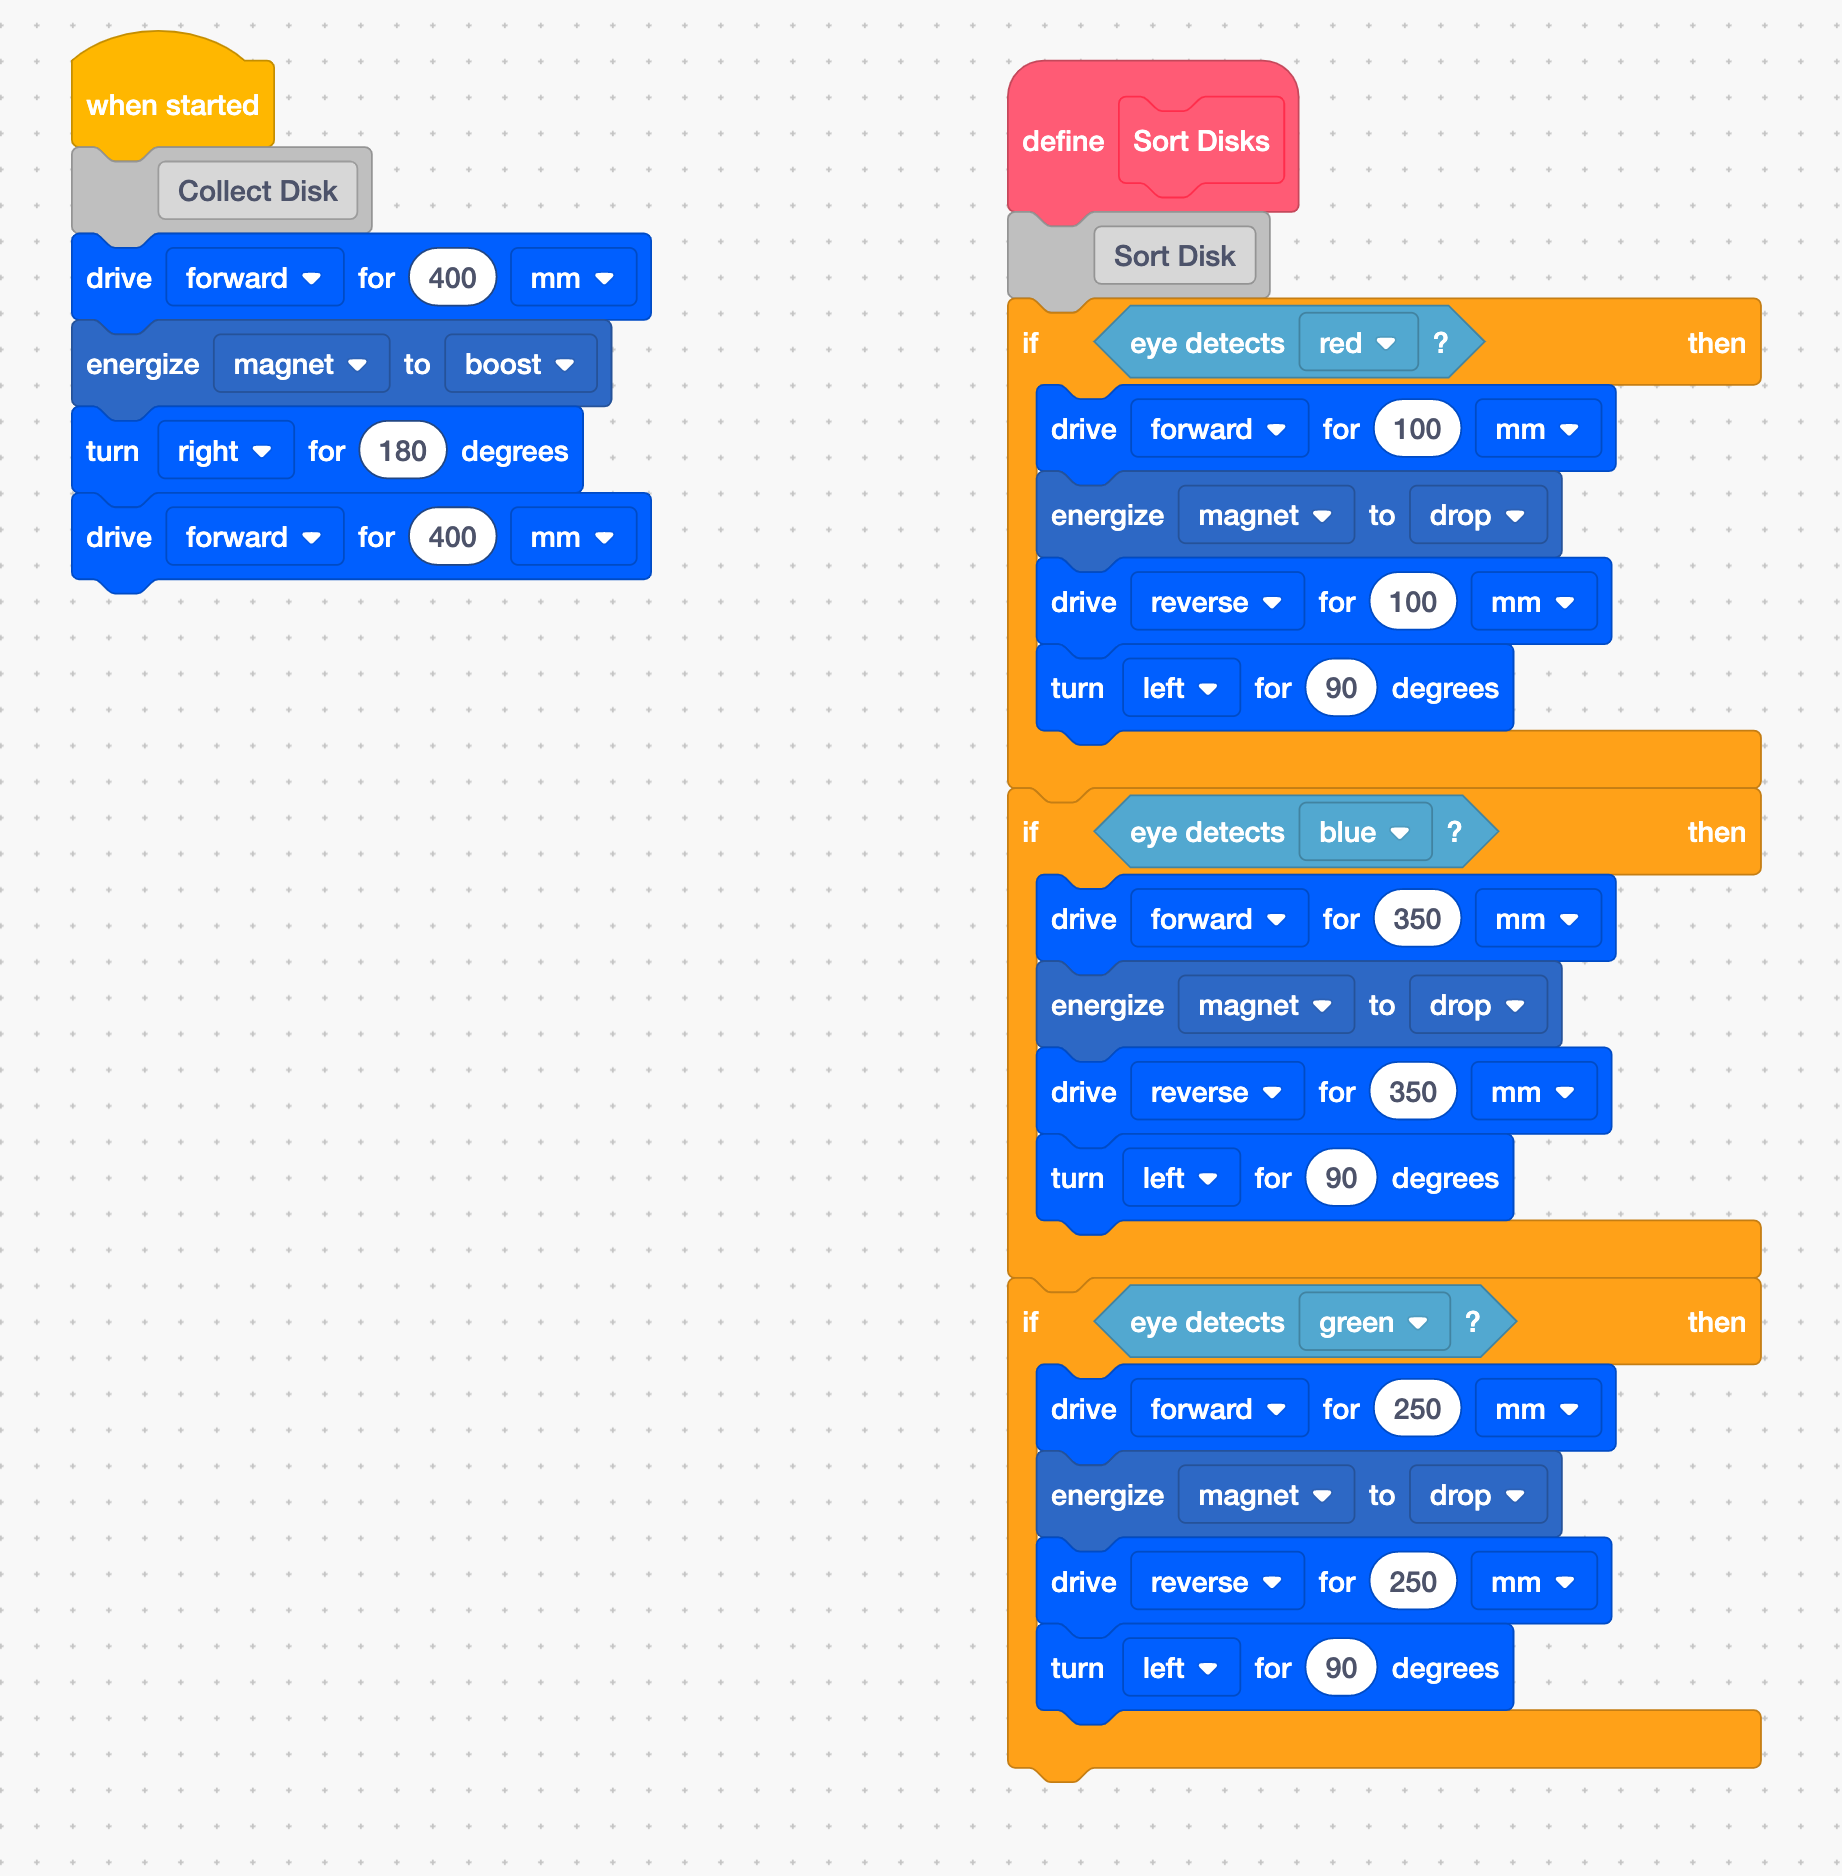
[Define] block - Next, drag the sequence of blocks to sort the Disks from the Sort All project, and attach them to the [Define] block. Your project should now look like this, with the sequence of [If then] blocks attached to the [Define] block.
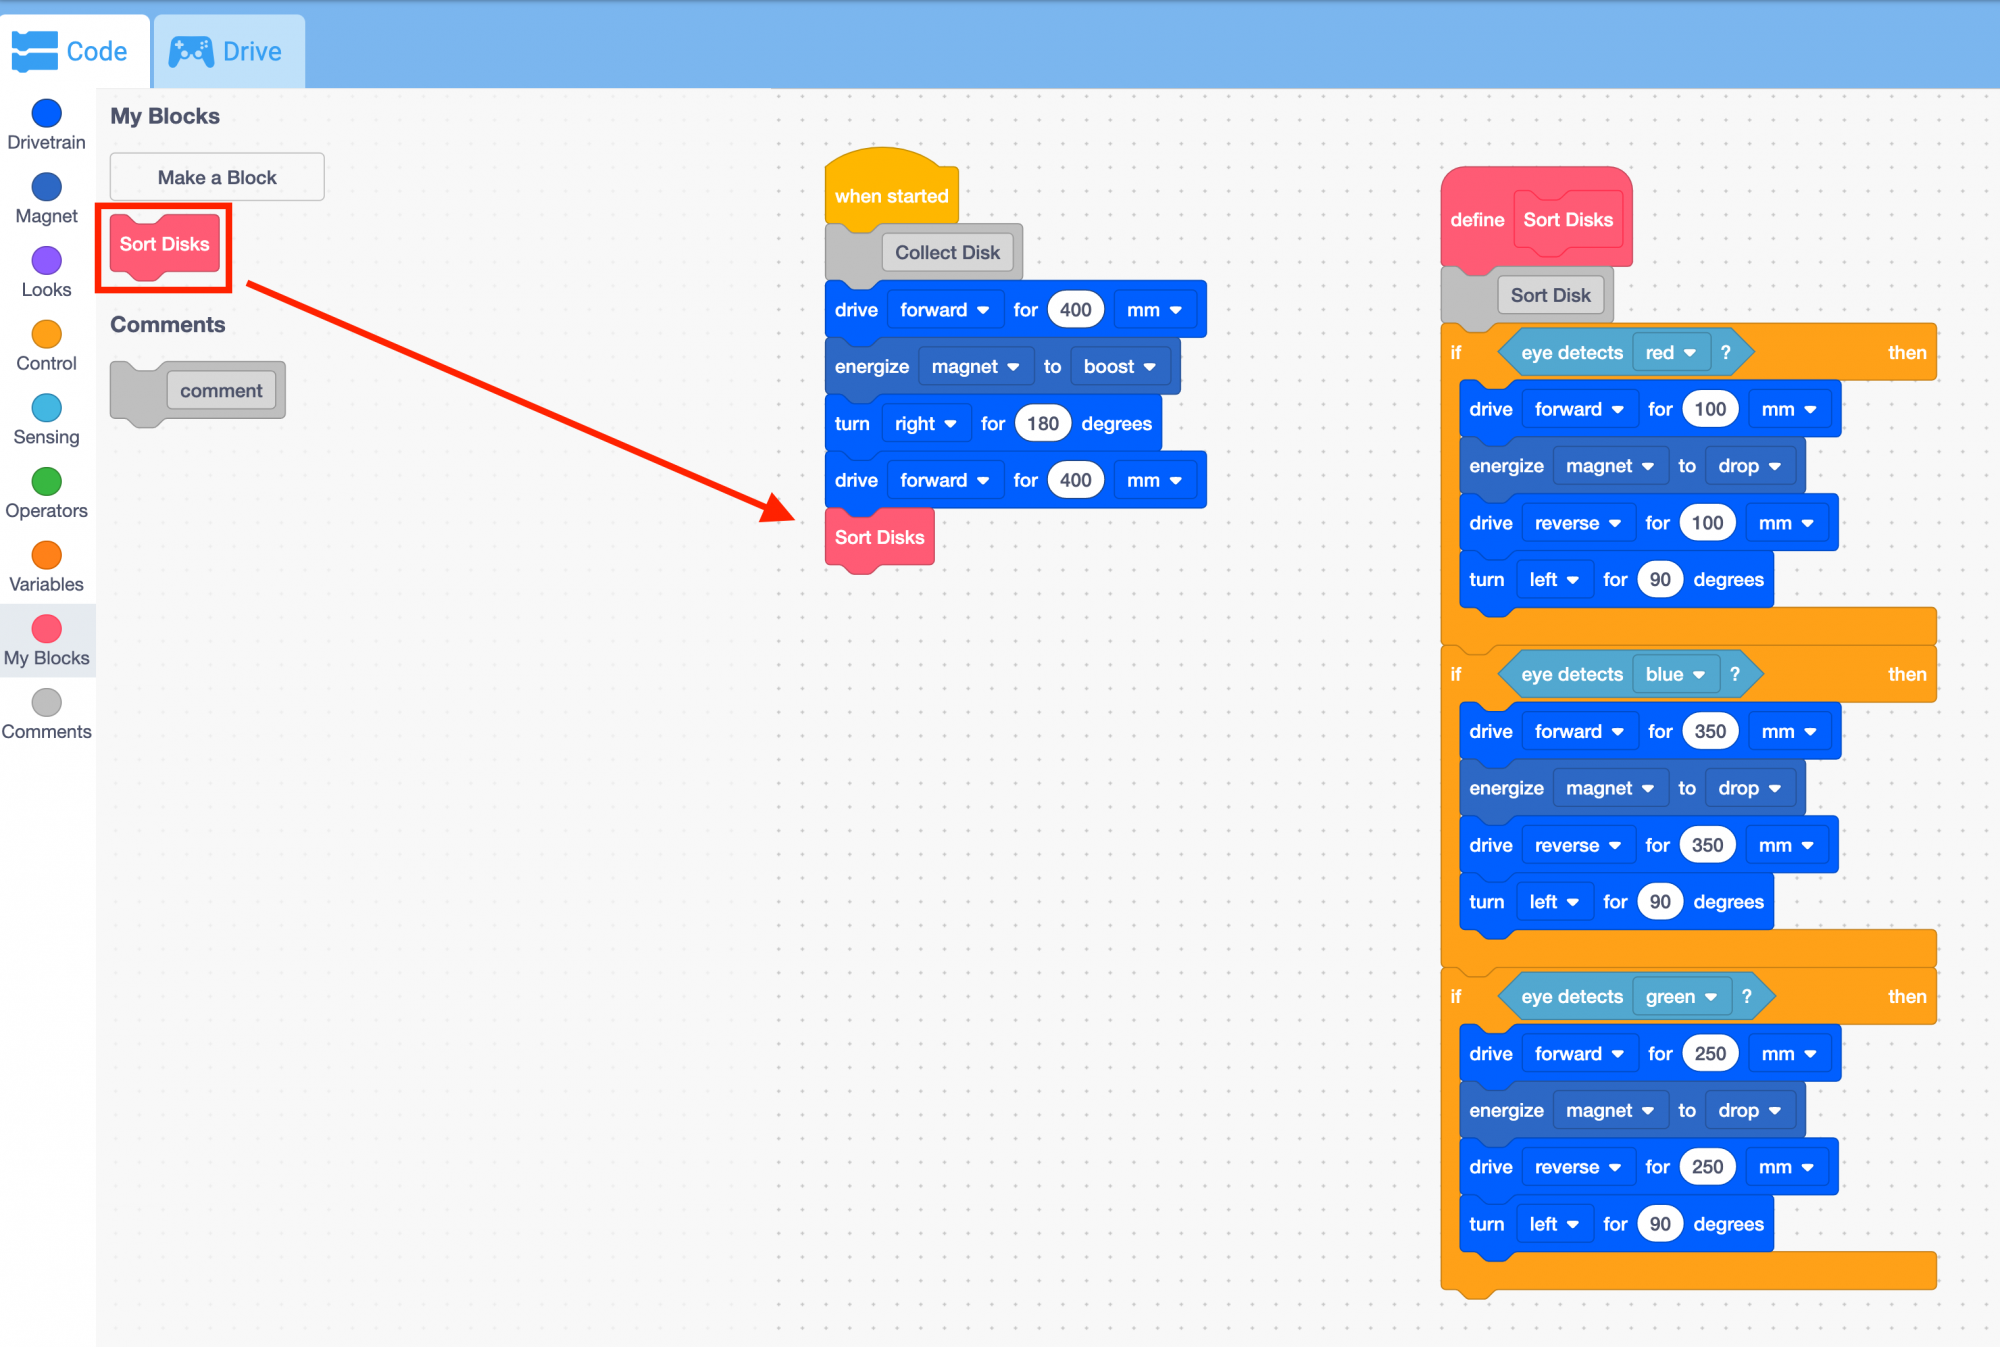
Drag the Sort Disk sequence to the [Define] block - Now that you have "defined" what your robot will do with the [My Block], you will add it to your project. Together with your students, look at the stack of blocks beneath the {When started} block – this is the sequence used to collect the first Disk, and return it to the Mars base. What does the Code Base need to do next? Sort the Disk! Add the [My Block] to your project.
Add [My Block] to your project Facilitate a demonstration for the class to trace the project flow as the Code Base executes your project with the [My Block].
- Turn on and connect your Code Base to VEXcode GO if you have not done so already. See the Connecting articles of the VEXcode GO VEX Library for device-specific steps to connect the VEX GO Brain to your computer or tablet.
- Place your Code Base and a Disk on the Field, as shown in the image below.
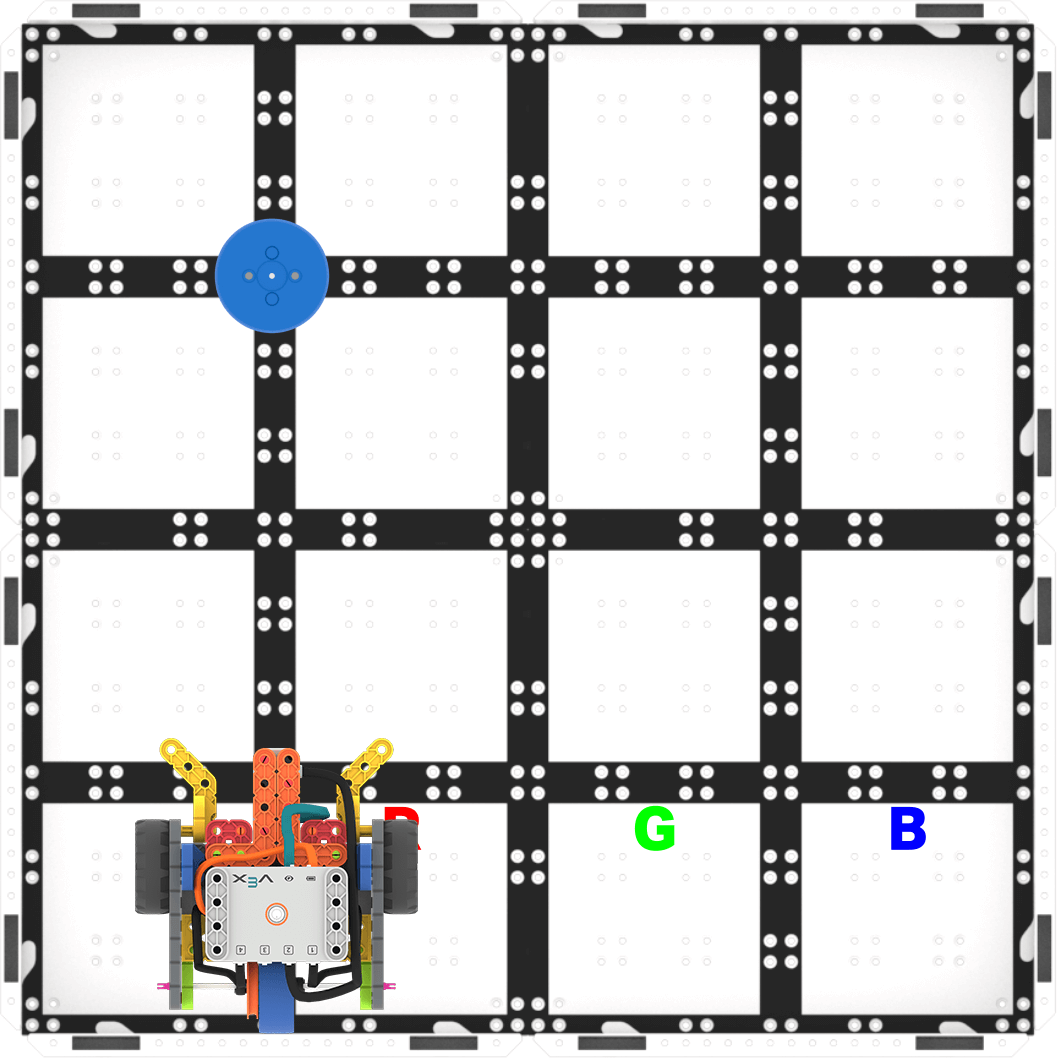
Setup to test your project - Make sure that students can see both the robot and your screen with VEXcode GO, then start the project. As the project runs, have students pay attention to the highlighting of the blocks in the project. Call their attention to when the highlight moves to the [Define] block, and narrate what is happening in the project when that highlight moves from one stack of blocks to the other. You may want to restart the project multiple times or step through the project to slow it down, to help students trace the project flow with the [My Block].
- Ask questions to help students trace the project flow with you, like:
- When will the highlight "jump" to the [Define] block? What makes you say that?
- When it reaches the [Sort disk] block, the highlight will move to the [Define] block and run the sequence.
- Why did the highlight "skip" an [If then] block? What condition was False? Which was True? How did that affect the way the highlight moved?
- The highlight will move to the [If then] block where the condition is True. It will skip the [If then] blocks where the condition is False. For example, if the Code Base picked up a Blue Disk, the highlight would skip the [If then] blocks with the red and green conditions and only run the one with the blue condition.
- What if our Code Base picked up a different colored Disk? Would the highlight still go to the [Define] block? Why?
- Yes, the highlight would still go to the [Define] block because the [Sort disk] block will still be executed, no matter what color the Disk is.
- When will the highlight "jump" to the [Define] block? What makes you say that?
- Ask questions to help students trace the project flow with you, like:
Facilitate students getting ready to complete the rest of the challenge with their groups.
- Have students name their project as Geo Challenge and save it to their device. See the Open and Save section of the VEXcode GO VEX Library for device-specific steps to save a VEXcode GO project.
- Draw students' attention to how their project is now set up to collect and sort the first Disk, and now they are going to try to collect two more with their groups!
- OfferOffer positive reinforcement for students who are following directions, taking turns, and paying attention to the process of building and testing the [My Block].

Teacher Troubleshooting
- Check the [My Block] - As students are building their [My Block] with you, ask for frequent check-ins, so that you can make sure that students are following along with the process. If one student is building the project in VEXcode GO, ask their partner if it matches your project, to keep all students involved.
- Check Your Ports - Remind students to check to make sure that they are connecting the Eye Sensor and the Electromagnet into the correct port. The Eye Sensor is plugged into the teal port on the front of the Brain, and the Electromagnet gets connected to Port 3.
Facilitation Strategies
- Think about how your students will access VEXcode GO. Ensure that the computers or tablets that students will use have access to VEXcode GO. For more information about setting up VEXcode GO, see this VEX Library article.
- Gather the materials each group needs before class. For this Lab, each group of two students will need a GO Kit, Build instructions, a computer or tablet to access VEXcode GO, and the Red, Blue, and Green Disks from the Kit. Students will also need access to a Field for testing.
- If students do not have a pre-built Code Base 2.0 - Eye + Electromagnet from the previous Lab, allow 10 - 15 minutes for students to build it prior to the Lab activities.
-
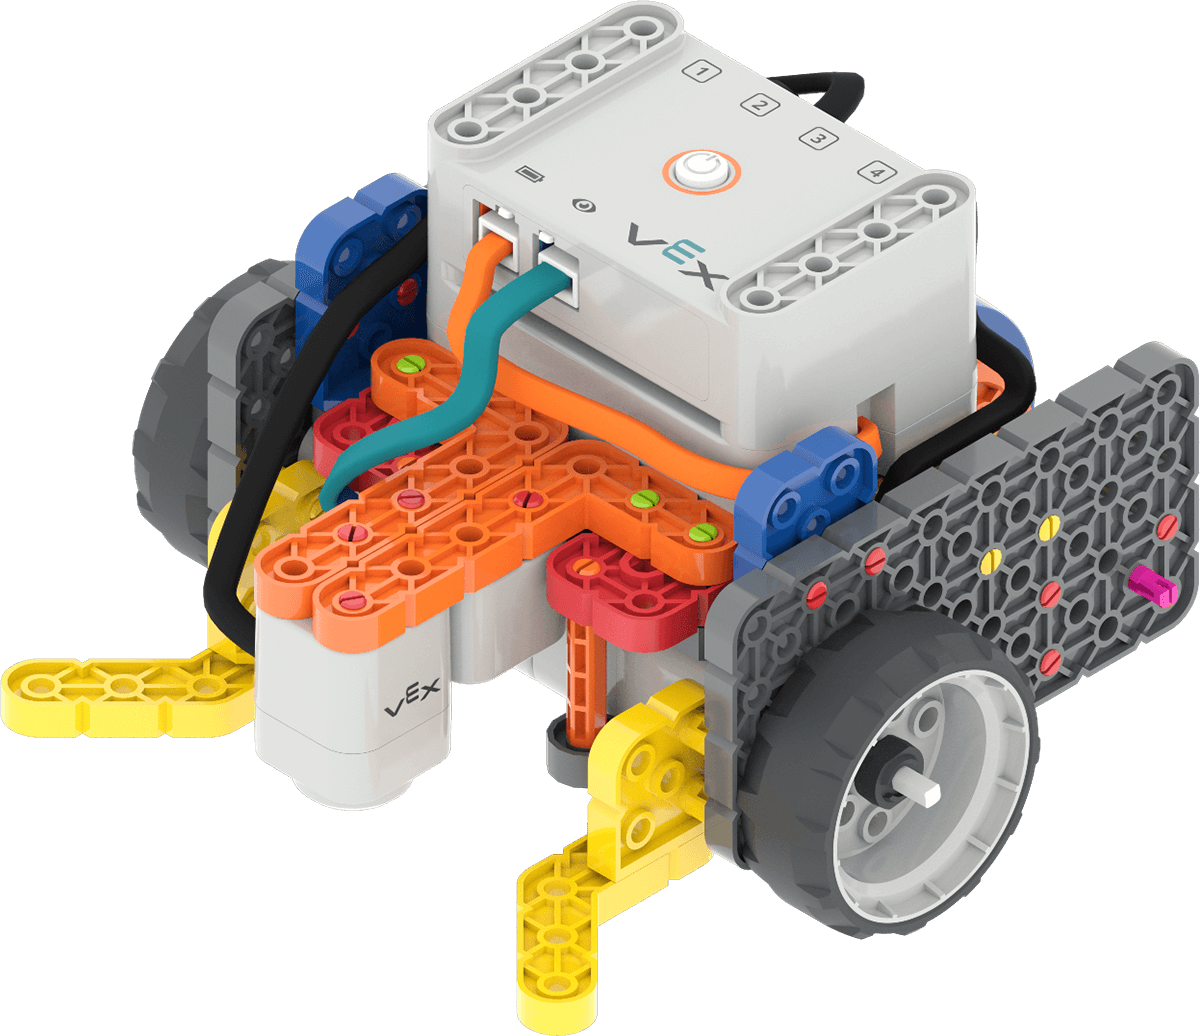
Code Base 2.0 - Eye + Electromagnet - Set up your Fields ahead of time, as shown in the image below, to serve as a testing area for the Code Base. Have these spread out around the classroom to allow students ample space to test their projects. In this image, the Disks are shown in place for the challenge in Play. You may want to mark the starting locations of the Disks and the Code Base, as well as the sorting area locations with a dry erase marker to help students when they are setting up to test their projects.
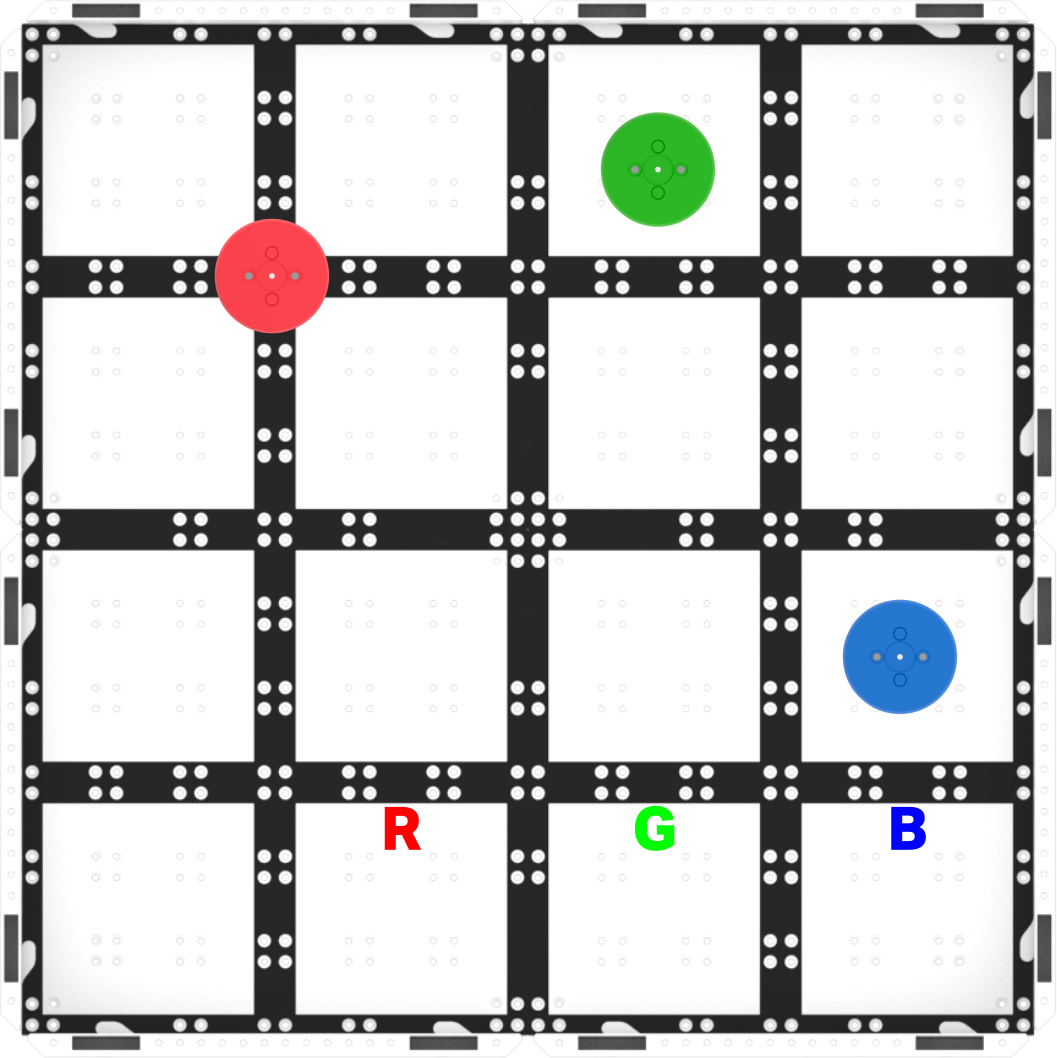
- Write the distances to each Disk on the board for students to reference during the Lab. To keep students focused on the coding concepts during Play, give students the approximate distances to each Disk, so that they are not distracted by measuring.
- To collect the Red Disk - 400 mm (~16 inches)
- To collect the Green Disk - 425 mm (~17 inches), turn, 300 mm (~12 inches)
- To collect the Blue Disk - 150 mm (~6 inches), turn, 400 mm (~16 inches)
- Celebrate challenges as well as successes. This Lab is an opportunity for students to apply what they have learned throughout the Unit, and students will have varying levels of difficulty and success. To reinforce the growth mindset and the value of perseverance in coding, celebrate the moments where students are challenged, and showing persistence. Encourage groups to support one another, and share strategies that they have learned to help one another.