Play
Part 1 - Step by Step
- InstructInstruct each team to begin work on their extension for the Code Base. Ensure each group has access to a VEX GO Kit to gather materials they would like to use for their design. Model for students how to use the iterative design process for the construction of the extension.
-
Make sure the students are able to verbalize the intention of the activity before they start. They are to design and build an extension for the Code Base that will collect the most pieces of “trash.”
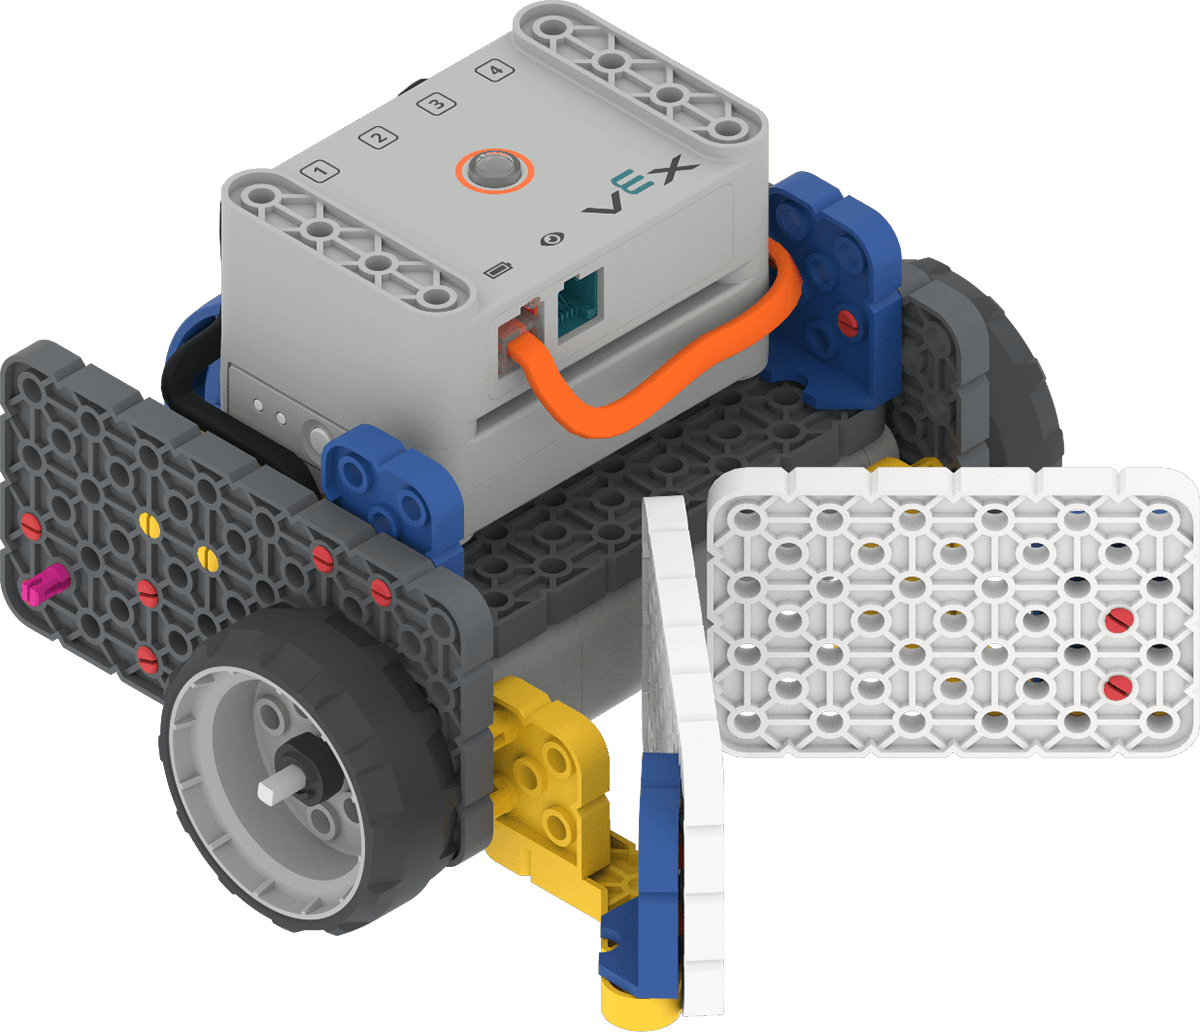
Code Base with Example Plow Extension
-
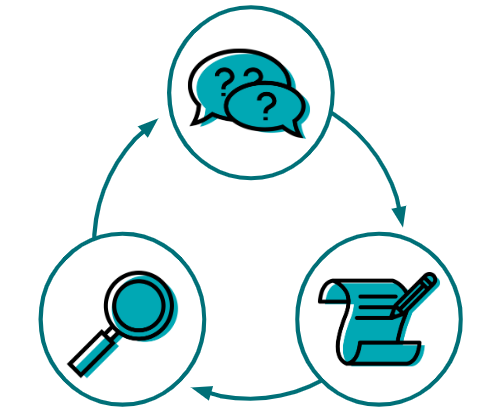
- ModelModel for students how to use the Engineering Design Process for the construction of the extension. Show the Engineering Design Process image in the Lab 1 Slideshow and point out the arrows between each section leading students through each step again and again.
- Iterative means they will need to try and test again and again to make the best extension they can.
- As groups begin to say they are “done,” ask them about what does and does not work on their extension.
- Encourage students to keep improving their designs.
- If you have students that are stuck or struggling, you can guide them to make this plow extension then have them adjust it as they like.
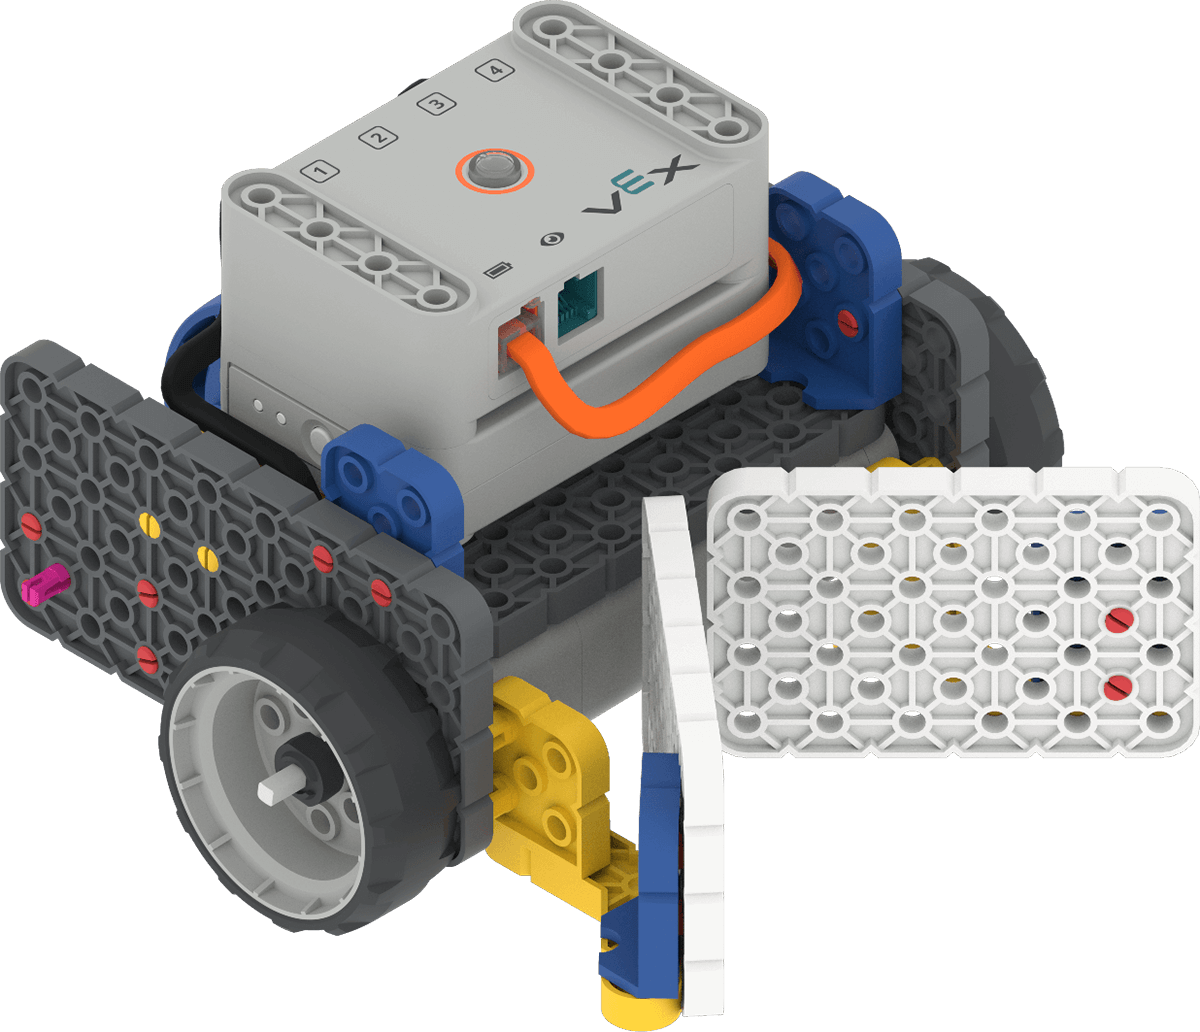
Code Base with Example Plow Extension -
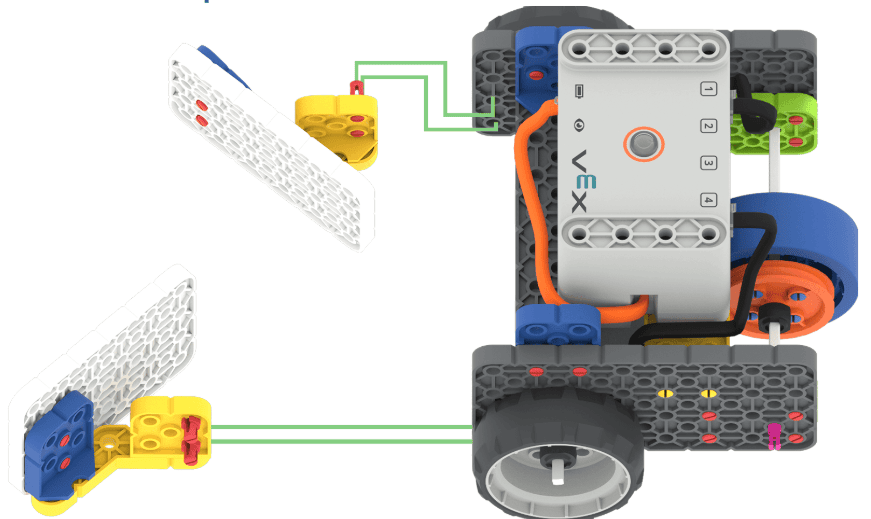
Use this diagram to help students build the example plow extension.
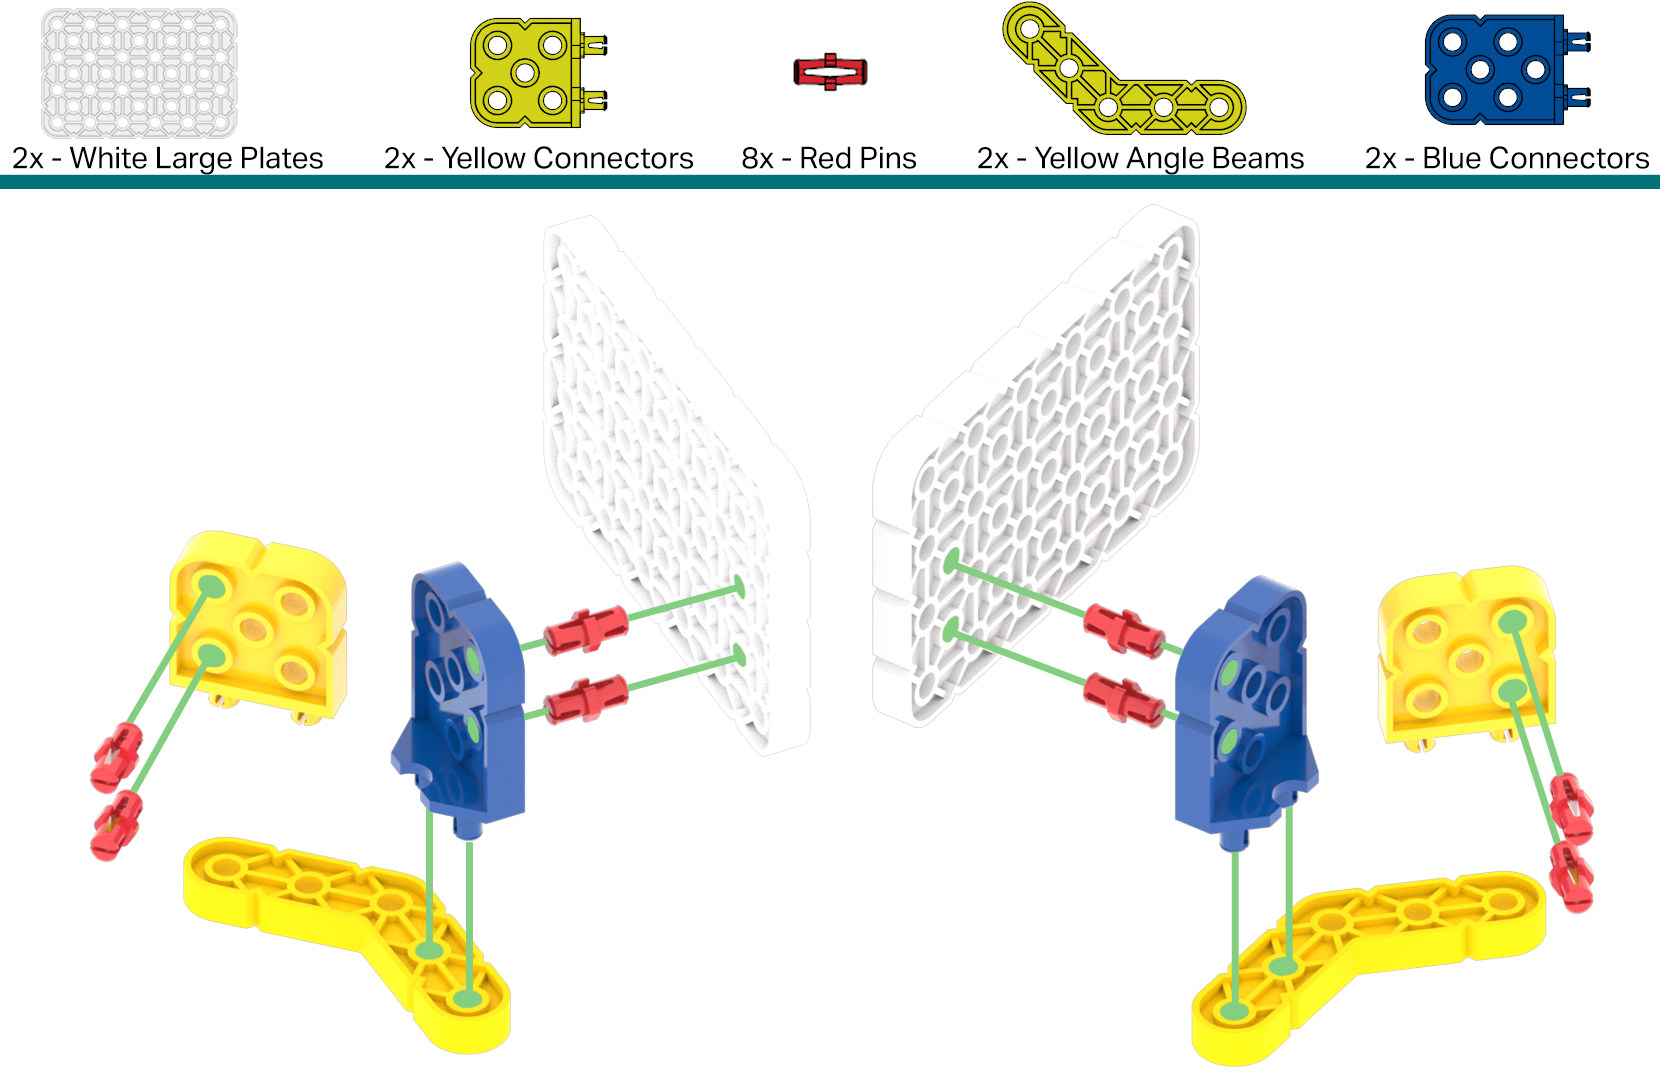
Plow Extension Assembly - Each side of the example extension connects near the wheels of the Code Base, as shown below.
- FacilitateFacilitate a discussion with the students by asking the following questions:
- What is the goal for your extension? How many pieces of trash would you like it to collect?
- Where will the extension be added to your Code Base robot? To the front? Back? Side? Can you explain using gestures?
- What is the shape of your extension? How did you connect the pieces for it?
- How will the Code Base robot move once the extension is attached? Can it still move as intended?
- Were there any parts of your original design that did not work when you tried it?
- How many times did you have to iterate on your design?
- What part of the Engineering Design Process was most helpful?
Note about extension: As students design their extension, they should make sure the extension does not touch the ground or otherwise impede the movement of the Code Base.
- RemindRemind students to record their observations of each trial on their EDP Organizer sheet. Remind students to keep trying even when they fail at first. Students will need to go through multiple iterations of their designs and builds. Note where and how a design does not work. Guide students to use this information to improve their design. Remind them that this is an important part of the Engineering Design Process.
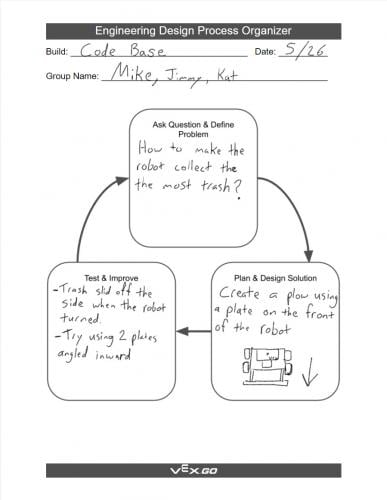
- AskAsk students if they have ever had to change something after failing the first time? Refer to their work on the EDP Organizer. Ask students if they feel trying something multiple times is a valuable skill for a future job? Discuss the importance of being able to be iterative in future jobs.
Mid-Play Break & Group Discussion
As soon as every group has created a basic extension, come together for a brief conversation.
- How will your design work once attached to the Code Base robot?
- What pieces did you use to create your extension?
- What questions did your group have as you were designing your plan?
- What major components to your design did you change and why?
- How did the Engineering Design Process help with your design process?
Part 2 - Step by Step
- InstructInstruct each team to begin creating a 30 second speech to describe the design for their extension. Model for students an example of a 30 second speech about something in the classroom. This could be about how one wall in the classroom is decorated or how the certain desks are in one place versus another. Be creative! This could also be a speech about something else the students are learning about in another subject. Each speech given by the students should accomplish:
- How the extension works.
- What pieces the extension uses.
- Why the group decided on the current design for the extension.
- How they used the Engineering Design Process for their design.
Once a group has given their speech, leave 5 minutes before the next group starts for a short discussion. Make sure the students are able to verbalize the intention of the activity before beginning.

- ModelModel for students how to properly describe their extension design using spatial language. Some examples could include, “these two pieces were attached together in order to make the extension longer,” or “the extension was added to the lower part of the front of the Code Base robot, so that it could reach trash closer to the ground.”
- FacilitateFacilitate a discussion with the students by asking the following questions:
- When you were designing your extension, were you worried about how big or small it might be?
- What pieces did you use for your design? How did you connect them together?
- Did you notice any design elements from other groups that you liked?
- If you had more time, what would you change about your design and why?
- RemindRemind teams to try to incorporate vocabulary words in their speeches and to reference their EDP Organizer sheet. Remind students to keep trying even when they fail at first. The students may need to explain a concept multiple times before it is clear to others.
Remind students to make sure that their extension does not touch the ground or impede the movement of the Code Base.
- AskAsk students why it would be important to share designs with others? Ask students if they feel trying to present information is a valuable skill for a future job? Discuss the importance of designing and sharing ideas with others in the professional field.