Background
In this Unit, students will explore the evolution of a robotic arm from manual to motorized to automated, and how it can be controlled to accomplish a task by hand, with switches, and using code. Throughout the Unit students will have the opportunity to think about and discuss concepts related to mechanization, automation, project flow, and conditional statements, and to make connections between human and robotic processes.
Builds and Features in this Unit
There are four builds in this Unit:
- A manual Robot Arm
- A Motorized Robot Arm
- A Code Robot Arm that moves on 1 axis
- A Code Robot Arm that moves on 2 axes
These builds can be completed individually (built from scratch for each Lab), or as a transitional build (the first build is modified in subsequent Labs). The key features of each build include:
Robot Arm: A manually operated robotic arm that is controlled by moving the white long beam to turn it from side to side, or the orange knobs to move the arm up and down. This build uses a North-South magnet to lift the disks.
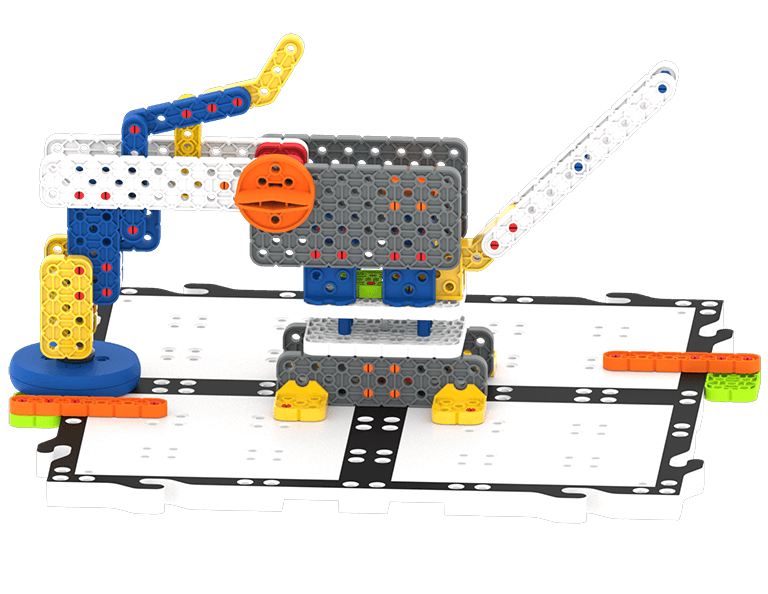
Motorized Robot Arm: A robotic arm that uses motors and switches to move. The motors and switches are connected to a battery. This build also uses a North-South magnet to lift the disks.
- Note: This build requires 2 GO Kits to complete 1 Robotic Arm.
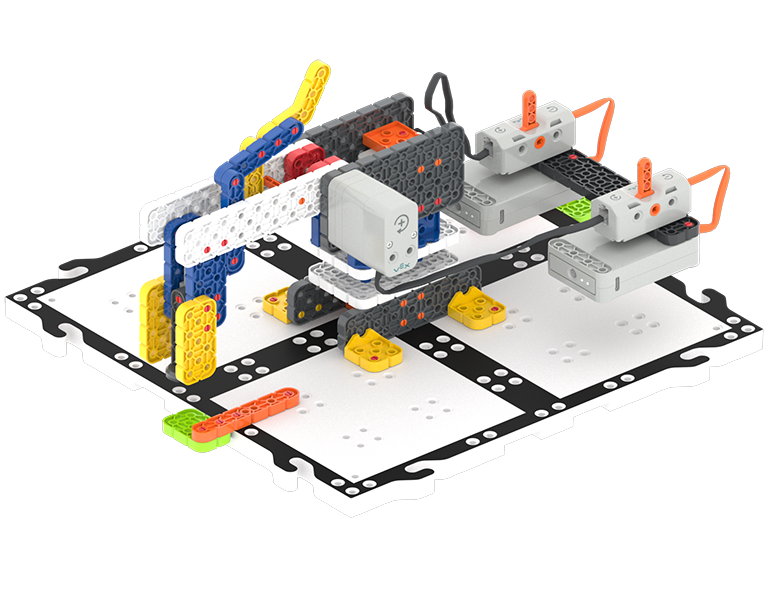
Code Robot Arm (1-Axis): A robotic arm with motors and a Brain that is controlled using VEXcode GO to move on 1 Axis - side to side. This build adds an Eye Sensor, and uses an Electromagnet to lift the disks.
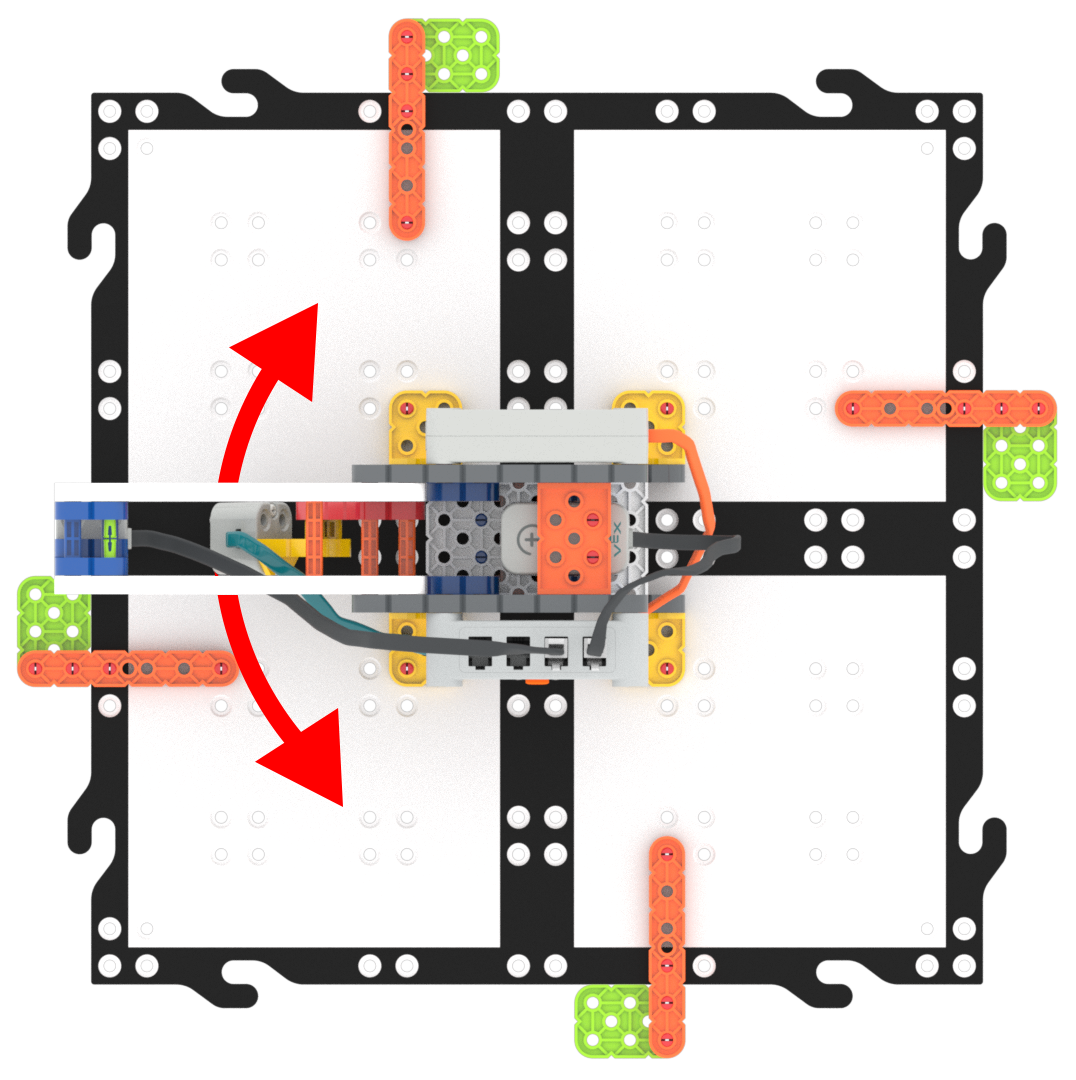
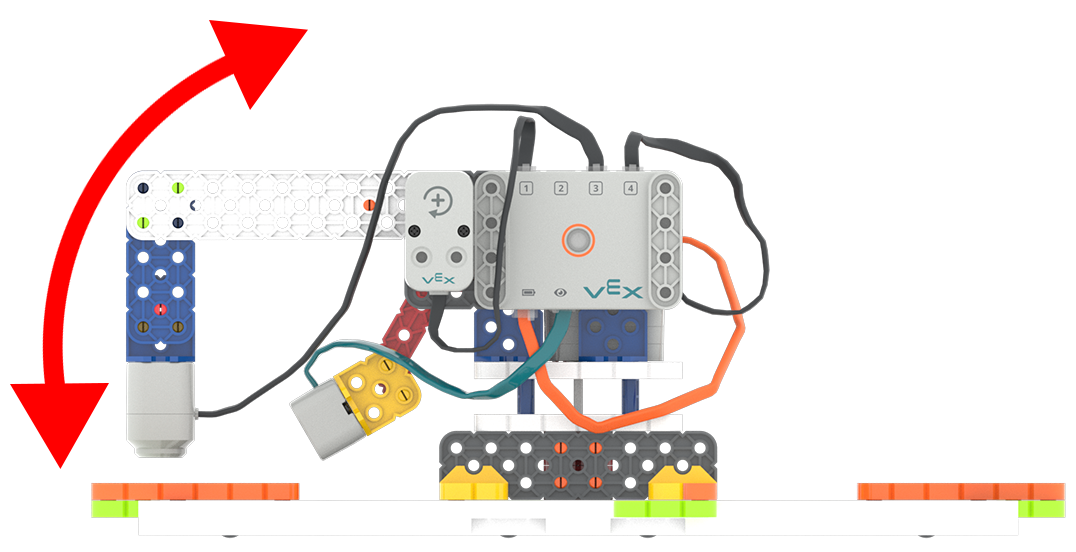
Code Robot Arm (2-Axis): The final robotic arm build that adds a motor to lift the arm on a second axis - up and down. This build continues to use the Eye Sensor and the Electromagnet to lift the disks.
Robotic Arms in Real Life
A robotic arm is a type of mechanical arm, usually programmable, that functions similar to a human arm.
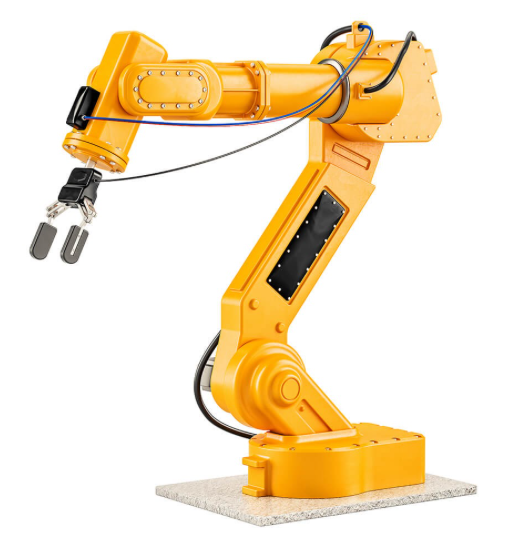
Robotic arms, which can move in several different directions, can be programmed to carry out many different tasks. Some of these tasks include welding metal, machining, painting, assembling things, placing things into other machines, and sorting objects. These robots often do jobs that are dull, dirty, and dangerous so people do not have to do them.
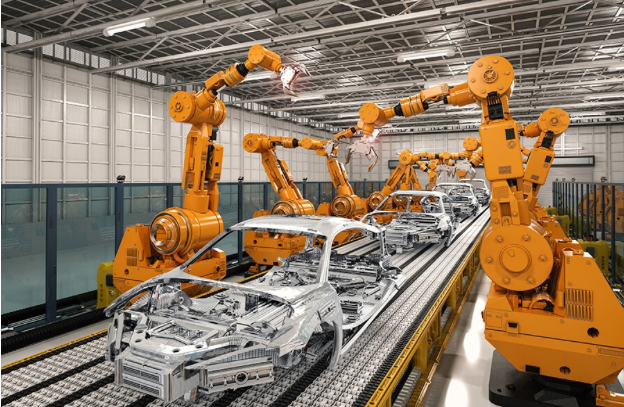
Robotic arms can be equipped with any type of tool. These tools are used with precision, accuracy, speed, and repetitiveness that can not be matched by humans. In this STEM Lab Unit, students will equip their Robot Arm build with a magnet and later, an electromagnet.
These robotic arms can use sensors, and information from sensors, to make decisions about their behaviors. In the later Labs of the Unit, students will explore how the Eye Sensor works and how it can be used to control the movement of the Robot Arm.
Industrial robots and automation are an important part of the manufacturing of most products produced in today’s world. For an extension activity, have students research industrial robots and make a list of products they use that have been made by or sorted by a robotic arm.
Lab Solutions Explained
In Labs 3-5, students will use VEXcode GO to create projects that control the movement of the Robot Arm using the Electromagnet, Eye Sensor, Motors and Brain. Lab 3 introduces basic programming to energize the Electromagnet and turn the Robot Arm. Labs 4 and 5 explore how to control the Robot Arm through decision making in code, and explores project flow using Boolean Conditions, Conditional Statements, and the [Forever] block to move disks and make decisions based on color sensing.
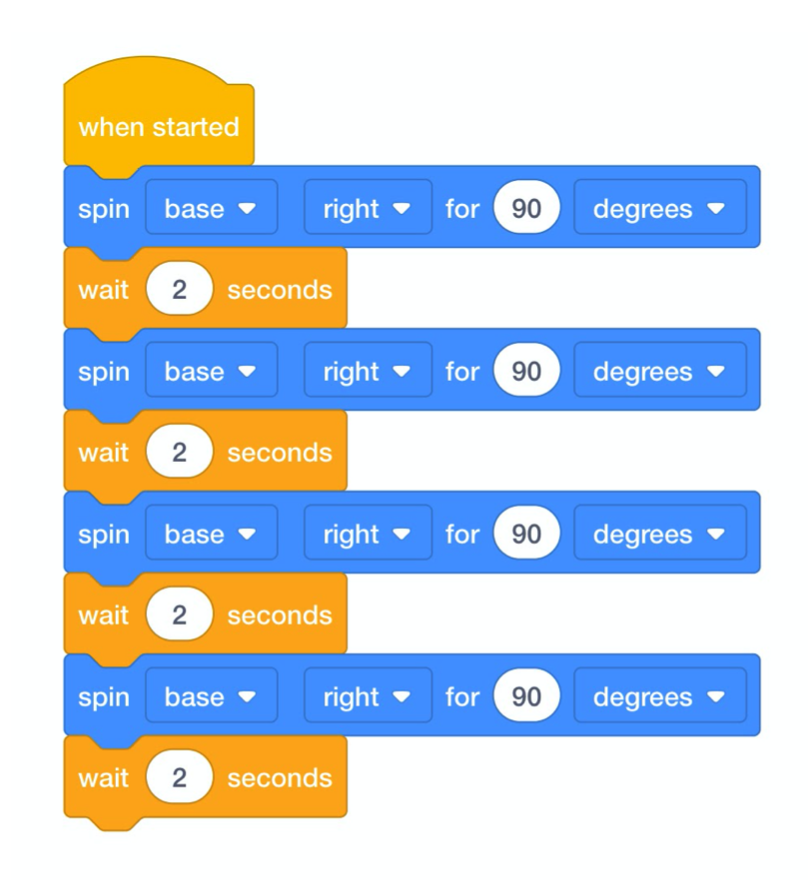
Lab 3 Play Part 1 Solution
This project will make the Robot Arm:
- Spin the Robot Arm right (for 90 degrees.)
- Then, wait for 2 seconds.
- Then, repeat that process 3 more times, to turn the Robot Arm completely around and return it to its starting position.
Lab 3 Play Part 2 Solution
This project will make the Robot Arm:
- Energize the Electromagnet to pick up the disk.
- Then, spin the Robot Arm right to move the disk.
- Drop the disk in a new location.
- Return the Robot Arm to its starting position.
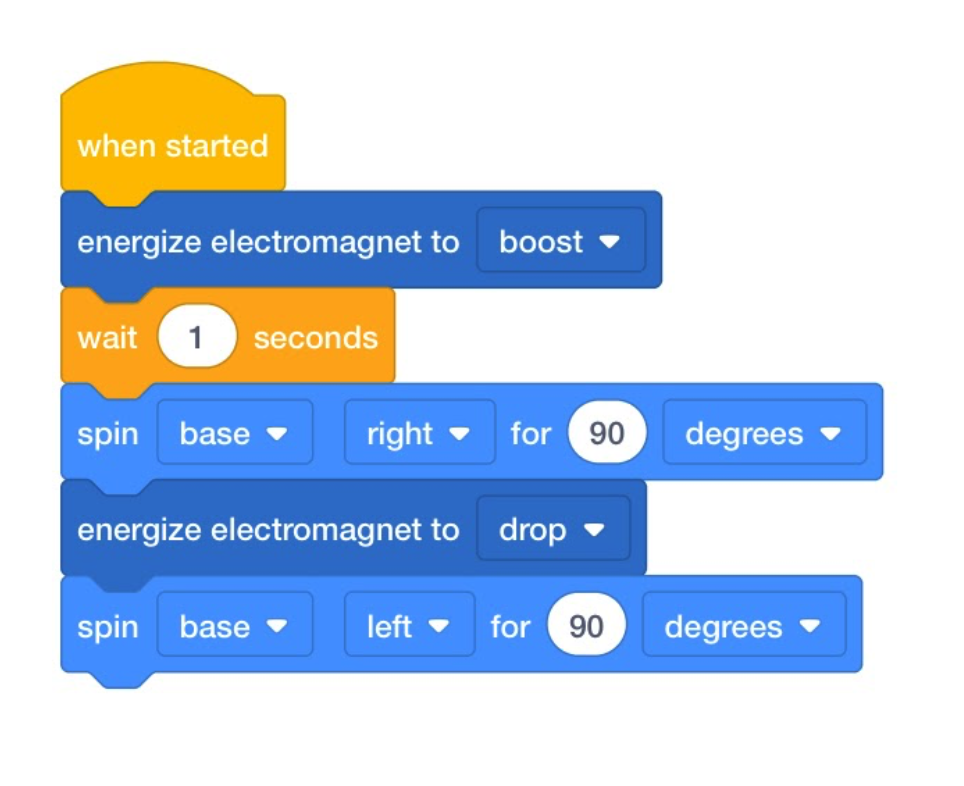
Note: In this scenario, the disk will hit the orange beam on the tile, and should get separated from the magnet. This is the intended behavior.
Lab 4 Play Part 1 Solution
This project will make the Robot Arm:
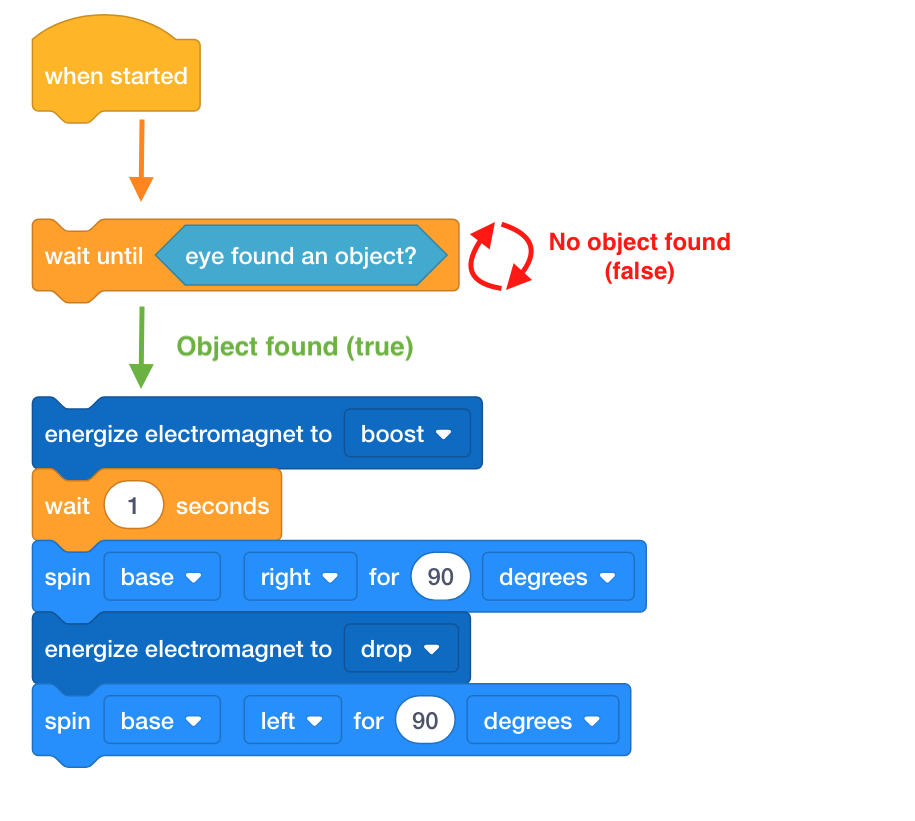
- Wait until the Eye Sensor found an object.
- Then, energize the Electromagnet to pick up the disk.
- Then, spin the Robot Arm right to move the dis
- Drop the disk in a new location.
- Return the Robot Arm to its starting position.
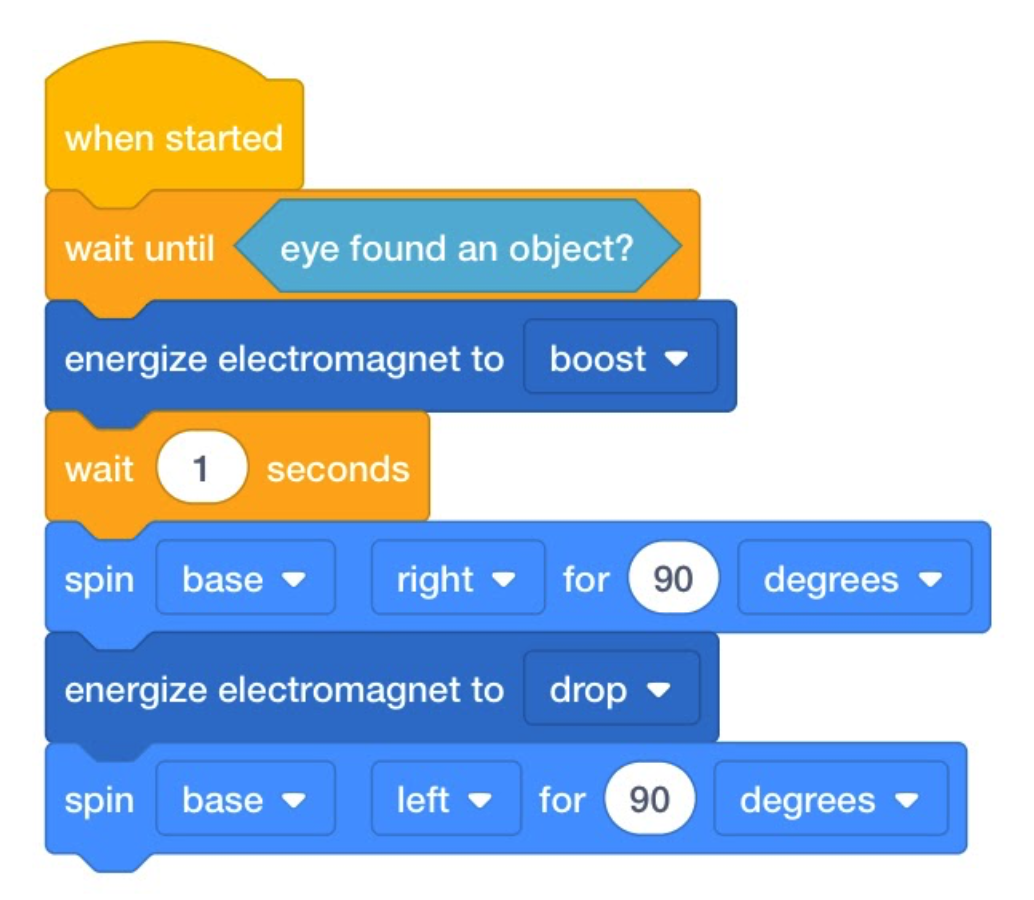
Note: In this scenario, the disk will hit the orange beam on the tile, and should get separated from the magnet. This is the intended behavior.
Lab 4 Play Part 2 Solution
This project will make the Robot Arm:
- Wait until the Eye sensor found an object.
- Then, energize the Electromagnet to pick up the disk.
- Then, move the Robot Arm UP to lift the disk.
- Then, spin the Robot Arm right to move the disk.
- Then, move the Robot Arm DOWN so it can drop the disk.
- Return, the Robot Arm to its starting position.
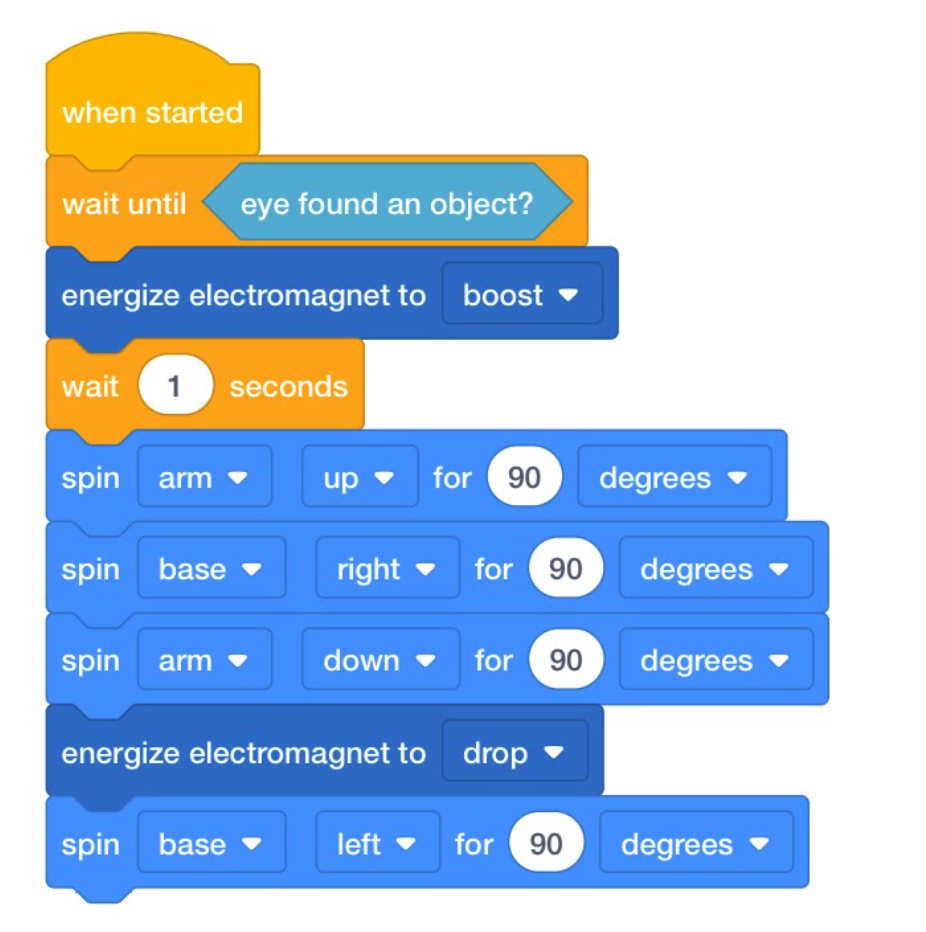
These projects use the [Wait until] block to control the flow of the project to Wait until the Eye Sensor detects an object before it energizes the Electromagnet. If it did not wait for the Eye Sensor, the electromagnet would move without picking up the disk. This enables the robot to make a decision based on the data it receives from its Eye Sensor.
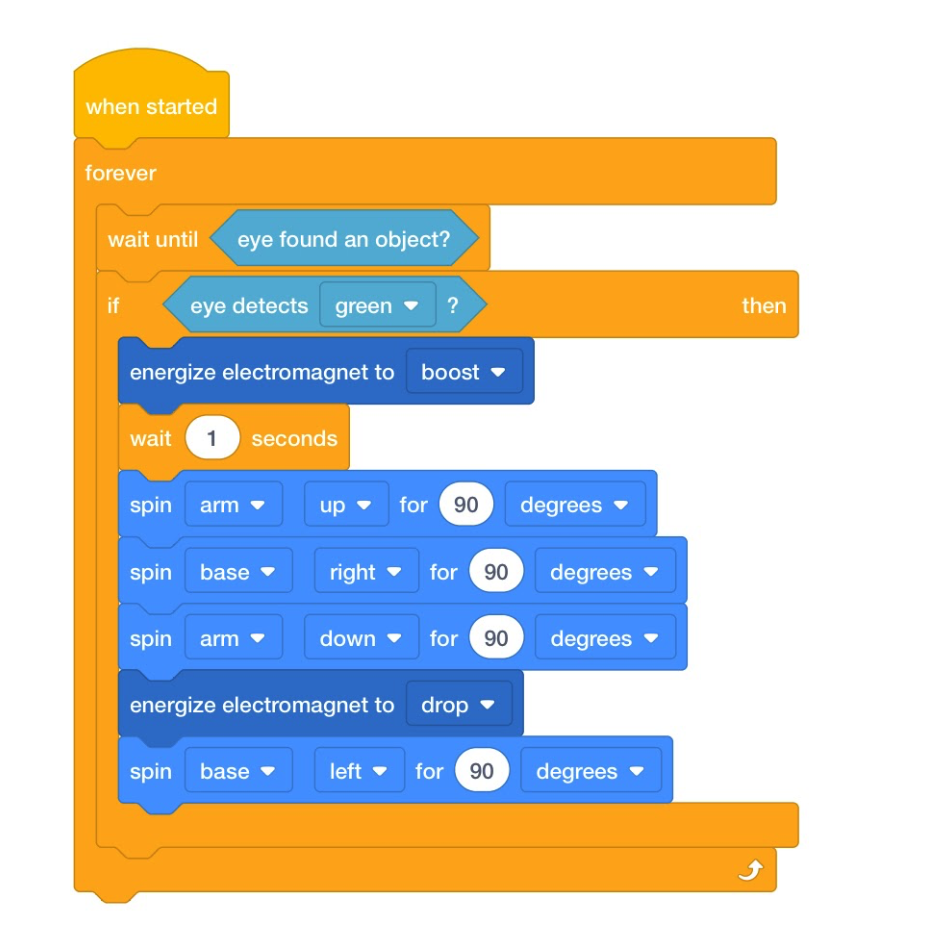
Lab 5 Play Part 1 Solution
This project will make the Robot Arm:
- Wait until the Eye Sensor found an object.
- If the object is green then it will move the disk as it did in Lab 4.
- The Robot Arm will continually check for a green object because of the [Forever] block around the stack.
Lab 5 Play Part 2 Solution
This project will make the Robot Arm:
- Wait until the Eye Sensor found an object.
- If the object is green, the Robot Arm will lift the disk and move it to the right 90 degrees, then drop the disk and return to its starting position.
- If the object is red, the Robot Arm will lift the disk and move it to the right 180 degrees, then drop the disk and return to its starting position.
- If the object is blue, the Robot Arm will lift the disk and move it to the left 90 degrees, then drop the disk and return to its starting position.
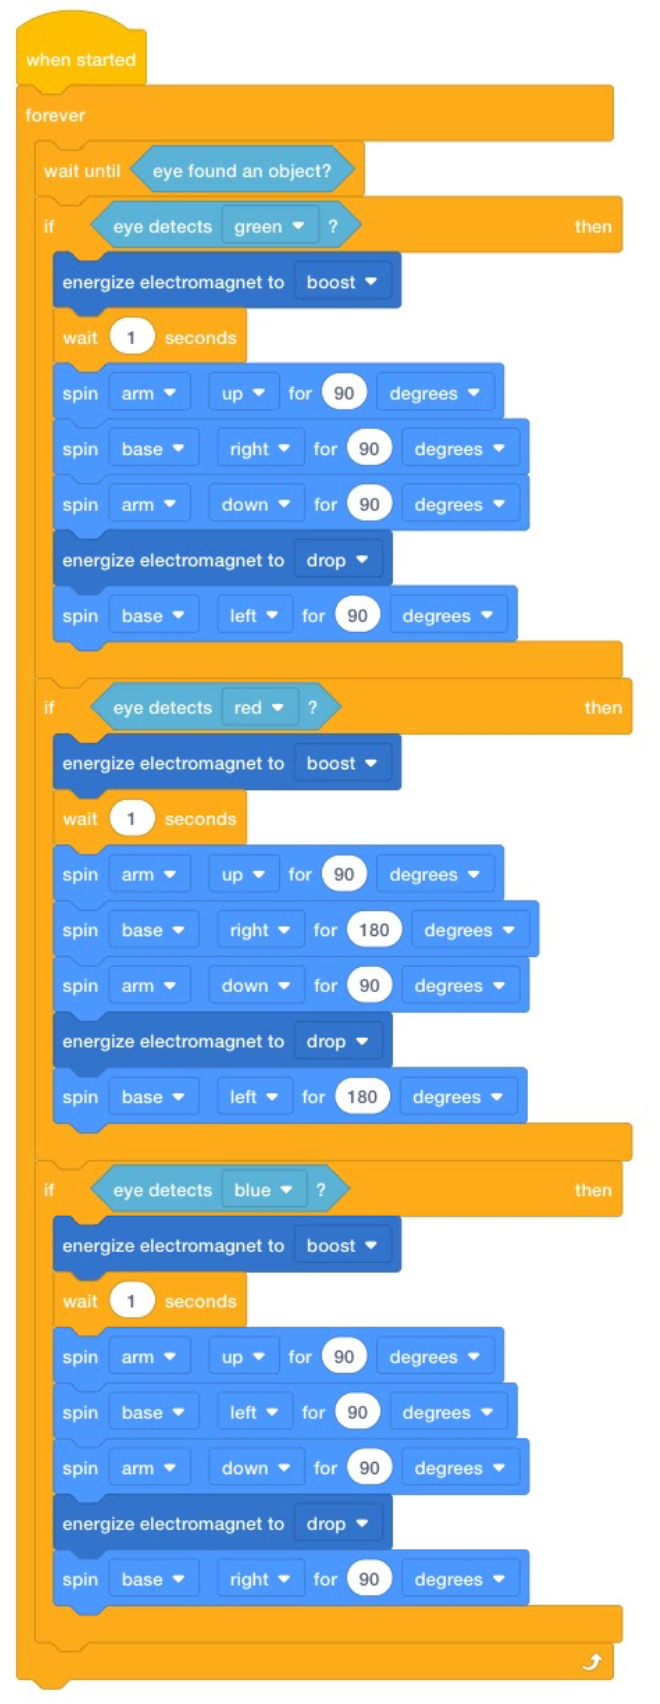
These projects add conditional statements to enable the robot to make repeated decisions based on the data from the Eye Sensor. They are repeated because the [Forever] block is used to tell the robot to continually check for objects.
For more information on the individual blocks used in these projects, use the Help feature in VEXcode GO. For more information on block shapes and their meanings, see the Block Shapes and Meanings article in the VEX Library. If you would like to learn more about the Computer Science concepts behind these code solutions, the Computer Science Fundamentals Educator Certification Course might be for you.
What is Project Flow?
Project Flow describes the order that blocks are executed in a project. All projects flow from top to bottom, starting from the [When started] hat block. Only one block is executed at a time, and once a block has completed its actions, or behaviors, the project moves on to the next block automatically. Certain Control blocks (orange in color) can modify the project flow, based on a condition or parameter value. In this project, for instance, the [Wait until] block will stop the project’s flow, and “wait until” the condition (in this case, did the eye sensor find an object), is met. Once that condition is met (the eye sensor found an object, so the block reports a value of TRUE), the [Wait until] block will end and move on to the next block in the project.
VEX GO Pieces
For more detailed information about the VEX GO Kit pieces and electronics used in the Robot Arm Unit, see the Pieces in the VEX GO Kit VEX Library Article.