
Now it's your turn to teach your VEX AIM Coding Robot new moves! In this lesson, you'll move your robot forwards and in reverse. First by driving, then using VEXcode AIM to turn your driving path into code. You'll build on what you learned in the previous lesson to continue to explore and iterate on your project.
Watch the video below to learn about:
- Adding additional blocks to a project.
- Changing a dropdown parameter.
Now that you have watched the video, capture your thoughts in your journal. Answer these questions to guide your thinking and help you prepare for a whole-class discussion:
- How are the blocks in a project executed by the robot? Explain your thinking, even if you are unsure.
- What did you observe in the video that supports your thinking?
- List at least two questions you have about coding the robot that will help you better understand how to complete a task.
- What is something you have learned about coding or VEXcode that you think will help you be successful in this lesson?
Guided Practice
Now that you have watched and discussed the video, it is your turn to practice!
Step 1: Set up the Field as shown below.
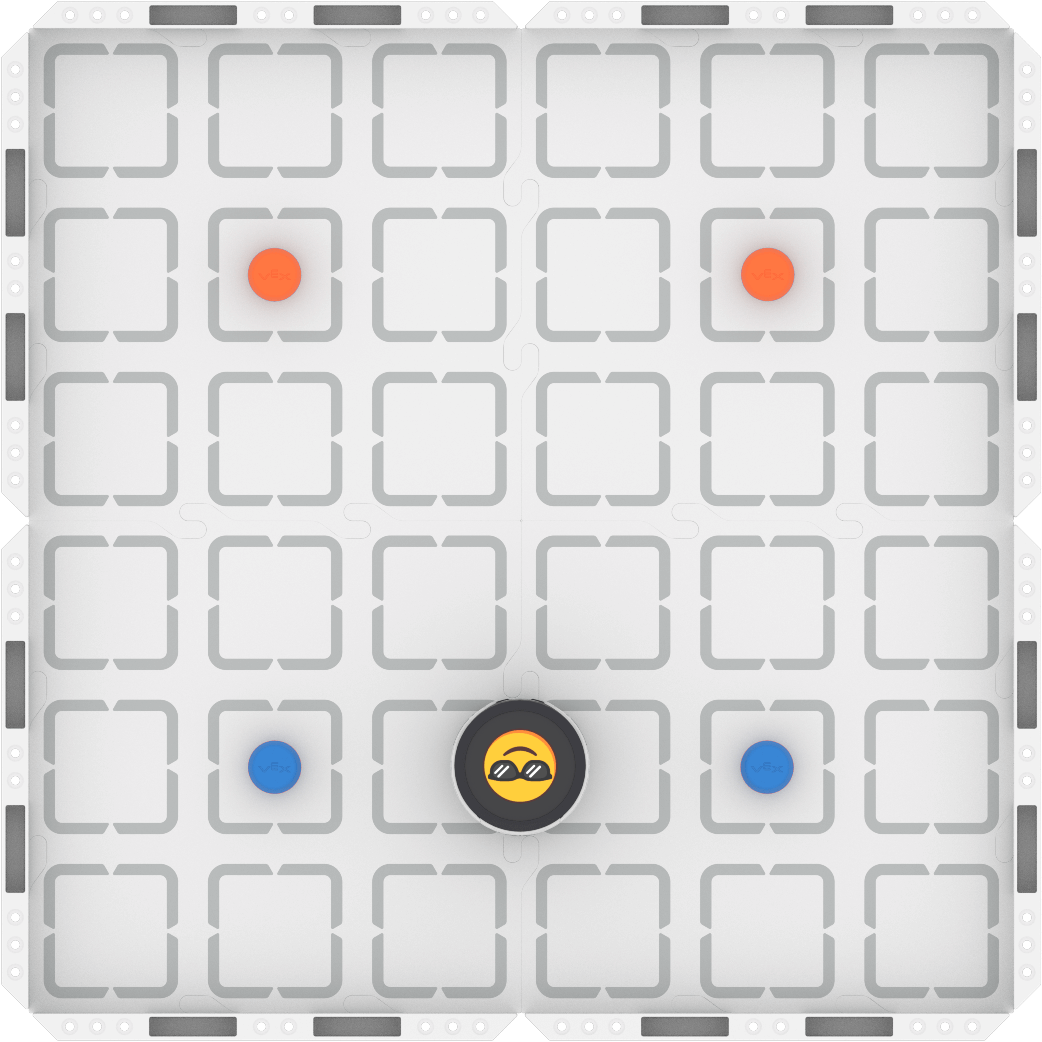
Step 2: Model the movements of the robot needed to complete the task using Drive mode.
- Your task is to drive the robot from the blue barrels to the orange barrels and back to the starting location, passing between each set. Document your driven path, then plan how to code that movement.
- Use this task card (Google / .docx / .pdf) to guide your practice.
- Pro Tip: Consider the details you used in the previous lesson to build your coding project. Pay attention to each driven movement, and document it in detail.
Step 3: Code the robot to complete the task.
- Your task is to use your planned path from Step 2 to code the robot in VEXcode AIM to move from the blue barrels to the orange barrels, and back to the start.
- Use this task card (Google / .docx / .pdf) to guide your practice.
- Pro Tip: Return to Drive mode to help you if your group is stuck when coding. You can drive slowly if you need to, to help you identify specifics about the movement of the robot.
Step 4: Explore! Move between driving and coding to iterate on your project and improve your solution.
- Together with your group, brainstorm ways to make your project better.
- Drive the robot to test out your ideas, and choose one to start with.
- Iterate on your project to make it match the new driven behaviors.
- Continue to move between driving and coding to iterate on your project and find the best strategy to complete the task!
Resources for Practice:
The articles linked here is available if you need additional support while completing the activity.
Wrap-Up
Now that you have practiced, it is time to share what you learned. Answer the following questions in your journal to help you reflect on your learning and prepare for a whole-class discussion:
- What is something you learned from using driving and coding together? How did you document that learning?
- Which is more precise—driving or coding your robot? Why? What evidence do you have to support your assertion?
- What is something you learned about using VEXcode that will help you moving forward?
Select Next > to move on to the next lesson.