Summary
Materials Needed
The following is a list of all the materials and teaching resources that are needed to complete the VEX 123 Lab. First listed are the materials needed for the entire Lab, including the 123 Robot. In certain Labs, links to teaching resources in a slideshow format have been included. Not all Labs will include a slideshow. These slides can help provide context and inspiration for your students. All slides are editable, and can be projected for students or used as a teacher resource.
| Materials | Purpose | Recommendation |
|---|---|---|
|
123 Robot |
To act as the Mars Rover and carry out projects. |
1 per group |
|
123 Field |
To use as a Mars landing area and as a testing surface for projects. |
1 Field per 2 groups |
|
Tablet or Computer |
To access VEXcode 123. |
1 per group |
|
VEXcode 123 |
To build projects for the 123 Robot. |
1 per group |
|
For visual aids while teaching. |
1 for the class to view | |
|
Light-colored scrap paper |
To ball up and use as obstacles on the 123 Field. |
1 piece per Field |
|
Dry erase marker |
To mark the start location on the 123 Field. |
1 for the class to use |
Environment Setup
- Think about how your students will access VEXcode 123. Ensure that the computers or tablets that students will use have access to VEXcode 123. For more information about setting up VEXcode 123, see this STEM Library article.
- Gather the materials each group needs before class. For this Lab, each group of two students will need a 123 Robot, a computer or tablet to access VEXcode 123, sheets of scrap paper to create obstacles (1 per Field), and access to a 123 Field for testing.
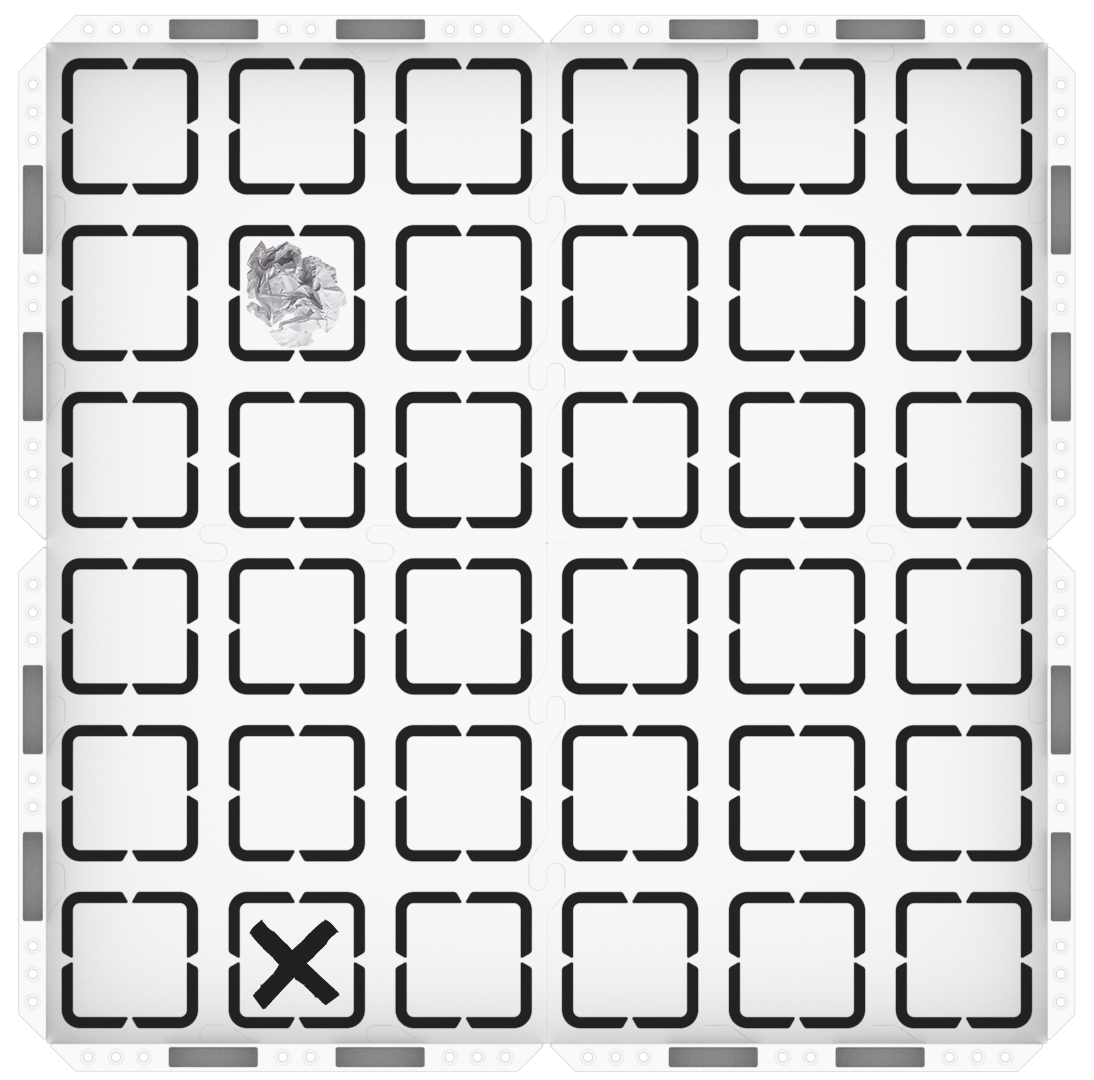
- Set up your 123 Fields ahead of time, as shown in the image below, to serve as a testing space for the 123 Robots. Mark the start, using a dry erase marker. Add an obstacle to the Field as shown in the example below, or to best meet the needs of your students. Crumple a piece of scrap paper to create a basic obstacle.
-
Note: Use white or light-colored paper for the obstacles to ensure that the Eye Sensor will be able to detect these objects. The Eye Sensor uses infrared light to detect objects, and since dark-colored objects absorb infrared light, the Eye Sensor does not detect them as well.

123 Field Setup - Have the Fields spread out around the classroom to allow students ample space to test their projects. Both Labs in this Unit will use the same Field setup, so you can leave your fields together from Lab 1 to Lab 2.
- Review the Facilitation Strategies in the Engage section for turn-taking ideas to help students share responsibilities during the Lab. For groups larger than the recommended two students, provide students with more granular roles. Examples of responsibilities for students in this Lab include:
- Making and placing the obstacles on the 123 Field.
- Turning on the 123 Robot and connecting it to the computer or tablet.
- Placing the 123 Robot on the Field in the starting location, and starting the project.
- Building the project in VEXcode 123 in Play Part 1.
- Editing the project in VEXcode 123 in Play Part 1.
- Building the project in VEXcode 123 in Play Part 2.
-
Editing the project in VEXcode 123 in Play Part 2.
Engage
Begin the lab by engaging with the students.
-
Hook
What senses do you have? How do you use your senses? The 123 Robot has an Eye Sensor on the front that will detect when an object is near.
-
Demonstrate
The teacher will build a project with the [Drive until] block and start the project so students can see how this block is used to make the robot stop driving when the Eye Sensor on the front of the 123 Robot detects an object
-
Leading Question
How can we use the Eye Sensor on the 123 Robot to detect an obstacle in the Mars landing area?
Play
Allow students to explore the concepts introduced.
Part 1
Students will build a project in VEXcode 123, together with their teacher, to drive the 123 Robot until an obstacle is detected on the 123 Field.
Mid-Play Break
Students will observe how the green highlight feature moves as their VEXcode 123 project is started. They will compare the movement with the highlight to the behaviors of the 123 Robot.
Part 2
Students will add a [Wait] and two [Glow] blocks to make the indicator light on the 123 Robot glow after an object is detected by the Eye Sensor.
Alternate Coding Methods
While this Lab is written for use with VEXcode 123, it can also be completed using the Coder. Instead of giving each group a tablet or computer, distribute a Coder and Coder cards for students to build the projects to drive until an object is detected. For more information about the Coder, see the Using the VEX Coder STEM Library article.
Share
Allow students to discuss and display their learning.
Active Share
Place an obstacle on a central 123 Field and have groups come up to test their projects. Change the location of the obstacle each time a group comes to test. While students show off their projects, ask them to describe how the 123 Robot is moving and how they would describe what the [Drive until] block does.

Discussion Prompts
- If someone came to our class, who did not know about the Eye Sensor in the 123 Robot, how would you explain what it does to them?
- How did you work together to build and test your project?