
Play
Part 1 - Step by Step
- InstructInstruct students that they will build a project in VEXcode 123 to drive and collect a sample with the 123 Robot. The animation below shows how the 123 Robot will move in this challenge. The robot begins on the bottom of the Field, facing the sample location. The robot drives forwards four steps and then stops on the marked spot, where a hand places a sample on top of the robot.
Video file
- ModelModel for students how to build a project in VEXcode 123.
- Begin by showing students how to connect their 123 Robots to their device in VEXcode 123. Because connection steps vary between devices, see the Connecting articles of the VEXcode 123 Knowledge Base for specific steps to connect the 123 Robot to your computer or tablet.
-
Drag a [Drive for] block into the workspace and attach it to the {When started} block.
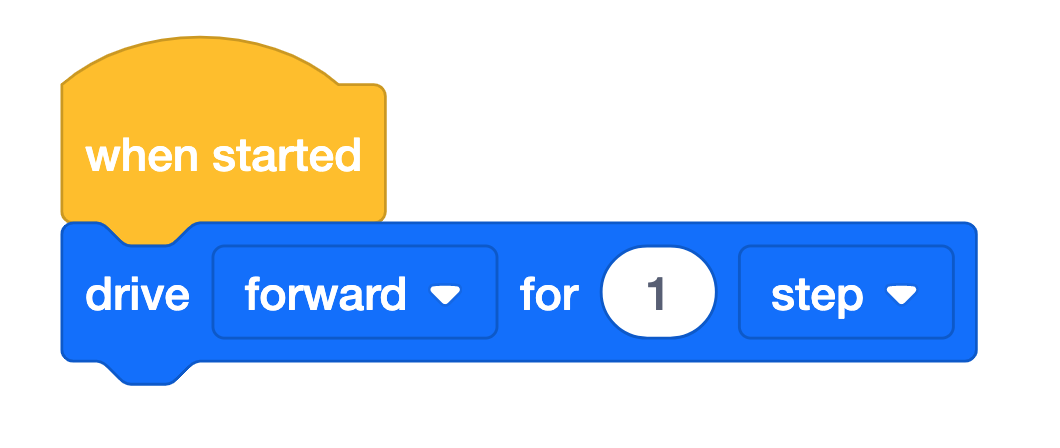
[Drive for] block -
Model for students how to change the parameter of the [Drive for] block so the 123 Robot drives forward four steps to the sample.
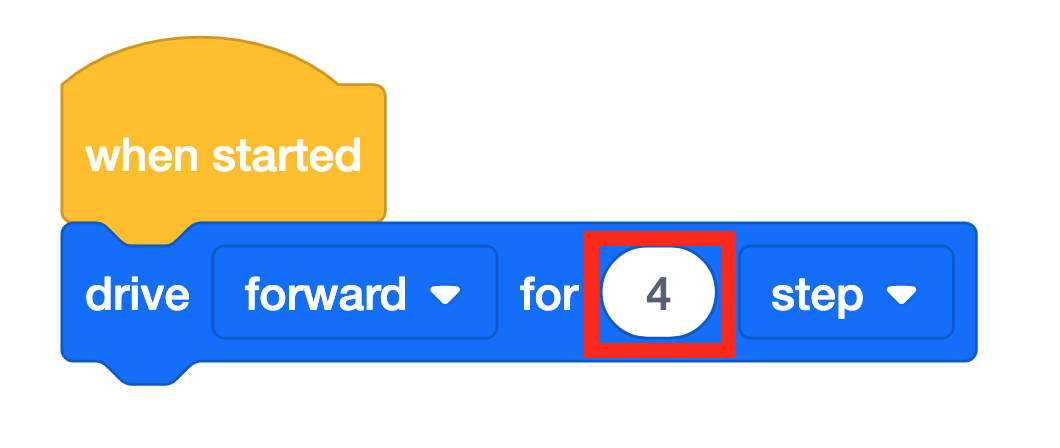
Change parameters -
Next, have students drag in a [Wait] block, and set it to 3 seconds. These three seconds will allow time for the 123 Robot to collect the sample.
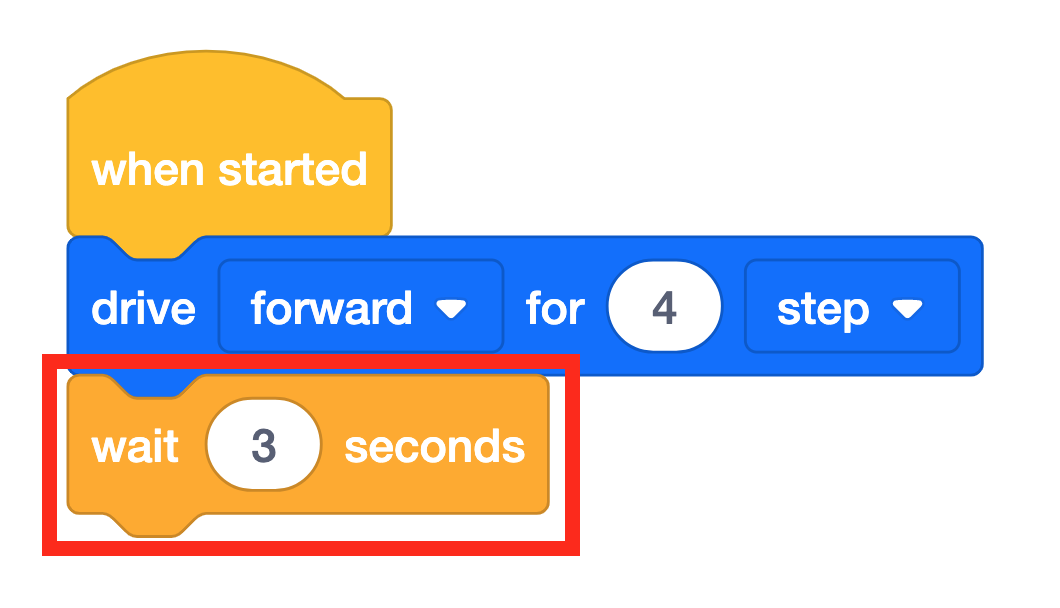
Add the [Wait] block -
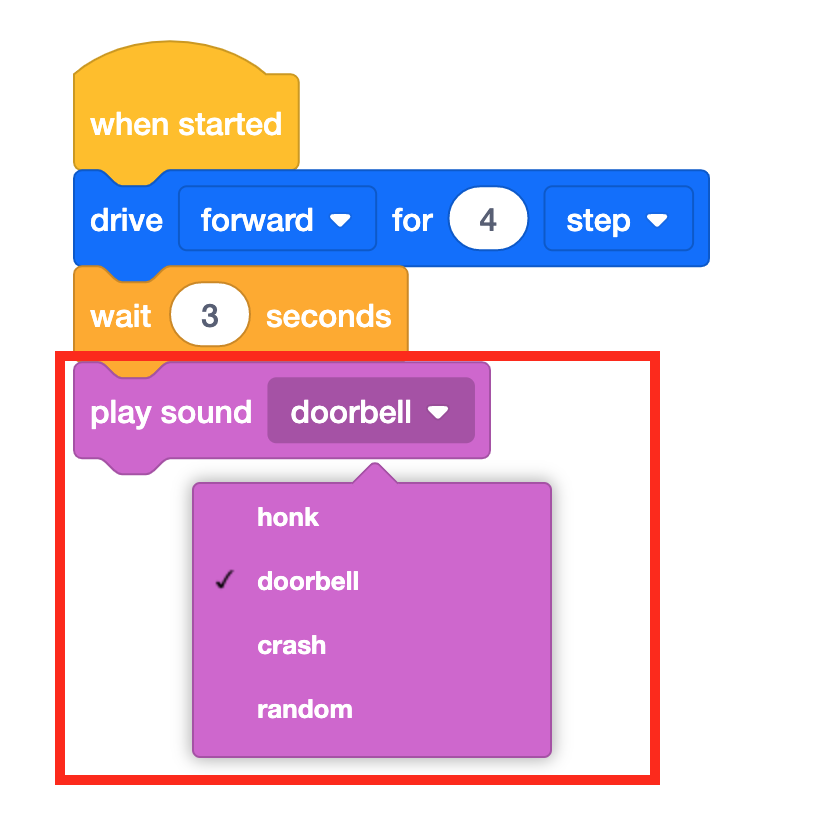
Students should then add a [Play sound] block, and set it to “doorbell” to symbolize that it has picked up a sample.
Play doorbell - Once students have built their project, have them name their project as Lab 1 Play 1 and save it to their device. See the Open and Save section of the VEXcode 123 Knowledge base for device-specific steps to save a VEXcode 123 project.
-
Model for students where to place their 123 Robots on the 123 Field. The 123 Robot should start on the ‘X’ and face the circle where the sample will be collected.
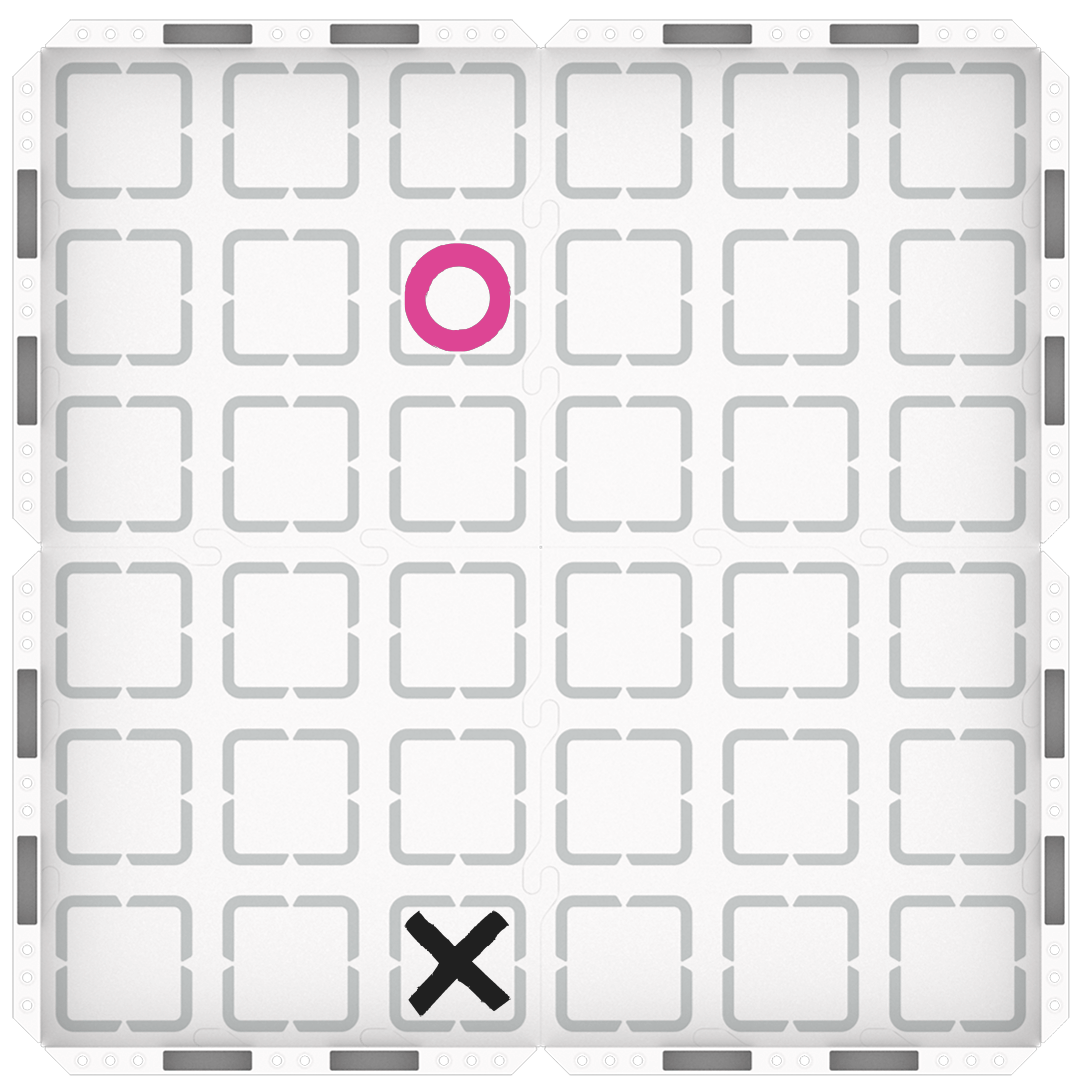
123 Field Setup -
Once the 123 Robots are placed on the Field, have students select ‘Start’ in VEXcode 123 to test their projects.
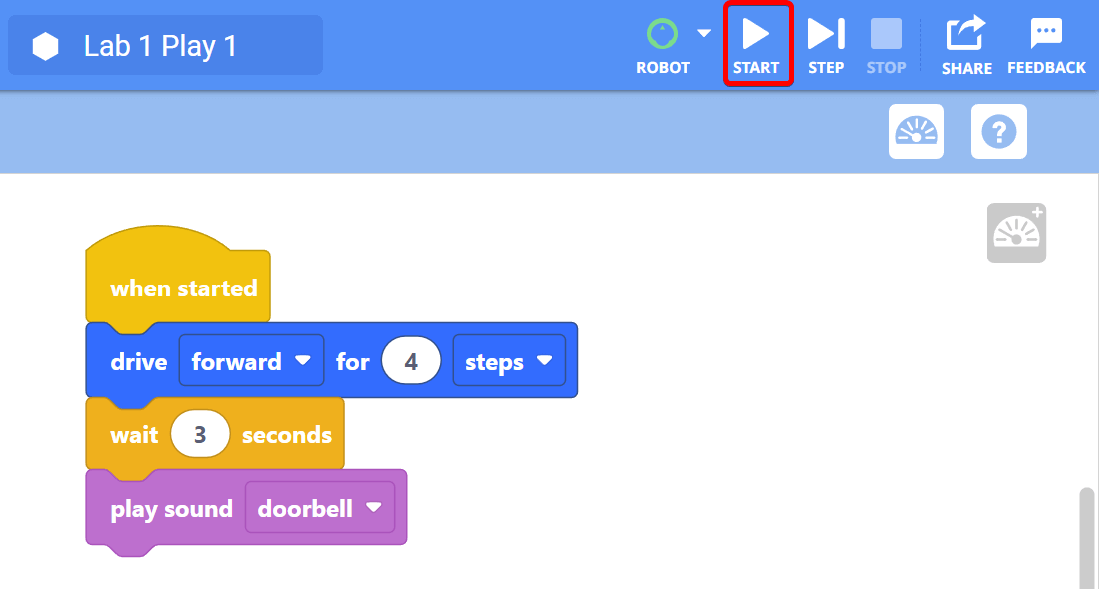
Select ‘Start’ to test the Lab 1 Play 1 project - After the 123 Robot drives 4 steps to the collection location, students should place their “sample” item on top of the 123 Robot. The robot will play the doorbell sound three seconds after it stops driving.
- For groups who finish early and need additional challenges, have them add a [Turn for] block to the end of their project and test it to see what the 123 Robot will do. Ask them to experiment, and think of ways that this block could be useful in collecting samples on the 123 Field.
- FacilitateFacilitate students testing their projects, and taking turns on the 123 Field. As students are testing, ask questions to help them think about the way their 123 Robots are moving.
- Can you show me, using your hands, how your 123 Robot is going to move to collect the “sample”?
- How do you think your 123 Robot might move next, if it was going to go back to the base?
- RemindRemind students that they can edit their projects, and retest them, if their 123 Robot doesn’t get to the “sample” location the first time. Students should check the parameter in the [Drive for] block, to make sure that it is the correct number of steps needed.
- AskAsk students about what kinds of things they think the Mars rover is collecting on its missions. If they were scientists studying Mars, what would they want to learn about?
Mid-Play Break & Group Discussion
As soon as every group collected the sample, come together for a brief conversation.
- Now that we’ve collected our sample” what do you think our rover needs to do with it?
- How do you think we can code our 123 Robot rover to bring it back to the base? How will the 123 Robot need to move to deliver the sample to the base?
- What blocks do you think we might need to use in the next part of our project to do that?
Part 2 - Step by Step
- InstructInstruct students that they will be adding onto their project so the 123 Robot drives the “sample” back to the base. The animation below shows the 123 Robot driving to collect the “sample,” and returning to the base to deliver the “sample.”
In this animation, the robot repeats the behaviors it did to collect the sample, then turns 180 degrees to the right, and drives four steps forward to return to its starting location.
Video file - ModelModel for students how to build onto their existing VEXcode 123 project.
- If students need to open their Lab 1 Play 1 project, model the device-specific steps, as shown in the Knowledge Base articles in the Open and Save section.
-
Have students add blocks to their VEXcode 123 projects to recreate the code in the image below. The red box indicates new blocks that need to be added to the project.
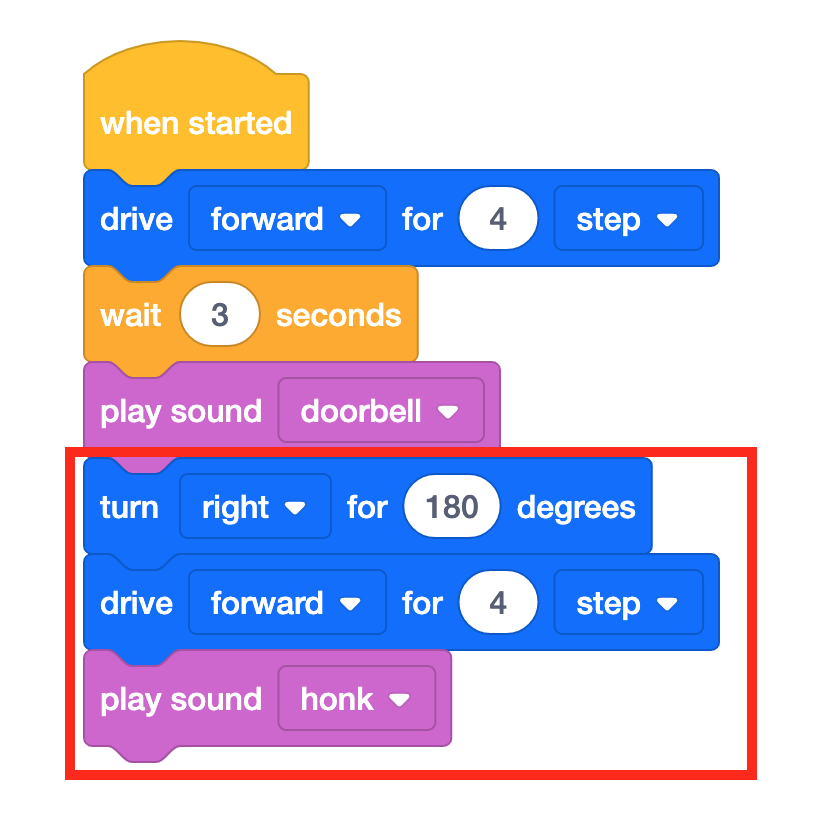
Lab 1 Play 2 project -
If students have not used the [Turn for] block in a previous project, model how to drag the [Turn for] block into the project and change the parameter to 180 degrees. The turn distance is set to 180 degrees so that the 123 Robot turns around to face the base before driving forward to deliver the sample.
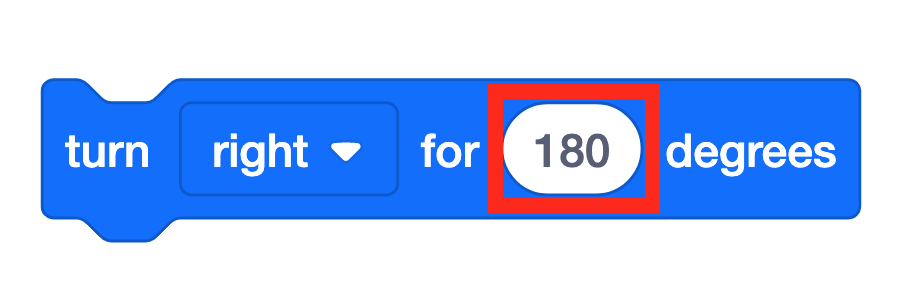
[Turn for] block - For younger students, you may want to build the project together as a class, as you did in Play Part 1.
-
- Once students have built their project, have them name their project as Lab 1 Play 2 and save it to their device. See the Open and Save section of the VEXcode 123 Knowledge base for device-specific steps to save a VEXcode 123 project.
-
Have students place their 123 Robots on the Field, then select ‘Start’ in VEXcode 123 to test their projects.
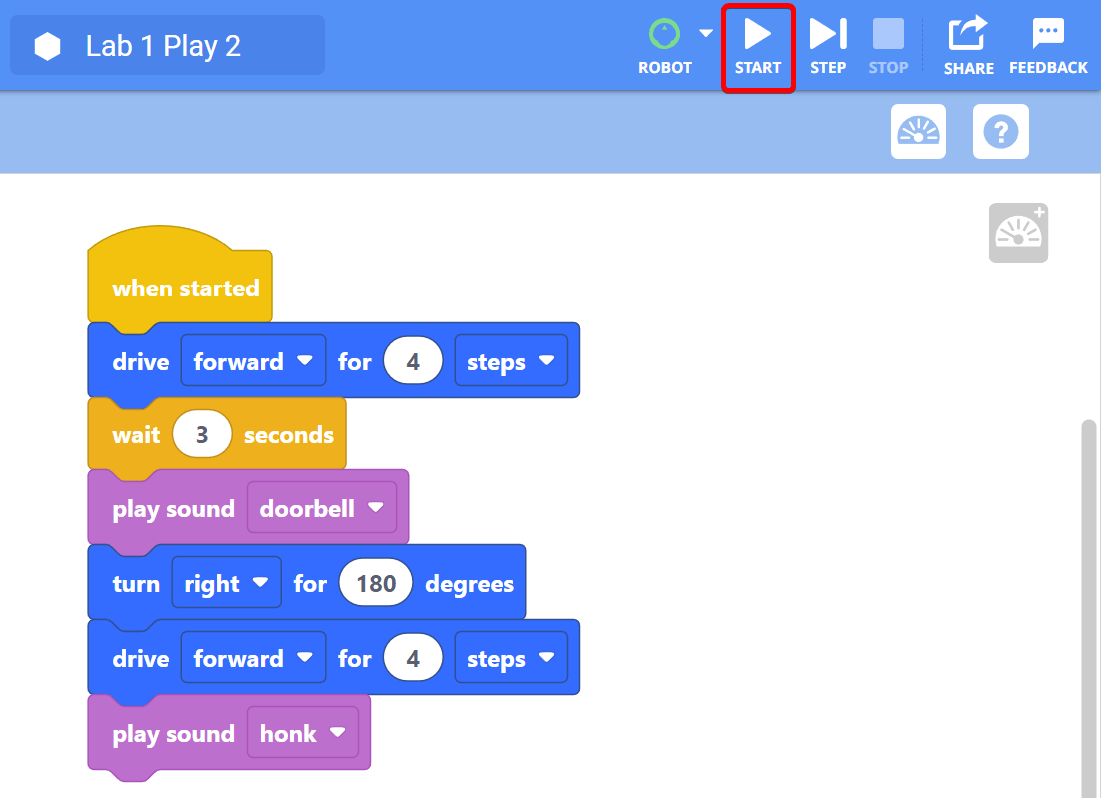
Select ‘Start’ to test the Lab 1 Play 2 project - After the 123 Robot drives four steps to the collection location, students should place their “sample” item on top of the 123 Robot before the doorbell sound plays. The 123 Robot will then turn right 180 degrees and drive back to the base. After the 123 Robot returns to the base, students should remove the “sample” from the 123 Robot. Finally, the 123 Robot will play the honk sound to symbolize that the “sample” has been delivered.
- If students finish collecting and delivering the sample and have additional time, encourage them to try navigating to a different sample location. Use a dry erase marker to mark a sample location that is one step closer or further from the base, and have students adjust the parameters of their project to reach this new sample and deliver it to the base.
- FacilitateFacilitate students testing their projects and taking turns on the 123 Field. As students are testing, ask them about the sequence of blocks in their project that enables the 123 Robot to move to the correct place.
- Can you show me, with your hands, how the 123 Robot would move if the [Turn for] block was set to left instead of right?
- What would happen if the turning part of the project came before the driving part? Would your 123 Robot be able to reach the “sample?”
- RemindRemind students that they should check their project and compare it to the image of the project, before testing. If one student built the project in VEXcode 123, their partner can check the code, before placing the 123 Robot and starting the project.
- AskAsk students about how many samples they think the scientists are trying to collect to study Mars. Why would more samples be more helpful than fewer samples? Do you think our 123 Robot rovers could collect multiple “samples?”