
Practice
In the Learn section, you learned how to plan the path you want your robot to take by decomposing behaviors. You also learned how to code your robot's arm and claw to move using the [Spin] and [Spin for] blocks in VEXcode EXP. In this practice section, you will begin to apply that learning in the Autonomous Movements practice activity.
In this activity, you will create a VEXcode EXP project to pick up a ring and place it on the small post. Follow along with the video below to decompose the behaviors for the activity. Then you can use those behaviors to begin creating your project for the Autonomous Movements practice activity. The video below will show you how your robot should move to complete the Autonomous Movements practice activity.
Now it's your turn to complete the Autonomous Movements practice activity!
In the video below, the Clawbot is on the left side of the field. There is one Ring on the field located near the top of the field, between the second and third tiles. There is a single post in the middle of the field, towards the right side. The Clawbot drives to the second and third tiles and then moves up towards the first ring, picking it up. It then raises its claw and backs up. Next, it drives to the post and releases the claw, letting the ring fall onto the post. This shows one example of how a project can be created to complete the Autonomous Movements practice activity.
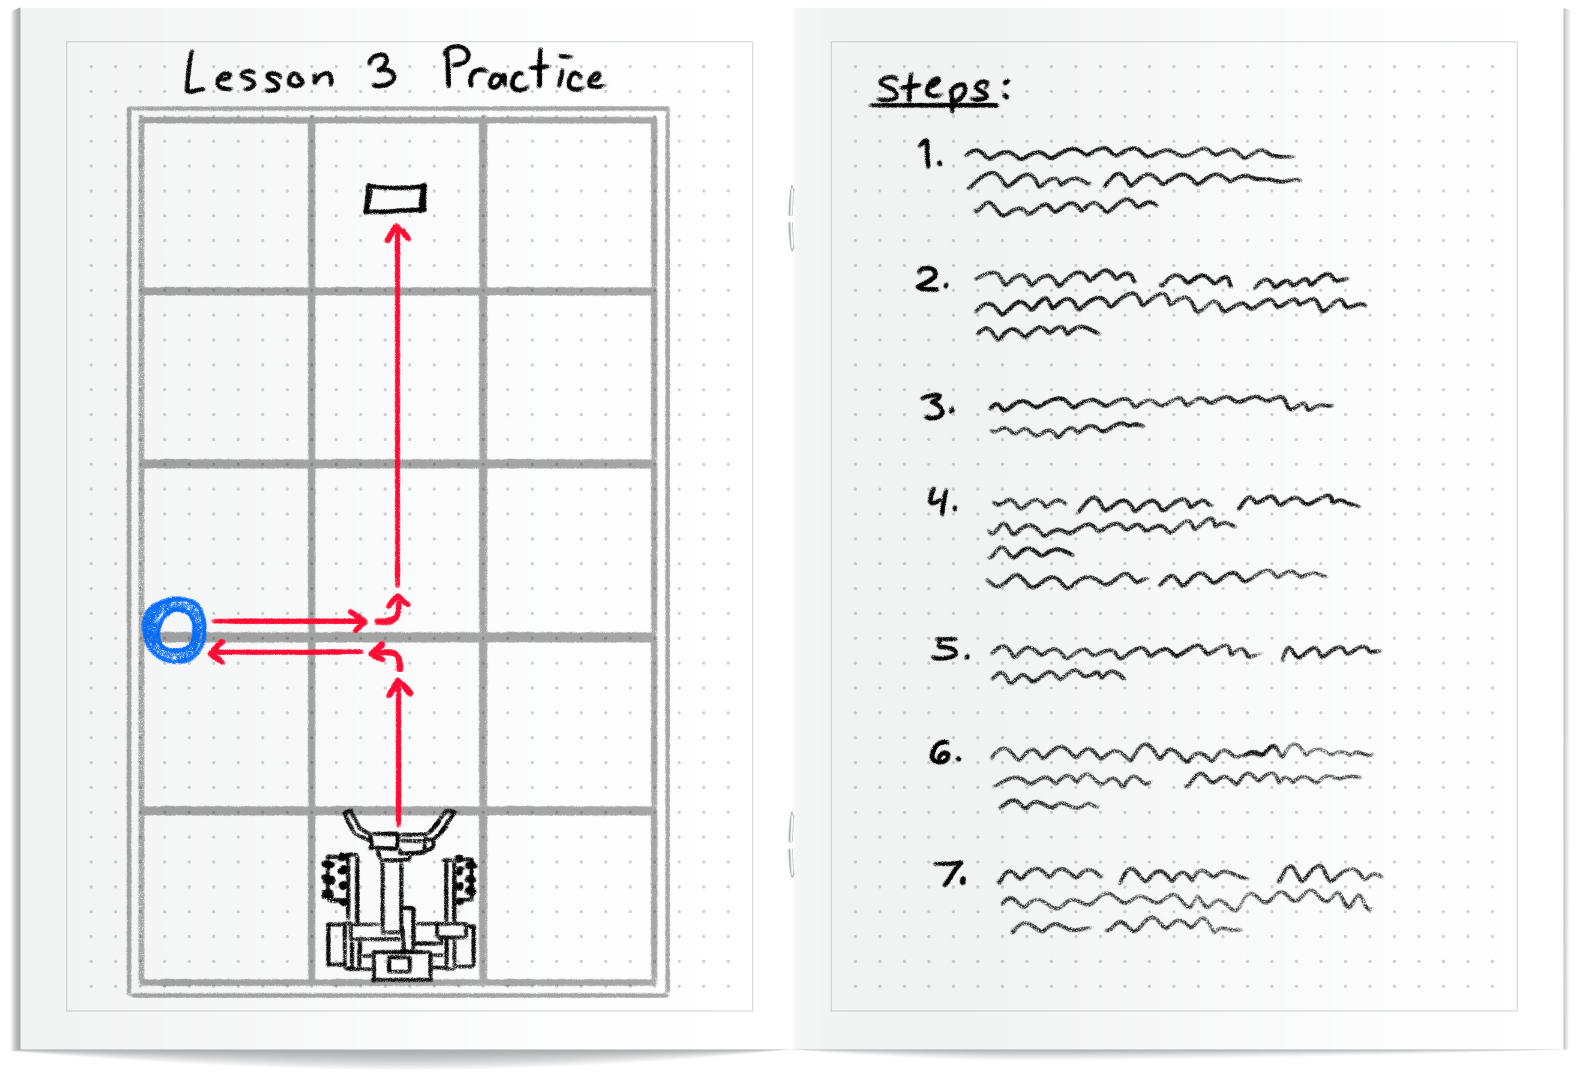
Use this document as a reference to complete the practice activity.
Google / .docx / .pdf
As you complete the Autonomous Movements activity, document your projects and tests in your engineering notebook.
- Draw a sketch to show how your robot should move to complete the activity
- List the steps needed to create a project based on your sketch
- Document the changes you make after each iteration
See the image on the left for an example of how you can record your project ideas and tests.
Prepare for the Challenge
In Compete (on the next page), you will code your robot to pick up and place two rings on the small post as quickly as possible in the Coding Crunch Challenge. Learn how to complete the challenge, check your understanding, then practice for the challenge.
The goal of this challenge is to code your robot pick up and place two rings on the post as quickly as possible.
In the video below, the Clawbot is on the left side of the field. There are two Rings on the field: one located near the top of the field, between the second and third tiles, and another near the bottom of the field, also between the second and third tiles. There is a single post in the middle of the field, towards the right side. The video starts with a countdown: 3, 2, 1. The Clawbot drives to the second and third tiles and then moves up towards the first Ring, picking it up. It then raises its claw and backs up. Next, it drives to the post and releases the claw, letting the Ring fall onto the post. Afterward, the Clawbot backs up and lowers the claw. It then drives to the second ring at the bottom of the field, picks it up, turns, and drives to the post. The Clawbot releases the claw, allowing the ring to fall onto the post. The timer stops at this point as the challenge is now completed, showing 15:13 seconds. All of these are done as autonomously as an example of how your robot could move to complete the Coding Crunch Challenge.
Follow the steps in this document to learn more about how to complete this challenge. Google / .docx / .pdf
Check Your Understanding
Before beginning the challenge, ensure that you understand the rules and setup of the challenge by answering the questions in the document below in your engineering notebook.
Check Your Understanding questions Google / .docx / .pdf
After completing the questions, try practicing the challenge.
Select Next > to compete in the Coding Crunch Challenge.