
Play
Part 1 - Step by Step
- InstructInstruct each group that they will be opening and starting the 'Drivetrain Moves and Turns' example project in VEXcode GO and observing the behaviors of the Code Base.
- ModelModel for students the steps to launch VEXcode GO.
- Model the steps to connect a Brain to your device.
Note: When you first connect your Code Base to your device, the Gyro built into the Brain may calibrate, causing the Code Base to move on its own for a moment. This is an expected behavior, do not touch the Code Base while it's calibrating.
-
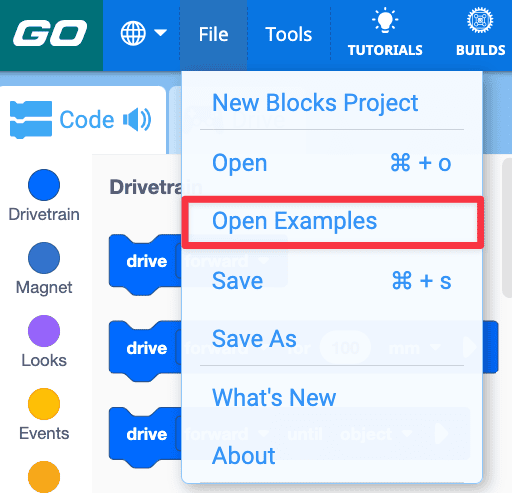
Students will be using an example project to help them learn about Drivetrain commands in VEXcode GO. Model for students how to open the File menu and select 'Open Examples.'
-
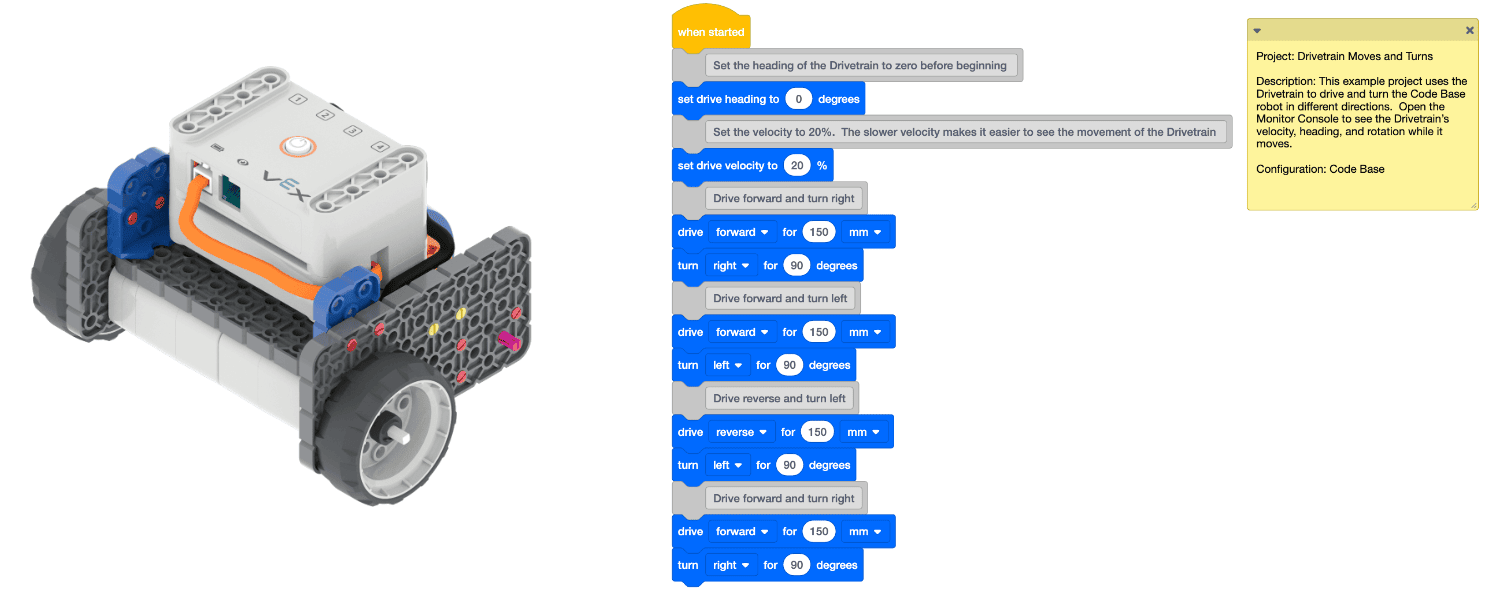
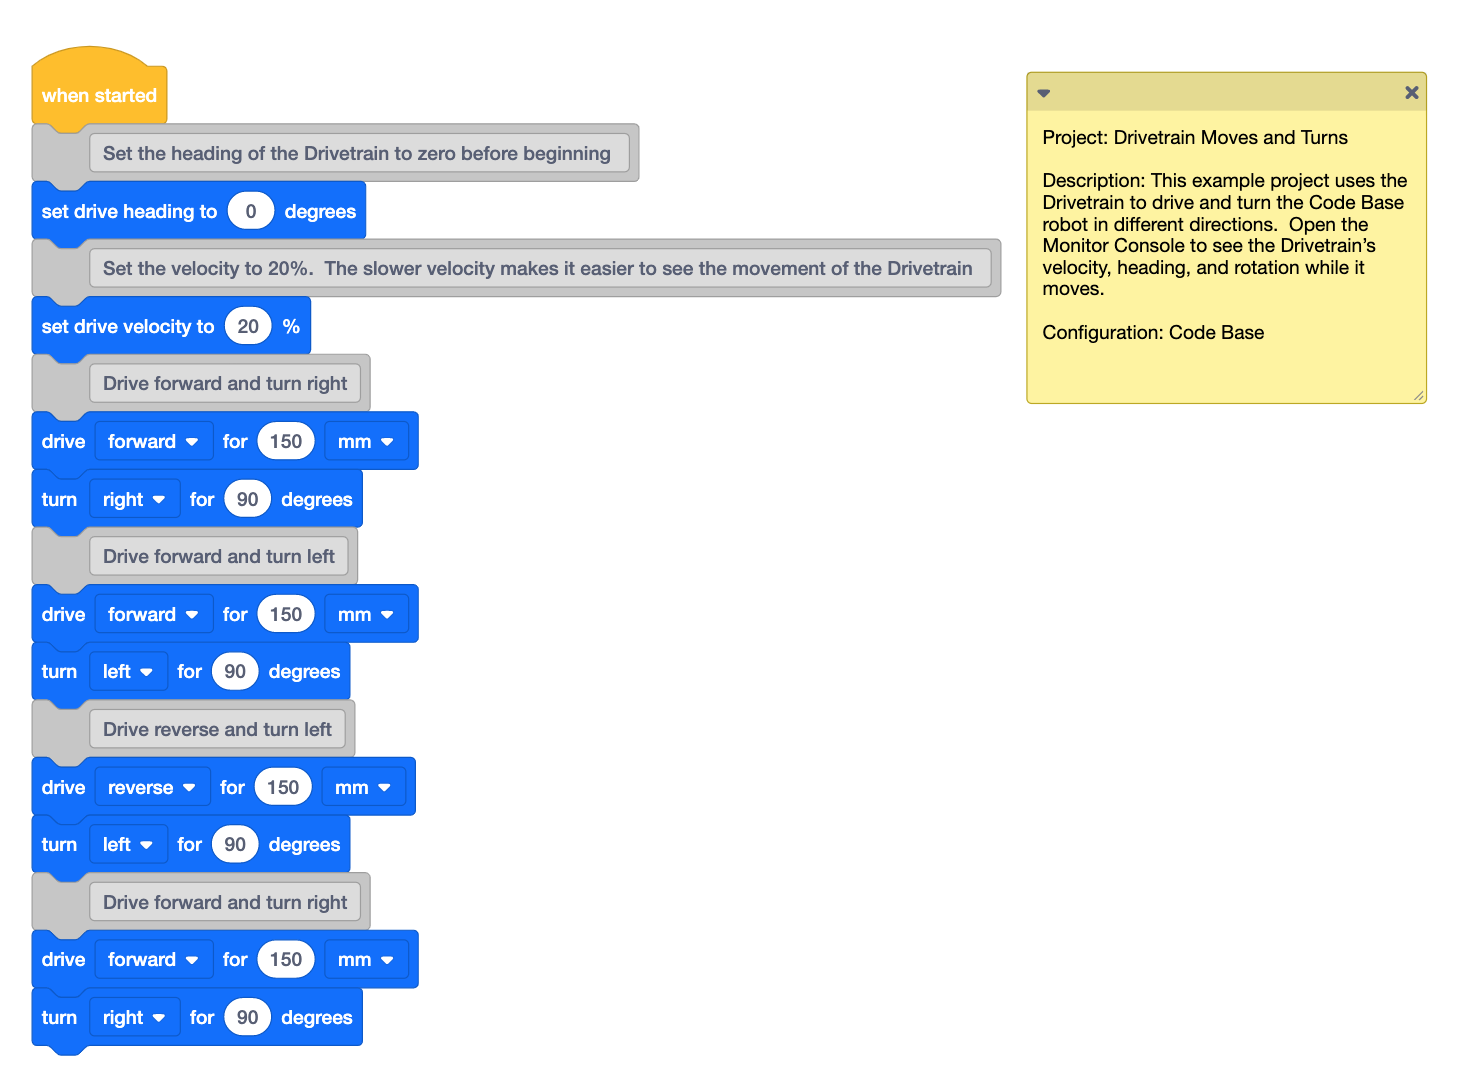
Open the 'Drivetrain Moves and Turns' example project.
Drivetrain Moves and Turns - Model for students how to name and save the example project. Have students name their project Drive.
- Then, have students start the project and observe the movement of the Code Base.
-
After the project is complete, students should be sure to select 'Stop' in the Toolbar.
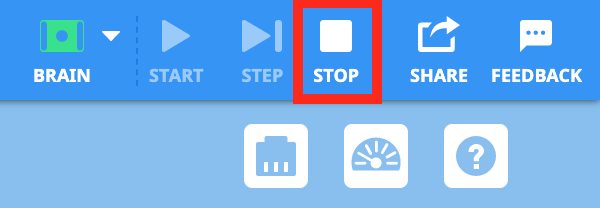
Stop the Project -
Model for students how they can change the parameter of one of the blocks by selecting a dropdown or changing the number in the [Drive for] and [Turn for] blocks. Students should make 1-2 changes, then start their project to see what changed.
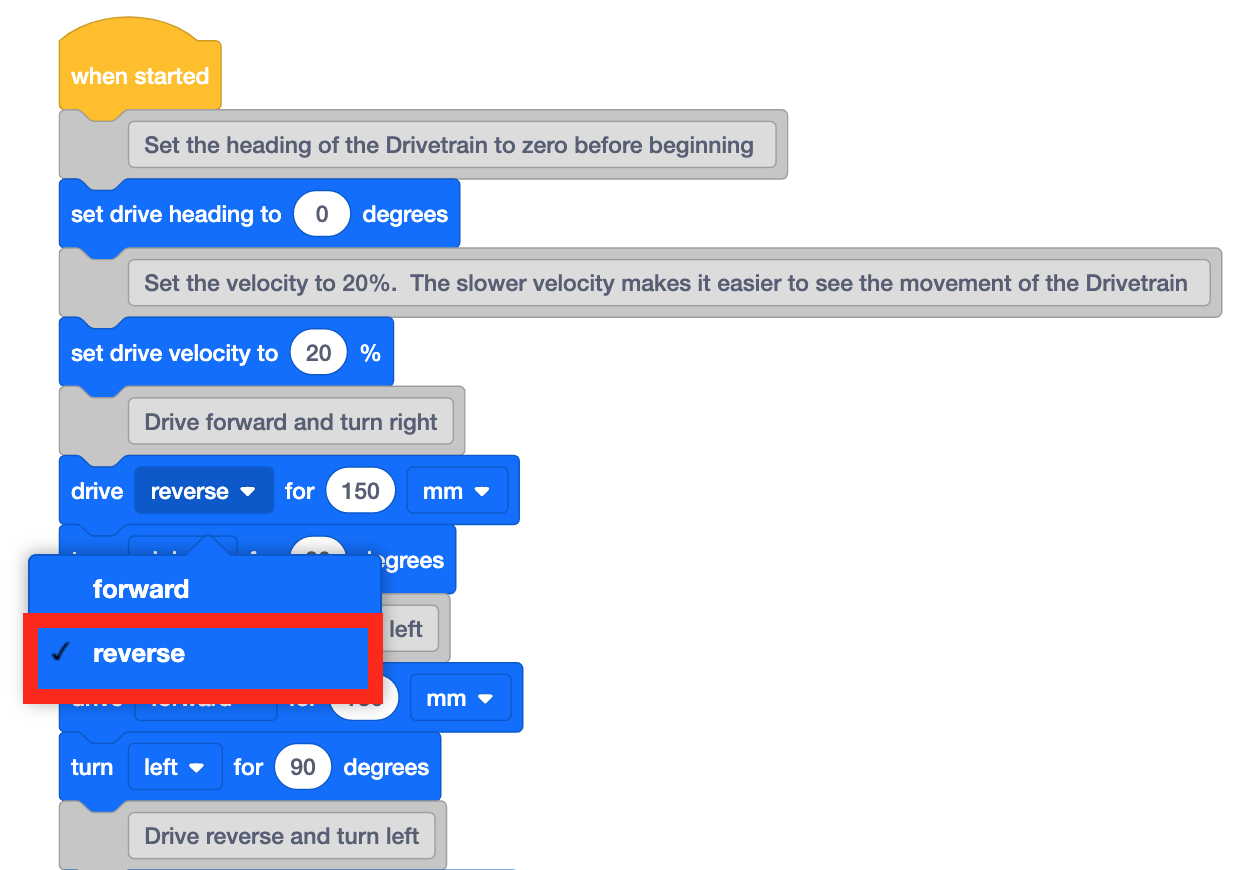
Change Parameters - Students should continue testing different parameters and see how the Code Base moves as a result.
- Help can be used to provide details on how to use the block and how to change the block’s parameters.
- FacilitateFacilitate a discussion with students as they test the example project.
- What parameters have you changed? How did they affect the movement of the Code Base?
- What do you think would happen if the first [Drive for] block was set to drive 200 millimeters? How would that compare to the original parameter?
- RemindRemind groups that if they are confused on what a block does, they can use the Help feature.
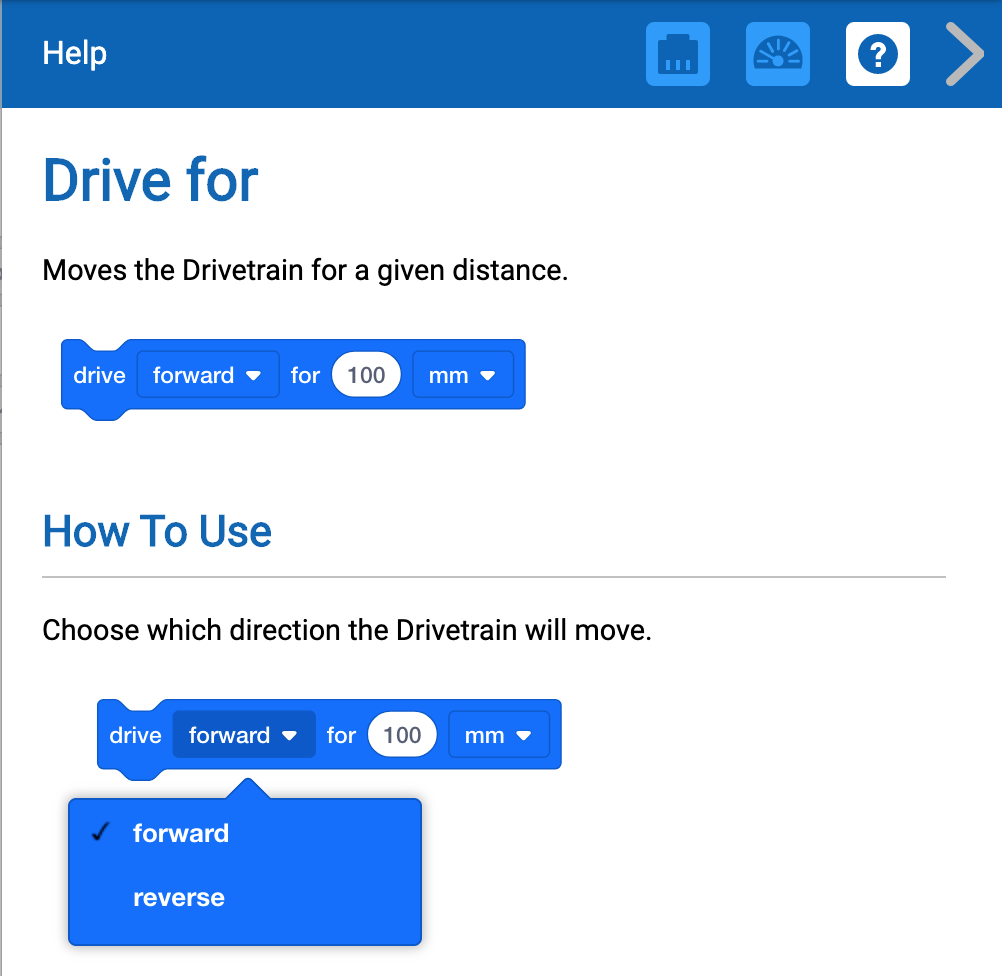
Help Window - AskAsk students what other things they know that use code. Have them list everyday items/devices that they use that they think use code.
Mid-Play Break & Group Discussion
As soon as every group has finished testing the example project, come together for a brief conversation.
- What parameters did your group change while testing the example project?
- How did your Code Base move after you changed that parameter in the "Drivetrain Moves and Turns" example project?
- If you had a chance to change one additional block in the project, what would you change? How do you think it would change how the Code Base moves?
Part 2 - Step by Step
- InstructInstruct each group that they will be creating their own VEXcode GO project to drive the Code Base past the second gate of the slalom course. View the animation below to see how the Code Base could move to start the course. In this animation, the Code Base begins in the lower left corner of the four tile course. It drives forward past the first gate. It then turns 90 degrees to the left and drives forward to pass the second gate. Finally, the Code Base turns 90 degrees to the right and drives toward the third gate then stops.
Video file
- ModelModel for students the steps to launch VEXcode GO.
- Model the steps to connect a Brain to your device.
- Students should use the 'Drivetrain Moves and Turns' example project as a starting point for their slalom project. Model for students how to open the example project by selecting the File Menu and then 'Open Examples.'
-
Once the example project is open, students should save the project and name it Slalom Course.

Name the Project -
Model for students how to add and remove blocks from the project. They add blocks by dragging each block into the Workspace and can remove them by dragging the blocks from the Workspace back into the Toolbox. View the video below to see how blocks at the end of the stack are selected and dragged back towards the Toolbox, and deleted, to remove them from the project.
Video fileRemove Blocks -
Students should add and remove blocks as needed to build their project that drives the Code Base past the second gate of the slalom course. Once they think they have a project that will work, model for students how to test by placing the Code Base at the starting point and start their project.
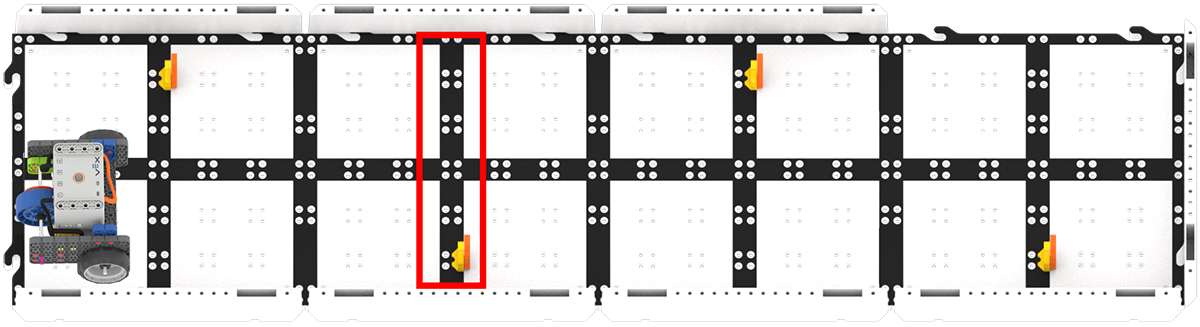
Second Gate of the Slalom Course - Remind students to stop their project after each test.

Stop the Project - NOTE: Students can map out their plan for navigating the Code Base through the slalom course by editing the comments in the project.
- FacilitateFacilitate a discussion with students as they create their projects and test their code.
- How far does the Code Base need to drive forward at the beginning?
- Describe how the Code Base is going to move to get it past the second gate.
- What parameters are you changing in your project? Why?
- So far, how does this compare to remote control driving your Code Base through the course?
- RemindRemind groups that this may take multiple tries to get their project to work. Each time the project fails, they learn a bit more about coding and what it will take to succeed at the challenge!
- AskAsk students to think about a time when they have had to try something multiple times before they got it right. Share with students a time when you have tried something multiple times before you got it right. Adults in all professions in the real world constantly have to rework ideas and projects daily to make things better.