
Play
Part 1 - Step by Step
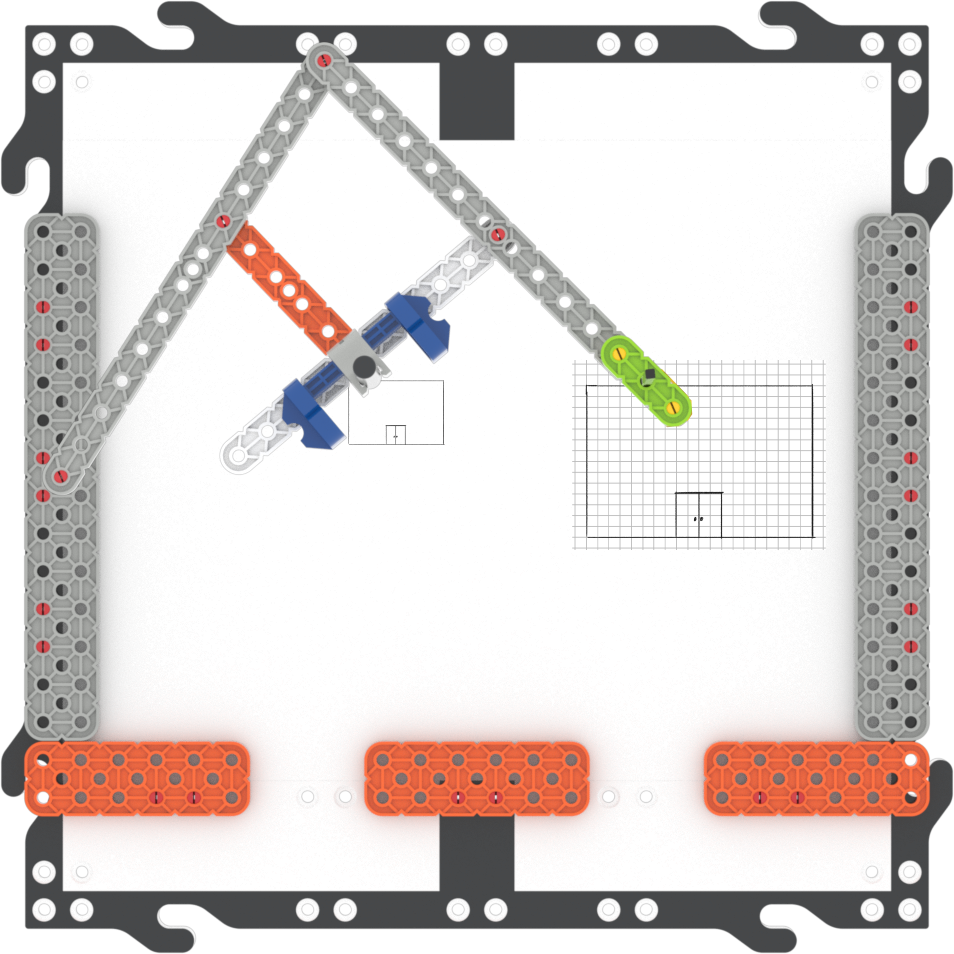
- InstructInstruct each group that they will draw a large school outline, and use the Pantograph to make a small copy for each group member. First students will insert the Blueprint Worksheet or plain paper under the Pantograph and draw a large outline of their astronaut school.

Example School Outlines - With the basic outline in place, each student should fold an extra sheet of paper, insert it under the pen attachment, and trace the large outline to create a smaller scaled copy. Each student will now have a smaller copy to add their own design ideas to.
- ModelModel using a group’s setup, how to line up the original large outline with the extra paper so that the small copies are made on individual sheets. You may want to fold the Blueprint Worksheet with the larger outline to allow for more space to create the smaller copy.

Create multiple small copies - FacilitateFacilitate the design process by moving between groups and making sure students are successfully using the Pantograph to make their individual copies.
Facilitate conversations between group members by asking questions about their design choices.
- Why did you choose that shape?
- How do you plan to overcome the design challenges we listed?
- What is something you think is unique to your design? Why is it important to you?
- RemindRemind groups to add their design ideas to the second box of the Engineering Design Process Organizer.
Students should continue to complete the Engineering Design Process Organizer, alongside their drawings. They can use the organizer to write notes that will help them when they share their designs with the class.
- AskAsk students to review their individual drawings to think about how they solve the design challenge for the bid, and about the design bid process. How do they think real architects or designers feel about participating in the bid process? How do they think collaboration plays into the creation of a design bid?
Mid-Play Break & Group Discussion
As soon as every group has completed their individual designs, come together for a brief conversation.
- What aspects of your design do you think work well to solve the design challenges of an astronaut school?
- How do you think having multiple design ideas in your group will help you come up with a better design?
Each group is only going to be able to submit one design from the group. What are some ways we could combine designs, or make design choices together, to make that collaboration successful?
Part 2 - Step by Step
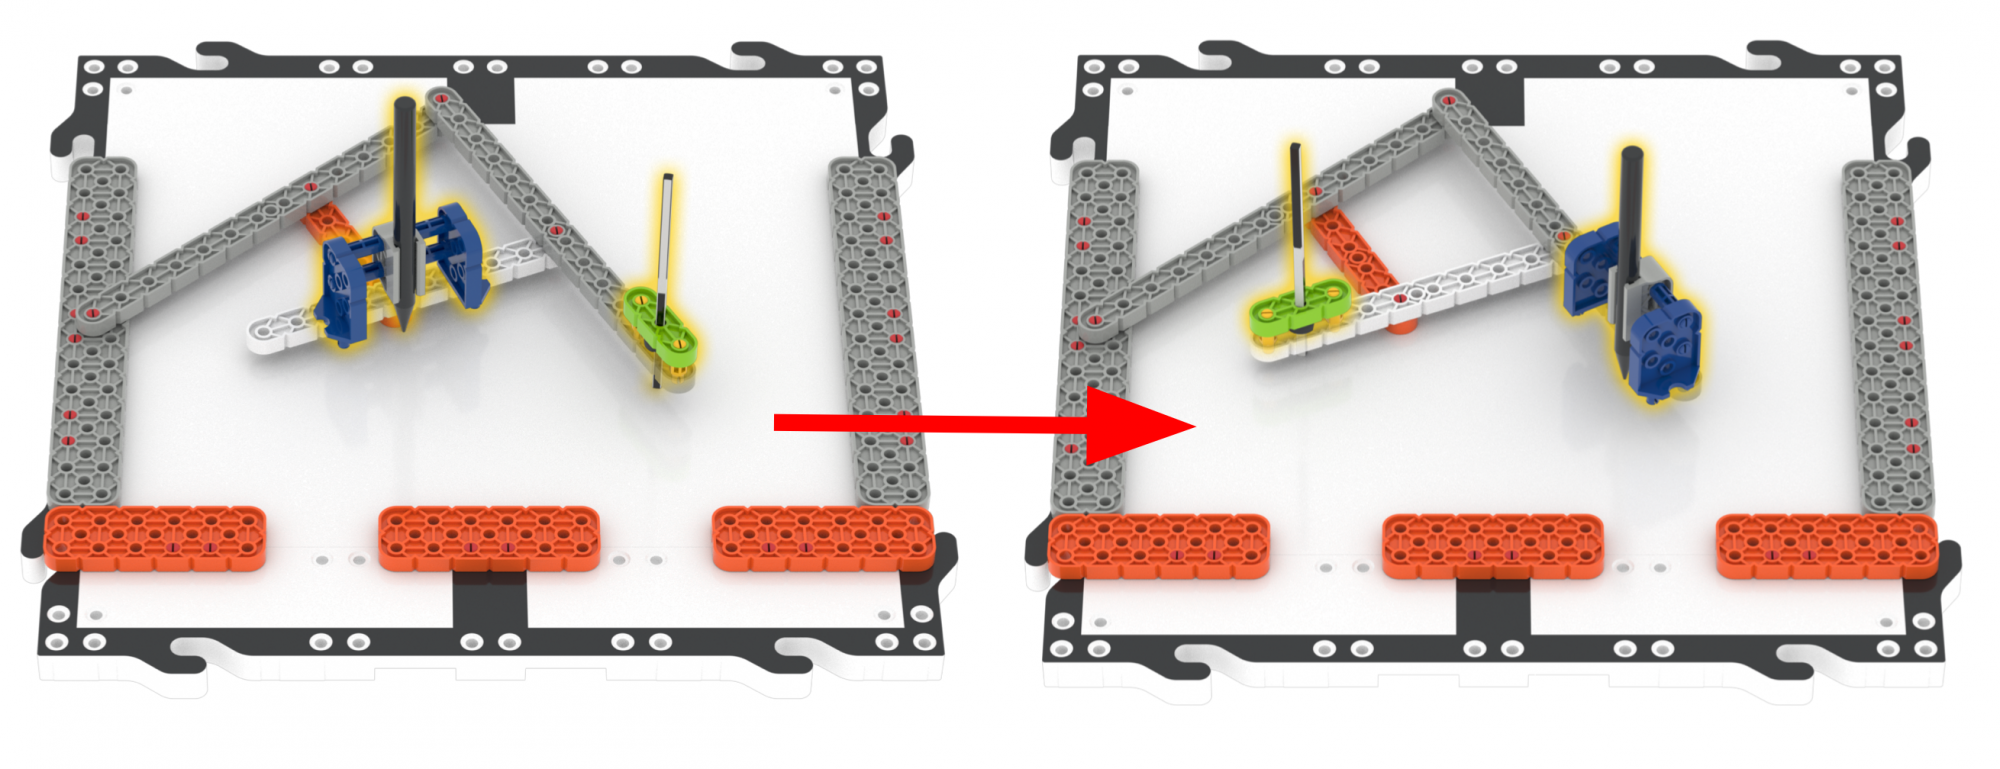
- InstructInstruct each group to compare their individual designs and collaborate to decide on one final design to submit for the bid. Students will switch the pen attachment and tracing attachment on the Pantograph. Each group will trace the elements from the individual designs onto their original school outline. Students will add any remaining details by hand and submit their final bid.

Example of a school design - ModelModel how to switch the Pantograph attachment for students to make sure they are in the correct location.
Switching attachments - FacilitateFacilitate the final design creation by asking students questions about their collaborative process, and use of the Pantograph.
- How did you work together to make the best possible design?
- Did you get new ideas when comparing your designs?
- How does the Pantograph work when drawing larger scaled drawings of the details, compared to smaller scaled outlines?

Collaborate on a final school design bid - Groups should also fill out their final design details on the Engineering Design Process Organizer.
- RemindRemind groups to use what they have learned about the Pantograph to make their designs come to life. Keep the Pantograph’s tracing attachment as steady as possible to get the scaled details as accurate as possible.
Remind groups to refer to their decision making agreements on the Robotics Roles & Routines sheet, if they need help making design choices. They can take turns adding elements, or roll a die to help make decisions fairly.
- AskAsk students to review the final design they created with the Pantograph and evaluate what worked well and what could use improvement. Have students post final designs on the board for everyone to see. If this were a real design bid, what other constraints or concerns do they think they would have to include for the evaluation?
Optional: Teams may deconstruct their Pantograph if needed at this point in the experience.