Play
Part 1 - Step by Step
- InstructInstruct students that they will be creating a project where the Robot Arm will move to each of the four Green Plates on the tile.
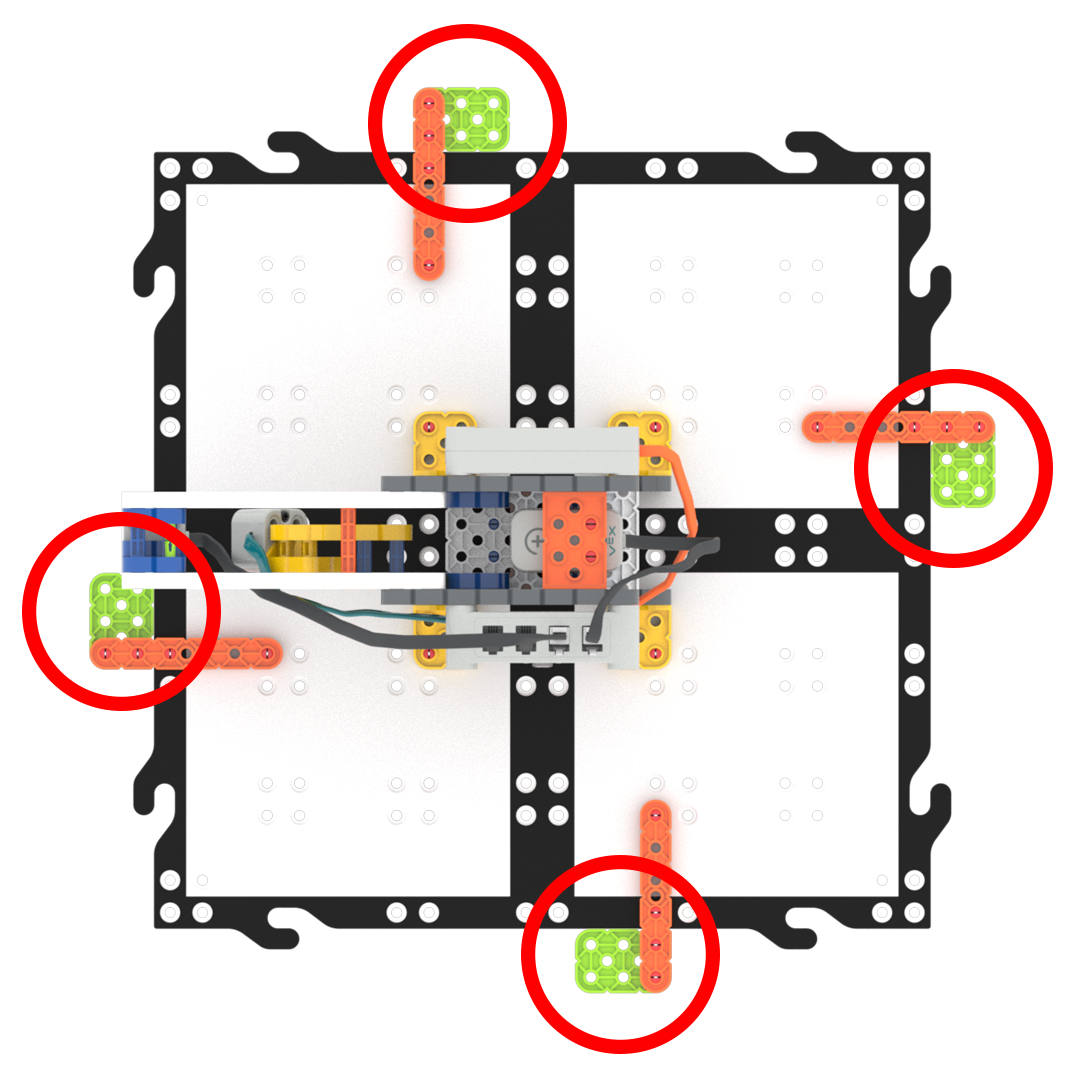
Four Green Plates - ModelModel for students the steps to create a project that instructs the Robot Arm to move to each to the four green plates on the GO tile by spinning the base motor.
- Model for students the steps in the article Open and Save a Project for your device. Then, have them follow these steps to open and create their projects.
-
Have students save their project as Lab 3 Part 1. If multiple groups will be working on the same devices, have them add their name to the project.

Name the Project - Students will then need to connect their Robot Arm (1-Axis) to their device and configure the Robot Arm.
Note: When you first connect your Robot Arm to your device, the Gyro built into the Brain may calibrate, causing the Robot Arm to move on its own for a moment. This is an expected behavior, do not touch the Robot Arm while it's calibrating.
-
Model the steps in this article Configure a Robot Arm to guide students in the process to Configure their Robot Arm.

Brain Connected - Show how to add the [Spin for] block to the workspace and attach it to the {When started} hat block. Have students follow along with you on a projected screen or through the Lab 3 Slideshow.

Add [Spin for] block - Explain to students that the [Spin for] block has multiple motor options. They will just be moving the Base Motor, so students should select the name of the motor and change it to “base.”
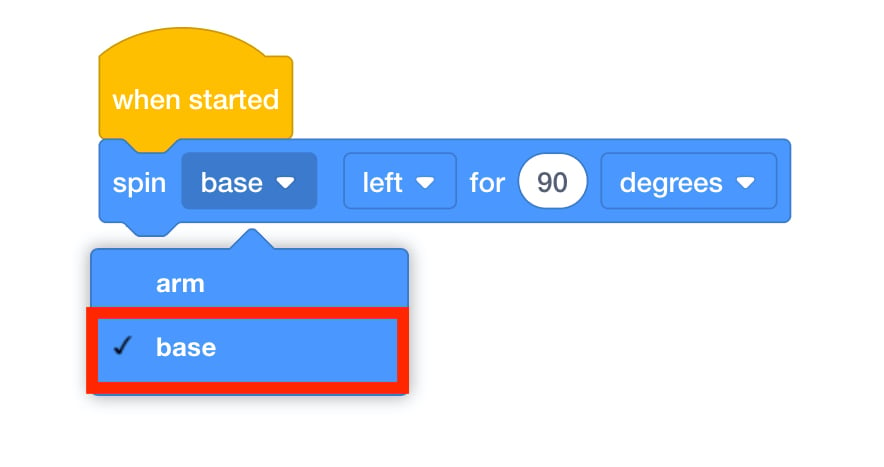
Select 'base' motor - The goal is to move the Base Motor to the right to reach the next Green Plate. Instruct students to select “right” from the next dropdown. The next Green Plate is 90 degrees away from the current location, so the rest of the block is ready to go.
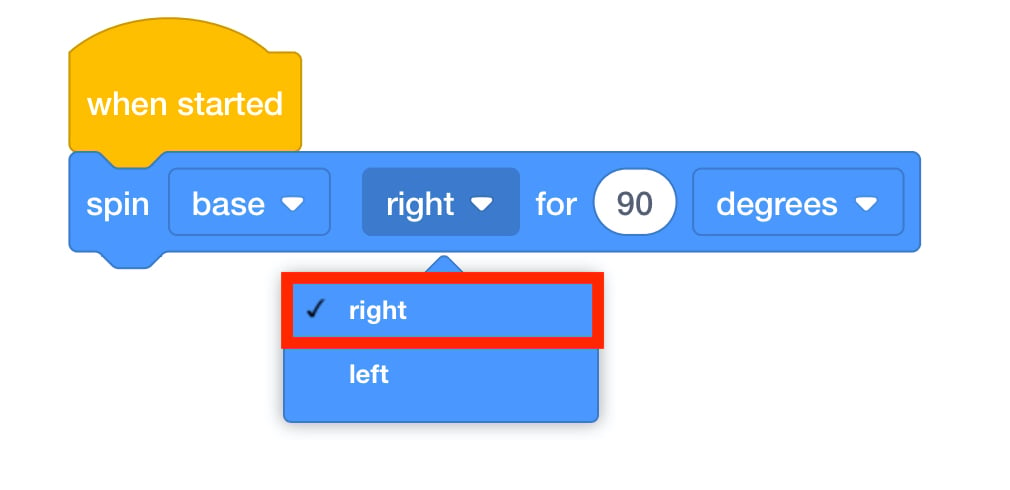
Select 'right' - When the Robot Arm reaches the Green Plate, students should code the Robot Arm to wait before moving to the next location. Have the students add a [Wait for] block and set it to wait for 2 seconds.
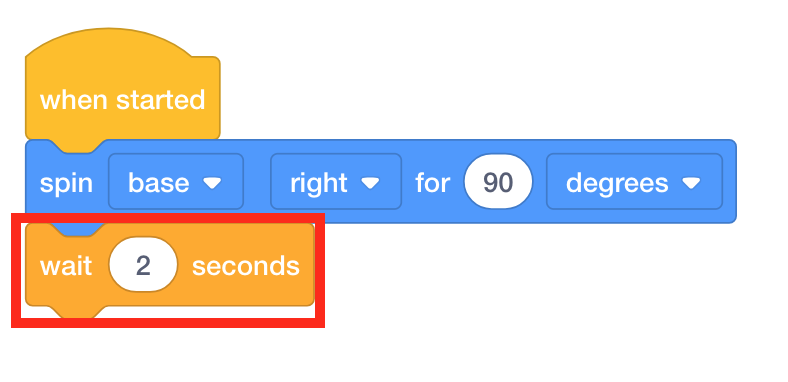
Add [Wait for] Block - Have students start the project and see how the Robot Arm moves. If they have any problems moving to the first Green Plate, have them follow these steps again. If needed, see the article Starting a Project in VEXcode GO and model the steps to start a project for students.
- Once students have successfully moved their Robot Arm to the first Green Plate, challenge them to follow the same steps and add additional blocks so their Robot Arm moves to all four Green Plates.
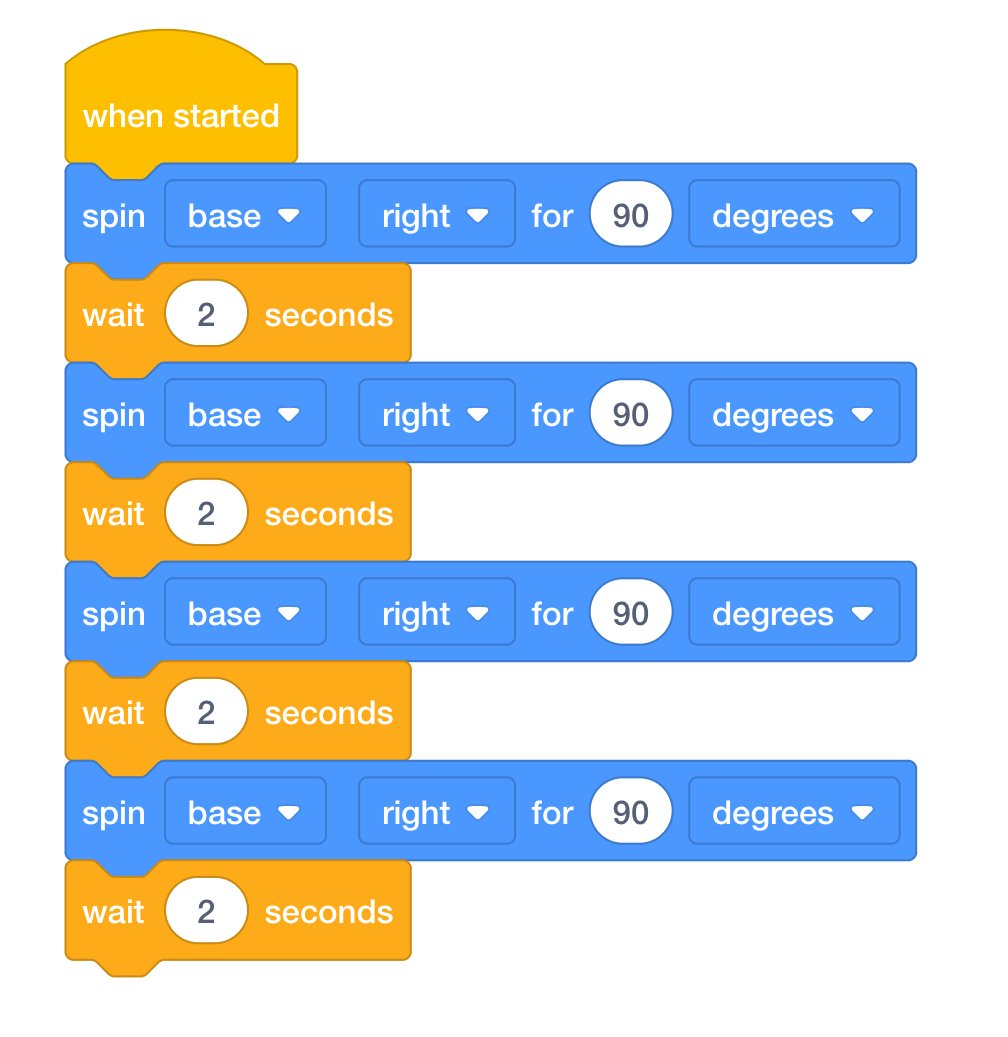
Lab 3 Part 1 Finished Project - FacilitateFacilitate a conversation with students about their project as you circle the room. Ask them some of the following questions to spark a discussion.
- How many additional blocks do you think you need for your Robot Arm to move to all four Green Plates?
- What do you think would happen if we changed the [Spin for] block to spin 180 degrees? Where would the Robot Arm stop moving?
- If you wanted to move a disk while you moved the Robot Arm, what other blocks would you need to add?
- How do these blocks relate to the step-by-step instructions you made for the Motorized Robot Arm?
- RemindRemind groups to ask questions if they get confused. Not every attempt will run properly.
Each time they start the project, students should identify what went wrong and brainstorm ideas for how to fix it.
Trial and error is expected. If students are frustrated and need more assistance, show them how to duplicate blocks by right-clicking or long-pressing on a block.
- AskAsk students to think back to the list they made in Engage about the devices at home that they use and how they are controlled.
In this section, students were using the [Spin for] block to control a motor. How many of these devices do they think have motors?
Mid-Play Break & Group Discussion
As soon as every group has moved the Robot Arm (1-Axis) to all four locations, come together for a brief conversation.
- What did your group struggle with the most when building the project? What was the easiest part of creating the project?
- Now we are going to move a disk. But this magnet looks different. What do you notice about the Electromagnet compared to the original magnet?
- Since we can control our Electromagnet using VEXcode GO, let’s use our Electromagnet and the blocks from Play Part 1 to create a new project to move disks from one location to another.
Part 2 - Step by Step
- InstructInstruct students that they are going to revise their project in order to create a project where the Electromagnet picks up a disk and places the disk in a different location.
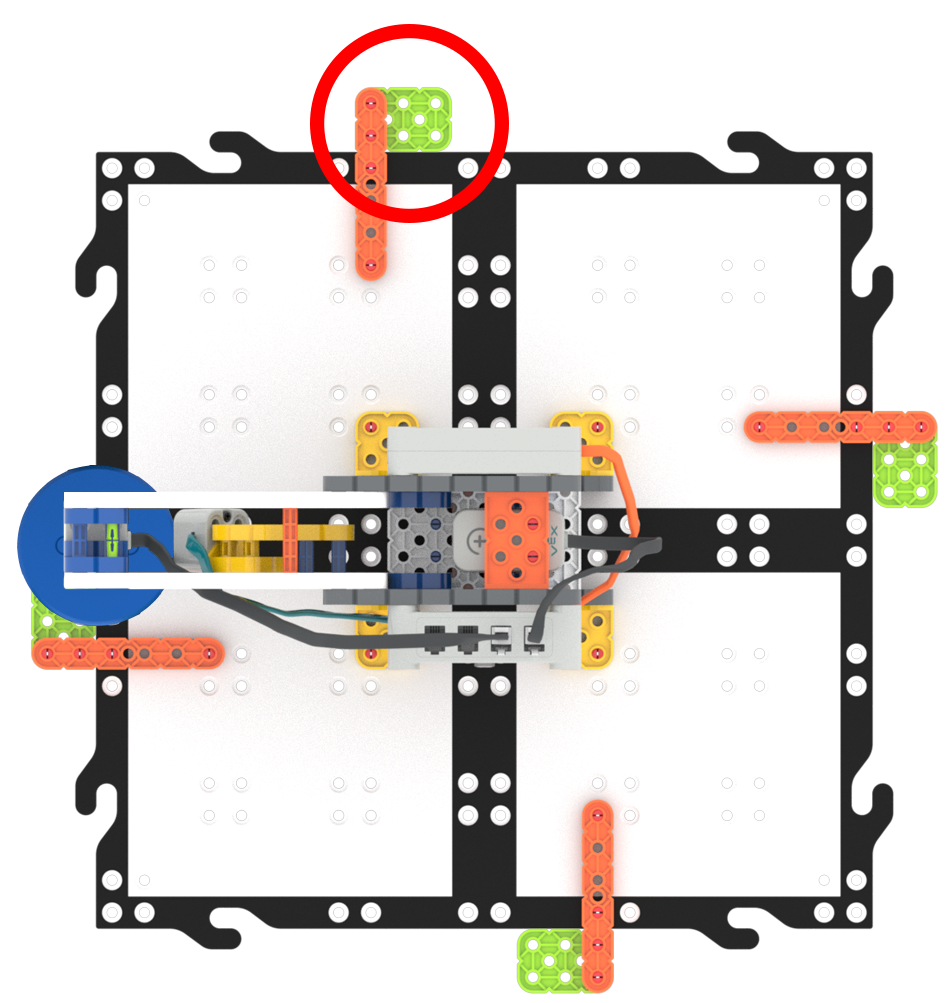
Move a Disk to a New Location - ModelModel launching VEXcode GO, and creating a project where the Robot Arm picks up a disk and moves it to the right, then returns to the starting position.
- Have students to open their Lab 3 Part 1 project, they will use this as a base for the project in this section.
-
Students will need to save their project at the beginning of the Lab. Have them select “Save As” or "Save to Your Device" (depending on which VEXcode GO version they are using) from the FIle Menu and save their project as Lab 3 Part 2. If multiple groups will be working on the same devices, have them add their name to the project.

Name the Project
-
If it is not still connected, students will need to connect their Robot Arm (1-Axis) to their device. If needed, model for students the steps in this article Connect a VEX GO Brain to help them connect the brain to their device.

Brain Connected - Show students how to disconnect blocks from the {When started} block and move the stack to the side. Have students follow along with you on a projected screen or through the Lab 3 Slideshow.
- Note: Let students know that this stack will not run because it is not attached to the {When started} block.
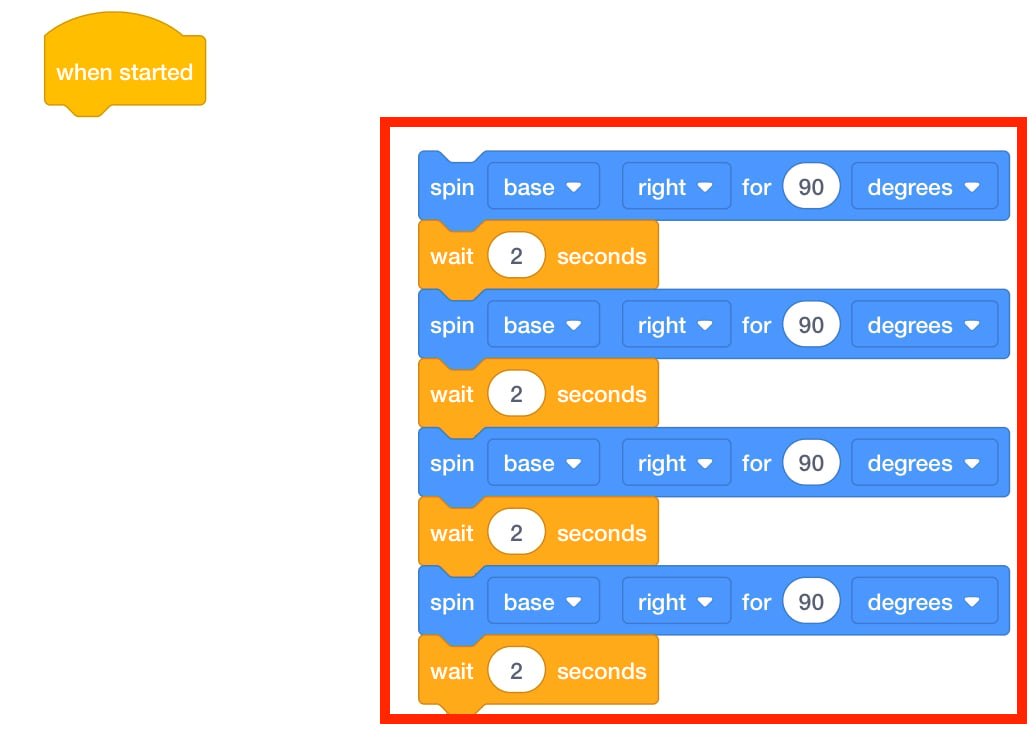
Unattached blocks will not run - Introduce students to the [Energize electromagnet] block. Explain that this block controls if the Electromagnet is set to “boost” or “drop.”
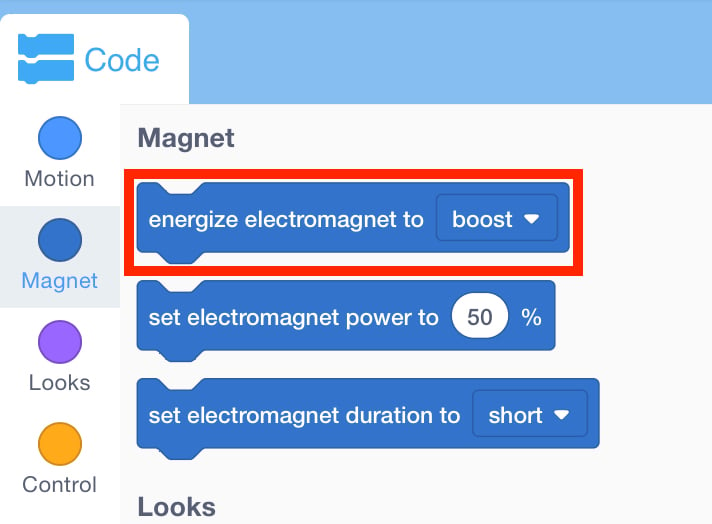
[Energize electromagnet] Block - Drag the [Energize Electromagnet] block into the workspace and attach it to the {When started} hat block.
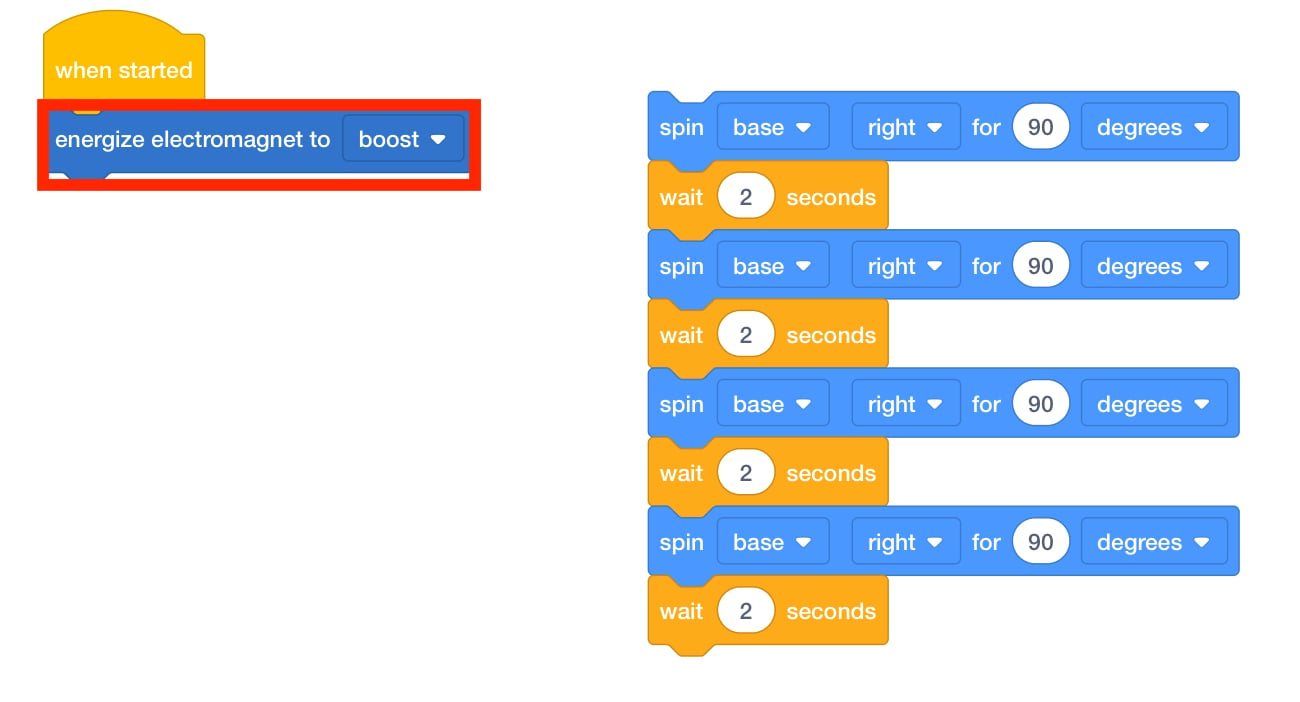
[Energize electromagnet] block - Explain to students that setting the Electromagnet to “boost” will attract any disks so they are picked up. Make sure students have their block set to “boost,” so they can pick up the disk.
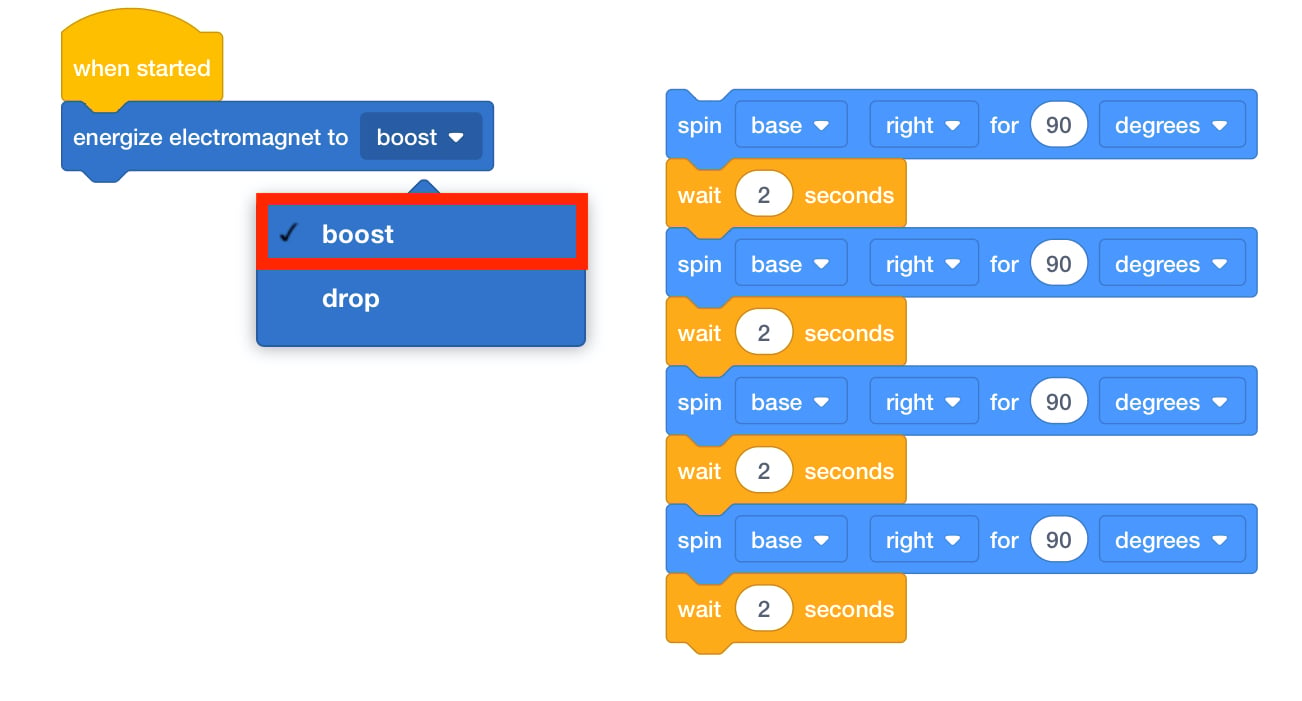
Set to Boost - Now that the Electromagnet has been set to “boost,” students will want to be sure it has time to pick up a disk. Have them add a [Wait for] block set to one second.
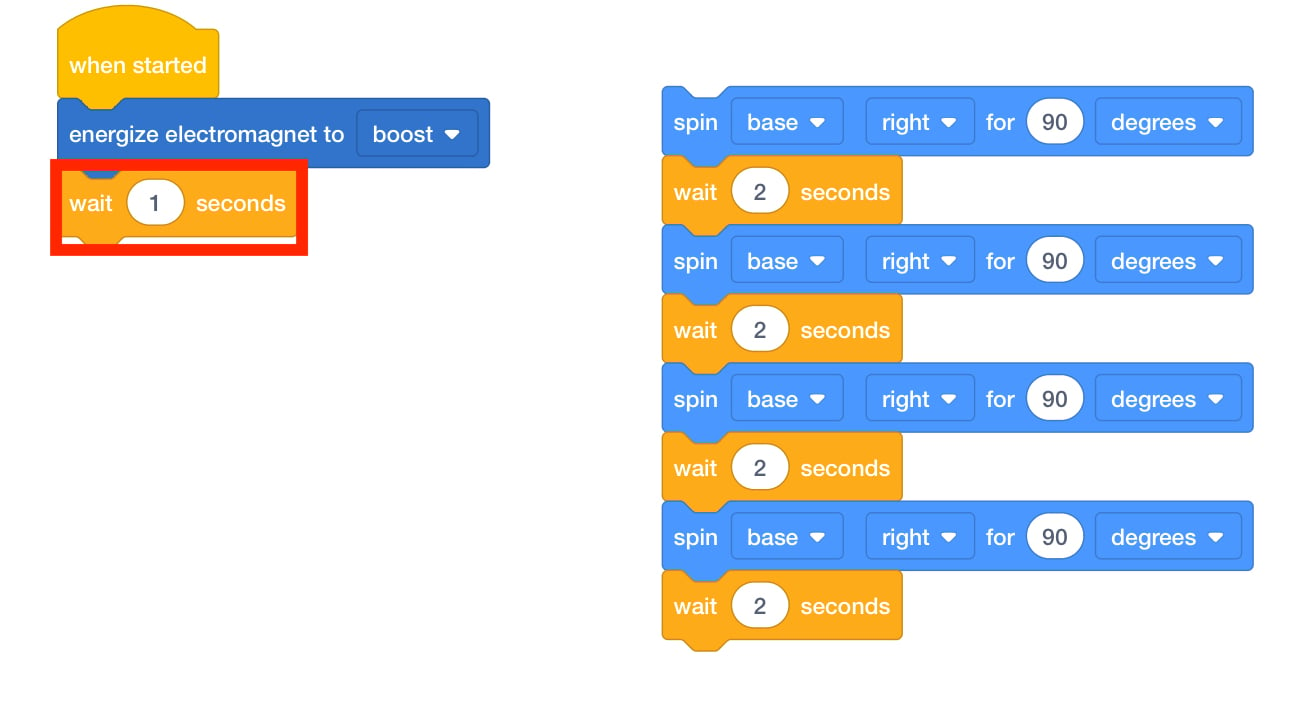
Add [Wait for] - Once the disk has been picked up, they need to move the disk 90 degrees. Ask students what blocks they think they should use to move the disk 90 degrees.
- Students should add a [Spin for] blocks and attach it beneath the [Wait for] block.
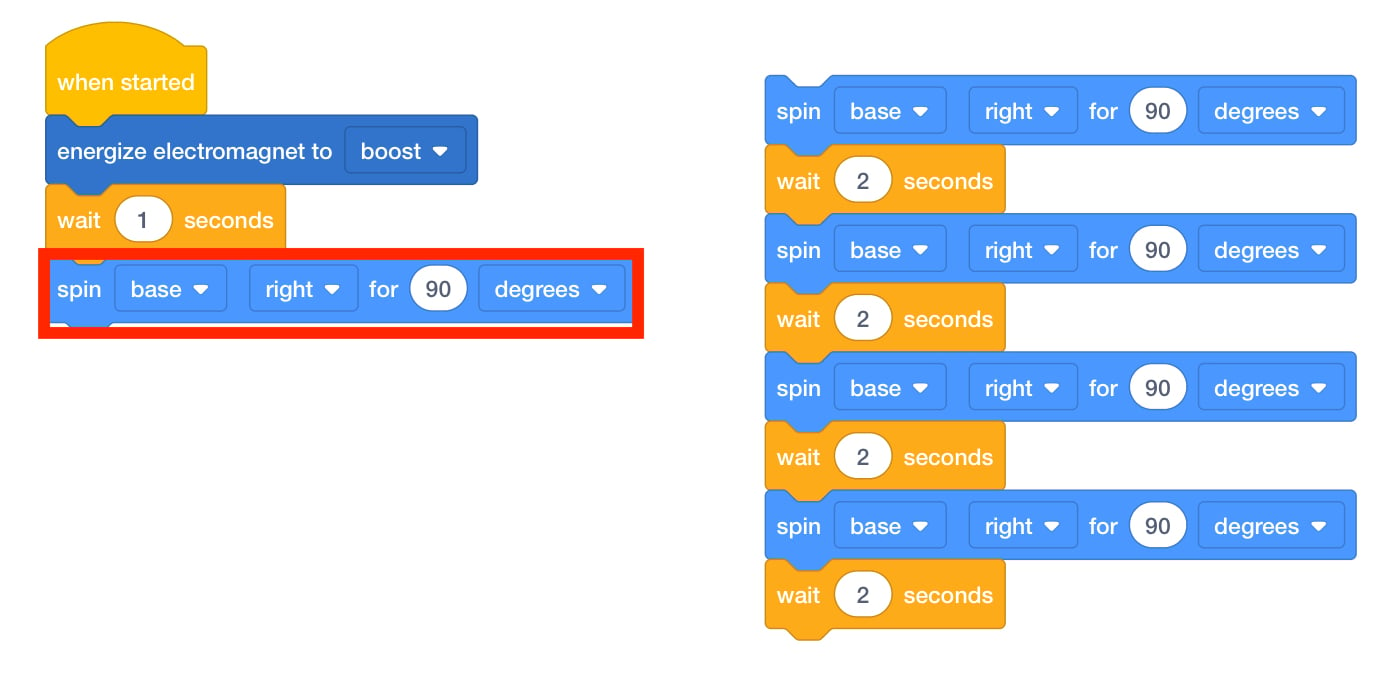
Add [Spin motor for] block - Have students place a disk on the Electromagnet of the Robot Arm, and start the project and see how the Robot Arm moves. If they have any problems picking up a disk and moving it right 90 degrees, have them follow these steps again.
- Note: the Robot Arm moves quickly and the disk may be knocked off of the Electromagnet when it reaches the next quadrant. This can be surprising to students.
- Once students have successfully moved a disk right 90 degrees, they will need to drop the disk and return to their starting position. Challenge students to use the same steps and add additional blocks so their Robot Arm drops the disk and returns to the start.
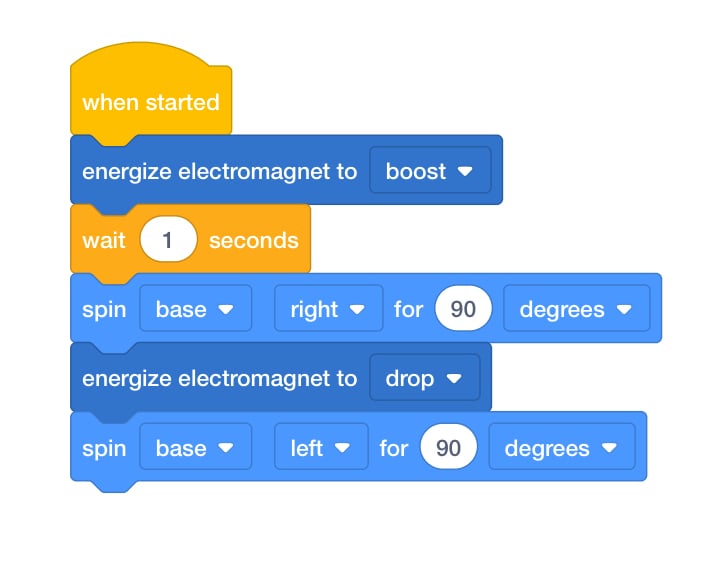
Lab 3 Part 2 Finished Project - FacilitateFacilitate a conversation with students about their project as you circle the room. Ask them some of the following questions to spark a discussion.
- How many additional blocks do you think you need for your Robot Arm to drop the disk and return to the start?
- What do you think would happen if we changed the [Spin for] block to spin 180 degrees? Where would the Robot Arm stop moving?
- If you wanted to move a second disk at the end of the project, what other blocks would you need to add?
- How is this project similar or different to the project you made in Play Part 1?
- RemindRemind groups to ask questions if they get confused. Not every attempt will run properly. Trial and error is expected.
- Each time they run the project, students should identify what went wrong and brainstorm ideas for how to fix it.
- If students are frustrated and need more assistance, remind them how to change the parameter of a block by selecting the drop-down options.
- AskAsk students about some of the chores they have to do at home. How might having an Electromagnet help them finish their chores? Would it be useful for picking up toys? What about clothes? What tasks would be best suited for an Electromagnet?