
Lesson 2: Drive to Number '1'
-
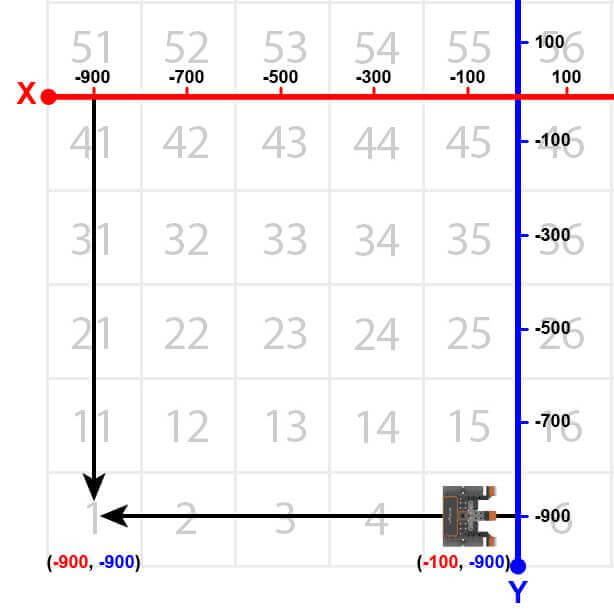
Now the VR Robot will drive back to the number ‘1.’
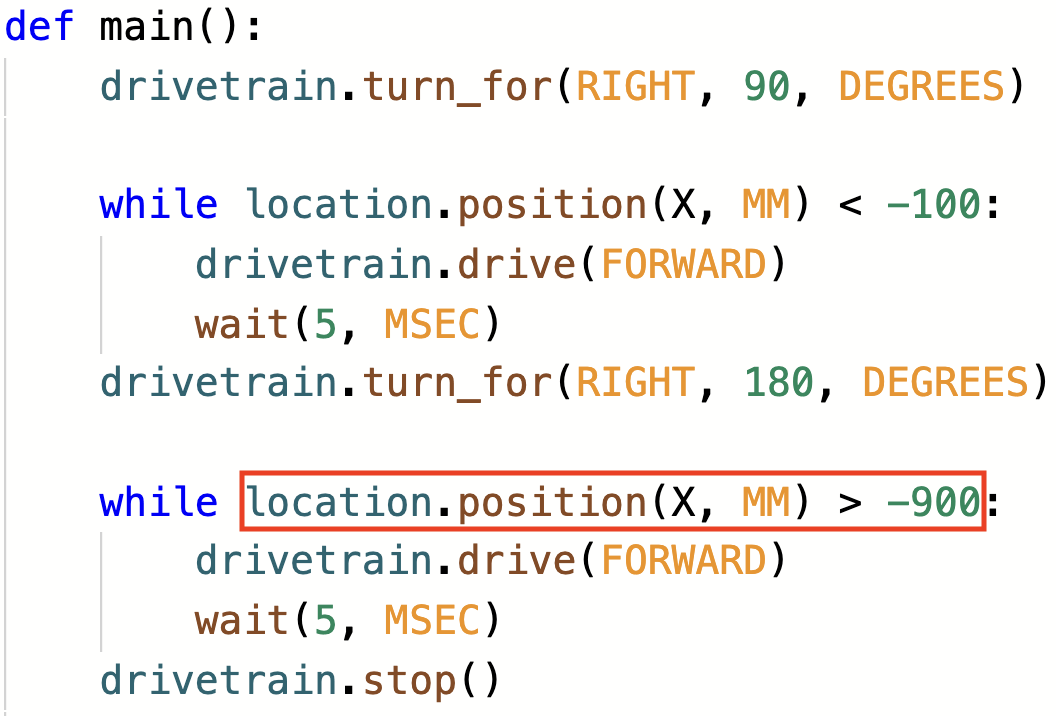
- To navigate the VR Robot back to the number ‘1,’ remove the stop command and replace it with the following commands. Your project should look like this:
# Add project code in "main"
def main():
    drivetrain.turn_for(RIGHT, 90, DEGREES)

    while location.position(X, MM) < -100:
        drivetrain.drive(FORWARD)
        wait(5, MSEC)

    drivetrain.turn_for(RIGHT, 180, DEGREES)

    while location.position(X, MM) > -900:
        drivetrain.drive(FORWARD)
        wait(5, MSEC)

drivetrain.stop()- Note that the second while loop contains a greater than operator instead of a less than operator. This is because the VR Robot is now driving down the X axis and the numbers are becoming smaller. The VR Robot will stop once the X-values are LESS than -900.
- Launch the Number Grid Map Playground if it is not already open and run the project.
- Watch the VR Robot drive to number ‘1’ on the Number Grid Map Playground.
- In this project, the VR Robot drives to the number ‘1’ on the Number Grid Map Playground. Since the X-values are decreasing as the VR Robot drives to the number ‘1,’ the project uses a greater than operator.
- The VR Robot will drive forward while the X-value is greater than the coordinate that the indicated number is on and stop once its X-value is less than the X-value of the coordinate. Since the X-value of the number ‘1’ is -900, the VR Robot will stop driving once the X-value is less than -900.
For Your Information
A wait command will pause the project's flow for a specific period of time in seconds before moving on to the next command. A wait command can be used to help observe individual behaviors in your project that may run quickly together, such as moving between two different locations on a Playground. A wait command can wait in seconds or milliseconds. Both of these commands will pause the VR Robot's movement for 1 second.
wait(1, SECONDS)
wait(1000, MSEC)
In the Number Grid Map Playground, the wait command could be used to cause the VR Robot to pause on a specific number before moving on to the next location in the project. In this example, the wait command will make the VR Robot stop for 2 seconds on the number '5', before driving back to the number '1'.
# Add project code in "main"
def main():
    drivetrain.turn_for(RIGHT, 90, DEGREES)

    while location.position(X, MM) < -100:
        drivetrain.drive(FORWARD)
        wait(5, MSEC)

    drivetrain.turn_for(RIGHT, 180, DEGREES)
    wait(1, SECONDS)

    while location.position(X, MM) > -900:
        drivetrain.drive(FORWARD)
        wait(5, MSEC)

    drivetrain.stop()
Select the Next button to continue with the rest of this Lesson.