Play
Part 1 - Step by Step
- InstructInstruct students that they will practice debugging a project.
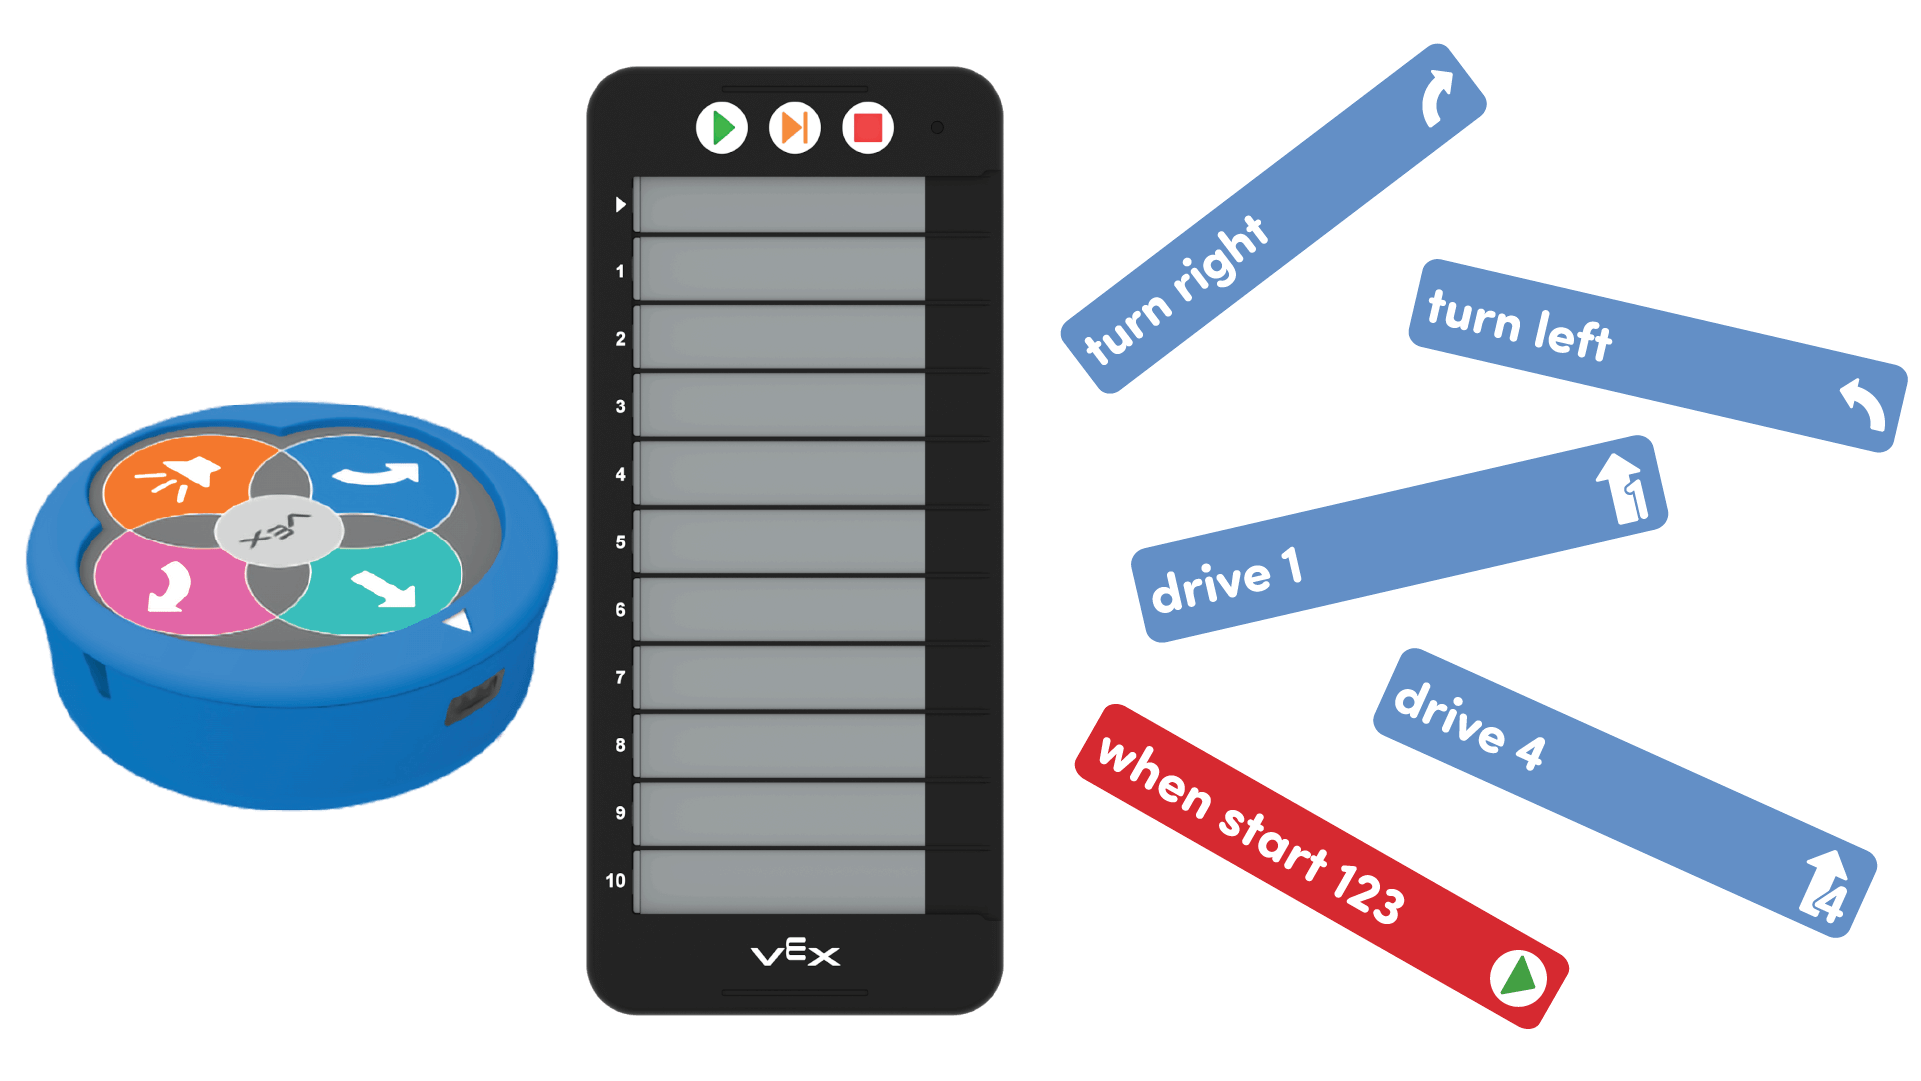
123 Robot, Coder, and Coder cards - ModelModel the project students should create using their Coder and Coder cards.
- Each group will need a 123 Robot, Coder, access to a 123 Field, and the following Coder cards.
- One "When start 123"
- One "Drive 1"
- One "Drive 4"
- One "Turn left"
- One "Turn right"
- Write the following sequence of Coder cards on the board or display for the class to see.
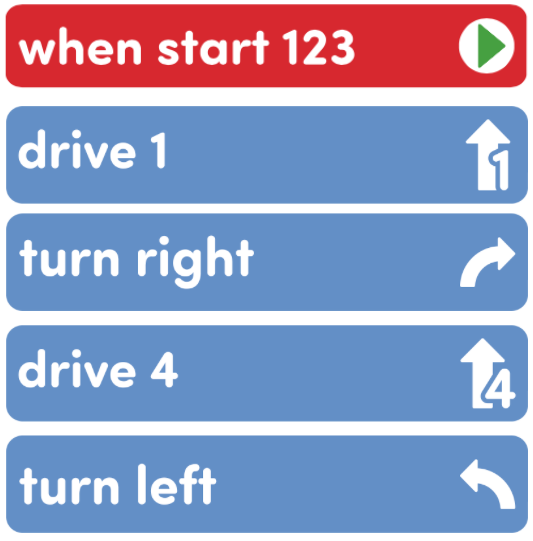
Display Coder Card Sequence. - Have all groups insert the Coder cards into the Coder in the matching sequence.
- Groups should wake the 123 Robot by pushing the wheels along a surface until you hear the startup sound, as shown in the animation below. Turn on sound for this animation. For more information about the 123 Robot, see the Using the VEX 123 Robot Knowledge Base article.
Video file- Then, they should to connect the 123 Robot to a Coder. To connect the 123 Robot and Coder, press and hold the Start and Stop buttons on the Coder, and the Left and Right buttons on the 123 Robot for at least 5 seconds, until you hear the connected sound, and the indicator lights flash in time, as shown in the animation below. Turn on sound for this animation. For more information about the Coder, see the Using the VEX 123 Coder Knowledge Base article.
Video file- Have groups test their project by placing the 123 Robot in the top left corner of their 123 Field, and start their project while other students observe the behavior of the 123 Robot. If groups are sharing a Field, each group should have a turn starting their project.
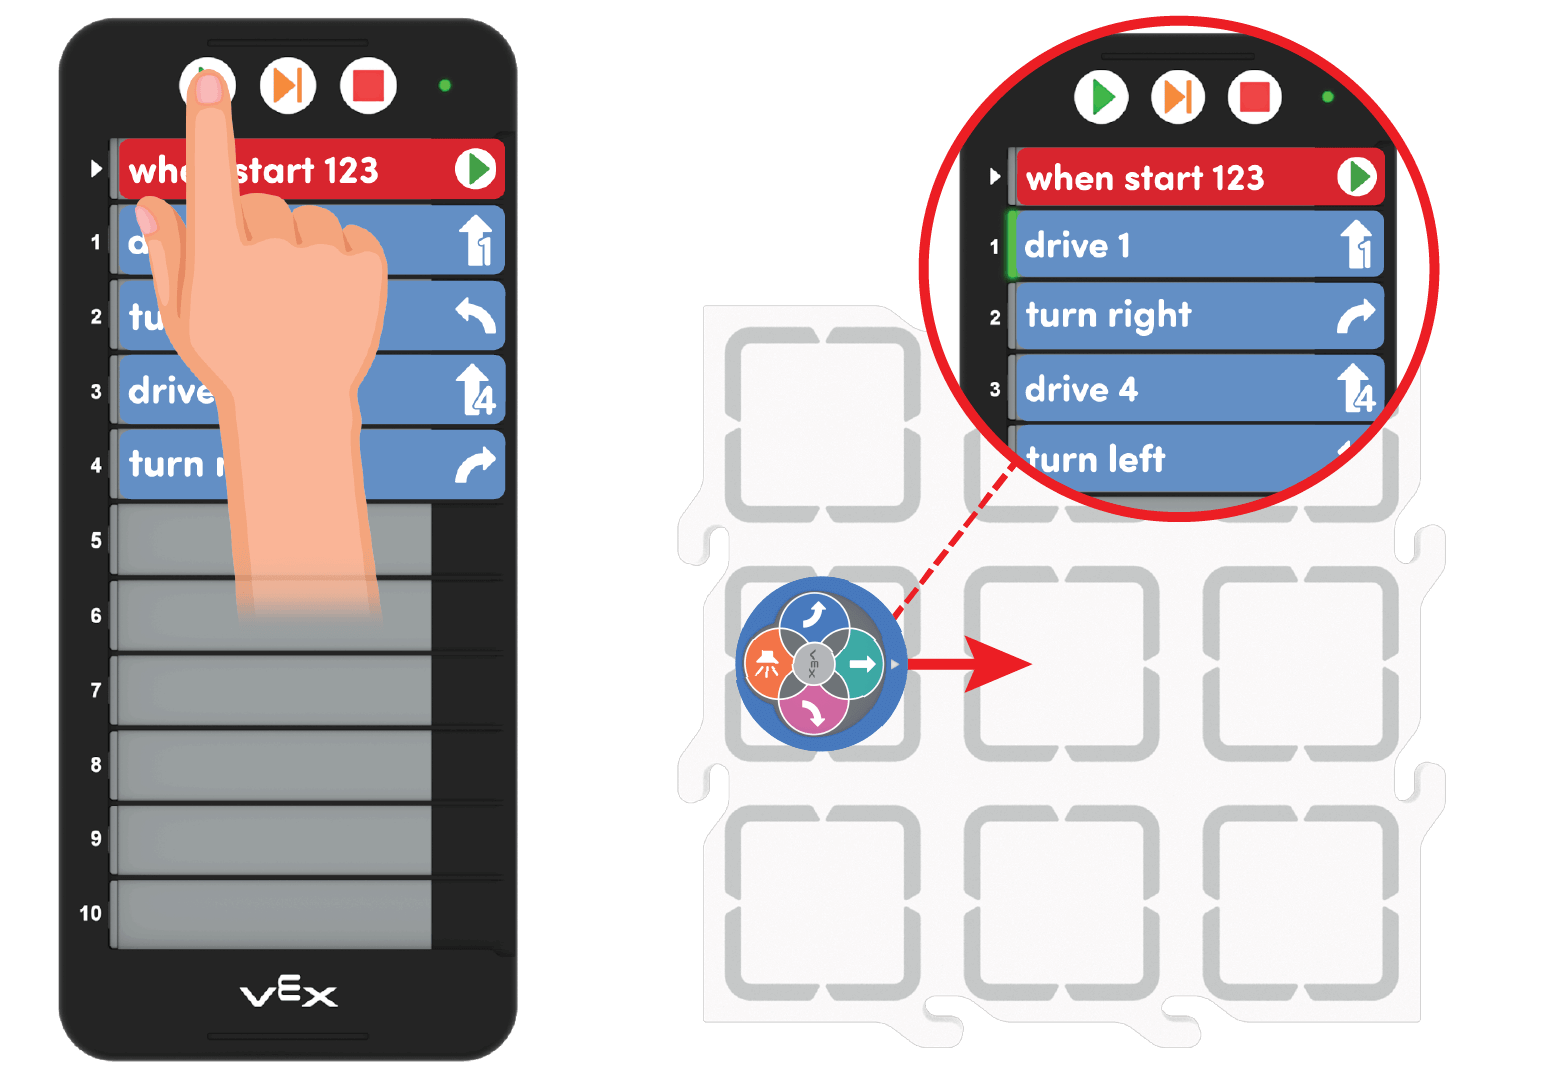
Start the Coder and Observe the 123 Robot - Then, write a note on the board for students to show the intended behavior of the 123 Robot. (for younger students draw symbols to show the intended behavior.
- Intended behavior: 123 Robot drives forward one space, turns left, drives forward four spaces, then turns right.
- Does their project do this? Have them start their projects again and compare the the project to the intended behavior that is posted.
- Show student how to use the Step feature to go through their project one Coder card at-a-time and observe the behavior of the 123 Robot for each card. They can see which card is being actioned by watching the green highlight on the left side of the Coder. Can they find the bug in the project?
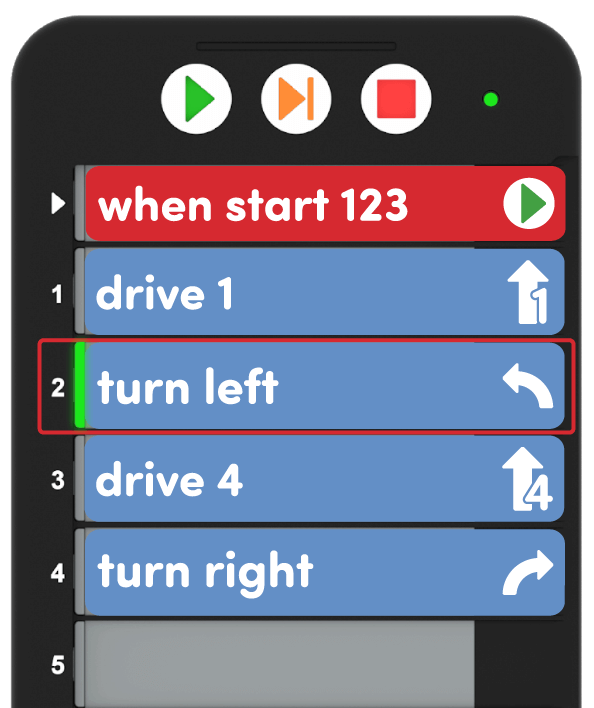
Match 123 Robot Behaviors to the Coder Cards - Have students verbally note the problem cards where the actual behavior does not match the intended behavior and remove those cards from the Coder.
- They should then put the correct Coder card in its place.
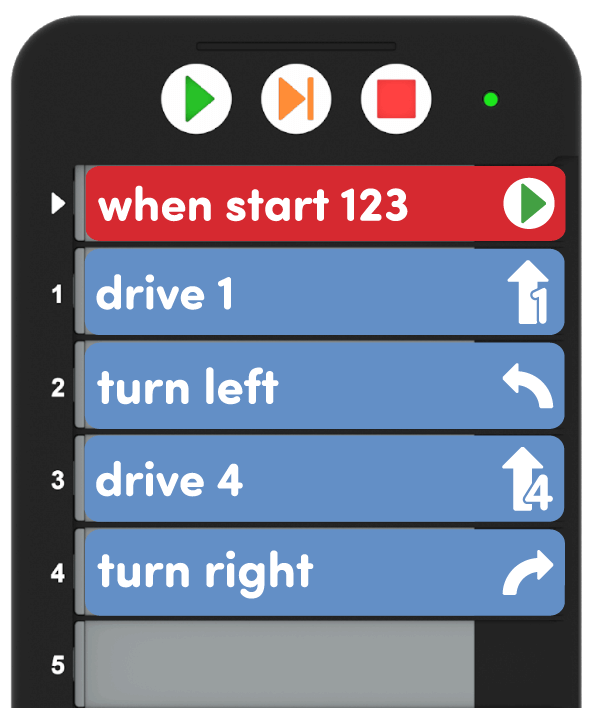
Correct Coder cards - If groups finish early, they can play a debugging game! One person can mix up the Coder cards in the project, and another can find and fix the bugs in the project to have it complete the intended behaviors.
- Each group will need a 123 Robot, Coder, access to a 123 Field, and the following Coder cards.
- FacilitateFacilitate a discussion with students about their debugging process.
- What errors did you find in the Coder cards?
- What steps did your group take to debug the code?
- Use your hands to describe what behaviors were completed by the 123 Robot.
- RemindRemind students that debugging may take more than one try! It is okay if they struggle to fix the incorrect Coder cards. Every time they find and fix a bug, they are making their projects better!
- AskAsk students how they have debugged without a robot. Have they ever tried to solve a puzzle? Did all the pieces fit where they were supposed to on the first try? How is that similar or different to what is happening while you debug with the 123 Robot?
Mid-Play Break & Group Discussion
As soon as every group completes the debugging process, come together for a brief conversation.
- What cards needed to change in your project?
- How did you figure out where the bug was in your project?
- How did the Step feature help you find the bug in your project?
Part 2 - Step by Step
- InstructInstruct students that they are going to now try to follow the debugging process themselves, so they can be Code Problem Solvers.
If students need any reminders, create a Debugging Process area on the board with the following steps (see image slideshow for a slide to project with these steps):
- Start the Coder project.
- Observe the 123 Robot.
- Compare to the intended behaviors.
- Use the Step feature and find an incorrect Coder Card.
- Remove the wrong Coder card, and add the correct card.
- Go back to the beginning and start again!
- ModelModel mixing up the Coder cards into a new project as you distribute additional Coder cards to each group.
- Distribute the following Coder cards to add to the Coder cards they already have from Play Part 1:
- "Play honk"
- "Glow purple"
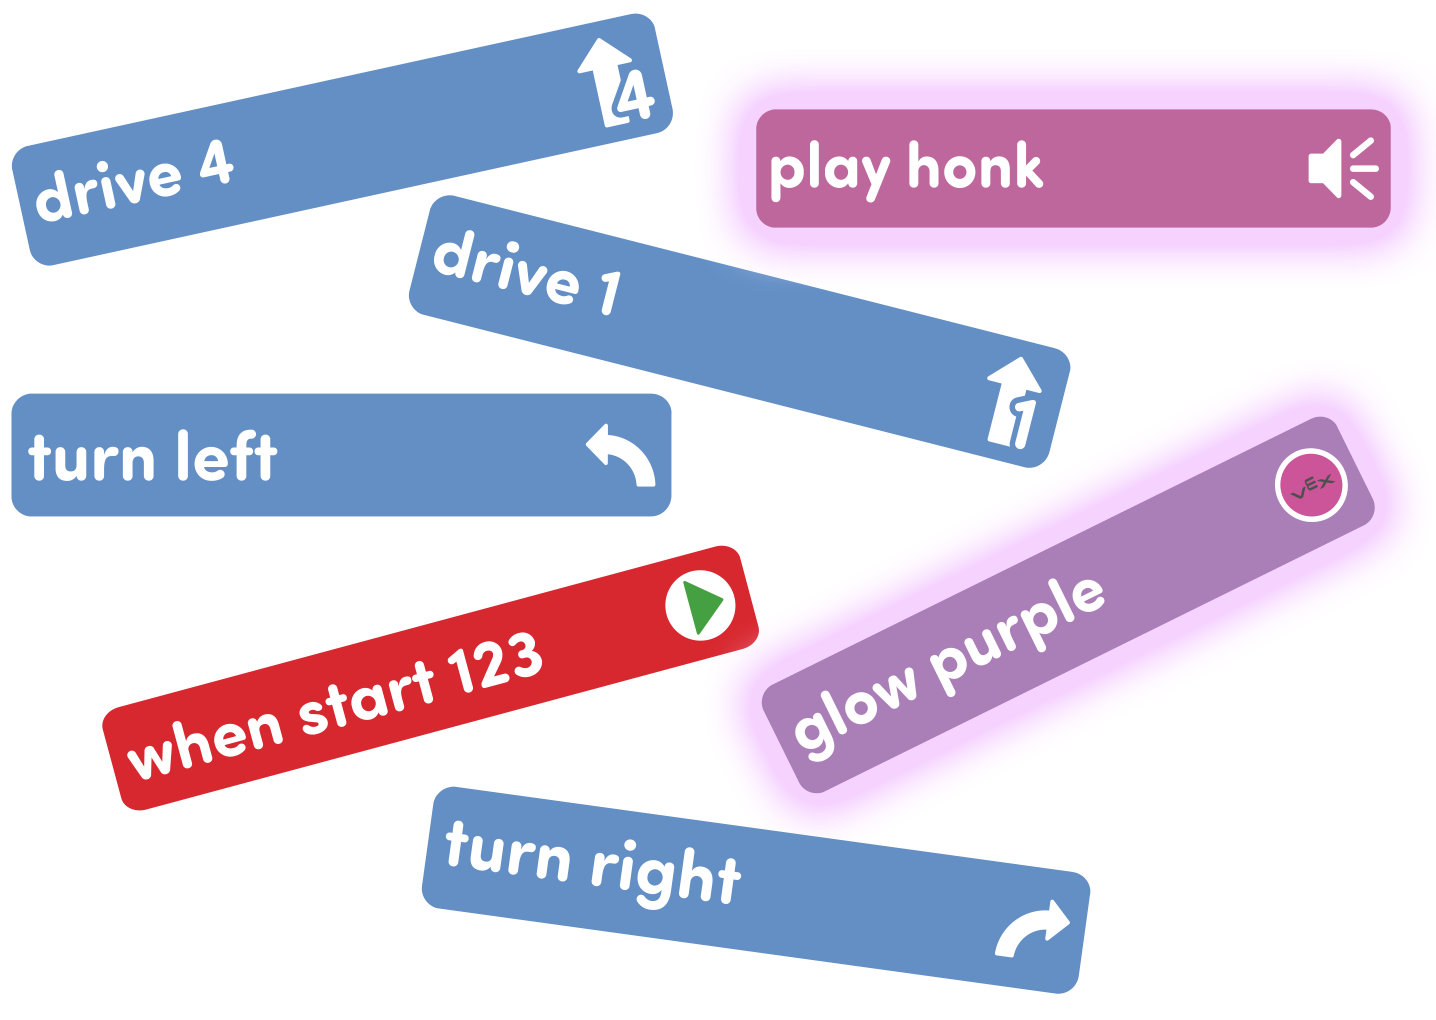
Additional Coder Cards - Ask students to create a mixed-up project using all seven of their Coder cards. Remind them that "When start 123" always needs to be the first card!
- Have students start their project and observe the behaviors of the 123 Robot.
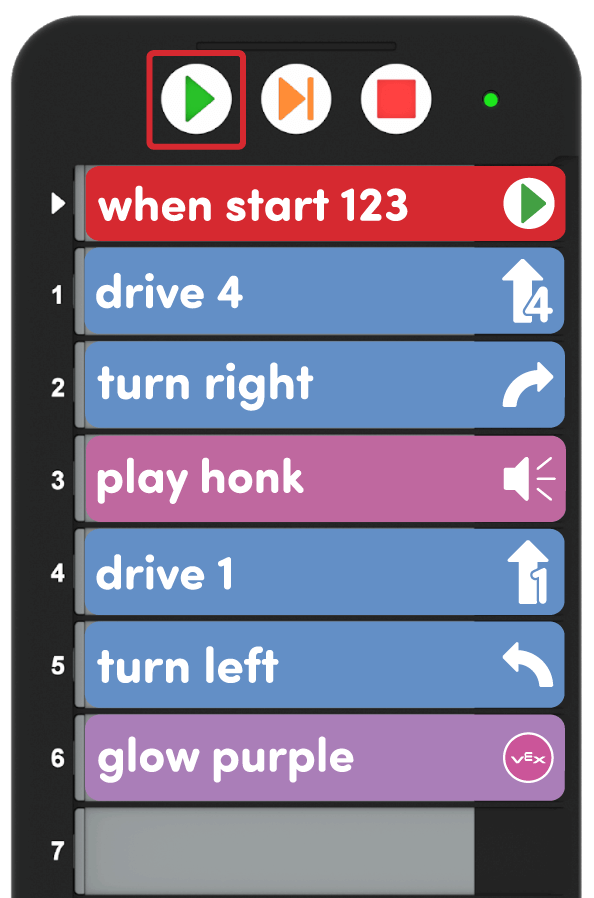
Start the mixed-up project - Inform the groups of the new intended behavior for the 123 Robot. Write these on the board or on a piece of paper for each group to reference.
- Intended behaviors: Drive four spaces, turn left and glow purple, drive one space, turn right, then honk.
- Have groups use the debugging process to fix their mixed-up project to have it complete the intended behavior sequence! These steps are also in the Lab 4 Image Slideshow.
- Help groups as they work together. Highlight groups that are carefully working through the debugging process and following the steps.
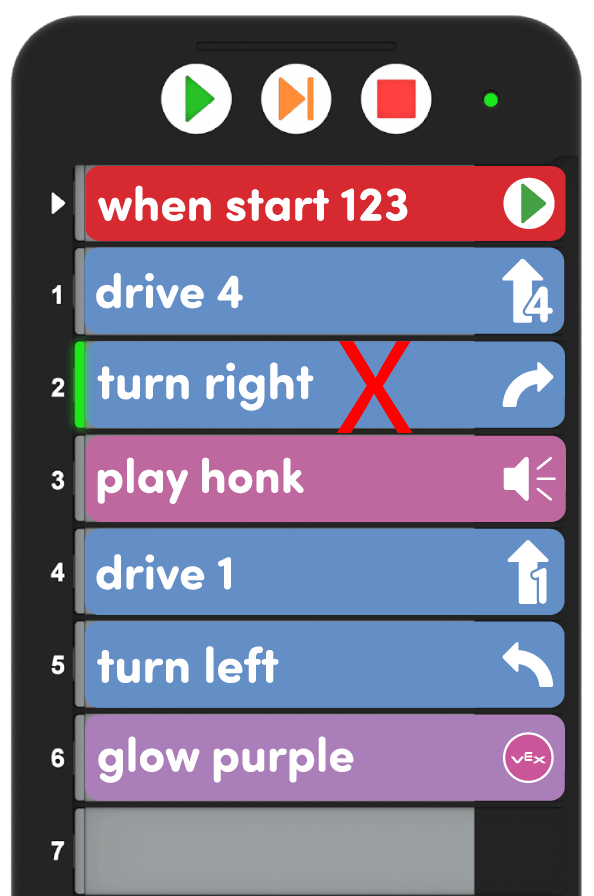
Debugging - Distribute the following Coder cards to add to the Coder cards they already have from Play Part 1:
- FacilitateFacilitate a discussion on debugging with groups as you walk around the classroom.
- How did you know that a behavior was wrong?
- How did your group change the Coder cards while you were debugging?
- How many Coder cards did your group have to change?
- RemindRemind students to check how they matched individual behaviors with Coder cards if they are getting stuck. Debugging will take multiple tries to get it right. Remind students that they cannot change the Coder cards while the 123 Robot is moving. They should wait until the project is finished, then change the Coder cards.
Students may need to wake the 123 Robot if it times out. Remind students of the steps to wake the robot by pushing the wheels along a flat surface as shown here. Turn on sound for this animation to hear the indicator sounds of the 123 Robot.
Video fileFor more information about the 123 Robot, see the Using the VEX 123 Robot Knowledge Base article.
- AskAsk students how they have solved other problems around the classroom. Did they try to find what was wrong? How was their process of solving a problem in the classroom similar to debugging the 123 Robot?