Background
The Moving from Touch to Coder STEM Lab Unit will help you and your students use what you have learned about coding the 123 Robot using Touch buttons, and apply that to transition to coding using the Coder and Coder cards. Through coding challenges involving driving the 123 Robot through a zoo field trip, students will learn the step-by-step process, and terminology associated with using the Coder with the 123 Robot to code robot behaviors. These processes including turning on the Coder, pairing it with the robot, and building and testing a project. Throughout the Unit, students will gain practice using the Coder and Coder cards to build projects that successfully drive the robot to visit various animals in the zoo.
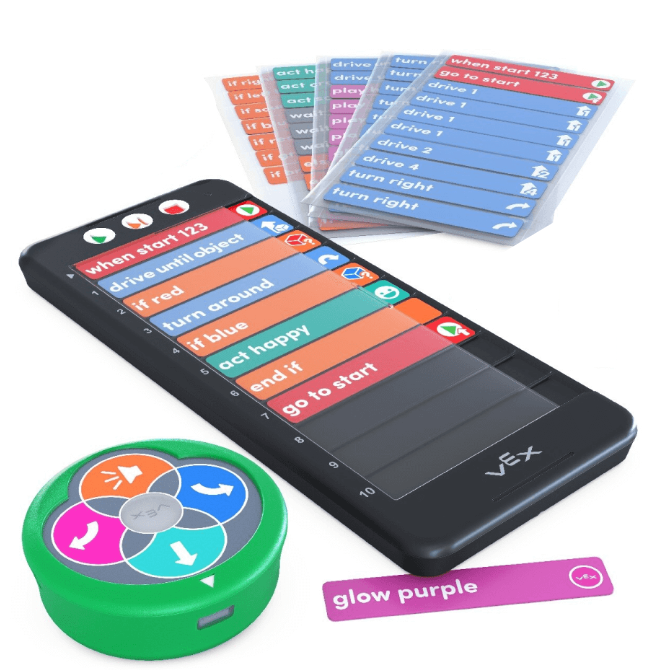
What is the VEX Coder?
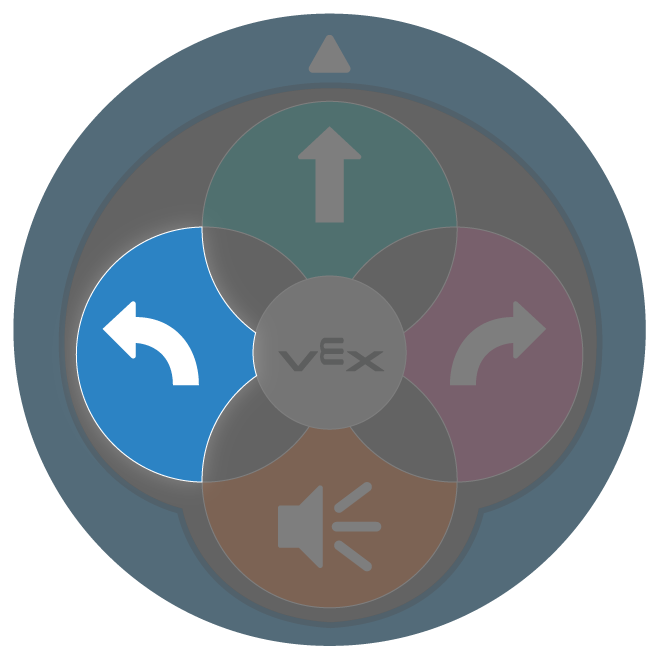
The VEX Coder is a screen-free device that enables students to code the 123 Robot to execute behaviors by sequencing Coder cards in the slots on the Coder. The Coder connects via Bluetooth to the 123 Robot, and students can use the buttons on the Coder to start, stop, or step through their project to make the 123 Robot carry out their Coder project.
Just as students used Touch buttons as a programming language to code the 123 Robot, the Coder and Coder cards are also a programming language that the 123 Robot uses. The 123 Robot uses Coder cards as commands for the programming language. The Coder communicates the Coder card commands to the 123 Robot. The 123 Robot then carries out the corresponding behaviors. The Coder cards are executed from top to bottom (Coder slots 1 through 10), based on the sequence in which they are inserted into the Coder. To change the sequence of behaviors, simply change the order of Coder cards in the Coder.
Connecting the 123 Robot and Coder
To connect a Coder to a 123 Robot, first push to wake the 123 Robot and press the Start button on the top left of the Coder to turn it on. Then, press and hold the Start and Stop buttons on the Coder, and the Left and Right buttons on the robot simultaneously for at least five seconds. You will hear and see a series of sounds and lights, and then the indicator light on the Coder will flash in time with the Start button on the 123 Robot, to show that they are connected, as shown in the animation below.
Starting a project with the Coder
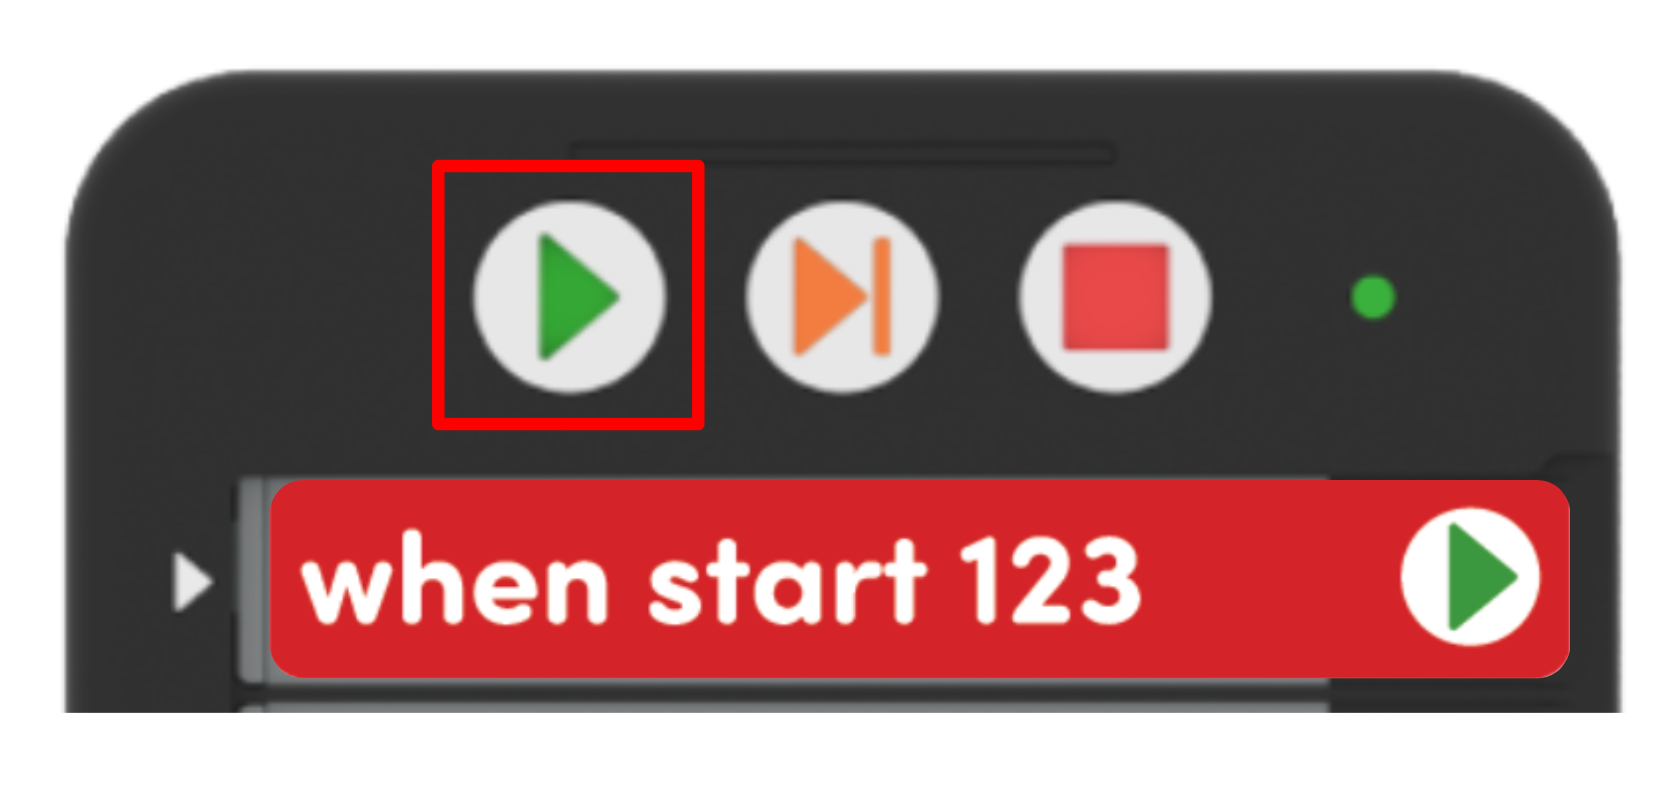
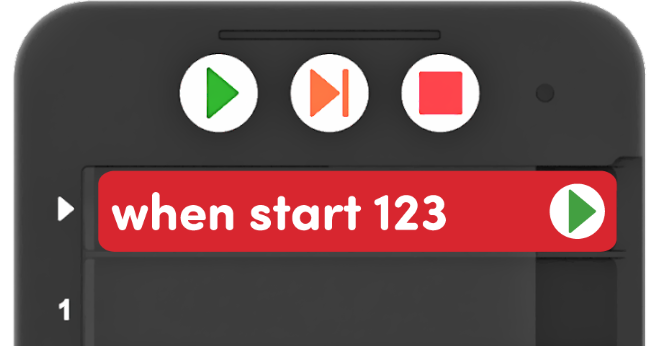
Once a Coder project is loaded into the Coder, and the 123 Robot and Coder are connected, start the project by pressing the Start button. When you press the Start button, the indicator lights to the left of each Coder card slot will flash in sequence, as the Coder reads each Coder card in the project. You will then hear the 123 Robot make a start sound, and see it begin to run the project.
Stopping a project with the Coder
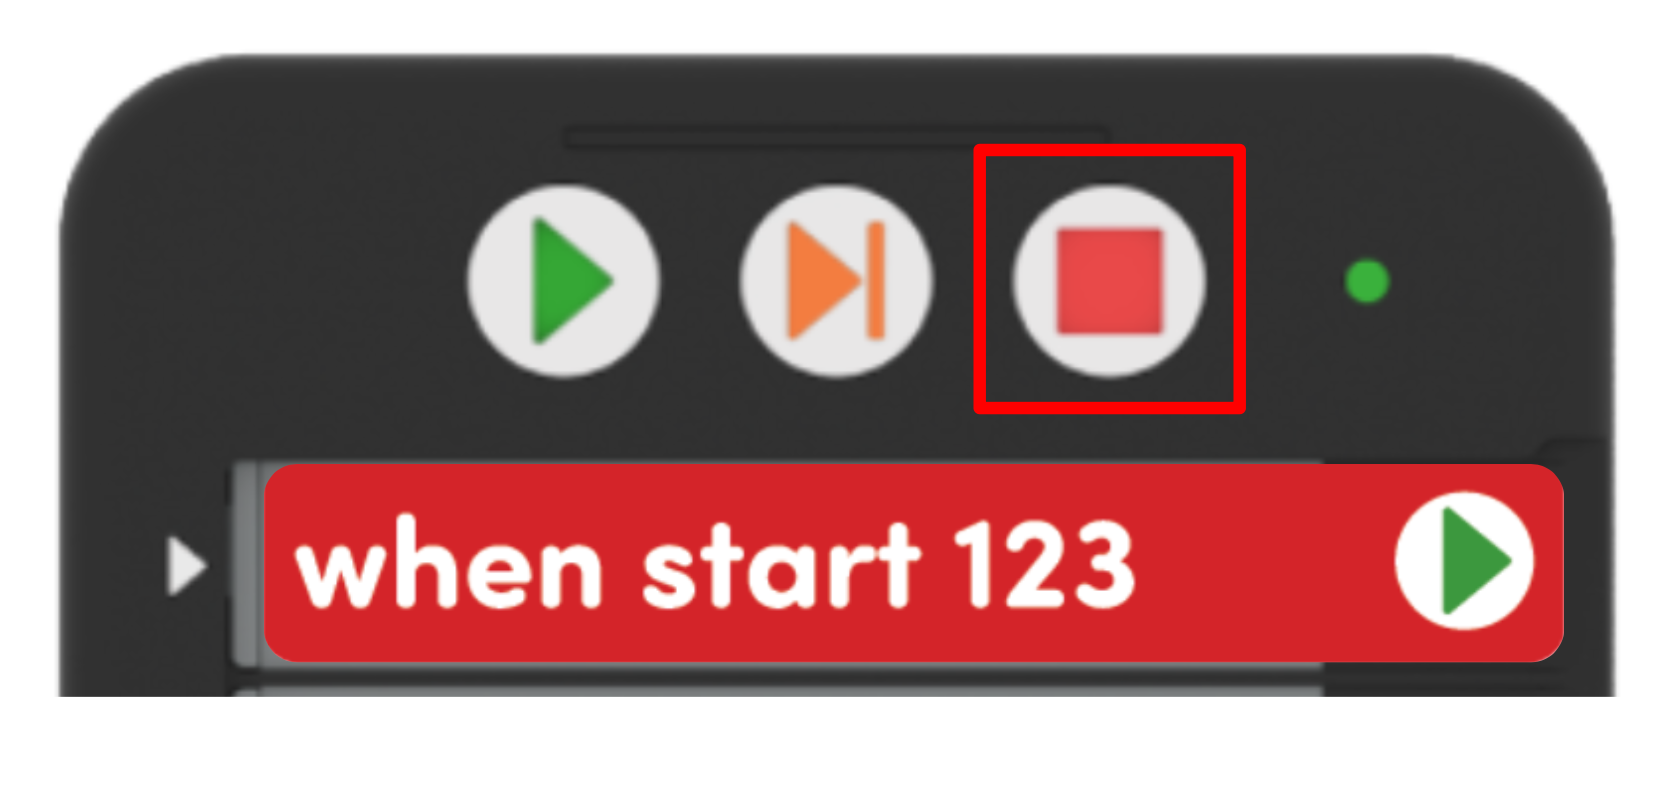
Press the Stop button to cause the 123 Robot to stop a project at any time. When the Stop button is pressed, the indicator light on the Coder will show red, and the 123 Robot will stop its action.
To learn more about using the VEX Coder, see this article.
Features of the Coder and Coder cards
'When start 123'
Each Coder project begins with a red ‘When start 123’ Coder card, which should always be inserted into the small top slot on the Coder. Both the ‘When start 123’ Coder card, and its accompanying slot are specifically sized so that only this Coder card will fit.
Icons on the Coder cards
Coder cards are designed to support pre-readers or early readers, using icons to represent the words of the card itself, so students can essentially read the images, if they cannot yet read the words. Encourage students to use these icon images to help them as they work to build their projects. Reinforce this by referring to the images on the Coder cards when you are naming them with students, like “The When start 123 Coder card, the one with the green arrow, always goes first.”
Highlighting on the Coder
Each time a project is started, the Coder will ‘check’ the project and will show a green highlight next to each Coder card in sequence. As the project begins to run, the green highlight will show beside the Coder card that the 123 Robot is currently executing. Call students’ attention to the highlight as they are running their projects, so that they can continue to build their understanding of how each Coder card corresponds to a behavior of the 123 Robot. View the animation below to see an example of the highlight feature in action. A Coder is pictured to the left of a 123 Field. A finger presses the Start button on the Coder, and the green light to the left of the When start 123 Coder card glows. The next card in the Coder is Drive 1. The green light beside this card begins to glow, to indicate this card is being executed by the robot. Simultaneously, the robot drives forward one square.
Check and share code easily
Once Coder cards are loaded into the Coder, students can hold up their Coder to show their code, just as they would hold up a whiteboard with a math solution on it. Use this strategy during group instruction, as a means for checking students’ accuracy before they start their projects. You can quickly and easily see if the correct Coder cards are used, if they are inserted in the correct order, and make sure that they aren’t upside down or backwards. When checking in with groups to facilitate independent activity, look to the Coders and Coder cards to check progress.

To learn more about using the Coder as a teaching tool, see this article.
How do the Touch buttons correspond to Coder cards?
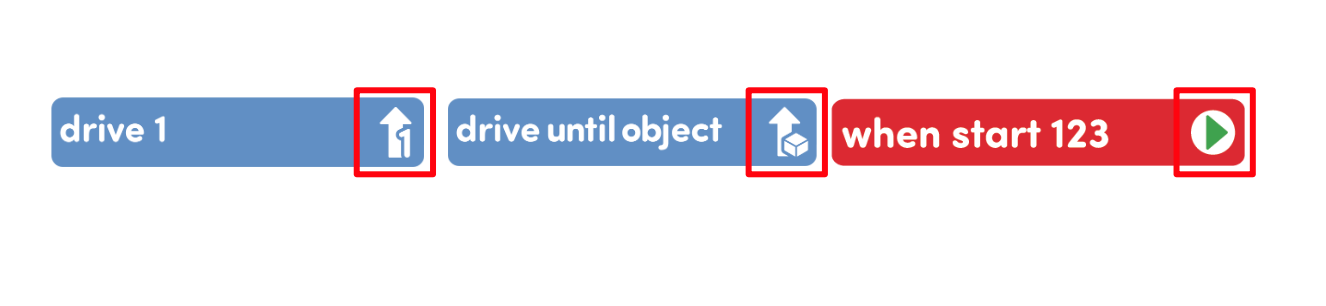
When coding with the Touch buttons, each button press corresponds to one robot behavior. This does not change when using the Coder and Coder cards – each Coder card in a project corresponds to one robot behavior. Just as sequencing multiple Touch button presses causes the 123 Robot to carry out more complex behaviors, so does sequencing multiple Coder cards in a project. A key difference when coding with the Coder and Coder cards is that you have many more Coder cards than Touch buttons, so the behaviors and projects that you are able to code grows considerably when coding this way. When facilitating the transition from Touch buttons to Coder and Coder cards with your students, it can be helpful to highlight the Coder cards that correspond to Touch button behaviors, so that students can solidify the connection between commands (in this case, Coder cards) and 123 Robot behaviors. This chart shows the direct correlation between the Touch buttons and Coder cards:
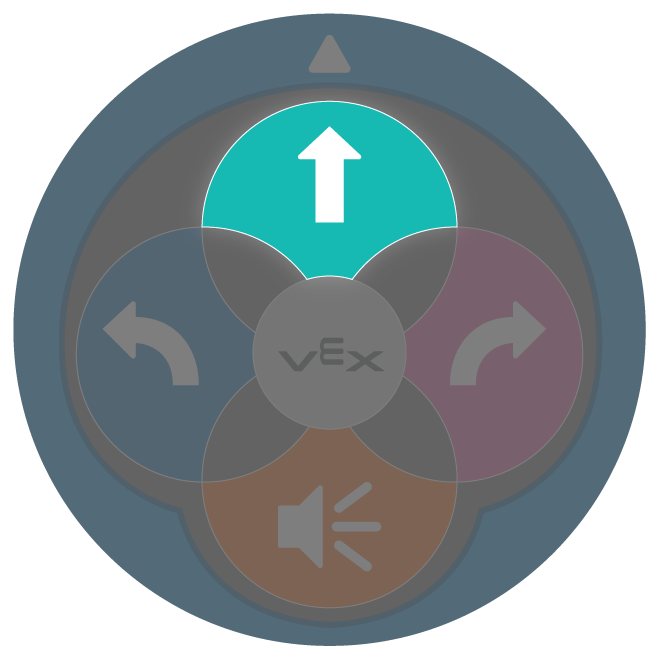 |
Causes the same 123 Robot behavior as |  |
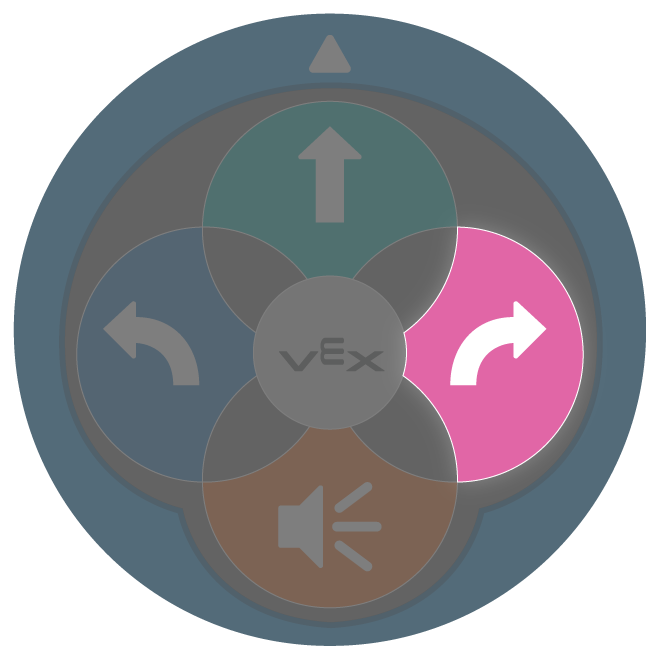 |
Causes the same 123 Robot behavior as |  |
 |
Causes the same 123 Robot behavior as |  |
 |
Causes the same 123 Robot behavior as |  |
Facilitate conversations about Coder cards as students transition from Touch buttons
In this Unit, you will also use Coder cards like 'Drive 2', 'Drive 4', or 'Turn around'. These Coder cards, like many others, cause the 123 Robot to carry out behaviors that would take multiple Touch button presses. As you explore these Coder cards with your students, have them predict what behaviors each Coder card will make the 123 Robot perform. Not only can this help students to build their conceptual understanding of the programming language of the Coder and Coder cards, but it can also help them to engage in spatial talk about these commands. For instance, the 'Drive 4' Coder card will make the 123 Robot move the equivalent distance as four presses of the Move button, however it will drive four steps forward without pausing after each step. These subtle differences can spark some interesting spatial reasoning conversations with students.
Ask questions like:
- How many steps do you think the 123 Robot will drive when we use this Coder card? How many Touch button presses would that be?
- Can you show me how the 123 Robot will move on the Field when this Coder card runs? How can you tell?
- Can you show me with your body which way the 123 Robot will move when this Coder card is run?
- Watch how the 123 Robot moves when we use this Coder card. How is it similar or different to how it moved when you used the Touch buttons?
It is always recommended to give students only the Coder cards that they are going to use in an activity, rather than the complete set of all 50 Coder cards. Limiting their options not only can help students stay focused, but can also enable you to take better care of your Coder cards with your students. Especially as students are transitioning to using the Coder, and are just making sense of the Coder cards and their corresponding 123 Robot behaviors, giving students limited choices allows for a deeper exploration of what each Coder card does, and how to appropriately use them with the Coder. To learn more about organizing, managing, and caring for Coder cards with your students, see this article.
What Coder cards do you need?
Coder cards represent 123 Robot commands that are inserted into the Coder and used to code the 123 Robot. Below is a list of the main Coder cards used during this Unit. See the Environment Setup section of the Summary in each Lab for more detailed information about organizing and distributing Coder cards to your students.
| Card | Behavior | Example |
|---|---|---|
 |
Starts the project when the ‘Start’ button on the Coder is pressed. | |
 |
123 Robot will drive forward for 1 robot length, or 1 square on the 123 Field. |  |
 |
123 Robot will drive forward for 2 robot lengths, or 2 squares on the 123 Field. | 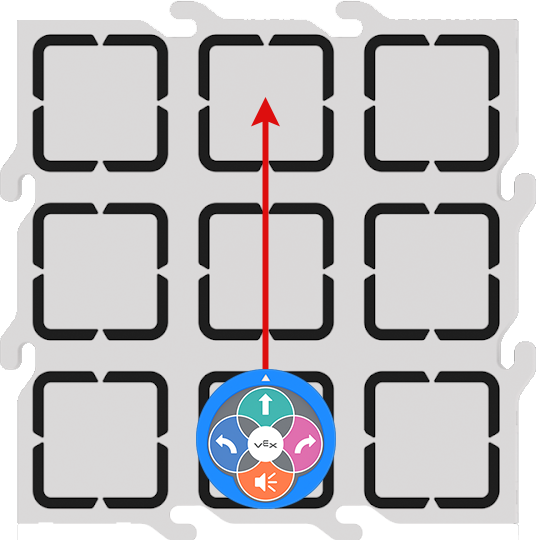 |
 |
123 Robot will drive forward for 4 robot lengths, or 4 squares on the 123 Field. | 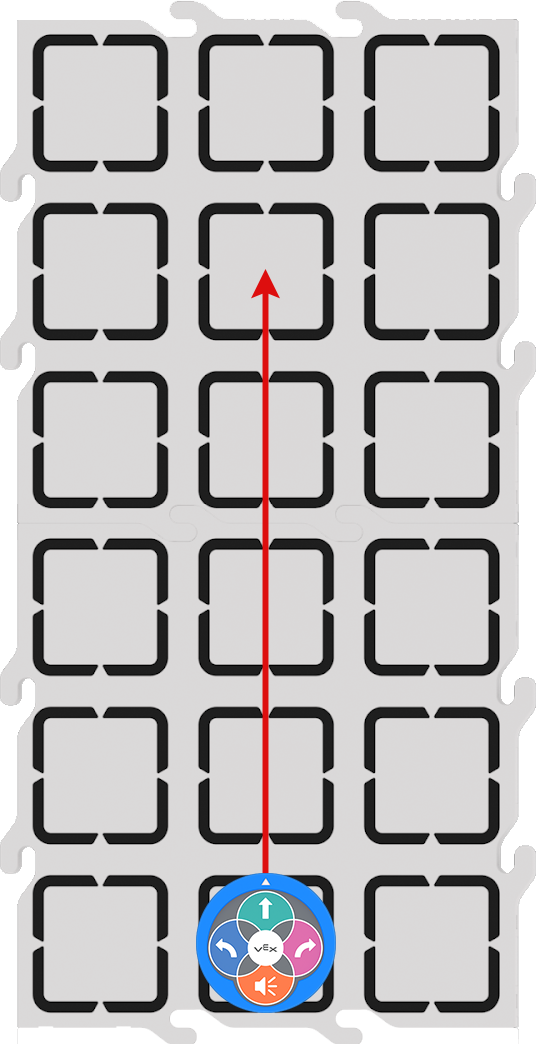 |
 |
123 Robot will turn in place 90 degrees to the left. | 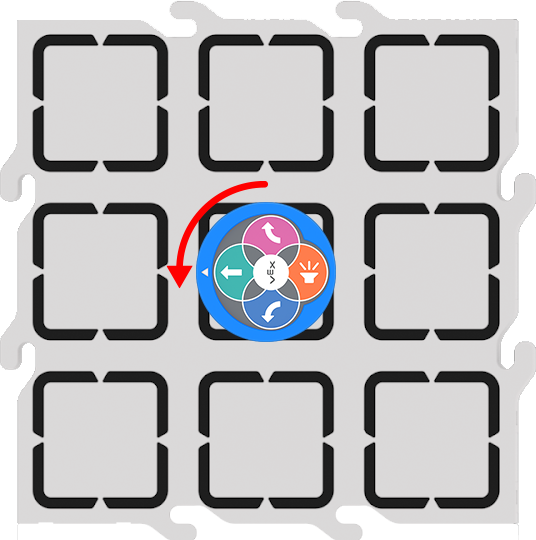 |
 |
123 Robot will turn in place 90 degrees to the right. | 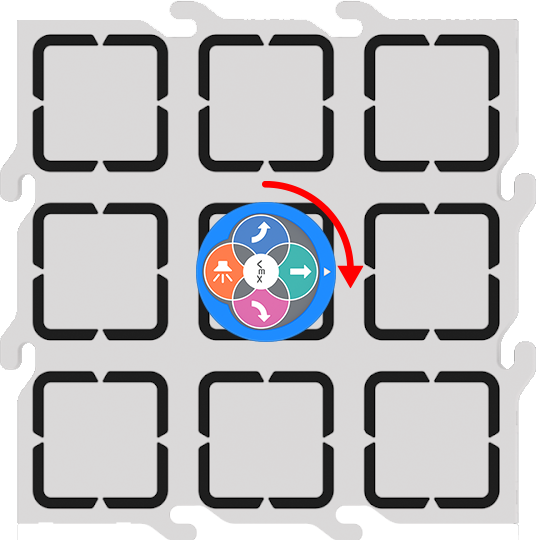 |
 |
123 Robot will turn in place 180 degrees to the right from its starting position. | 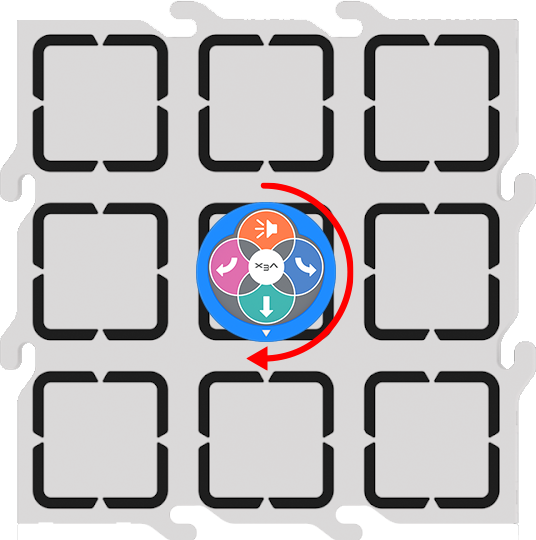 |
For a full list of Coder cards and their behaviors, see the VEX Coder Card Reference Guide article.
Using the printable resources in this Unit
The printable resources that are provided within this Unit are designed to help facilitate students transition from coding with Touch button to coding with the Coder and Coder cards. The printables can be used to help students make a visual connection between a familiar language (the Touch buttons) to the language of the Coder cards, as they are planning and sequencing their projects.
Lab 1 Printable
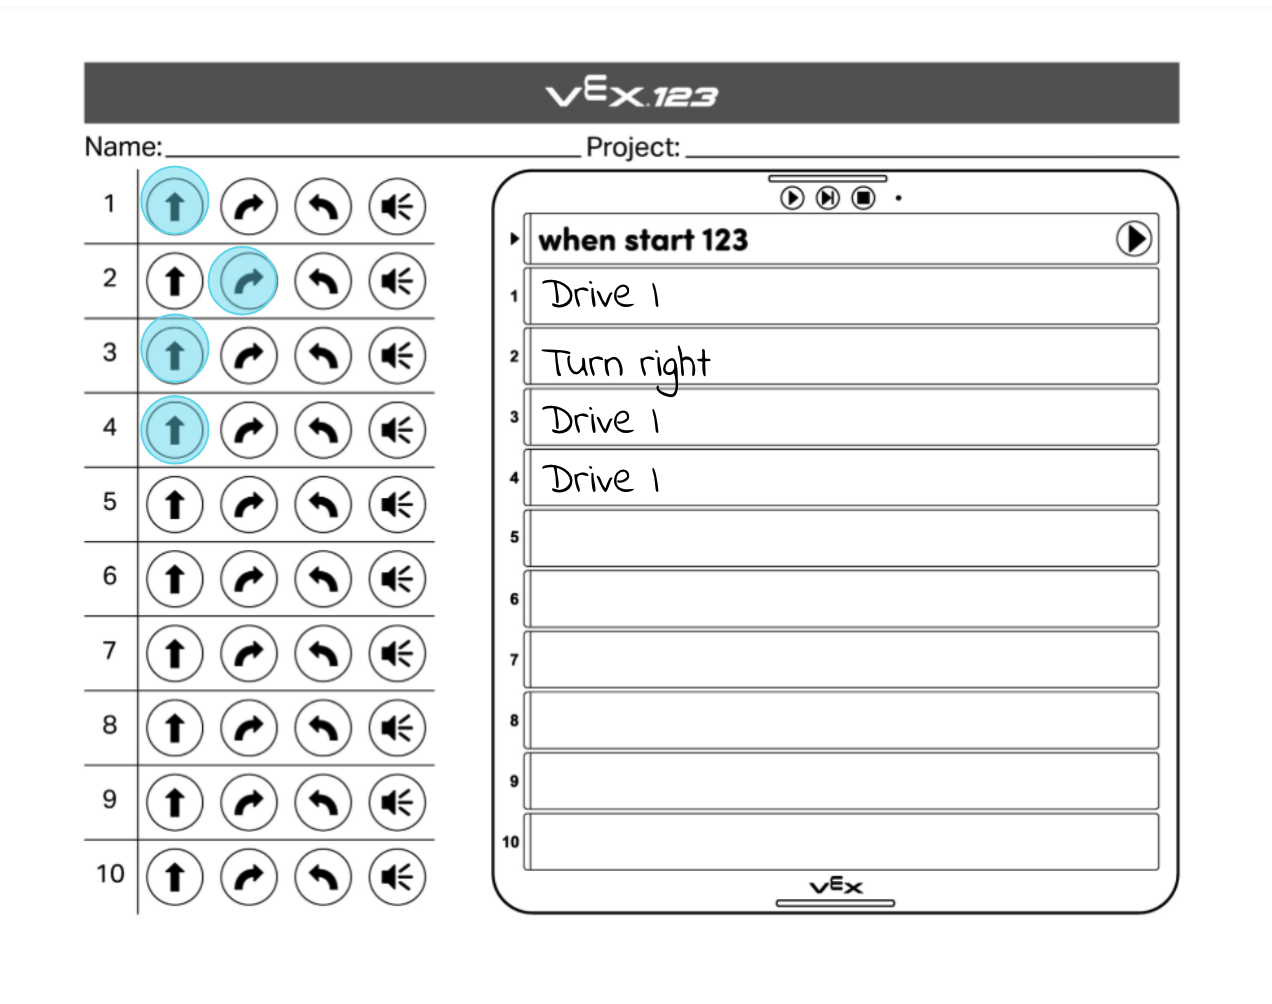
In Lab 1, the Touch button to Coder card side by side fill-in sheet is designed to be used in two stages. First, during the Engage section of the Lab, students would color in the Touch button sequence that is needed to drive the 123 Robot from the zoo entrance to the lions. Then, during the Play section of the Lab, students will write or draw the Coder cards that correspond to each Touch button press on the Coder side. Students can then use this as a visual reference as they are building their projects, and teachers can use these as artifacts from the STEM Lab to show students' learning.
Here is an example image of a completed sheet in Lab 1.
Lab 2 Printable
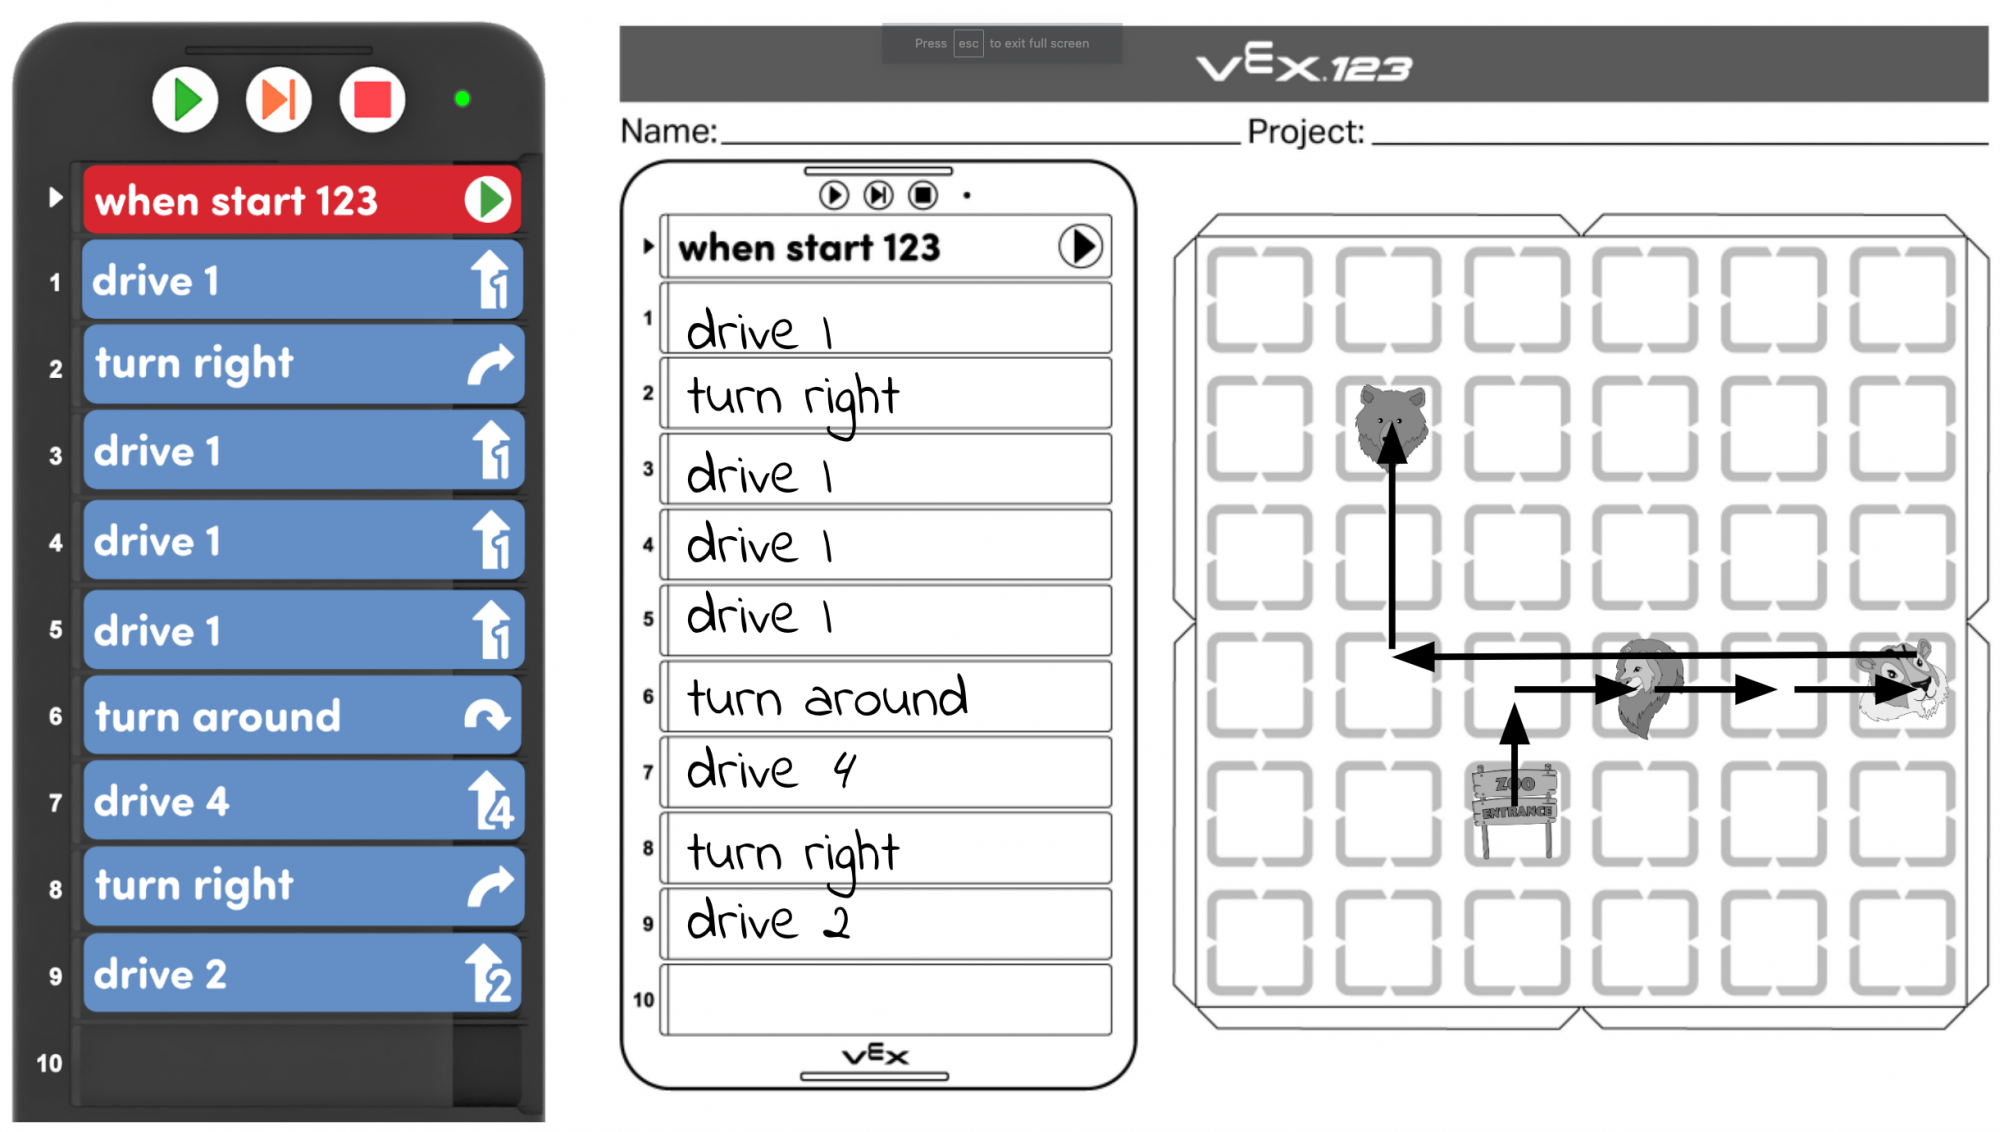
In Lab 2, the fill-in motion planning and Coder sheet is designed to be used by students to aid in their project planning as they work to drive to additional animals in the zoo. Students will begin the Play section by copying their existing project from Lab 1 into the Coder portion of the sheet. They should then mark the start and each of the animals' locations on the motion planning (blank Field) portion. Students can then draw a line or arrow to show the path their 123 Robot drove to get from the entrance (start) to the lion. As students plan for their 123 Robot to drive to the tigers, they should draw another line or arrow on the Field to show where the 123 Robot will need to drive. They can then draw or write the Coder cards they will use in order to carry out those behaviors. Students would then repeat this process for Play Part 2, so that by the end of the Lab their sheet shows their entire Coder project, as well as all of the motion of the 123 Robot. Students and teachers can share these artifacts with the classroom community to share their learning, or use them to 'save' their projects so they can revisit them during future Coder activities.
Here is an example image of a completed sheet in Lab 2.