
Background
In this Unit, students will learn about the features of VEX GO, through building the Code Base and its iterations to navigate in different ways. By progressing from driving the Code Base via remote control, in Drive Mode, to driving via code, to driving using sensor data, students will be able to scaffold their understanding of the components and functions of VEX GO and VEXcode GO.
What Features are Available in VEXcode GO?
VEXcode GO is the block based coding platform for VEX GO. In order to use VEXcode GO with your robot, you will need to set it up on your device. See the Setting Up VEXcode GO VEX Library article for more information, if you have not already done so.
Within VEXcode GO there are many features that can be used to support students as they learn about coding and STEM concepts throughout the Unit.
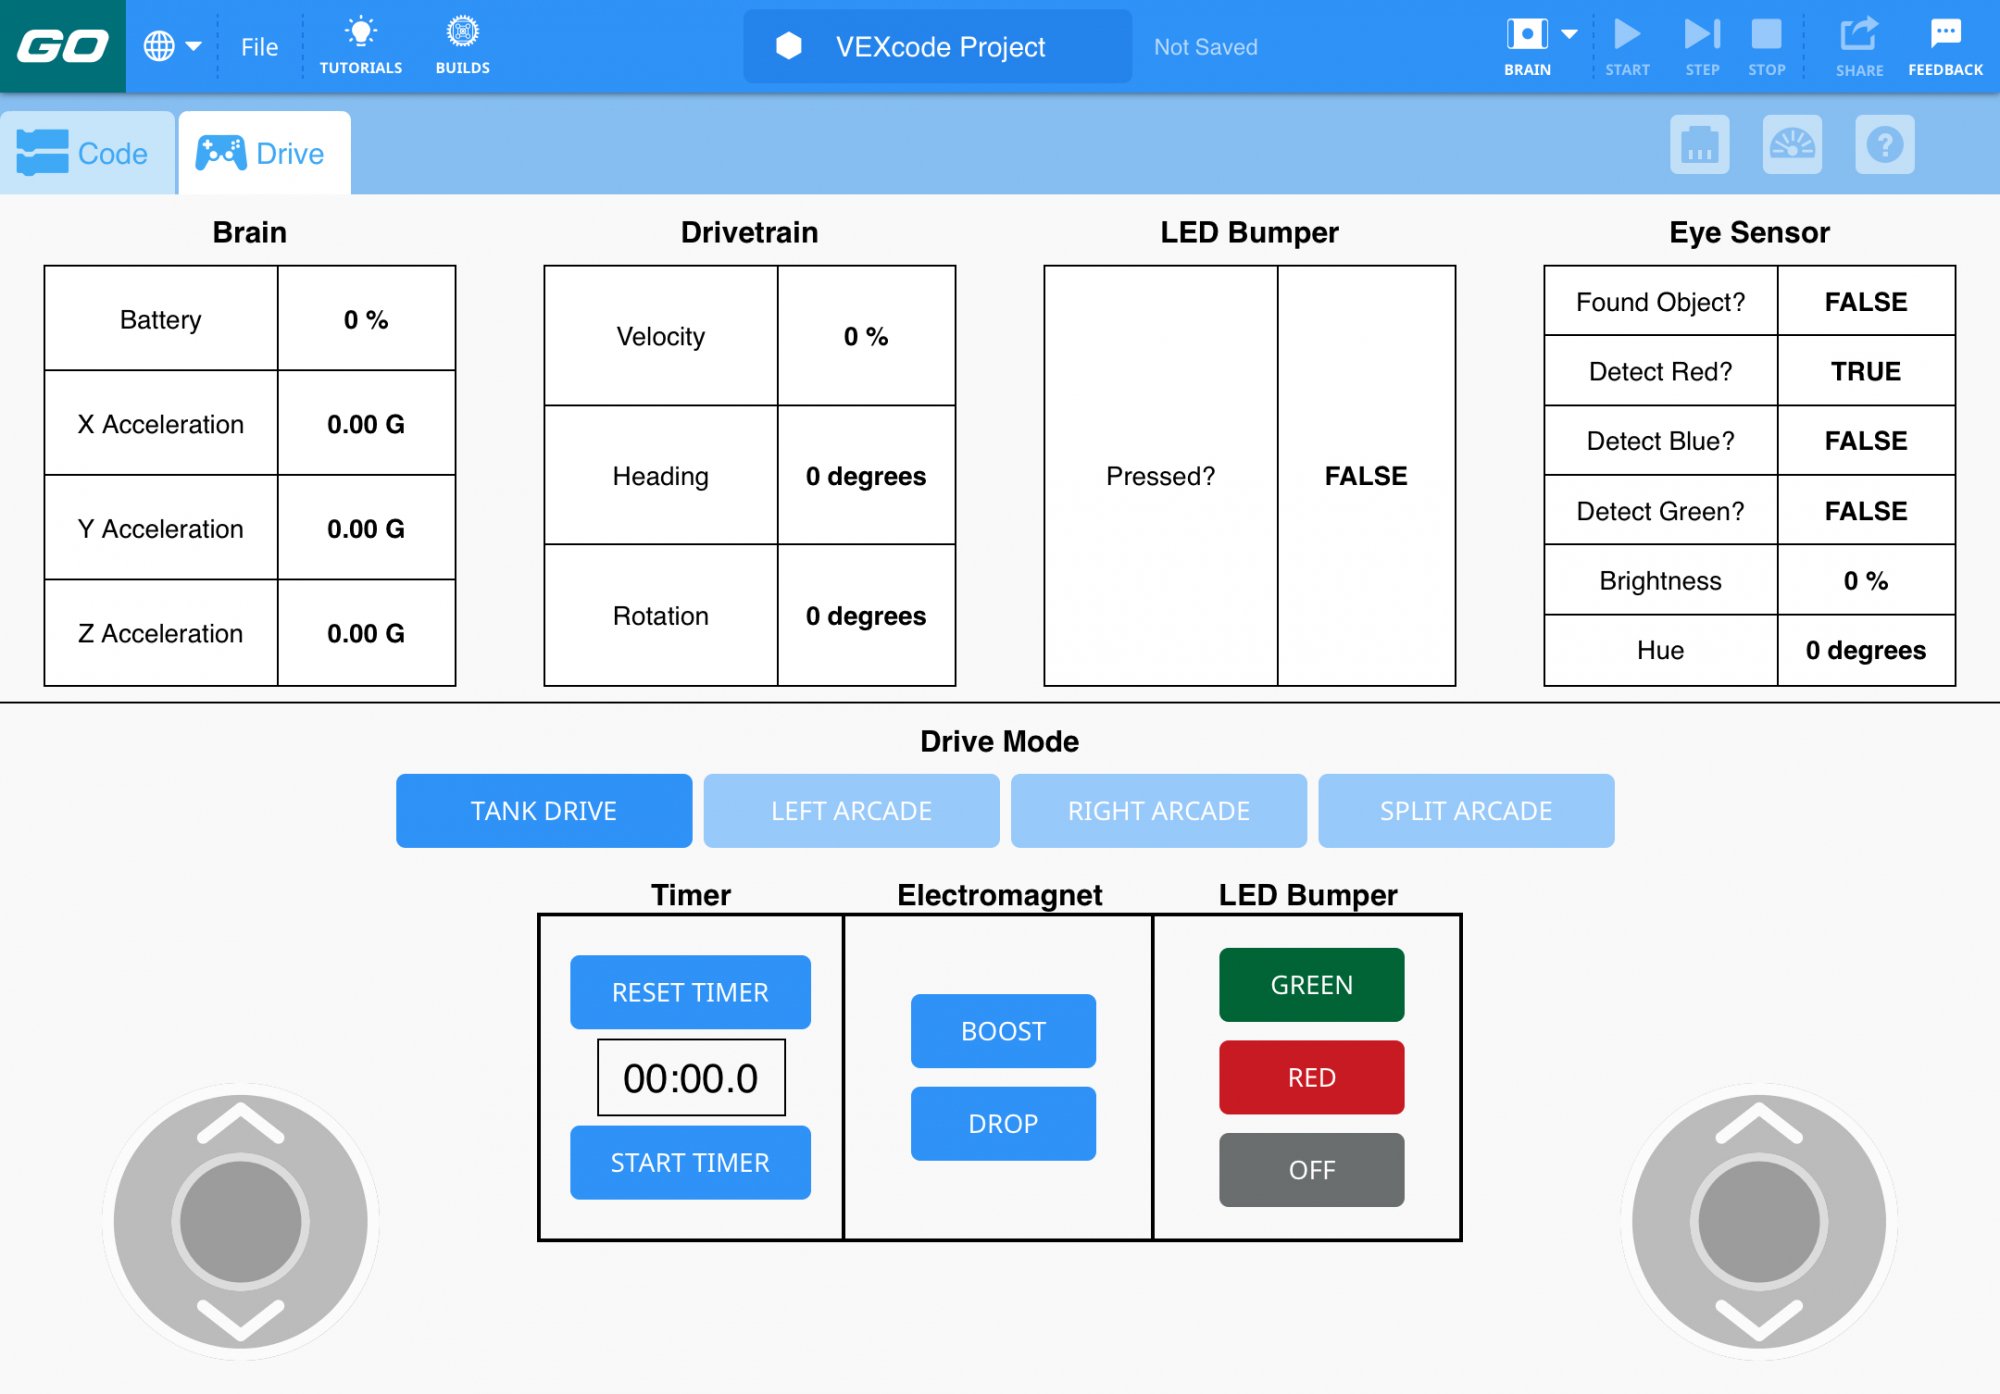
The Drive Tab - Lab 1 introduces students to driving the Code Base using the Remote Control feature, Drive Mode, located in the Drive Tab. Drive Mode enables students to begin driving their Code Base right away when they connect their Brain to their device, as it is pre-configured for the Code Base. For more detailed information about using the Drive Tab, see the Using the Remote Control in VEXcode GO VEX Library article.
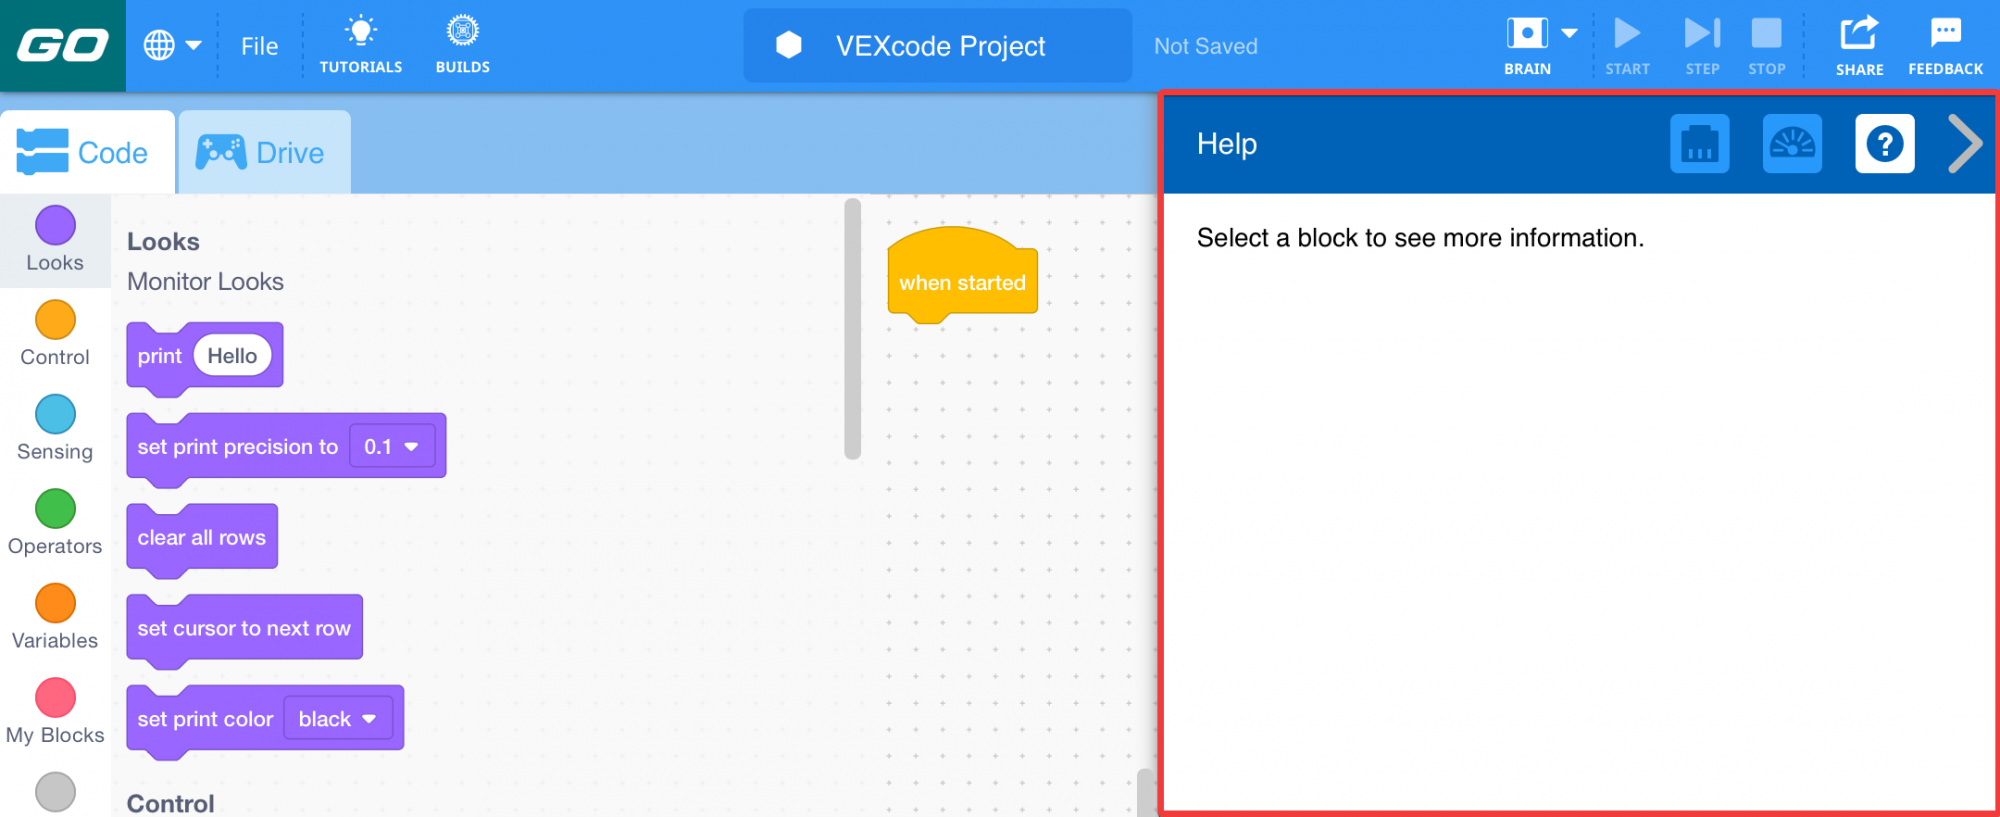
The Help Window - The Help feature of VEXcode GO can be used to explain more about a block as you are working in VEXcode GO. Simply open the Help Window, and select the block you want to learn about. Students can use this feature as they are working, to help them troubleshoot their own projects. For more information about VEXcode GO Help, see the Accessing Help VEX Library article.
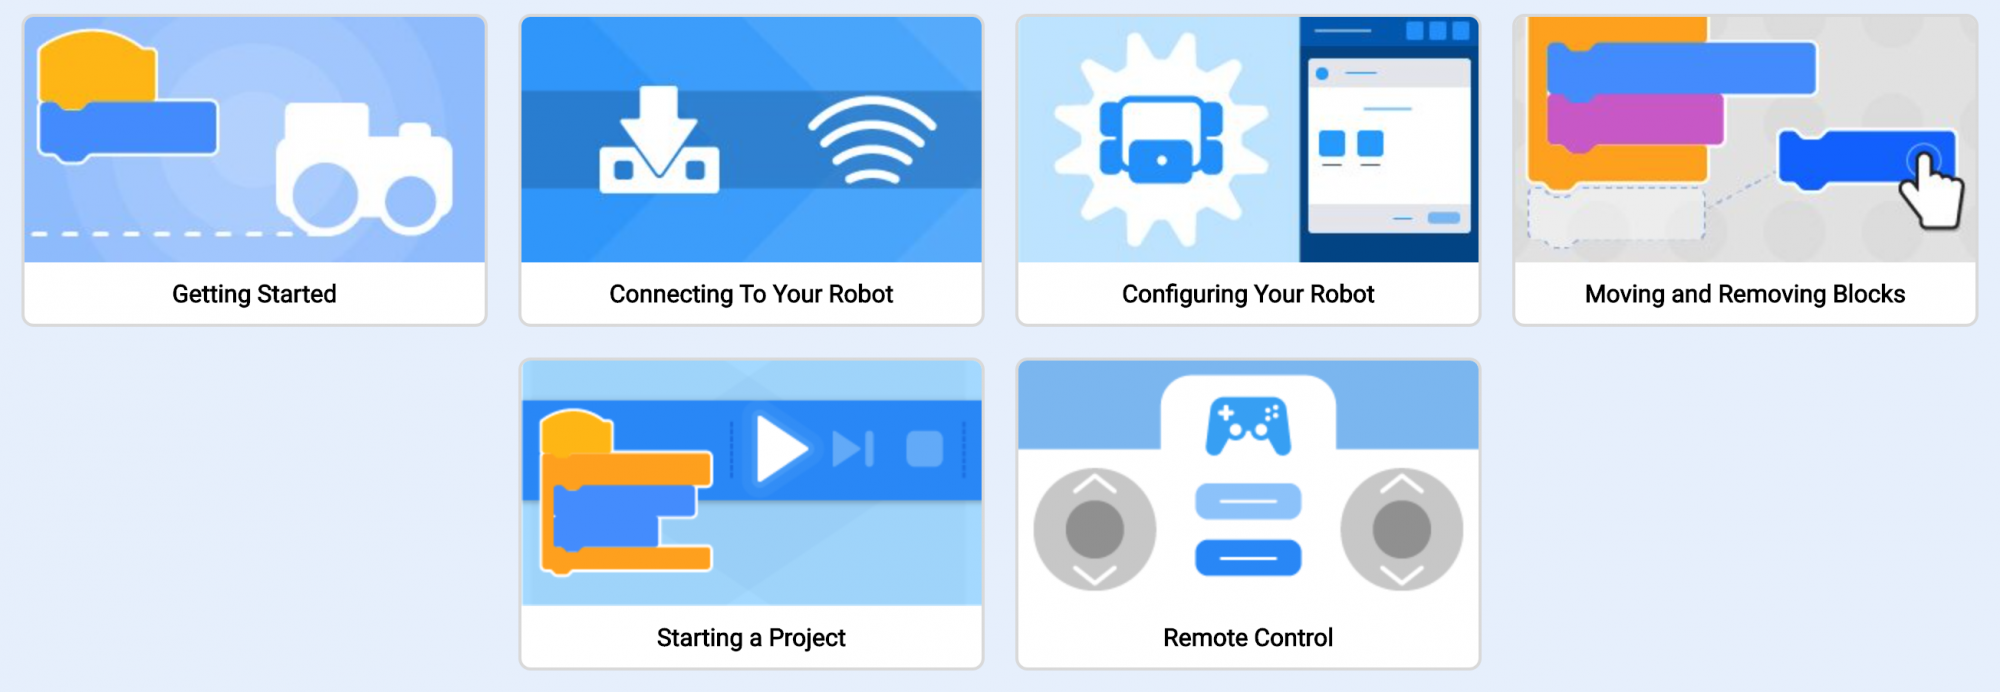
The Tutorials - The Tutorials are short explanatory videos that show you how to do different things in VEXcode GO. They are embedded in VEXcode GO, and can be viewed by selecting ‘Tutorials’ in the Toolbar.

You can point students to the tutorial videos at any time, if they need help to do things like connect to their robot or move and remove blocks from a project. Reminding students to check the tutorial videos for answers to their questions first, can help free up your time to help other students who may be working at different levels.
The Example Projects - These are projects that are built into VEXcode GO to show different ways to code your robot. They are often the basis for student work in STEM Labs, as they are in this Unit. You can also use Example Projects as a differentiation resource for students who may need more time to practice a particular coding concept, or for those who can iterate on it to explore a concept more deeply. You can access the Example Projects at any time by selecting the File Menu and ‘Open Examples.’

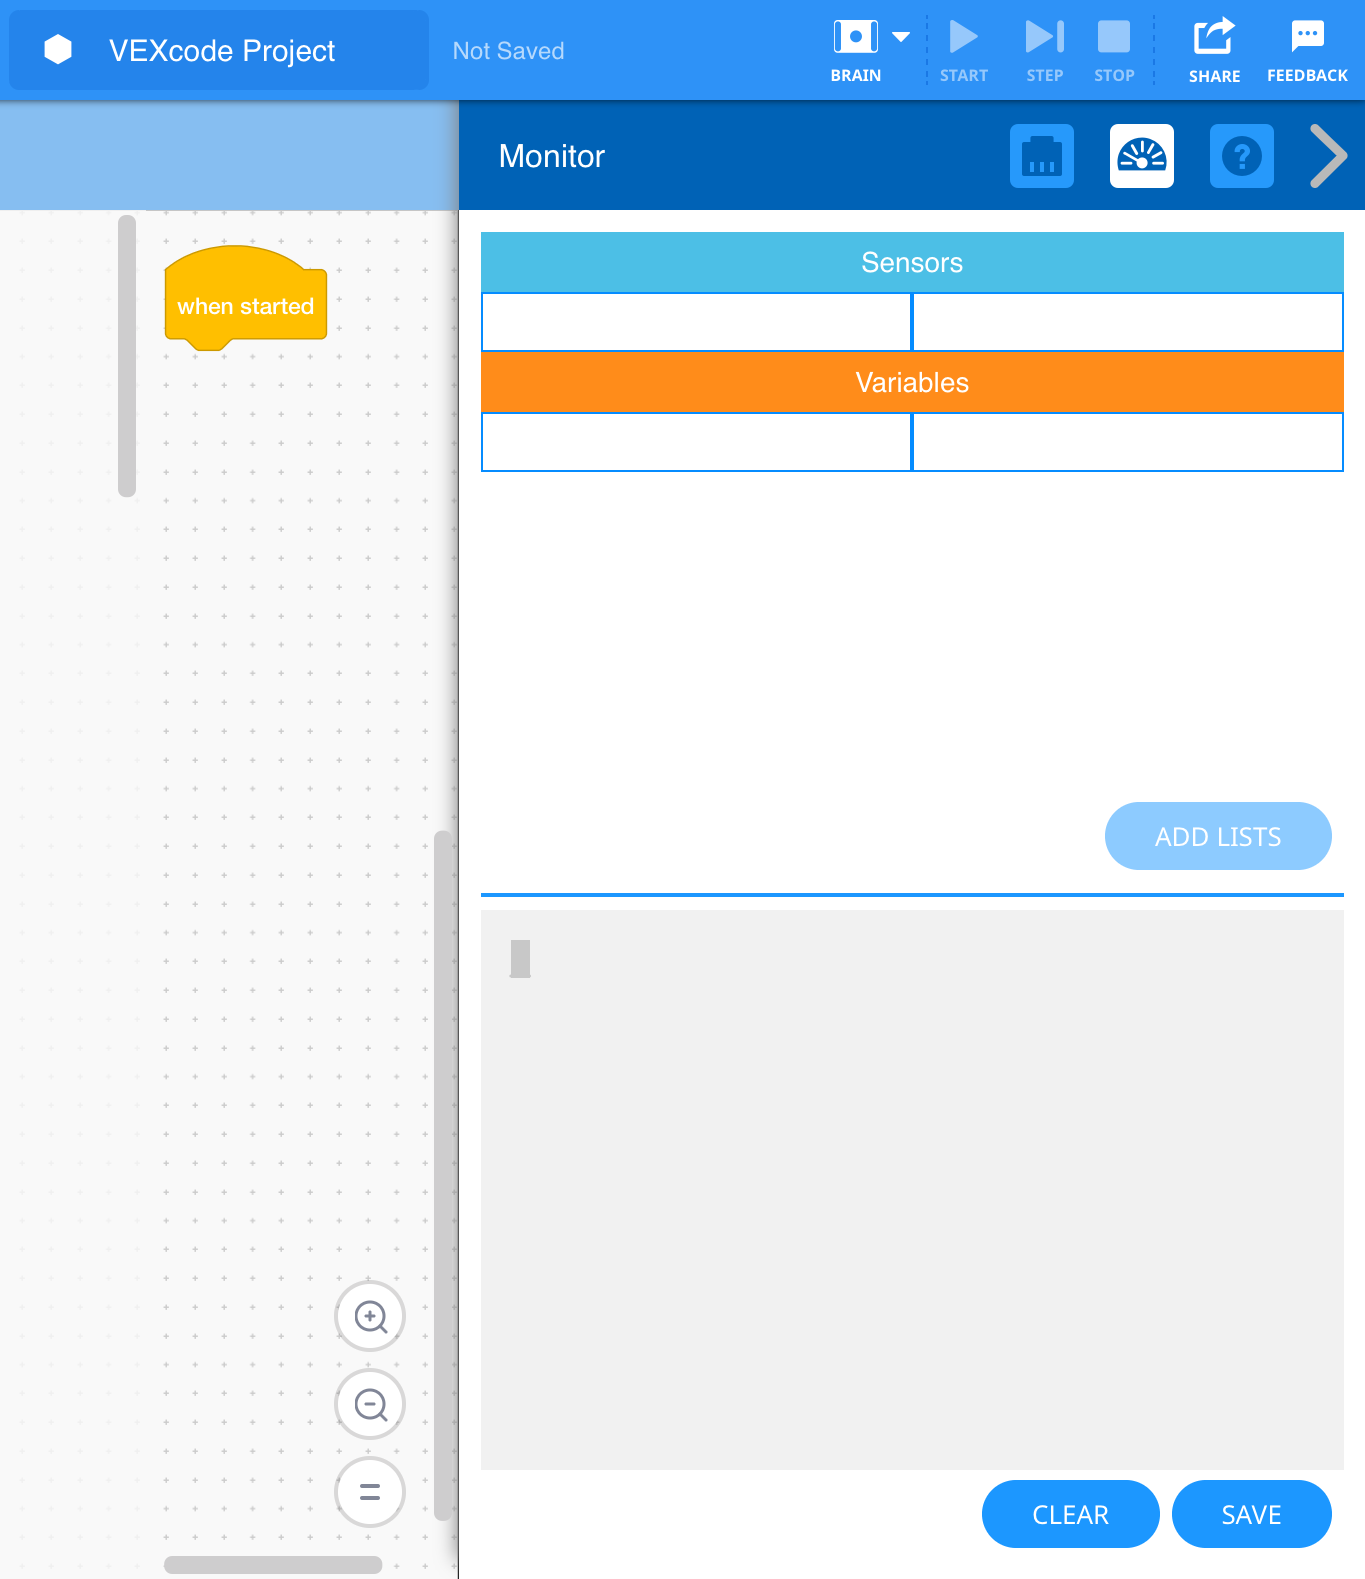
The Monitor Window - The Monitor Console in the Monitor Window offers students a different way of seeing what is happening in a project, with a sensor, or with their robot in real time. In Lab 4 of this Unit, the Monitor Console is highlighted as a way to show students the data that the Eye Sensor reports, offering them a visual connection to the sensor’s actions (that are otherwise not visible). For more information about this feature of the Monitor Window see the Variable and Sensor Values Monitoring in VEXcode GO VEX Library article.
What is a Sensor?
A sensor is, in essence, a device that helps the robot to understand the world around it. It does this by collecting and reporting data about its environment, which can then be used in a project to make the robot make decisions, or perform certain behaviors. This sequence is often referred to as the Sense → Think → Act decision loop.
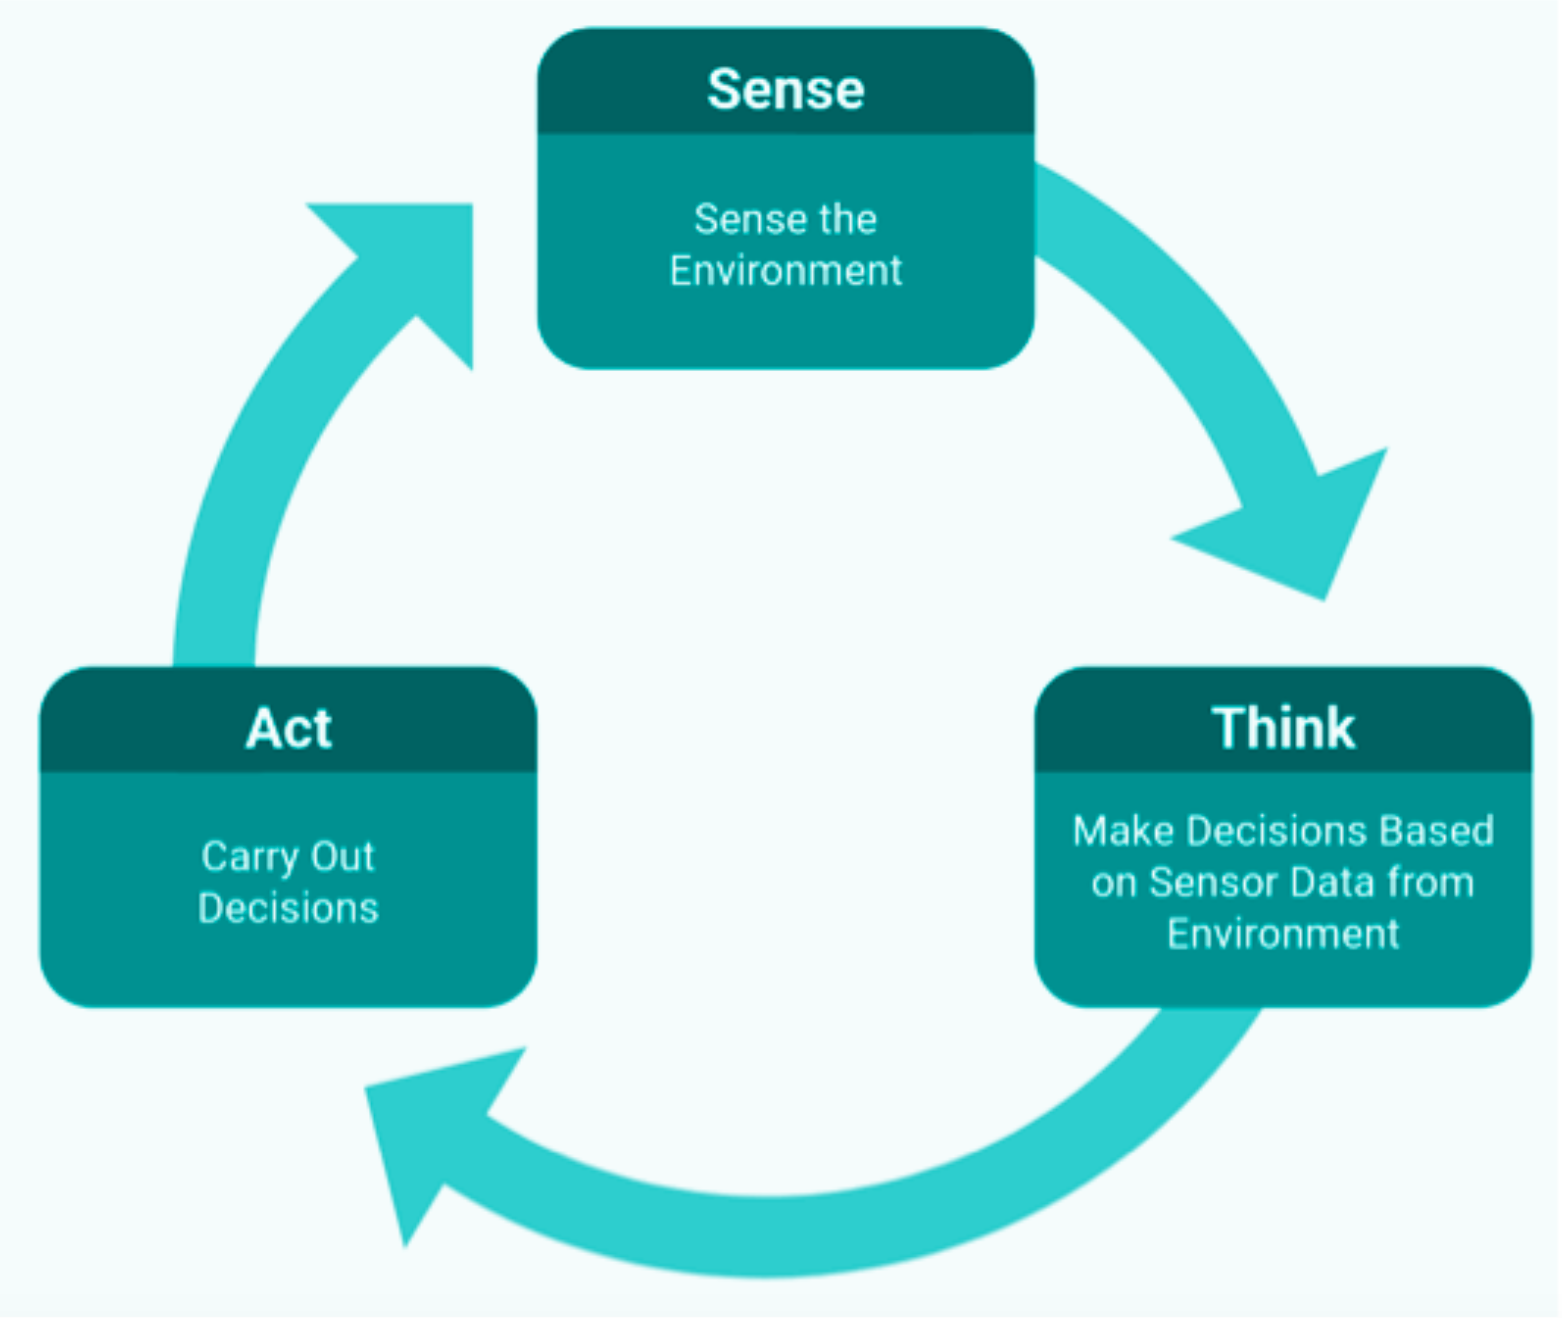
In Lab 4 for instance, the Eye Sensor is used in a project to detect the color of an object (sense), determine the branch of the project to follow (think), and then move the Code Base based on the color (act).
What VEX GO Sensors are Used in this Unit?
The LED Bumper is a sensor that can detect physical contact (whether the LED Bumper is pressed or released), and display colors (red, green, or off). In projects, it can be used as a switch, where the press or release of the LED Bumper causes a behavior to occur, as it is in Lab 3. For more detailed information of how the LED Bumper works, see the Coding with the VEX GO LED Bumper VEX Library article.
The Eye Sensor is a sensor that can determine three things - the presence of an object, its color, and the brightness of an object or surface. In Lab 4 of this Unit, the Eye Sensor is used to detect an object and its color in order to navigate a Color Disk Maze. The data reported by the Eye Sensor can be seen in the Monitor Console, which offers students a visual representation of what the robot is 'seeing,' and can be used to help them make the connection between the sensors and the behaviors of the robot. For more information about the Eye Sensor and how it works, see the Coding with the VEX GO Eye Sensor VEX Library article.