
Play
Part 1 - Step by Step
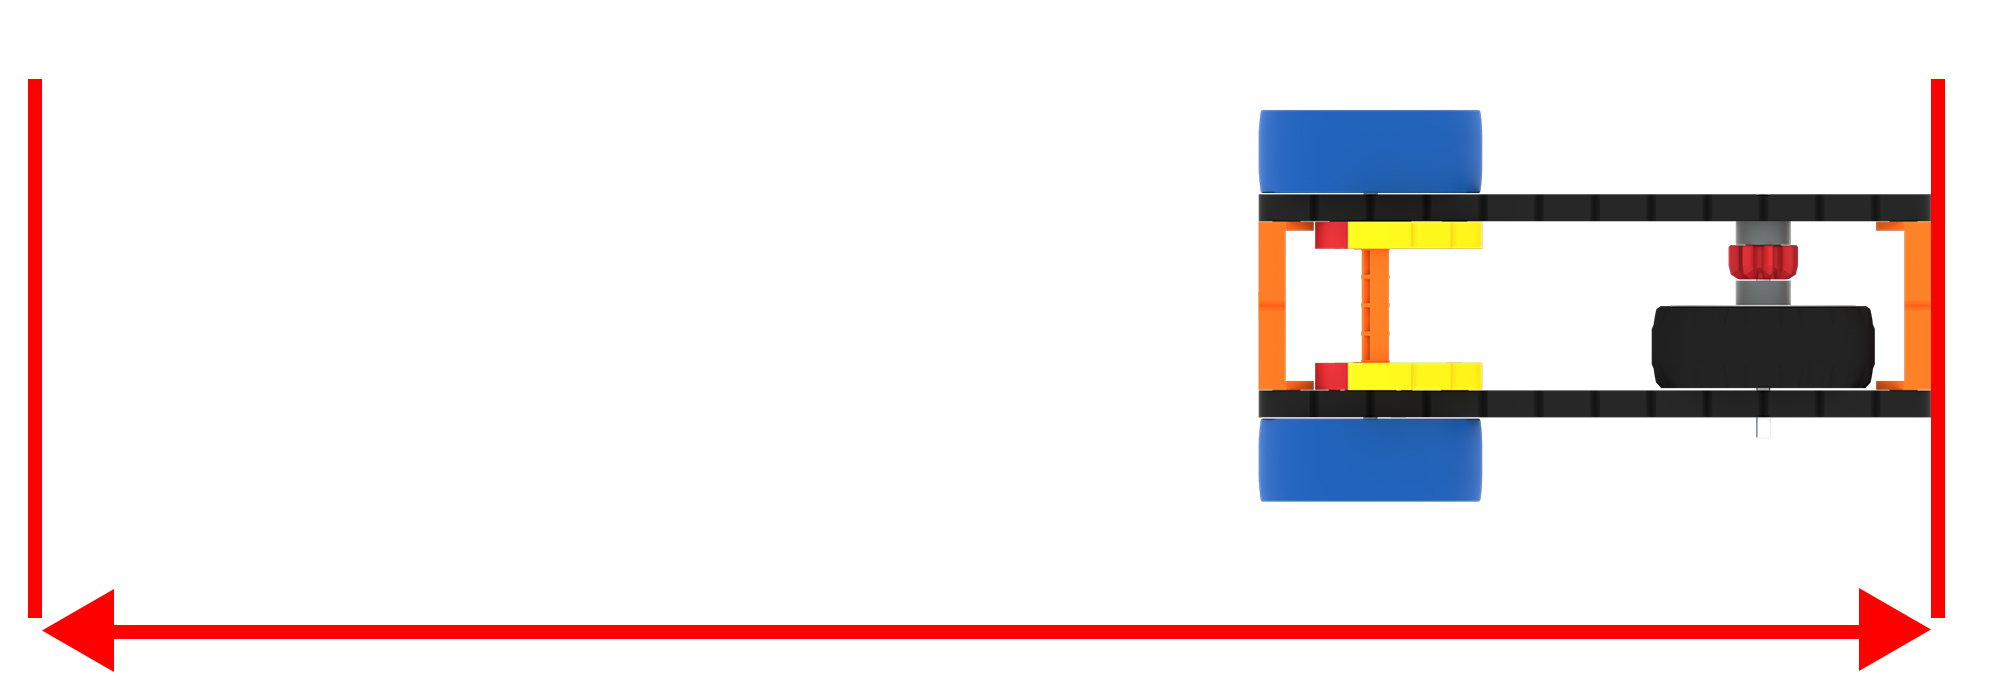
- InstructInstruct students to place the car at their starting line and push the car forward. Watch the animation below for an example of a student pushing an Unpowered Super Car and measuring the distance that the car travels as 35cm.
Place the car at the starting line and push it forward - ModelModel how to measure by having students mark their ending point with tape, then use a ruler or other measuring tool to measure the distance travelled from the beginning point to the ending point.
Mark and measure beginning point to the ending point -
Model for students how to set up their Data Collection Sheet or use the preset Lab 1 Data Collection Example document. Make sure students are clear on their methods for recording who pushed the car each time using one group as an example.
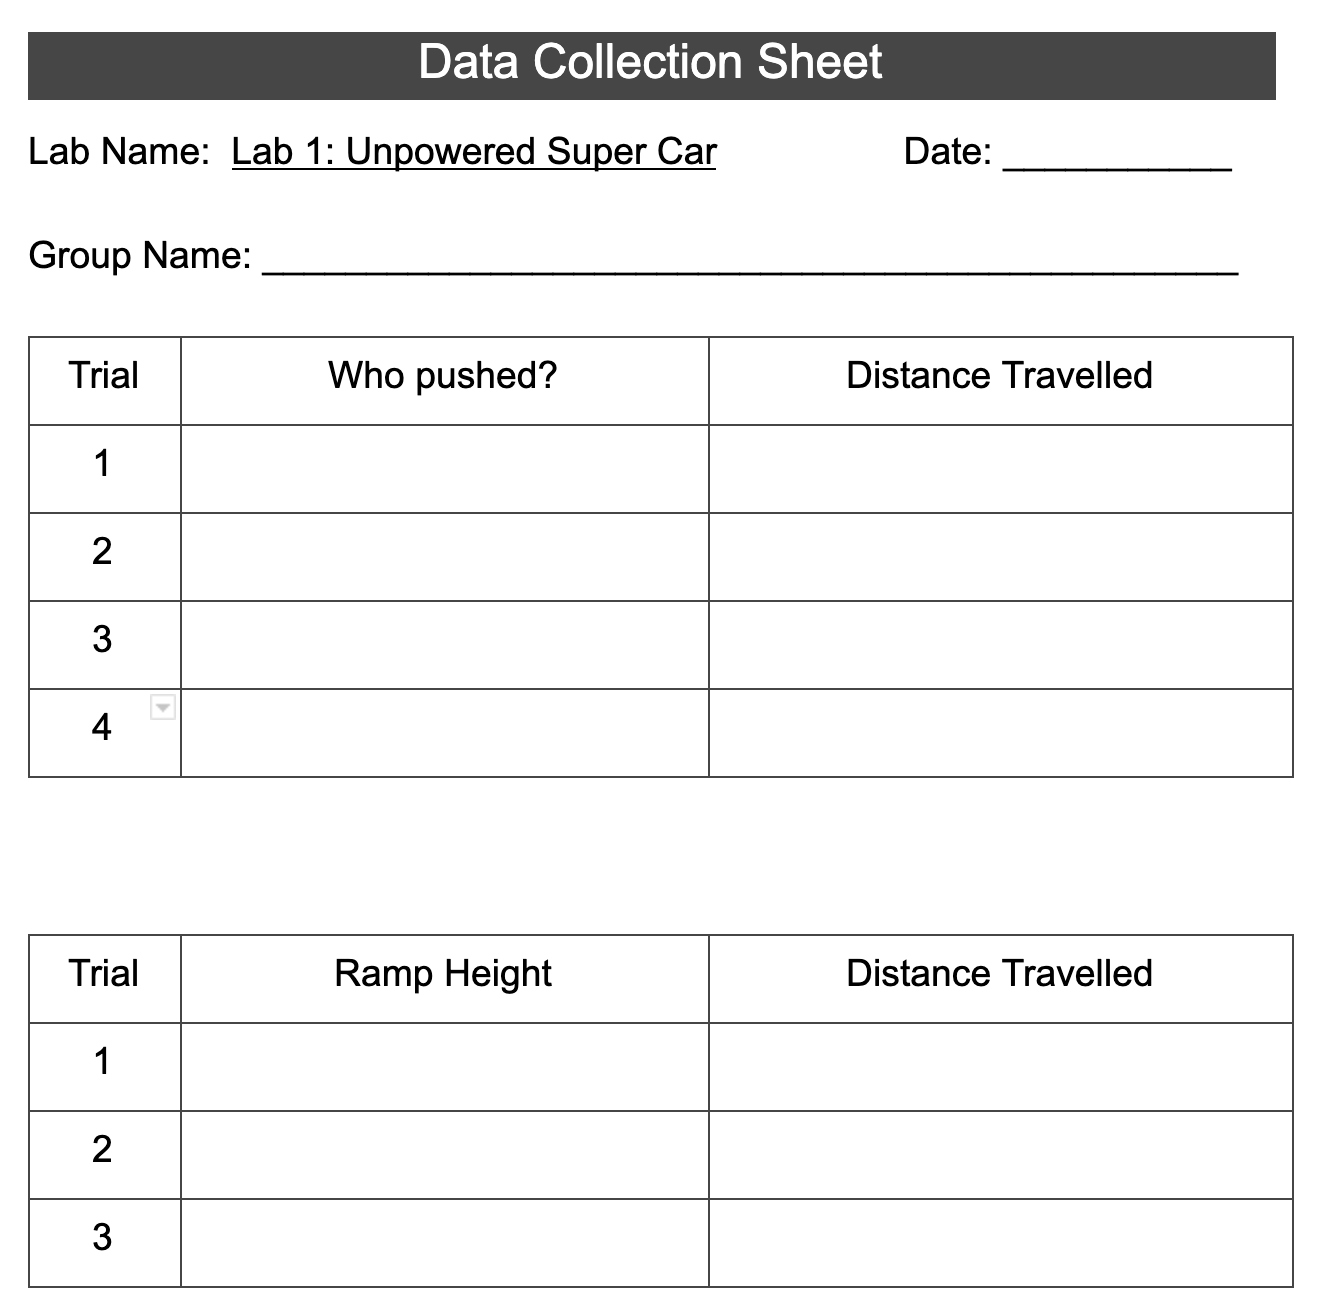
Data Collection Sheet
-
- FacilitateFacilitate discussions with students as they work by asking the following questions that encourage students to use spatial language.
- What direction does your car travel?
- How far did it travel?
- Can you explain how to make the Unpowered Super Car travel farther?
- How would you make the car travel a shorter distance?
- RemindRemind students to take turns pushing the car, and to push the car with different amounts of force (pushing it hard or soft).
- AskAsk the students what patterns they see. When does the car go further? What does the data tell you about what might happen next? Ask students to make predictions based on what they observe.
Mid-Play Break & Group Discussion
As soon as every group has completed their tests pushing the car and measuring the distance, come together for a brief conversation.
- When did the car travel the most distance?
- How did you measure the distance?
- Based on your observations, how does the amount of force relate to how far the car moves?
- Make a prediction, if you were to push the car with a small amount of force, would it travel a shorter or longer distance compared to if you pushed the car with a large amount of force.
Part 2 - Step by Step
- InstructInstruct students that they are going to use a VEX GO Field Tile to create a ramp. Explain that they are going to build an attachment for the bottom of the tile that will enable them to change the height of the ramp
-
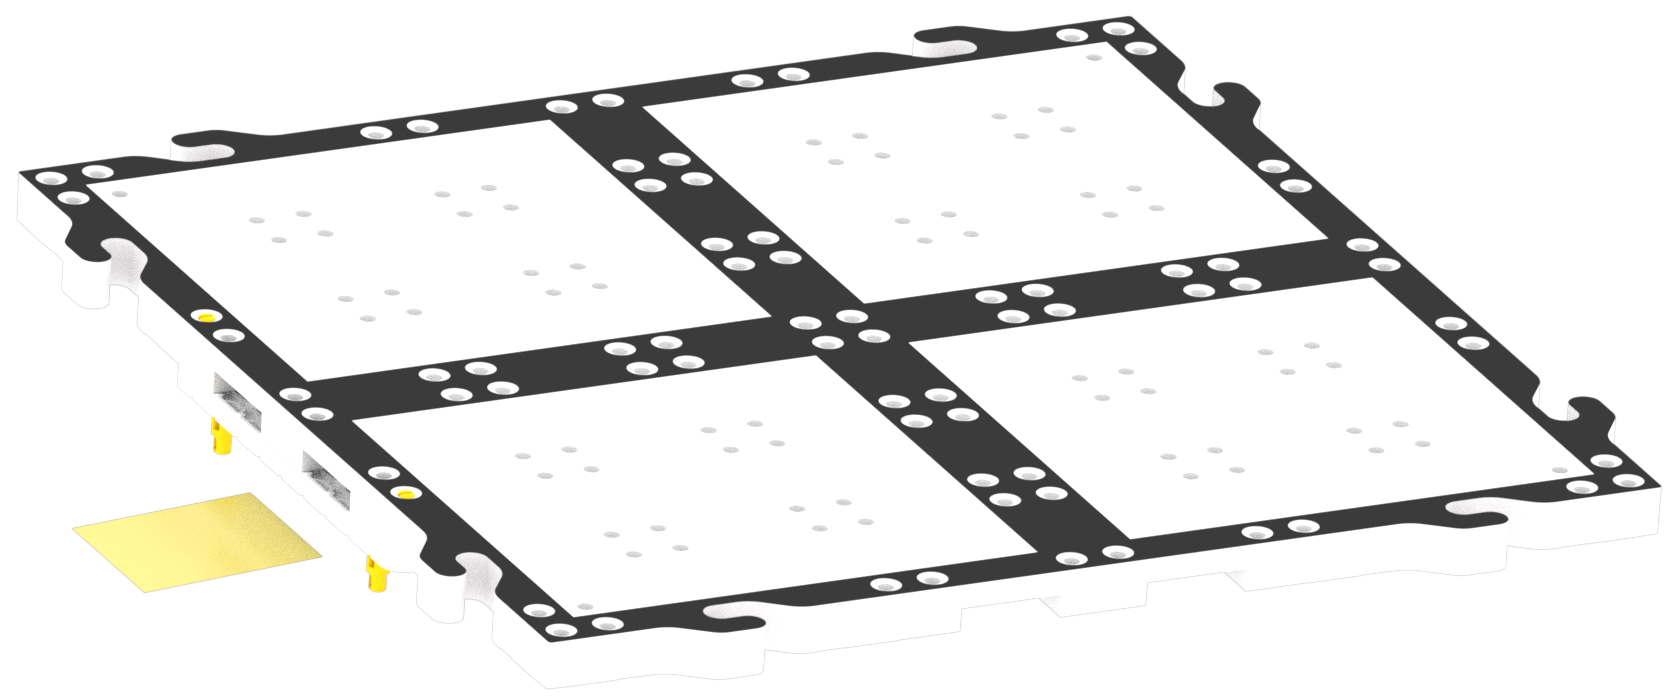
First, attach two Yellow Standoffs to a White Beam. Then, attach this to the holes on the top row of an overturned VEX GO Field Tile. Watch the animation below to see the two Standoffs and the White Beam being attached to the underside of a Field Tile.
Make a ramp for the Unpowered Super Car -
Students will then add two Yellow, Blue, and Orange Standoffs to the White Beam to adjust the height of the ramp. The Yellow Standoffs being the lowest height, the Blue Standoffs being the middle height, and the Orange Standoffs being the tallest height. Students will start their Unpowered Super Car at the top of their ramp each time.
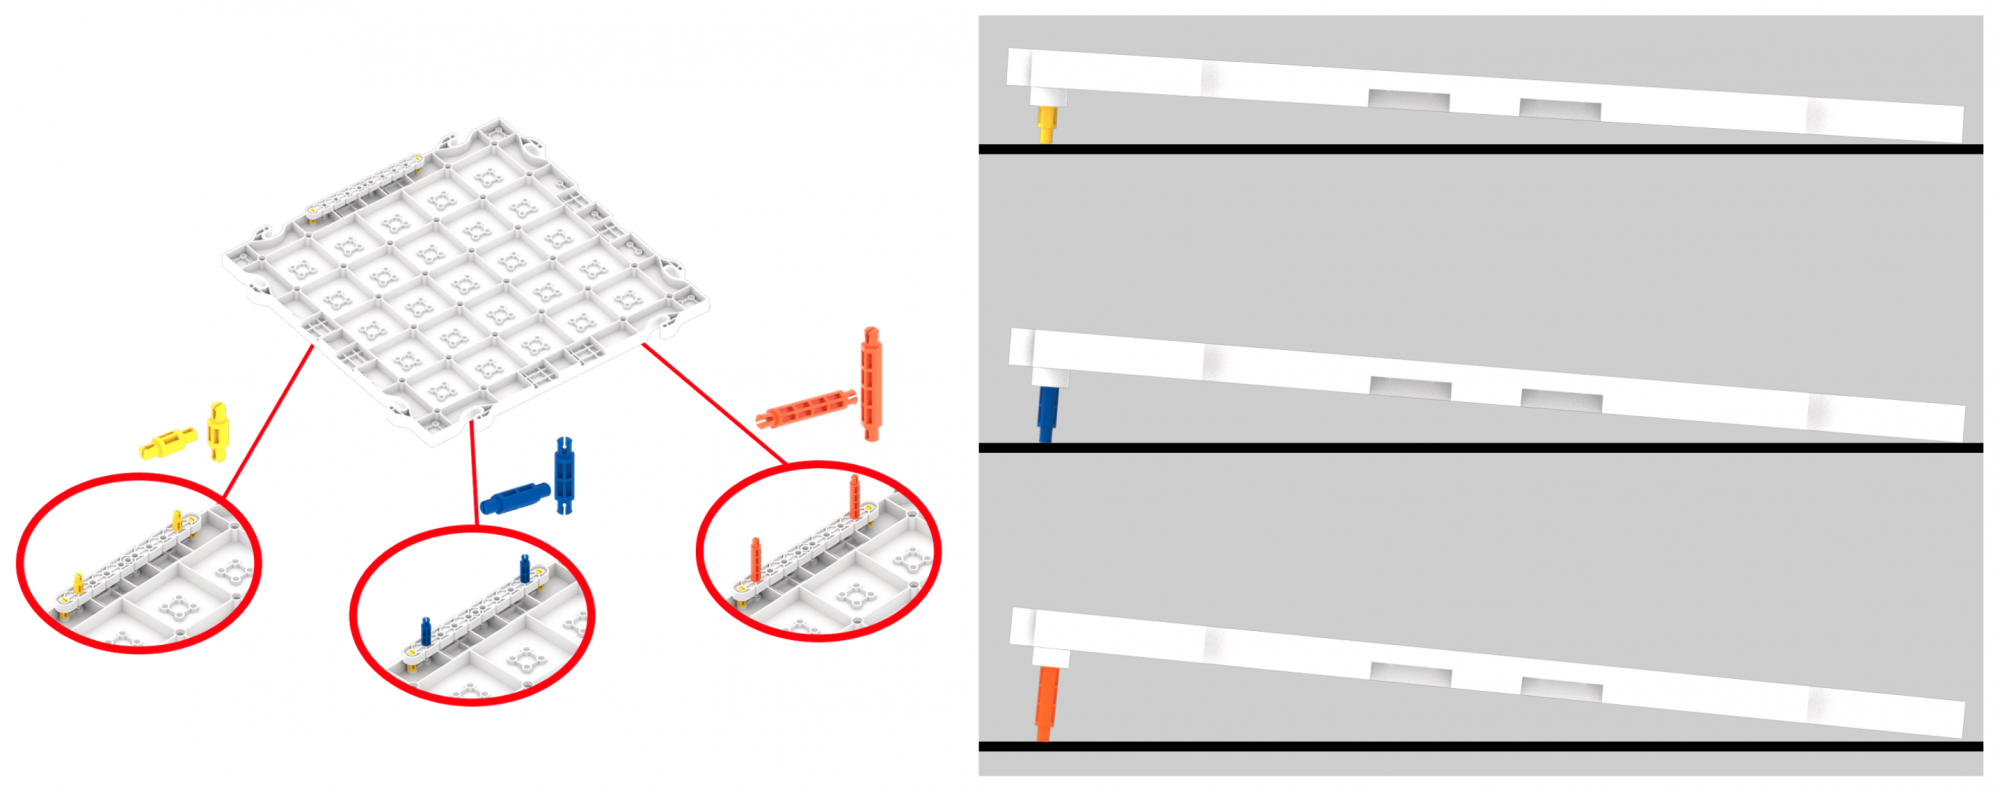
Adjust the Height of the Ramp -
Show students how to mark the start of their ramp. This ensures that the car is starting from the same position each time, when the height of the ramp is adjusted using the standoffs. This is also helpful if the ramp happens to move slightly during testing.
Mark the start of the ramp
-
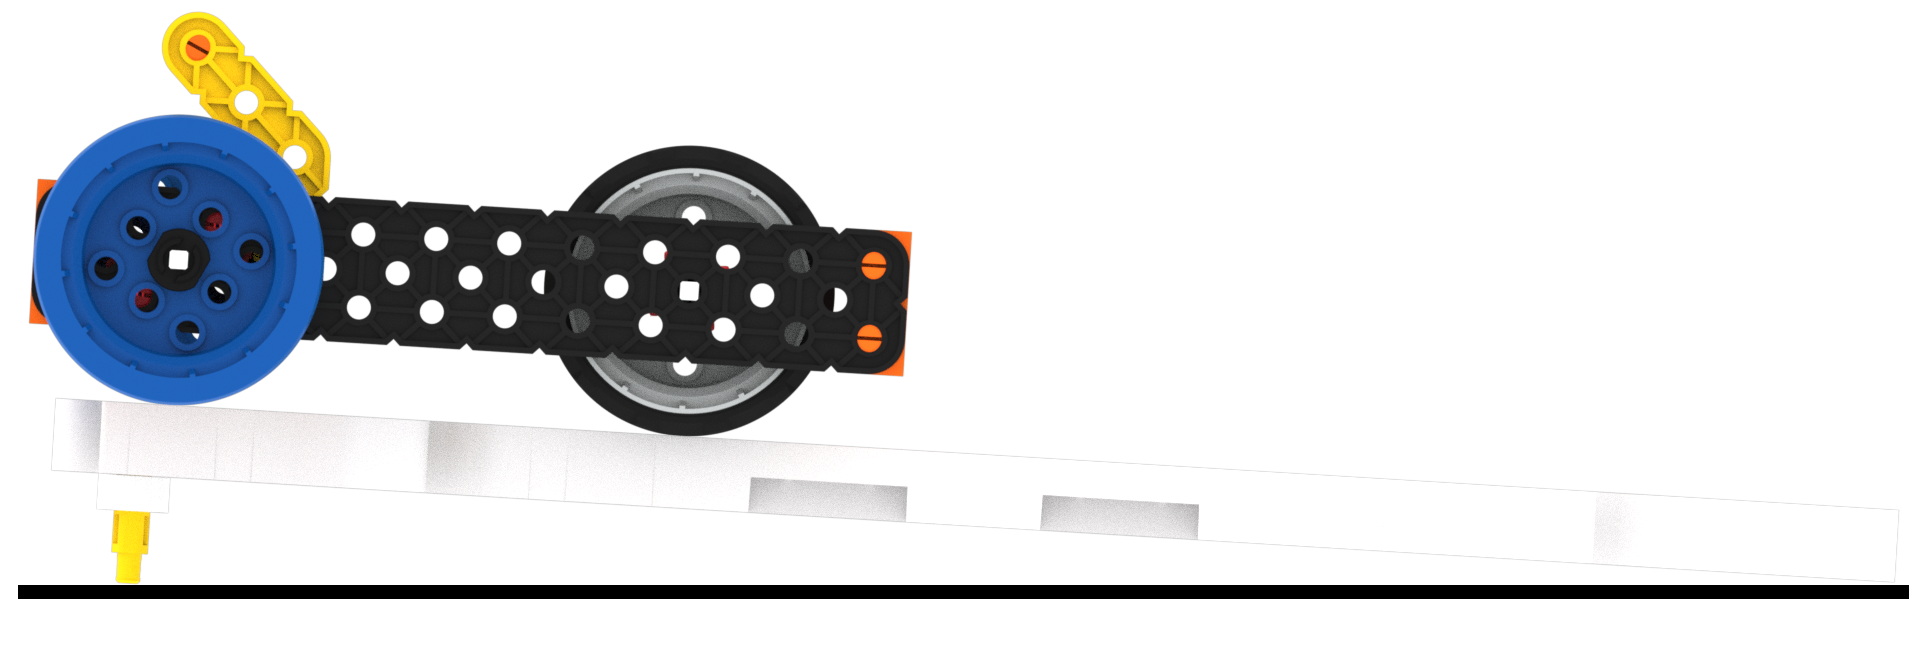
- ModelModel for students how to start their ramp at its lowest position with the Yellow Standoffs.
- Have the students place their cars on the top of the ramp and let go. Watch the animation below to see an Unpowered Super Car rolling down the ramp.
Video file- Model proper measuring and data collection routines while groups are taking measurements of how far the car traveled when using the ramp as the starting point.
- Once students have tested the ramp at the lowest height with the Yellow Standoffs, instruct students to repeat the process again at two more heights with the Blue and Orange Standoffs.
Start the ramp at the lowest position - FacilitateFacilitate a conversation about how far the car is traveling as students are testing on their ramp by asking the following questions:
- Did you imagine your car would travel a farther or a shorter distance than what occurred?
- What do you think would happen if you pushed the car instead of just letting it roll?
- What do you notice in the distance the car travels between the different heights? Does one height make the car travel further compared to another?
- RemindRemind students not to push their cars. They should just release the car because they are experimenting with how far gravity makes the Unpowered Super Car travel. Also remind students to test their car at all three heights, and to record their data after each trial.
- AskAsk students what force is making the car move?
Optional: Teams may deconstruct their Unpowered Super Car if needed at this point in the experience. However, there is an optional transitional set of Build Instructions to build the Super Car from an already constructed Unpowered Super Car in Lab 2: Super Car.