
Engage
Launch the Engage Section
ACTS is what the teacher will do and ASKS is how the teacher will facilitate.
| ACTS | ASKS |
|---|---|
|
|
Getting the Students Ready to Build
Let’s get our Robot Arms ready, so we can make them even more intelligent!
Facilitate the Build
-
InstructInstruct
students to join their groups, and have them complete the Robotics Roles & Routines sheet. Use the Suggested Role Responsibilities slide in the Lab Image Slideshow as a guide for students to complete this sheet.
- Instruct students to check all their materials to prepare for the Lab.
- They will need to make sure that they have the necessary materials, and everything is charged, and the Code Robot Arm (2-Axis) is built correctly.
- Have students give a thumbs up to the teacher when their group is ready to go! The Code Robot Arm (2-Axis) will need to be built if it is not already.
-
DistributeDistribute
the Code Robot Arm (2-Axis) builds and a device to access VEXcode GO to each group. Or, distribute build instructions and ask students to build the Code Robot Arm (2-Axis) if it is not yet built.
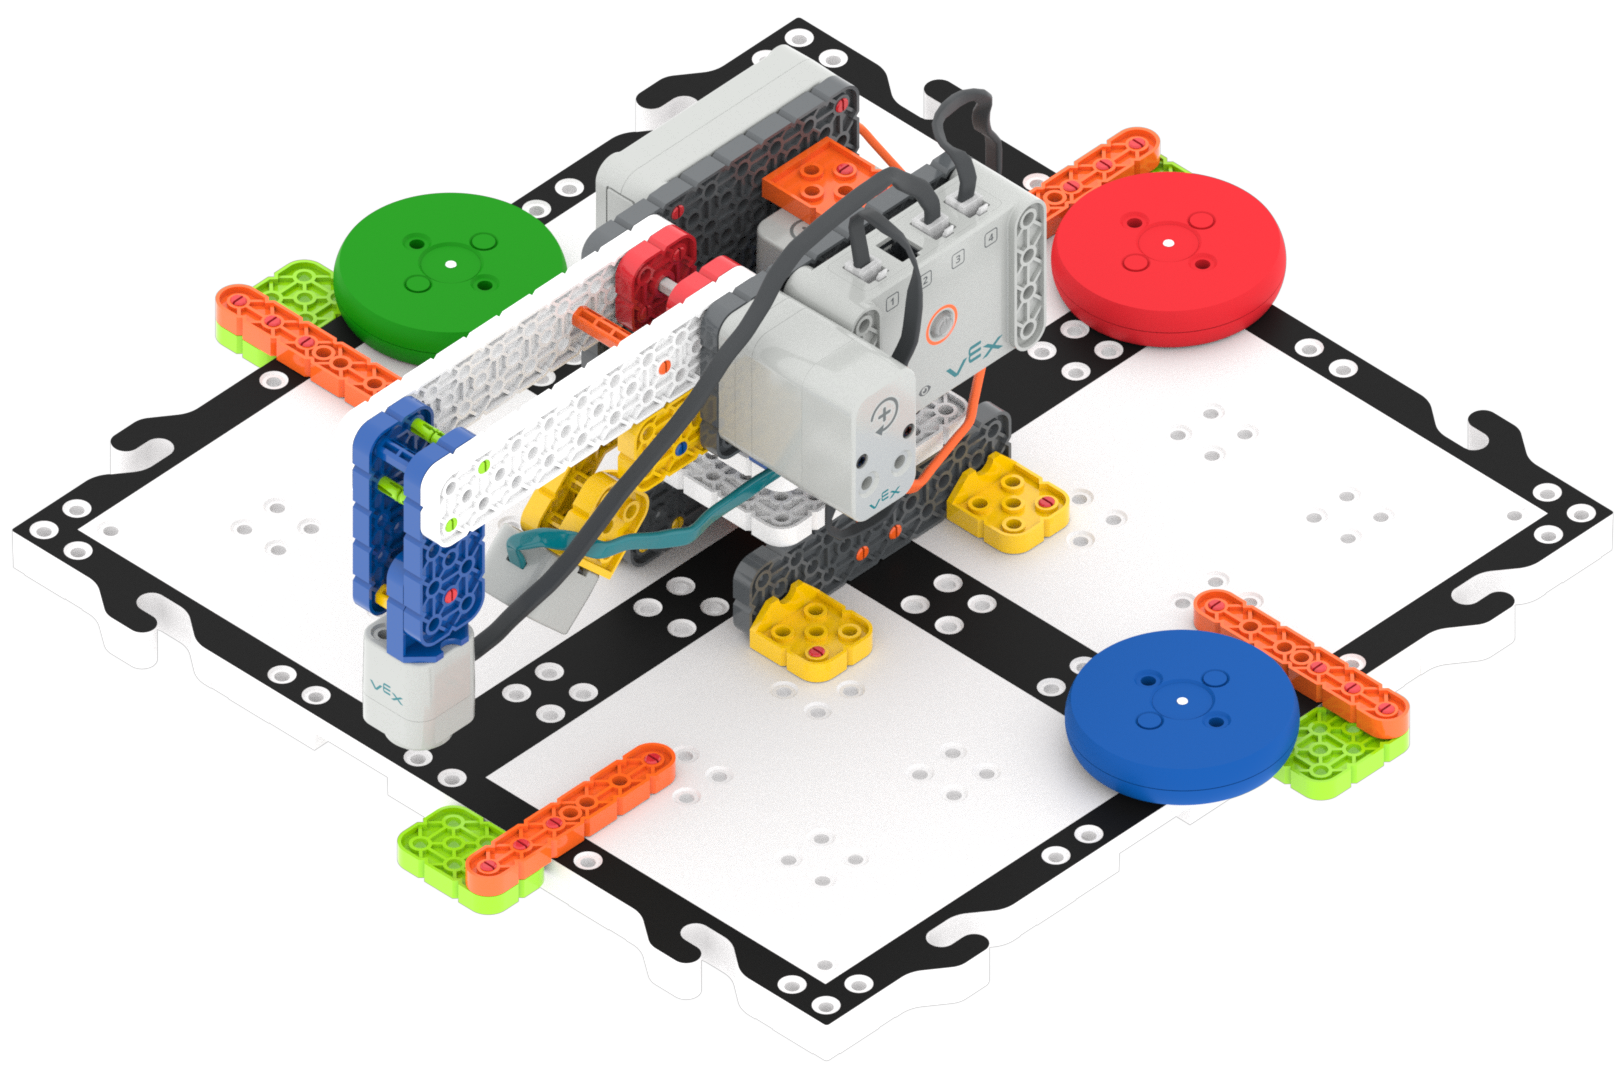
Code Robot Arm (2-Axis) -
FacilitateFacilitate
preparing the groups for the Play sections by walking them through the steps to check their materials.
- Is the Battery charged?
- Is the Code Robot Arm (2-Axis) built properly and not missing any pieces?
- Are all cables connected to the correct ports?
- Launch VEXcode GO on your device.
- OfferOffer support to groups that need assistance in launching VEXcode GO or preparing their Robot Arm.

Teacher Troubleshooting
- Update Your Firmware and Check Your Batteries - Prior to the start of the Lab, it can be helpful to check your Brains for the most up to date firmware using the Classroom App, as well as your GO Batteries, to make sure that these components are ready to go. Plug in your batteries in to charge overnight, or first thing in the morning, to make sure they are ready for use in the Lab.
- Robot Arm turns are not going to be 100% accurate - The Robot Arm will put the disk in the wrong spot sometimes. The base will not spin exactly 90 or 180 degrees. Just like humans are not correct 100% of the time, the builds are not going to be correct 100% of the time. This can be a teachable moment. An investigation or discussion on how students might improve the Robot Arm could be a great extension activity!
- Eye Sensor fix - Sometimes the Eye Sensor will detect the Electromagnet instead of the Disk. In this situation, the project may not differentiate between the blue and green disk. Try adding a [Wait] block after the Eye Sensor first detects a Disk to solve this.
Facilitation Strategies
- Think about the Builder role as Coder - If your students are working with pre-built Robot Arms from the previous Lab, there may not be much “building” to do. Encourage students to think about the role of the “Builder” as more of a “Coder”. Suggest dividing responsibilities for creating the code in VEXcode GO by Play Part 1 and 2.
- Condition vs. Conditional - If students are struggling to grasp the difference, use conversational statements to help them. A condition is a True/False statement, and a conditional tells what to do with the information from the True/False statement. For instance: In making a decision like: Do I need an umbrella today? The condition tells you the sensory information (rain/no rain), and the conditional tells the action that goes with it (take umbrella/leave umbrella).
- Condition: It is raining.
- Conditional: If it is raining, then I take an umbrella.
- Remember the Forever Loop - If students are having difficulty in Play Part 2, remind them to check that they are adding their blocks inside the [Forever] C-block. If the new blocks are outside the loop, they will only be checked once, and the project will not perform as the students intend it to.
- Map Out the Turning Radius - Students may have trouble visualizing or accurately coding their Robot Arm to move to separate locations with each colored disk. Encourage students to draw, trace on the tile with their finger, or move their own arms, the degrees and direction they are using in the [Turn for] block, to help them see where the Robot Arm is going to stop moving and drop the disk.