
Play
Part 1 - Step by Step
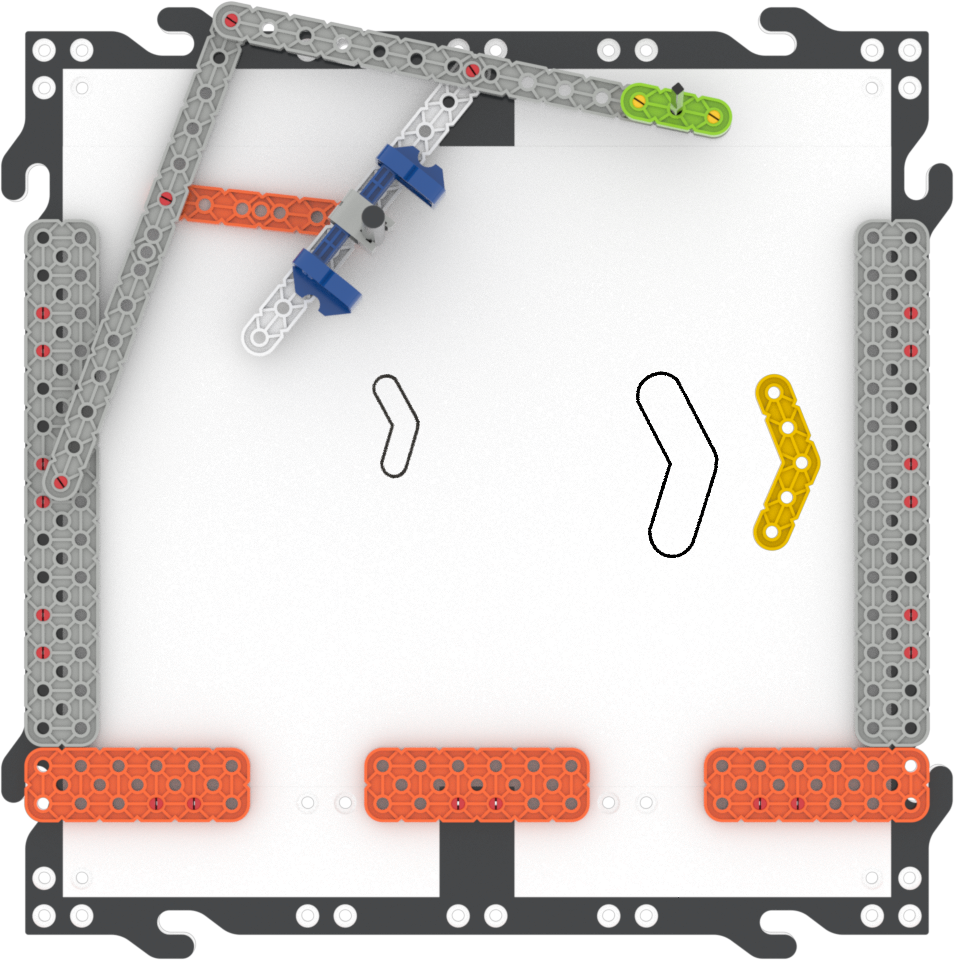
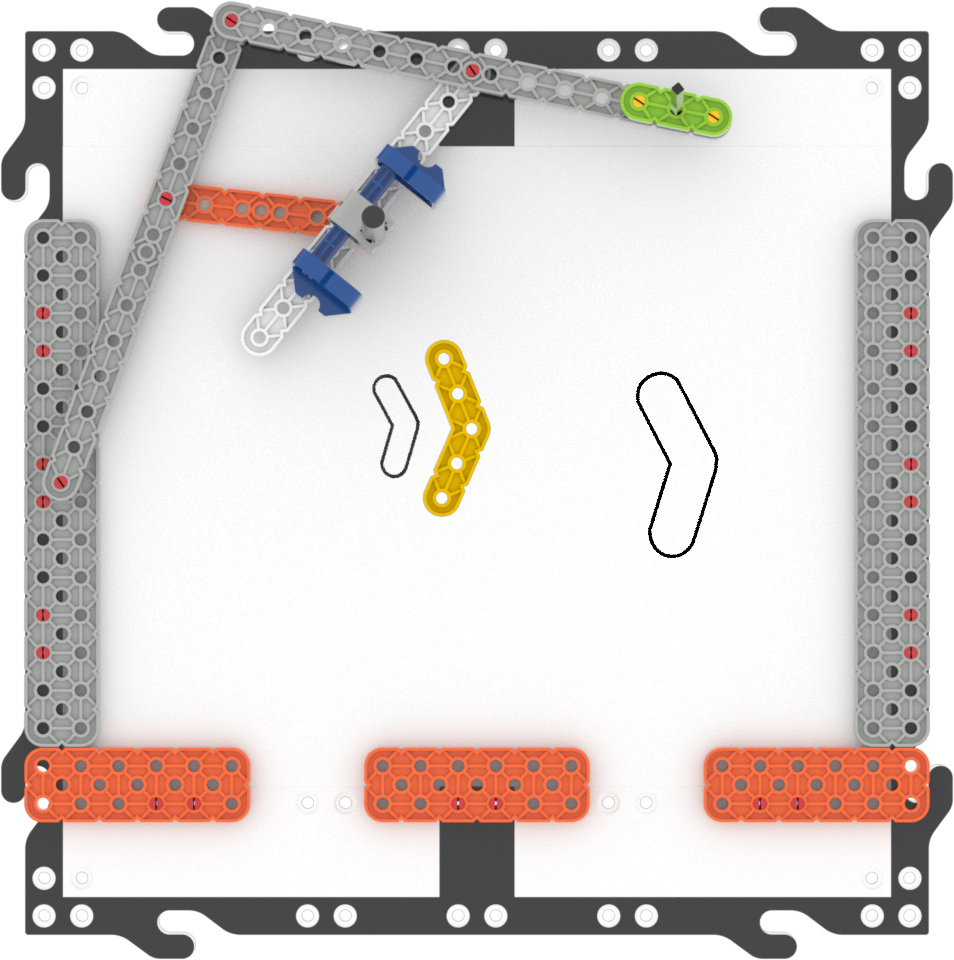
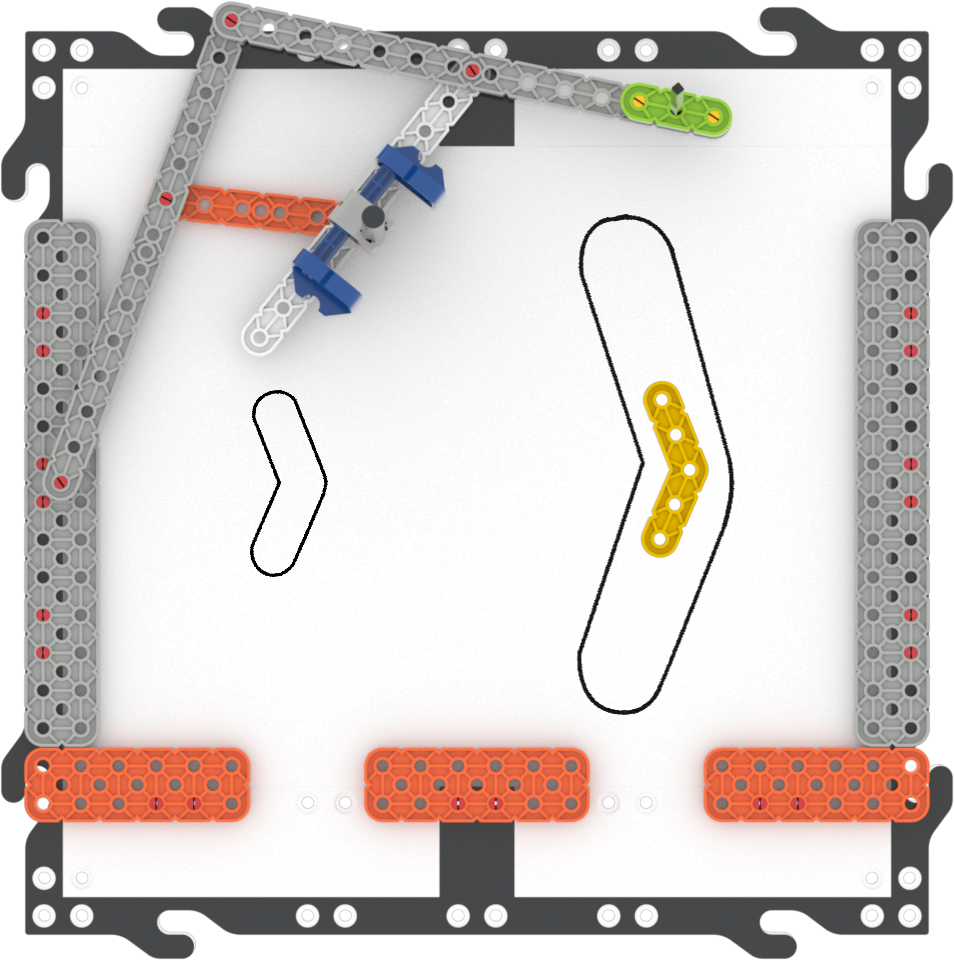
- InstructInstruct students that they will be creating scaled drawings using VEX GO pieces. Each student will select a beam, plate, or other large piece from the VEX GO Kit to trace. Students will trace the piece at the top of the Blueprint Worksheet or plain paper. Then, students will use the Plain Shaft of the Pantograph to trace the outline of the VEX GO piece, to create the smaller copy. Watch the animation below to see the Pantograph being used to draw a smaller version of a traced VEX GO piece. The VEX GO piece is traced on the right side of the Pantograph, and the smaller scaled drawing is created to the left.
Video file
- ModelModel for students how to use the Pantograph to create a smaller drawing. First, trace the VEX GO piece outline, then show students how to move the Plain Shaft over the outline in a steady motion, to create as accurate a smaller copy as possible.
Create a smaller drawing - FacilitateFacilitate students testing the Pantograph by asking questions related to how they are using the tool, and spatial reasoning.
- Do you have enough room for your drawing and your small copy? If not, how could you change their locations on the Blueprint Worksheet so that they fit better?
- Did you find a way of using the Pantograph that created a more accurate copy?
- What do you notice about how your movement of the Plain Shaft affects the drawing that is created?
-
How does your Pantograph's drawing compare to your tracing? What is similar or different?
Compare size and scale
- RemindRemind groups to use teamwork when tracing the drawings, and encourage students to share ideas on how to improve the drawings.
Students may not get a "perfect" copy on their first try with the Pantograph. If time allows, encourage students to test the Pantograph multiple times, and to pay attention to how they are moving the Plain Shaft. Do they notice a difference when they move the Plain Shaft faster or slower? What about if they press harder or more gently? What works best for each member of the group?
- AskAsk students to compare their drawings to the actual VEX GO piece they used. How does the drawing the Pantograph compare to the one you traced? How much bigger or smaller are the drawings to the original piece? How do you think that this could be useful when creating something like a blueprint?
Mid-Play Break & Group Discussion
As soon as every group has completed their individual designs, come together for a brief conversation.
Have students share their scaled drawings made with the Pantograph and describe how they compare to the original tracings.
- How did the Pantograph move while you traced your drawing?
- Which part of the build do you think made the drawing smaller?
Transition to Play Part 2, by asking students about another way to use the Pantograph.
- Do you think we could use the Pantograph to make larger scaled drawings? How might that work?
Part 2 - Step by Step
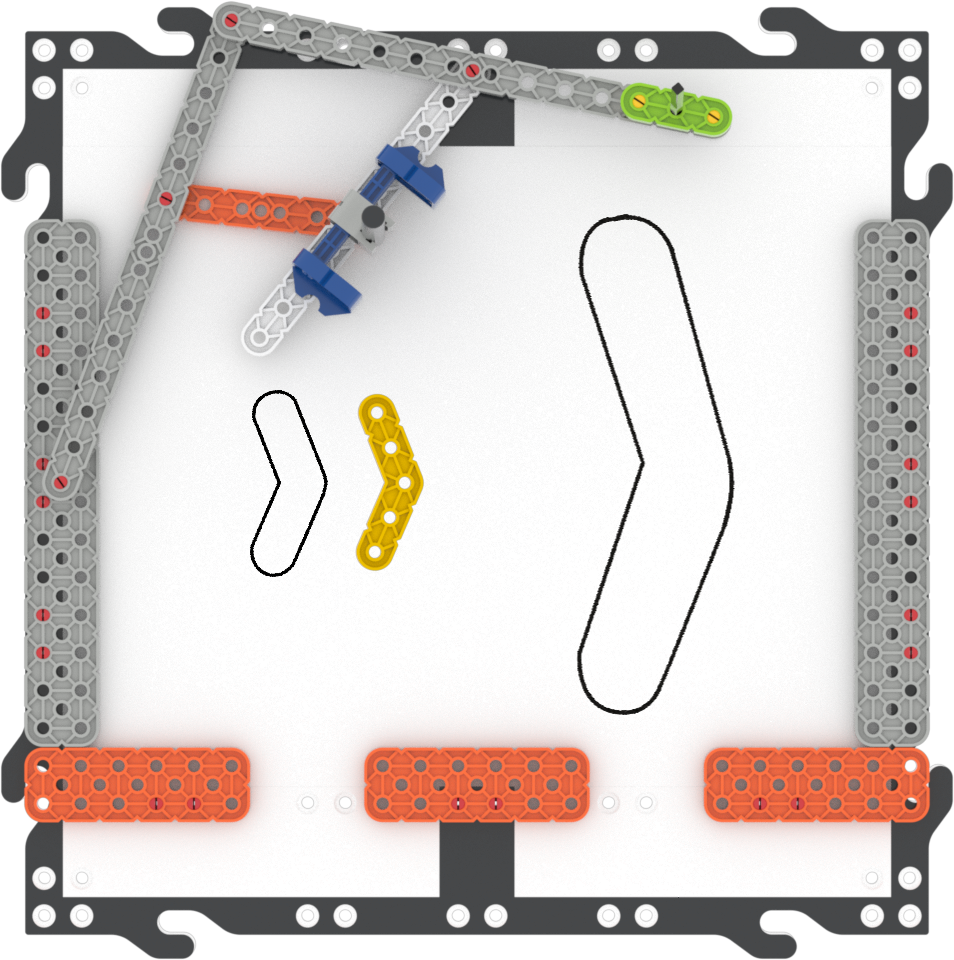
- InstructInstruct each group to remove the pen and tracing attachments, and switch their locations. Have students trace the same VEX GO piece at the bottom of a new Blueprint Worksheet or paper. Then, instruct students to use the Plain Shaft to trace the outline of the VEX GO piece, to creates the larger copy. Watch the animation below to see the Pantograph being used to draw a larger version of a traced VEX GO piece. The VEX GO piece is traced on the left side of the Pantograph, and the larger scaled drawing is created to the right.
Video file
- ModelModel for students how to switch the attachments. Show students how the Plain Shaft needs to shift to the end of the beam so it will attach, using a group’s Pantograph.
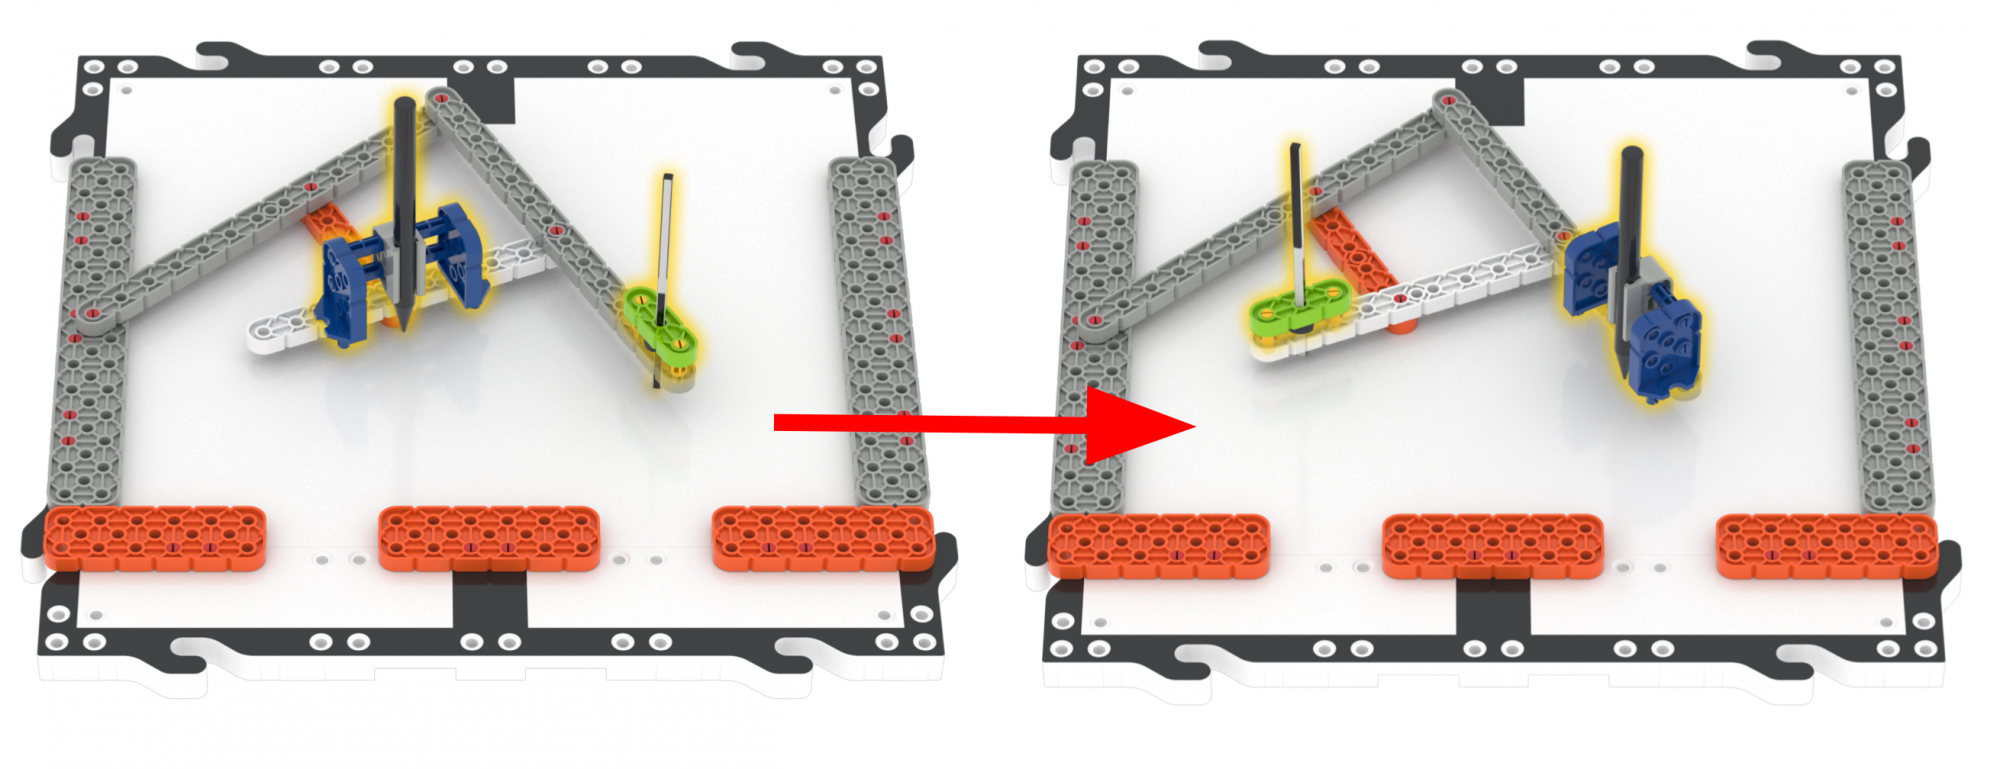
Switching attachments -
Model for students how to create the larger drawing using a group’s Pantograph. First trace the VEX GO piece, then show students how to move the Plain Shaft over the outline in a steady motion, to create as accurate a larger copy as possible.
Create a larger drawing
-
- FacilitateFacilitate students using the Pantograph to create larger drawings by asking questions related to spatial reasoning.
- What do you notice that is different about this Pantograph drawing?
- How do the size and scale compare to your first drawing?
-
Do you think the Pantograph makes creating accurate scaled drawings easier? What are some advantages or disadvantages to using a Pantograph to make a scaled drawing?
Compare size and scale
- RemindRemind groups to look for solutions and to be patient and persistent if they experience challenges while using the Pantograph.
Students may notice a difference between their large and small drawings, and may need multiple tries to get a Pantograph drawing that looks as they intended. Prompt students to use their experience with the Pantograph to think about how they could have better results, by asking questions like, Are you happy with your large copy? If not, how could you improve it? What can you apply from your experience making a small drawing to your large drawing?
- AskAsk students to compare their drawings to the actual VEX GO piece they used, and to think about the Pantograph usage in a larger context. How does the drawing the Pantograph compare to the one you traced? How much bigger or smaller do you think the drawings are to the original pieces? What kinds of jobs might use something like a Pantograph as a tool to create scaled drawings or objects? Why could it be helpful to have a tool to make accurate scale models?
Optional: Teams may deconstruct their Pantograph if needed at this point in the experience. This build will be used in Lab 2, so you may want to keep the build complete for Lab 2 if possible.