
Session 3: Driving Your Robot
Congratulations—your Hero Bot is built and ready to go! Now it’s time to practice driving! In this session, you will test out different ways to control your Hero Bot. You will collect data about each configuration to discover which one works best for you. Have fun exploring what your robot can do! 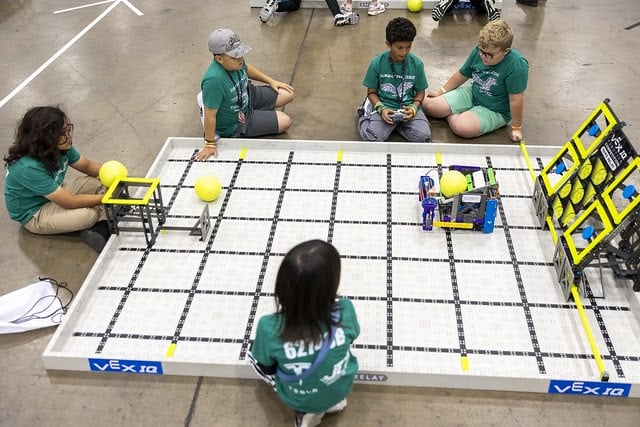
Before you begin, make sure you have the following ready:
- An assembled VIQRC Mix & Match Competition Field
- A built Hero Bot
- Charged controller and batteries
- An engineering notebook
Using the Driver Control Program
There is a program already built into the Brain that allows you to drive the Hero Bot using the controller without having to write any code. In this session, you're going to test out all of the different controller configurations in the Drive program to figure out which one works best for you.
Watch the video below to learn about how to use the Drive program. In this video you will learn:
- How to open the Drive program on the Brain
- How to change the controls
- That the four configurations are: Tank Drive, Split Arcade, Left Arcade, and Right Arcade
Activity: Driving Test
Now that you know how to run the Drive program and change the drive configurations, you're ready to drive Huey! You will practice driving the Hero Bot on the Field to test out the different driver configurations and find out which works best for you.

Use the task card (Google doc / .pdf / .docx) to guide you through the driving test and data collection.
- You will drive Huey in a figure eight around the Standoff Goal and one Pin on the Field.
- In your engineering notebook, you will record data about the drive configuration and how long it took to drive the path.
- You do not need any other Pins on the Field for this activity. You can remove the other Pins and Beams to keep driving the focus.
- If you need help changing the drive configuration, follow the steps in this article.
Each team member should get at least one chance to try driving the figure eight in each of the four Controller configurations!
Activity: Stacking Test
Now that you've tested driving around the Field, you're ready to try stacking Pins! You will practice driving Huey and using the Lift and Claw to pick up and stack Pins on the Field. 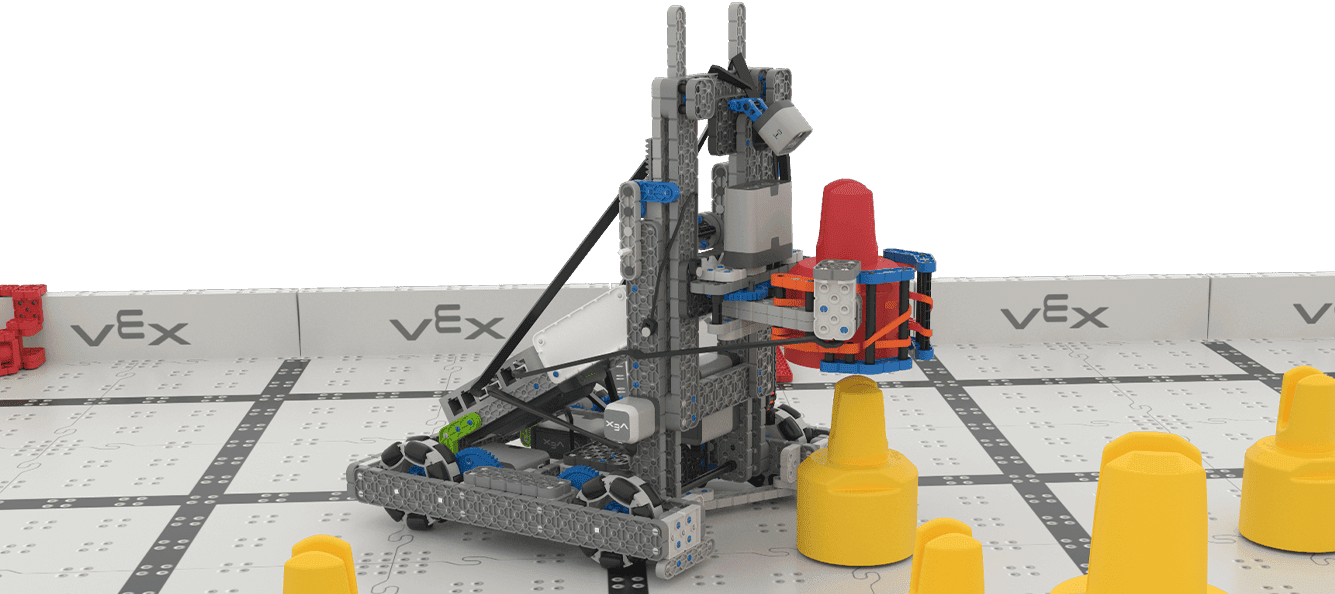
Use the task card (Google doc / .pdf / .docx) to guide you through the stacking test.
- You will drive Huey to lift up the preloaded Pin and stack it onto another Pin on the Field.
- In your engineering notebook, you will record data about the driver configuration and how long it took to make the stack.
- Make sure the Pins are in the same place for each test.
- If you need help changing the driver configuration, follow the steps in this article.
Each team member should get at least one chance to try to stack Pins using all four Controller configurations!
Wrap-up
Once everyone has completed both driving tests in all configurations, come together to decide on drive team partners.
In a VIQRC match, each team has two drivers at the Field. One driver starts the match and drives for 25-35 seconds, then hands off the Controller and the second driver finishes the match. Now that you have some practice with driving, and data about your driving, you are ready to make data-based decisions about drive team partners.
- Record all of the drive team partners, and the rationale for these decisions in your engineering notebook.
Pro Tip:
- You cannot change drive configurations mid-match, so choosing a partner whose preferred configuration matches your own is a helpful place to start. Don’t worry—you can revisit and adjust your drive teams in future sessions as you progress.
Select Next Session > to move on to the next session.