Teacher Portal

Engage

Launch the Engage Section

ACTS is what the teacher will do and ASKS is how the teacher will facilitate.

ACTS ASKS
  1. Show students the VEX GO Kit.
  2. Show the image of Mars (from Lab 2 Slideshow) using a tablet or projector to inspire students and introduce the unit theme.
  3. Demonstrate how to attach and detach pieces. Emphasize names of pieces.
  4. Then, detach pieces with the Pin Tool. Show how to use both the “Lever” and “Puller” of the Pin Tool.
  5. Show a photo of a flagpole on the Moon for inspiration.
  6. Ask students to begin brainstorming how they can build their own flagpole using the VEX GO pieces.
  1. What materials have you built with before? Sand for sandcastles? Blocks for towers? We are going to practice building with our VEX GO Kits.
  2. Introduce the build by saying, "We are going on a scientific voyage to explore Mars! We need to build some tools and structures for our mission, and we’re going to use our VEX GO materials to build these things. Our first project is to build a flagpole for our Astronaut to place on the surface of Mars."
  3. How are the pin and the standoff alike? (attach plates) How do these two pieces work differently? (standoffs leave a space between plates) Show the Connectors Image in the Lab 2 Slideshow, and demonstrate how pins and standoffs are used to attach parts. Highlight that there are different sizes of standoffs.
  4. How does this Pin Tool work? Have you seen a tool like this before?
  5. What are some important features of a flagpole? What are some characteristics of this flagpole? (encourage students to use spatial language: tall, slender)
  6. How can you use VEX GO pieces to build a flagpole for your Astronaut to place on the face of Mars? What if you have limited materials?

Getting the Students Ready to Build

We are going to work in groups to build a flagpole for our Astronaut to place on Mars!

Facilitate the Build

  1. InstructInstruct students that they are going on a scientific voyage to explore Mars! They will need to build some tools and structures for their mission, and they are going to use VEX GO pieces to build these things.
  2. DistributeDistribute beams, pins and standoffs to each student or group.

    VEX GO categories poster displaying three types of VEX GO pieces: beams, pins, and standoffs.
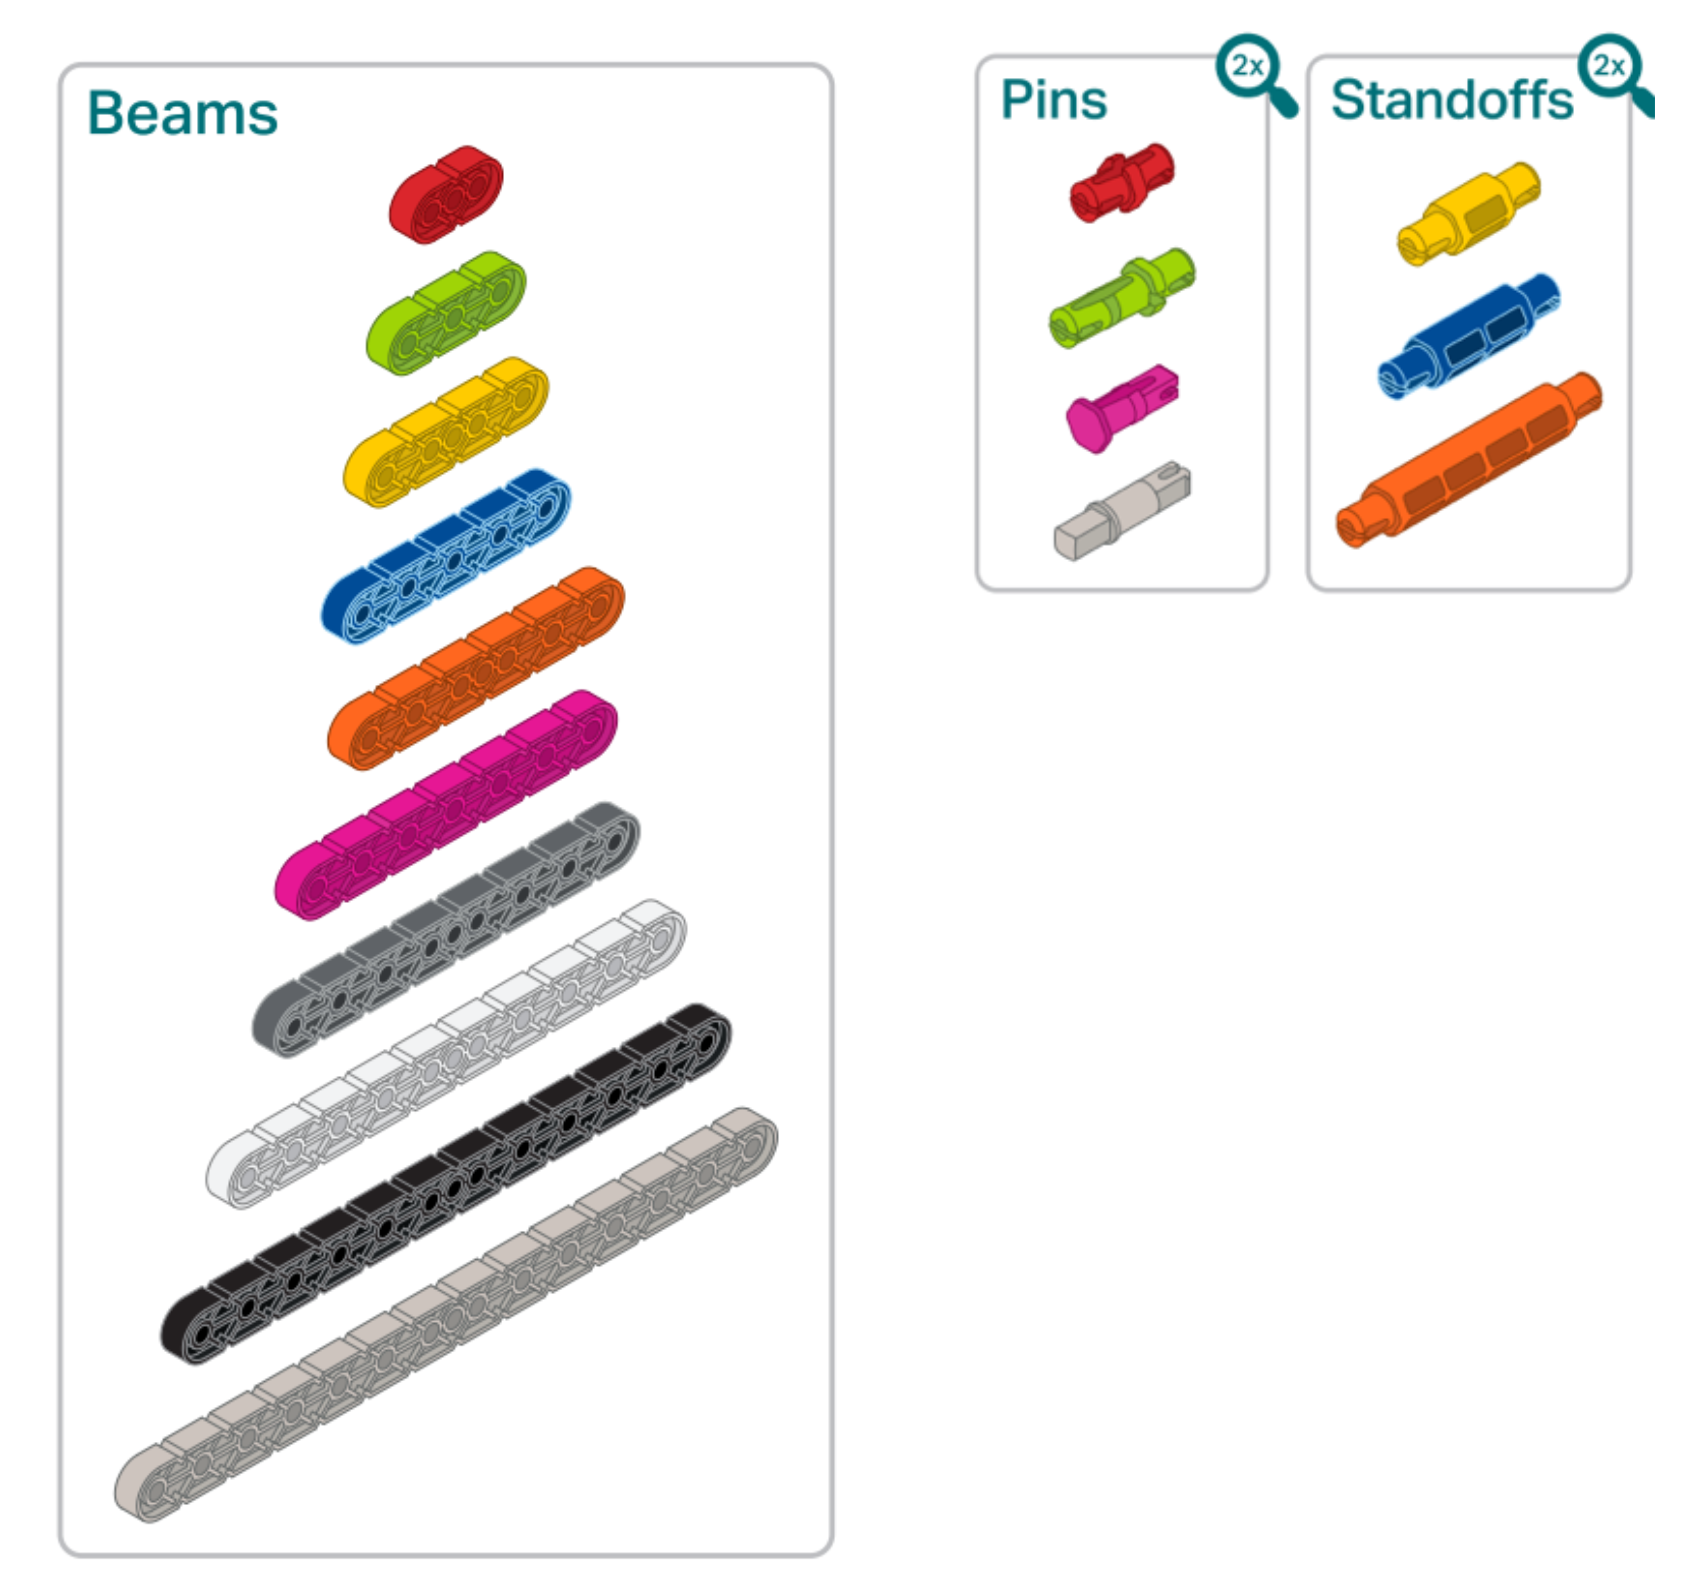
    Beams, Pins, and Standoffs


  3. FacilitateFacilitate student exploration of how to connect the VEX GO pieces.
    • Demonstrate how to assemble 2 Yellow Beams with a Red Pin, and 2 Yellow Beams with a Yellow Standoff. Highlight the difference between the two. (The Yellow Standoff leaves space between the two Yellow Beams.)
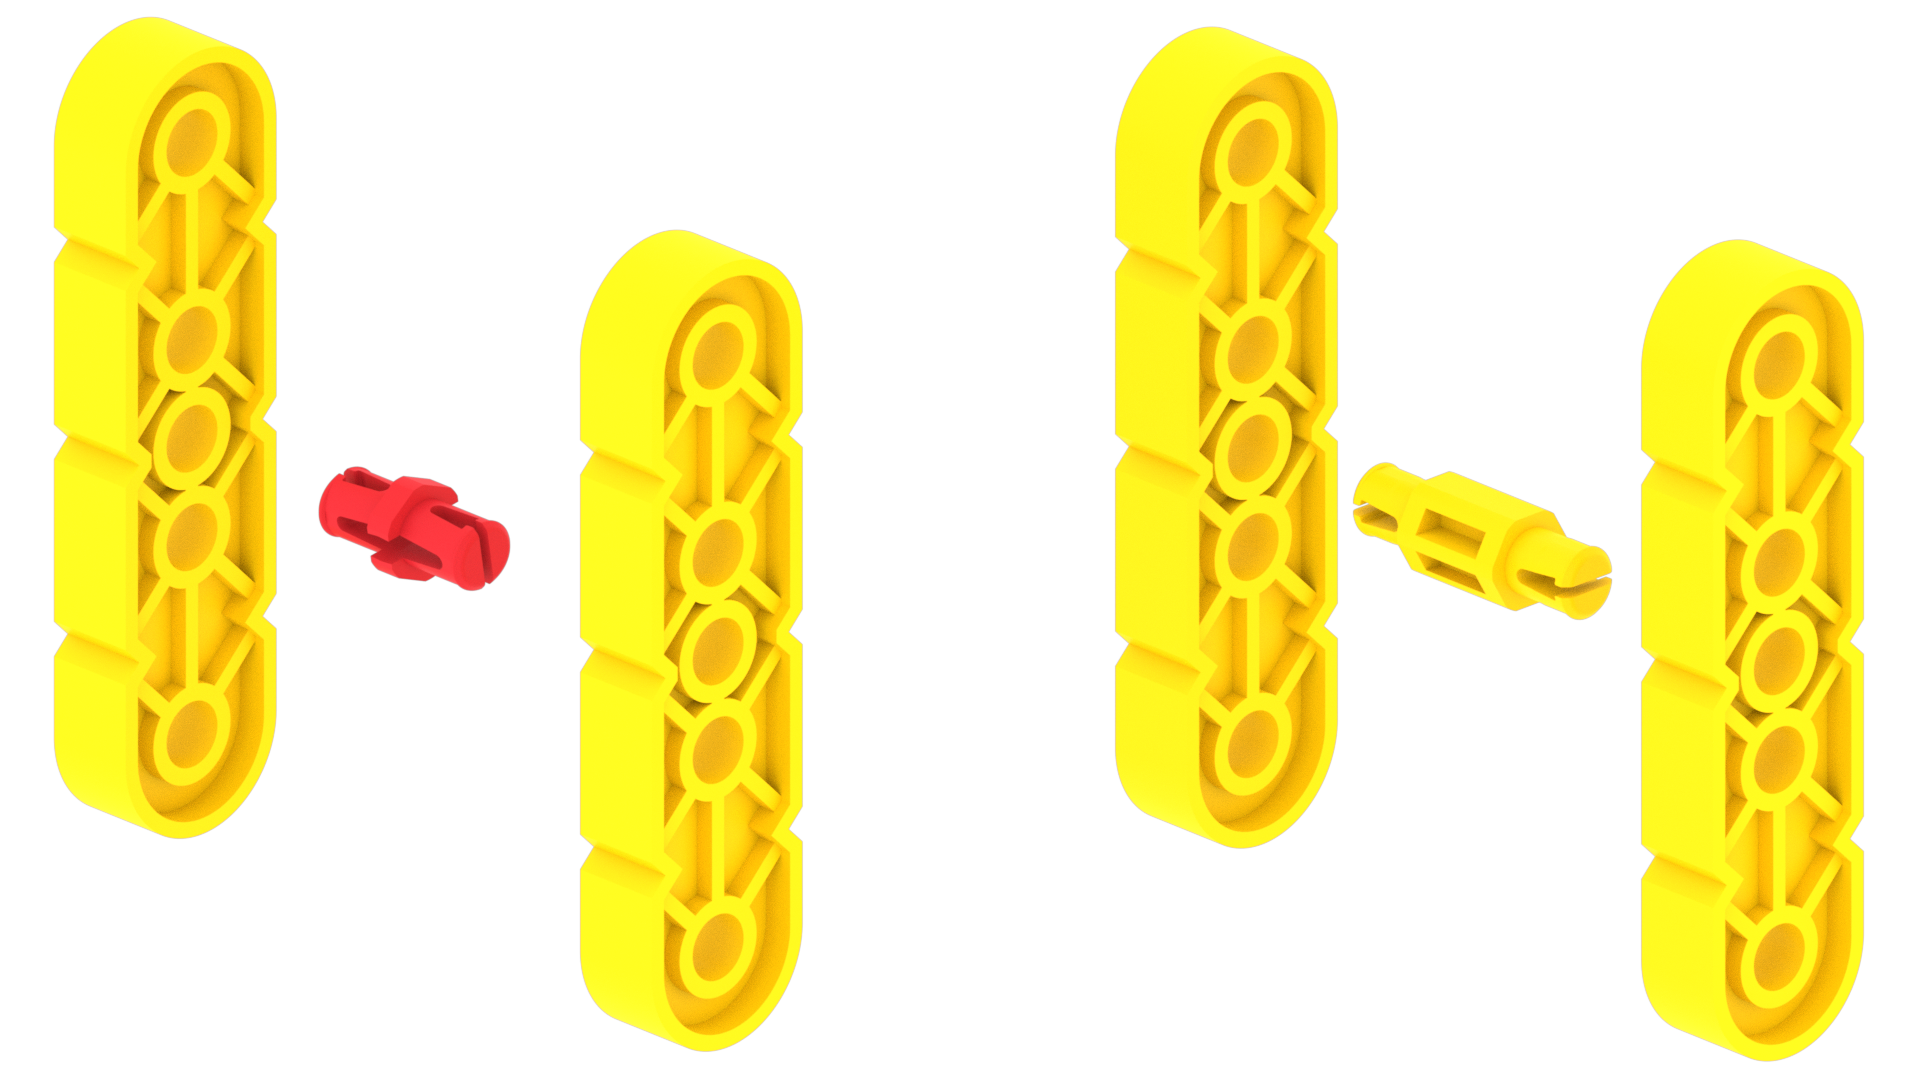
      Two assembly options to connect two yellow beams together. One uses a red pin to connect the pieces with no space between them, and the other uses a yellow pin to connect the pieces with a small space between them.
      Assemble Yellow Beams
    • You can also show the comparison of pins, standoffs and connectors image in Lab 2 Image Slideshow.
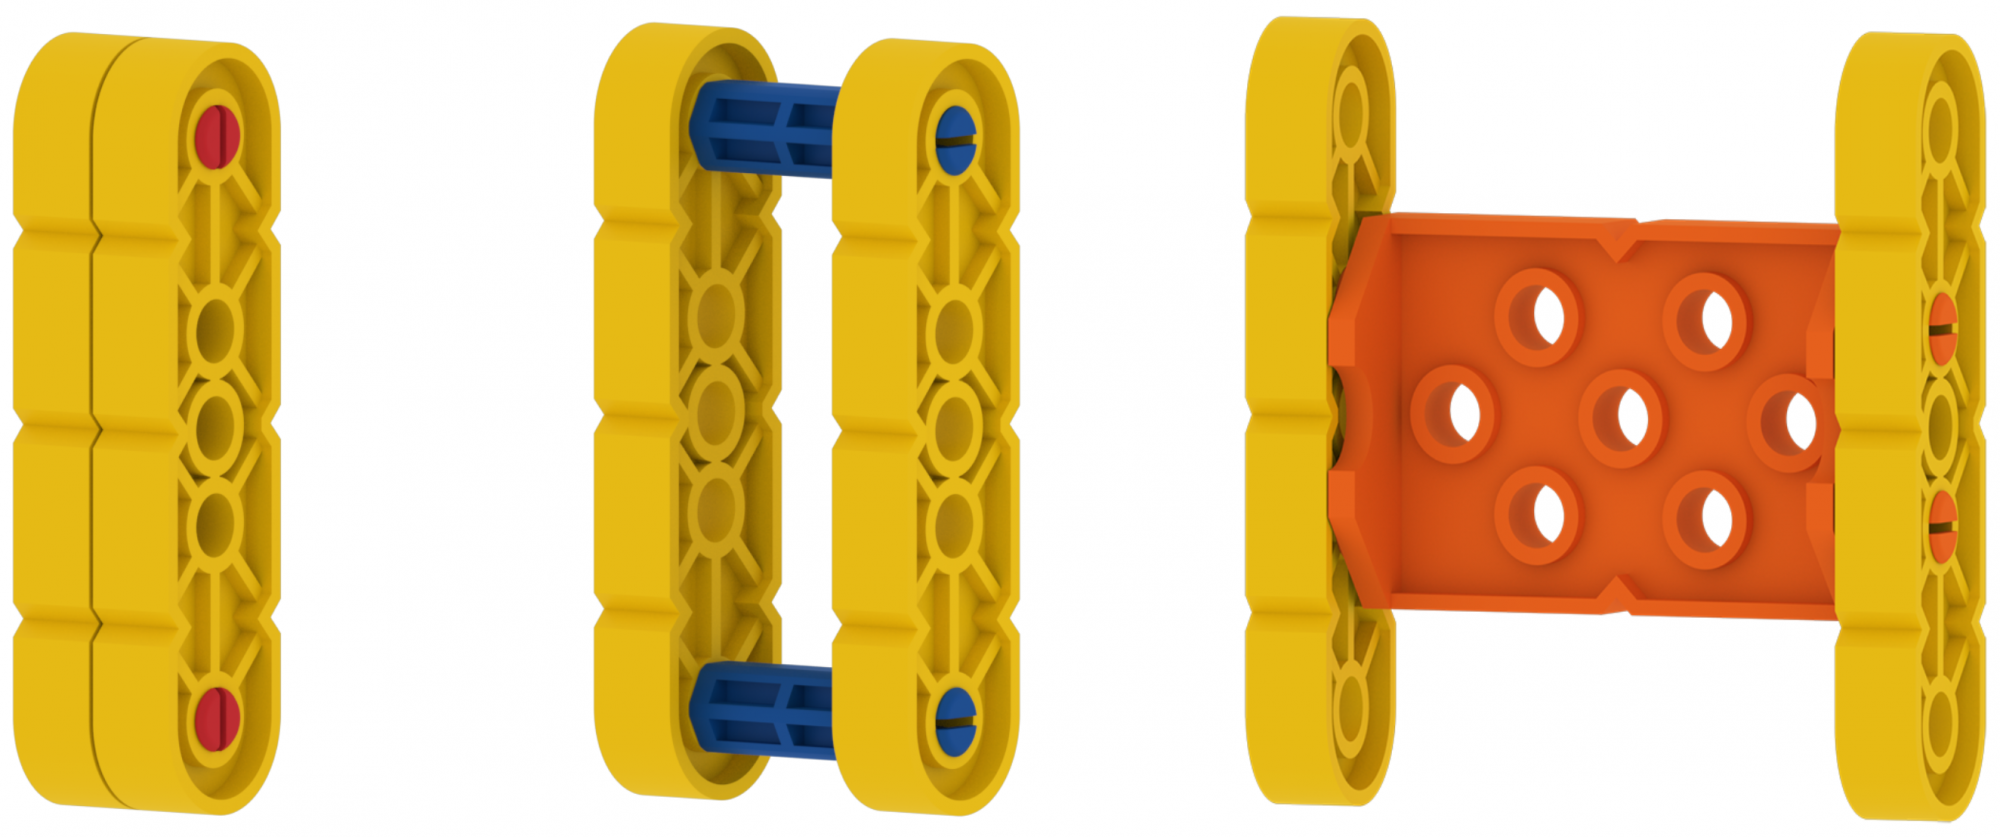
    Three assembly options to connect two yellow beams together. One uses a red pin to connect the pieces with no space between them, another uses a blue pin to connect the pieces with a space between them, and the last uses an orange connector to connect the pieces with a large space between them.
    Pins, Standoffs, and  Connectors
    • How are they alike and different?
    • Be sure to name each piece and describe its functions during the demo.
  4. OfferOffer the Pin Tool for support if students are struggling to work with the pieces.

    Demonstrate how to disassemble pieces with both the lever and the puller of the Pin Tool. Show the Pin Tool Image in Lab 2 Image Slideshow.
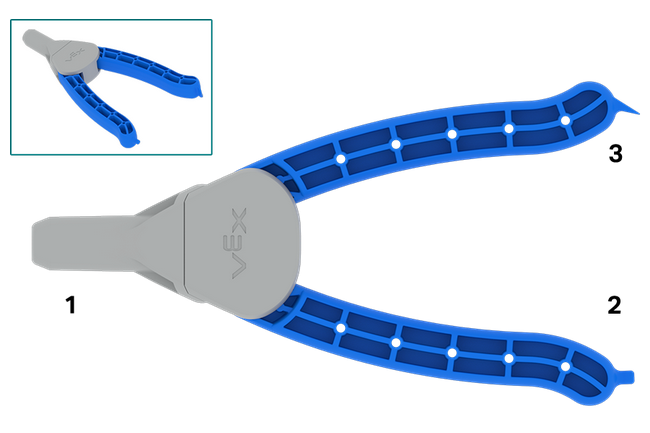
    Pin tool diagram with the puller tool labeled as 1, the pusher tool labeled as 2, and the lever tool labeled as 3 to indicate the three uses of the pin tool.
    1. Puller
    2. Pusher
    3. Lever

Teacher Troubleshooting