
Previously, you learned about how to code the 6-Axis Arm to pick up and place Cubes onto a pallet. You then revisited that skill in the previous Lesson as you learned how to make and implement a plan for a VEXcode project.
In this Lesson, you will:
- Create a plan to stack Cubes on a pallet.
- Code the 6-Axis Arm to stack Cubes on a pallet.
- Change z-axis coordinates to account for the height of a Cube to create a stack.
By the end of this Lesson, you will plan and build a project where the 6-Axis Arm creates two stacks of two Cubes on the pallets.

Making a Plan
You learned about how to make a plan for placing a Cube on the pallet in the previous Lesson. Now we are going to use the same process to make a plan to stack Cubes. Use the following steps to create a plan to stack the second Cube on top of the first.
Note: Begin by duplicating your plan from Unit 8 Lesson 1 in your engineering notebook. This plan builds on the plan shown in Lesson 1. We are going to build off of this existing plan to stack Cubes. It is important to keep your notes for Lessons 1 and 2 separate so you can reference the specific notes when looking back on this Unit.
Update the goal of the plan. The plan we are making is to move one Cube from the loading zone to a pallet then stack a second Cube on top of the first.
| Move a Cube to the Loading Zone to a pallet |
| Stack a second Cube on top of the First cube. |
| 1. Pick up a Cube. |
| a. Set the 6-Axis Arm's end effector to Magnet. |
| b. Move the 6-Axis Arm to the Cube in the Loading Zone. |
| c. Attach the Cube to the Magnet. |
Add two additional steps to the plan to account for what needs to happen with the second Cube.
- Pick up a second Cube.
- Stack the second Cube on top of the first Cube.
| 3. Pick up a second Cube. |
| 4. Stack the second Cube on top of the first Cube. |
Look at your plan for the first two steps. Step 1 and step 3 are the same because you are picking up a Cube from the loading zone. Copy the decomposed behaviors for step 1 into step 3. Your step 3 should now look like this example.
| 3. Pick up a second Cube. |
| a. Set the 6-Axis Arm's end effector to Magnet. |
| b. Move the 6-Axis Arm to the Cube in the Loading Zone. |
| c. Attach the Cube to the Magnet. |
| d. Move the 6-Axis Arm above the Loading Zone. |
Remove the "Set the 6-Axis Arm's end effector to Magnet." This was already completed at the beginning of the plan.
| 3. Pick up a second Cube. |
| a. Move the 6-Axis Arm to the Cube in the Loading Zone. |
| b. Attach the Cube to the Magnet. |
| c. Move the 6-Axis Arm above the Loading Zone. |
Compare the decomposed behaviors in step 2 to the action you want to complete in step 4. What elements of the plan can be reused?
| 2. Place the Cube on the pallet. |
| a. Move the 6-Axis Arm above the pallet. |
| b. Move the 6-Axis Arm down to place the Cube on the pallet. |
| c. Release the Cube from the Magnet. |
| d. Move the 6-Axis Arm above the pallet. |
| 4. Stack the second Cube on top of the first Cube. |
Copy the decomposed behaviors for step 2 into step 4.
| 4. Stack the second Cube on top of the first Cube. |
| a. Move the 6-Axis Arm above the pallet. |
| b. Move the 6-Axis Arm down to place the Cube on the pallet. |
| c. Release the Cube from the Magnet. |
| d. Move the 6-Axis Arm above the pallet. |
Update the decomposed behavior in step 4b to say "Move the 6-Axis Arm down to place the Cube on the first Cube."
| 4. Stack the second Cube on top of the first Cube. |
| a. Move the 6-Axis Arm above the pallet. |
| b. Move the 6-Axis Arm down to place the Cube on the first Cube. |
| c. Release the Cube from the Magnet. |
| d. Move the 6-Axis Arm above the pallet. |
While building the plan, many elements from the Lesson 1 plan were reused. You will notice as you build more and more plans that there will be common elements you can reuse. This is helpful when you get to more complex projects. You can look back through your engineering notebook, study the plans and related VEXcode projects that were built, and use elements of those successful plans in new projects.
| Move a Cube from the Loading Zone to a pallet. |
| Stack a second Cube on top of the first Cube. |
| 1. Pick up the Cube. |
| a. Set the 6-Axis Arm's end effector to Magnet. |
| b. Move the 6-Axis Arm to the Cube in the Loading Zone. |
| c. Attach the Cube to the Magnet. |
| d. Move the 6-Axis Arm above the Loading Zone. |
| 2. Place the Cube on the pallet. |
| a. Move the 6-Axis Arm above the pallet. |
| b. Move the 6-Axis Arm down to place the Cube on the pallet. |
| c. Release the Cube from the Magnet. |
| d. Move the 6-Axis Arm above the pallet. |
| 3. Pick up a second Cube. |
| a. Move the 6-Axis Arm to the Cube in the Loading Zone. |
| b. Attach the Cube to the Magnet. |
| c. Move the 6-Axis Arm above the Loading Zone. |
| 4. Stack the second Cube on top of the first Cube. |
| a. Move the 6-Axis Arm above the pallet. |
| b. Move the 6-Axis Arm down to place the Cube on the first Cube. |
| c. Release the Cube from the Magnet. |
| d. Move the 6-Axis Arm above the pallet. |
After creating the plan for stacking Cubes on the pallet, we can prepare to implement this plan in VEXcode.
Implementing the Plan
Now that the steps needed to stack the two Cubes are broken down into the smallest possible behaviors, the project to stack Cubes is ready to be built. The plan written in the engineering notebook will act as a guide for organizing and building the project.
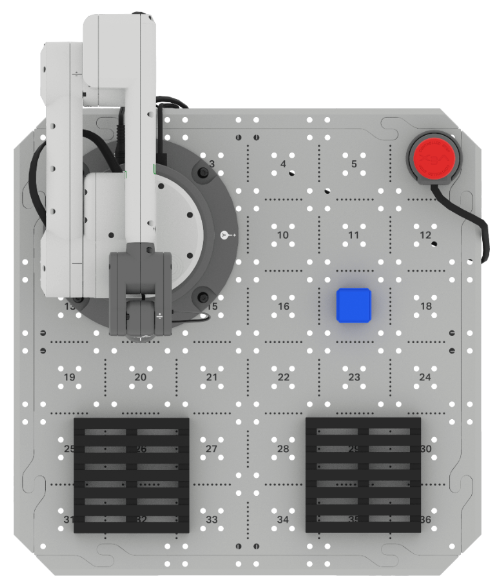
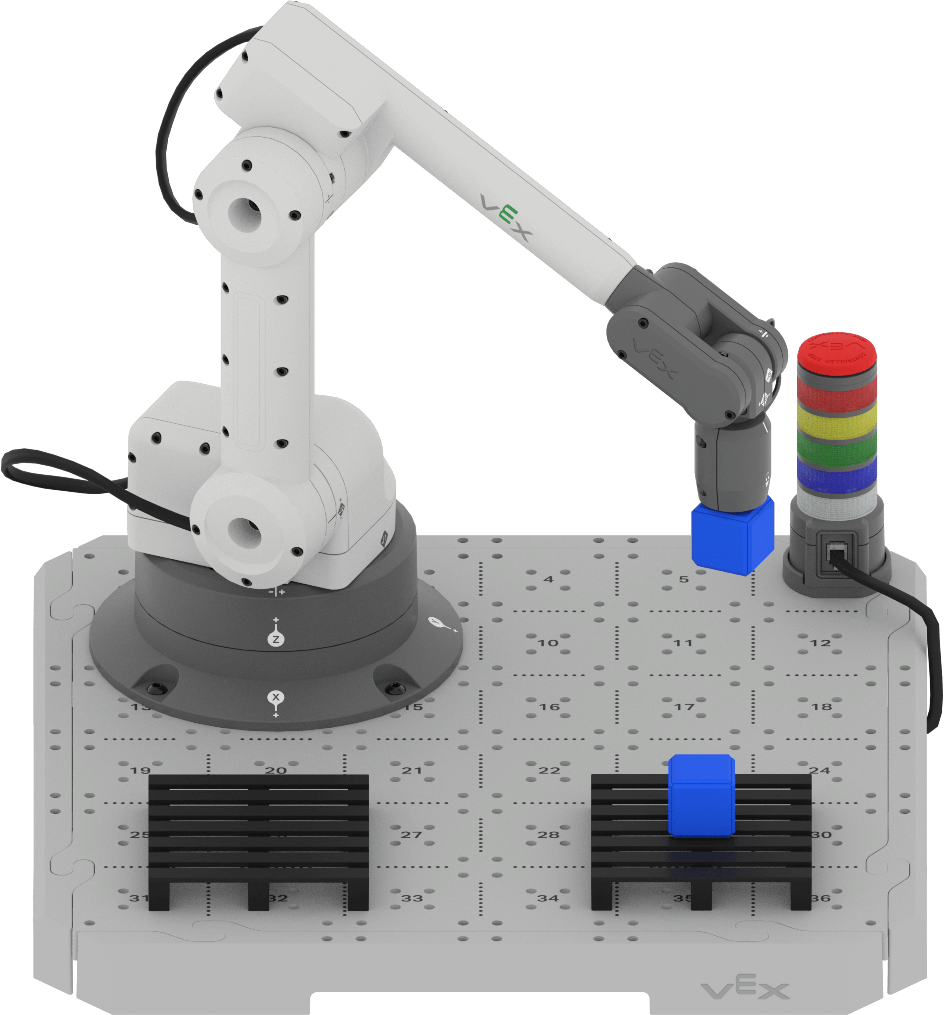
Set up for the project by placing one Cube in the loading zone on Tile location 17, as shown below. Complete the following steps to build your project.
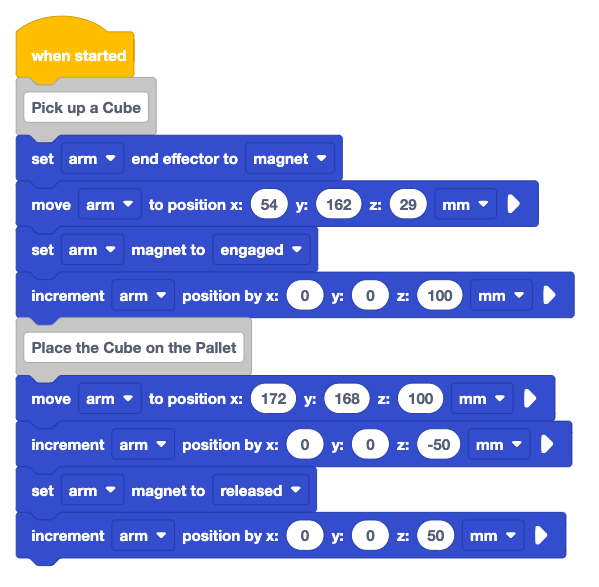
Open your Unit 8 Lesson 1 project in VEXcode. This project moves one Cube from the loading zone to the center of the pallet. You will build onto this project to stack a second Cube onto the first.
Note that the coordinates shown here are an example, and you should use your coordinates to ensure that the 6-Axis Arm behaves as intended.
Rename the project to Unit 8 Lesson 2 and save it to your device.

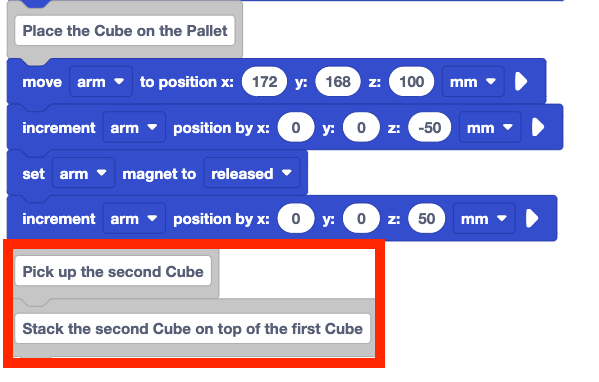
Add two Comment blocks to end of the project. Type the main steps of the plan to stack a second Cube as comments. These should match the steps in your engineering notebook.
- Pick up the second Cube
- Stack the second Cube on top of the first Cube
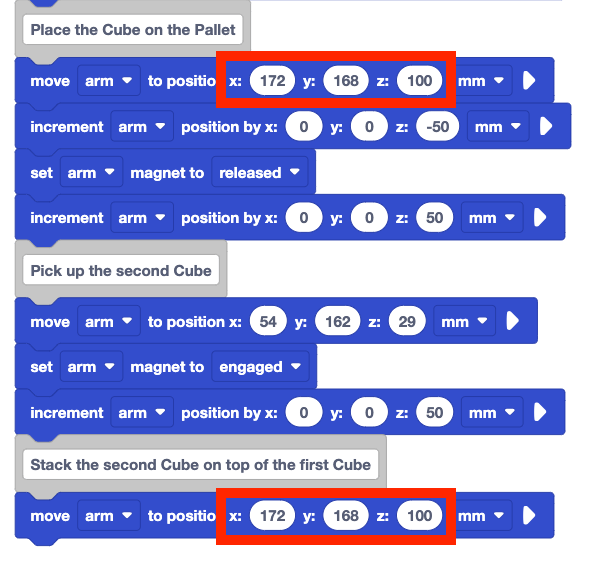
Recreate the first part of the project under the "Pick up the Cube" Comment block and place them under the "Pick up the second Cube" Comment block.
The first part of this plan is the almost same as the plan created in Lesson 1 including the coordinates of the loading zone, so the same blocks can be used.

Your project should now match the first step of the plan to stack the second Cube on the first. Note that the Set end effector block was not duplicated since it is not part of the step 3 in the plan.
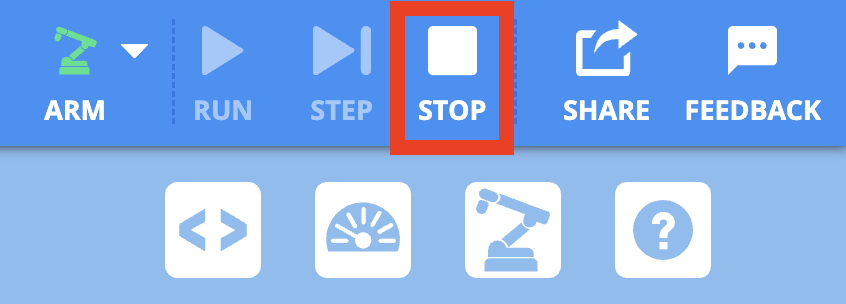
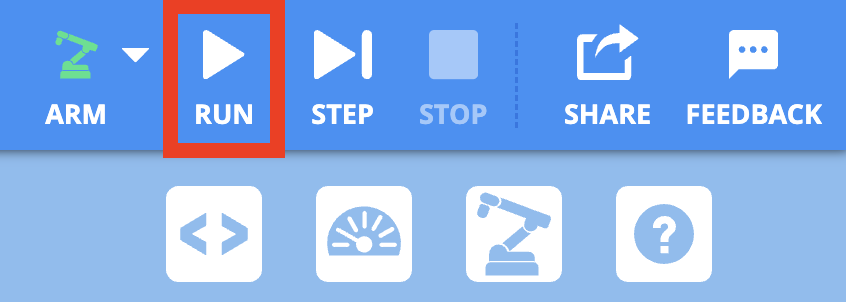
Be sure the 6-Axis Arm is connected to VEXcode. Run the project to test it.

Stop the project when the 6-Axis Arm has finished moving.
Did the observed behaviors of the 6-Axis Arm match those in your plan? Why or why not?
The first portion of the project has now been tested, and the second Cube successfully picked up from the Loading Zone.
Now the next steps in the plan can be implemented.
Add a Move to position block beneath the "Stack the second Cube on top of the first Cube" Comment block.
This block will correspond to the behavior "Move the 6-Axis Arm above the pallet" in your plan.
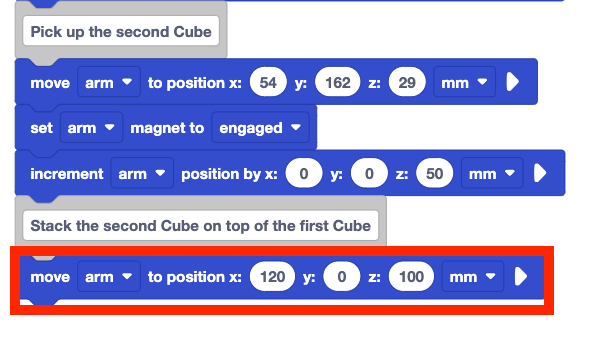
Set the x, y, and z-parameters of the Move to position block to the coordinates documented in your plan. Since the location above the pallet has not changed, the same coordinates used to move the first Cube above the pallet can be used to move the second Cube as well.
Remember to use your coordinates in your project, to ensure that your 6-Axis Arm moves as intended. The coordinates shown here are an example.
Add an Increment position block to your project.
This corresponds to the behavior "Move the 6-Axis Arm down to place the Cube on the first Cube" in the plan.
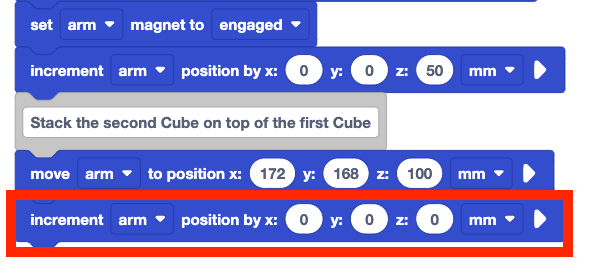
The z-parameter in the Increment position block will lower the 6-Axis Arm the distance necessary to stack the second Cube on top of the first. To figure out what that value is, we need to know the location of the Magnet when the two Cubes are stacked on each other. This offset can be used to help us figure out how far the 6-Axis Arm needs to move along the z-axis to stack the Cube effectively.
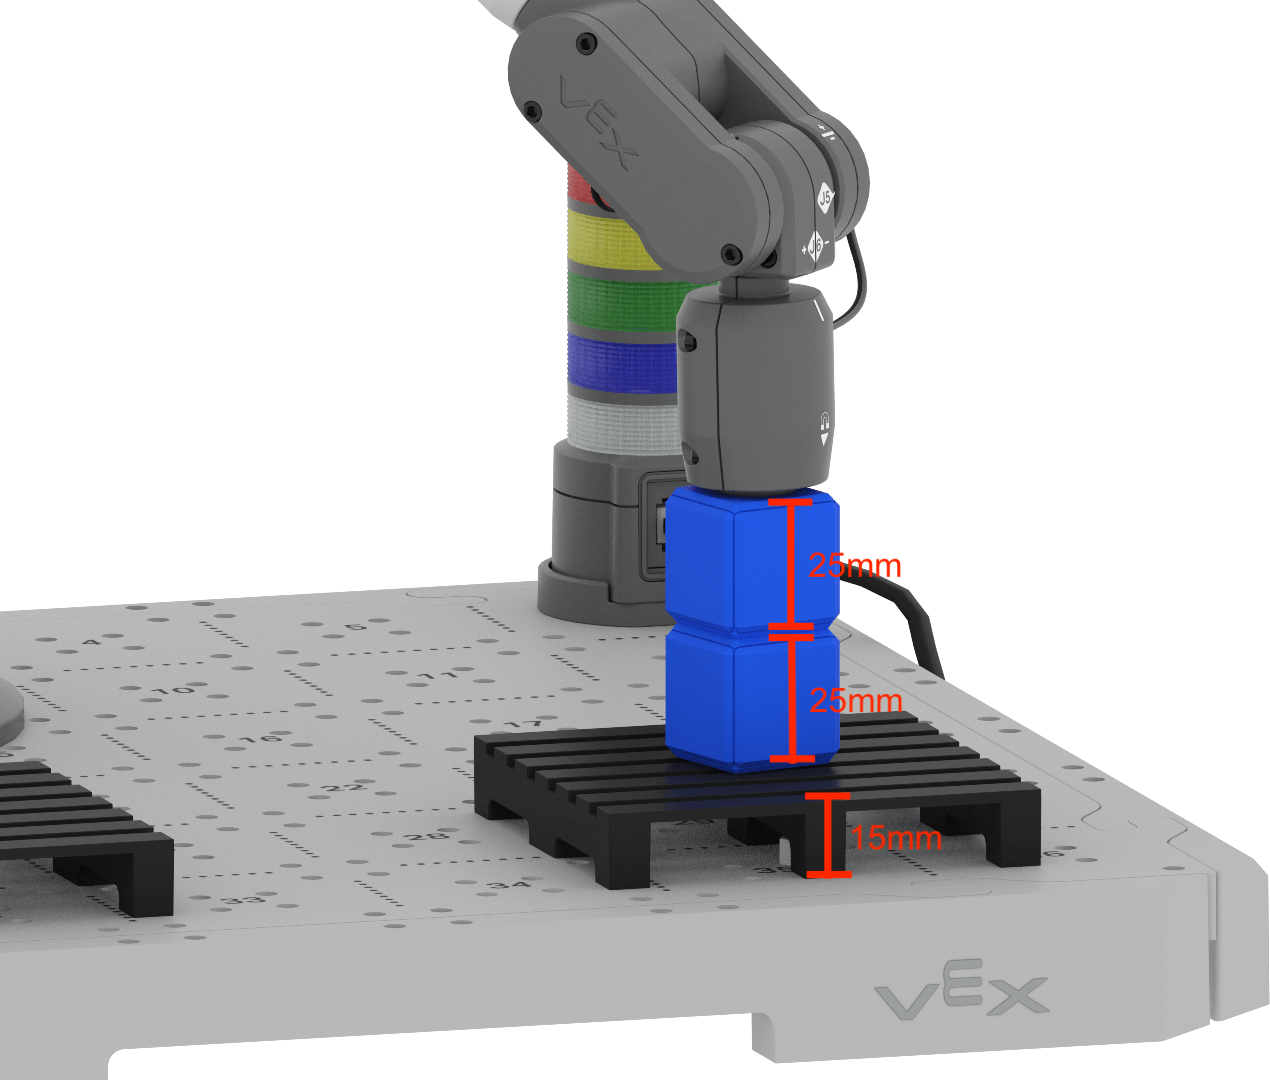
Using what we know about the height of the Cube and the height of the pallet, we can approximate the offset of the z-coordinate to be 65mm. Each Cube is approximately 25mm tall and the pallet is 15mm tall.
There are two ways to determine how far down on the z-axis to move the 6-Axis Arm.
- To move from the starting position (100mm) to the desired position, you can determine the difference. 100mm – 65mm is approximately 35mm. To avoid any collisions between the bottom of the second Cube and the top of the first, you can subtract another 5-10mm. Moving the 6-Axis Arm in the negative direction along the z-axis for approximately 25mm will enable the second Cube to be stacked in the desired position.
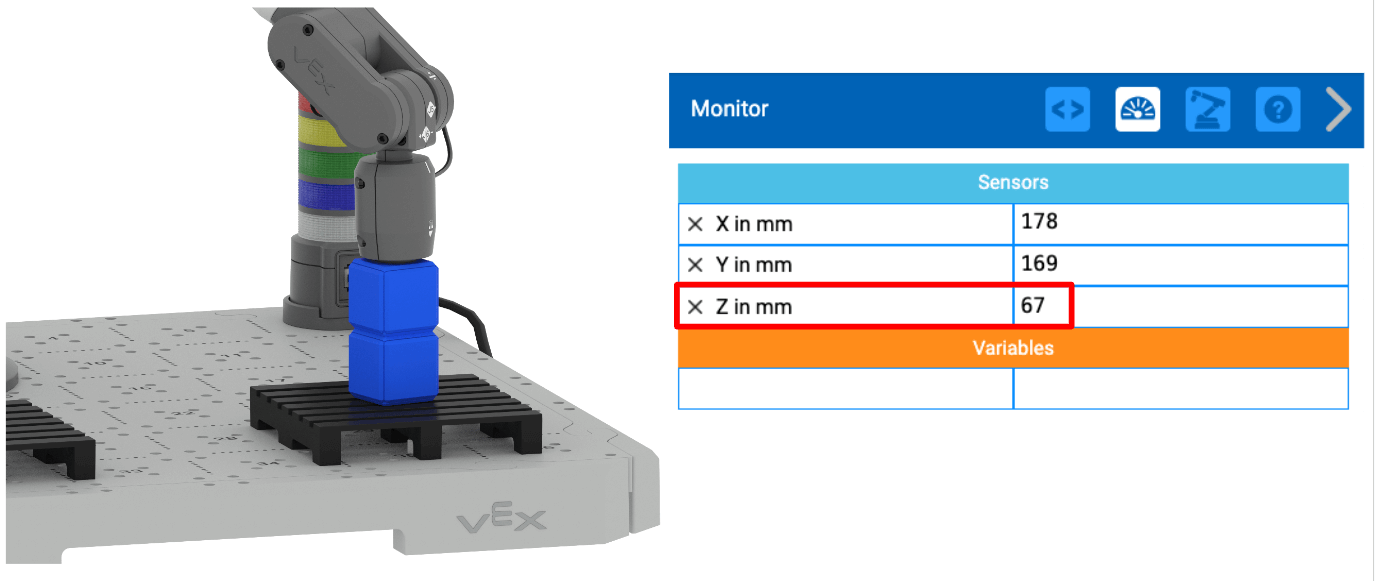
- You can also use the Monitor Console to find the z-value at the top of the stack of Cubes. This information from the Monitor Console can be used to help figure out the relative movement needed to lower the 6-Axis Arm to place the Cube effectively. In the project we are building, the z-coordinate is set to 100mm when the 6-Axis Arm moves above the Cube on the pallet. This is the starting position of the 6-Axis Arm for this relative movement. The z-value of the 6-Axis Arm's position on the top of the stack in the example shown here is 73mm. This is the desired position of the 6-Axis Arm when the placing the Cube on the stack.
To move from the starting position (100mm) to the desired position (73mm) is approximately 28mm. Moving the 6-Axis Arm in the negative direction along the z-axis for approximately 25mm will enable the second Cube to be stacked in the desired position.
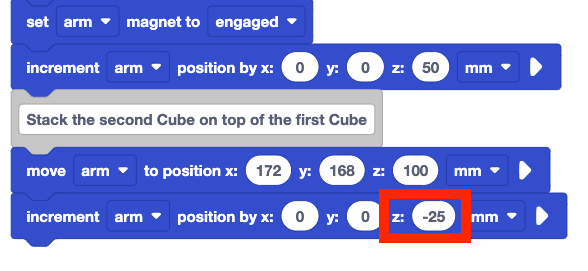
Set the z-parameter of the Increment position block to –25.
This will move the 6-Axis Arm in the negative direction along the z-axis to lower the Cube.
Be sure the 6-Axis Arm is connected to VEXcode, the first Cube is returned to the loading zone, and the second is set to the side of the Tile.
Run the project to test it. Observe the behaviors of the 6-Axis Arm.
Stop the project when the 6-Axis Arm is finished moving.
Did the behaviors you observed match the behaviors listed in your plan? Why or why not?

The 6-Axis Arm should have moved to pick up and place the first Cube on the pallet. Then the 6-Axis Arm picked up and placed the second Cube above the first.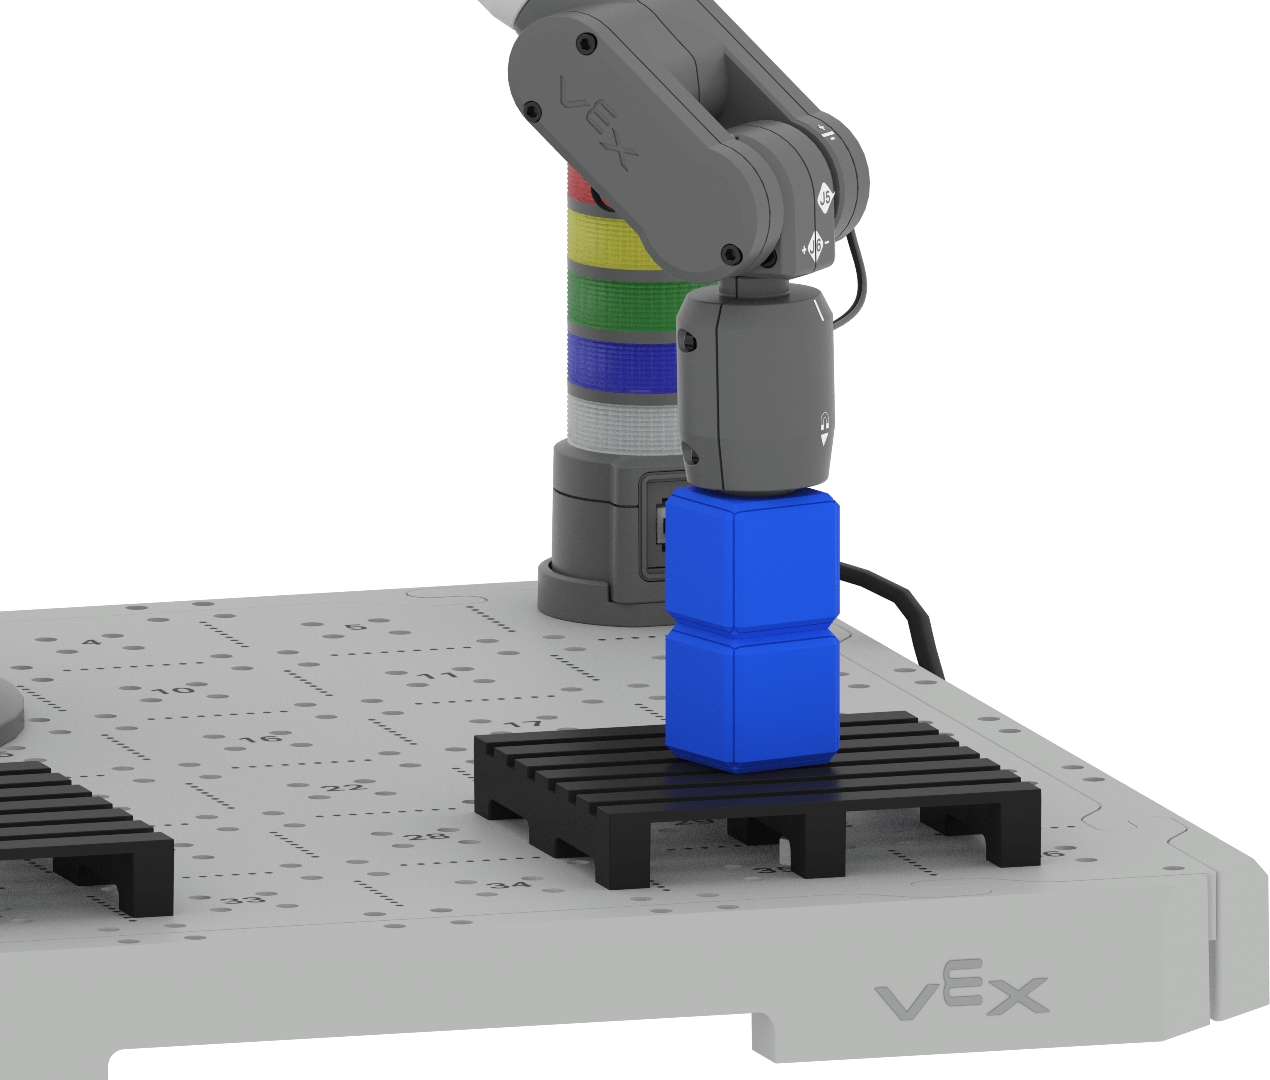
Now that we know how the 6-Axis Arm will place the second Cube, we can add onto the project to complete the implementation of the plan.
Add a Set arm magnet block to the project. Set the parameter to "released".
This block corresponds to the behavior "Release the Magnet" in the plan.

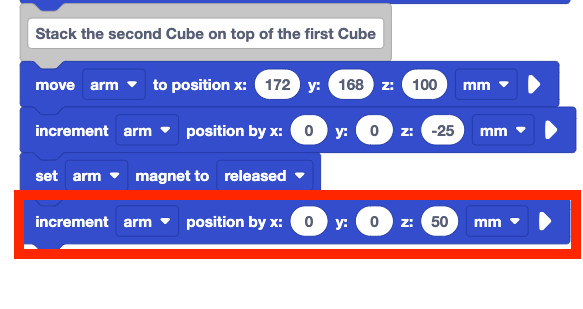
Add an Increment position block to the end of the project. Set the z-parameter to 50.
This corresponds to the final behavior "Move the 6-Axis Arm above the pallet" in the plan.
Be sure the 6-Axis Arm is connected to VEXcode, the first Cube is returned to the loading zone, and the second is set to the side of the Tile.
Run the project to test it. Observe the behaviors of the 6-Axis Arm.
Stop the project when the 6-Axis Arm is finished moving.
Did the behaviors you observed match the behaviors listed in your plan? Why or why not?
The 6-Axis Arm picked up and moved two Cubes to the pallet, stacking the second on top of the first.

Activity
Now that you have made a plan and coded the 6-Axis Arm to stack one Cube from the loading zone on top of another on the pallet, you will practice these skills. In this activity, you will build on your project from this Lesson to code the 6-Axis Arm to stack two additional Cubes onto the second pallet.
Setup: Place one Cube in the loading zone on Tile location 17.

Activity: Code the 6-Axis Arm to stack two Cubes on each pallet. 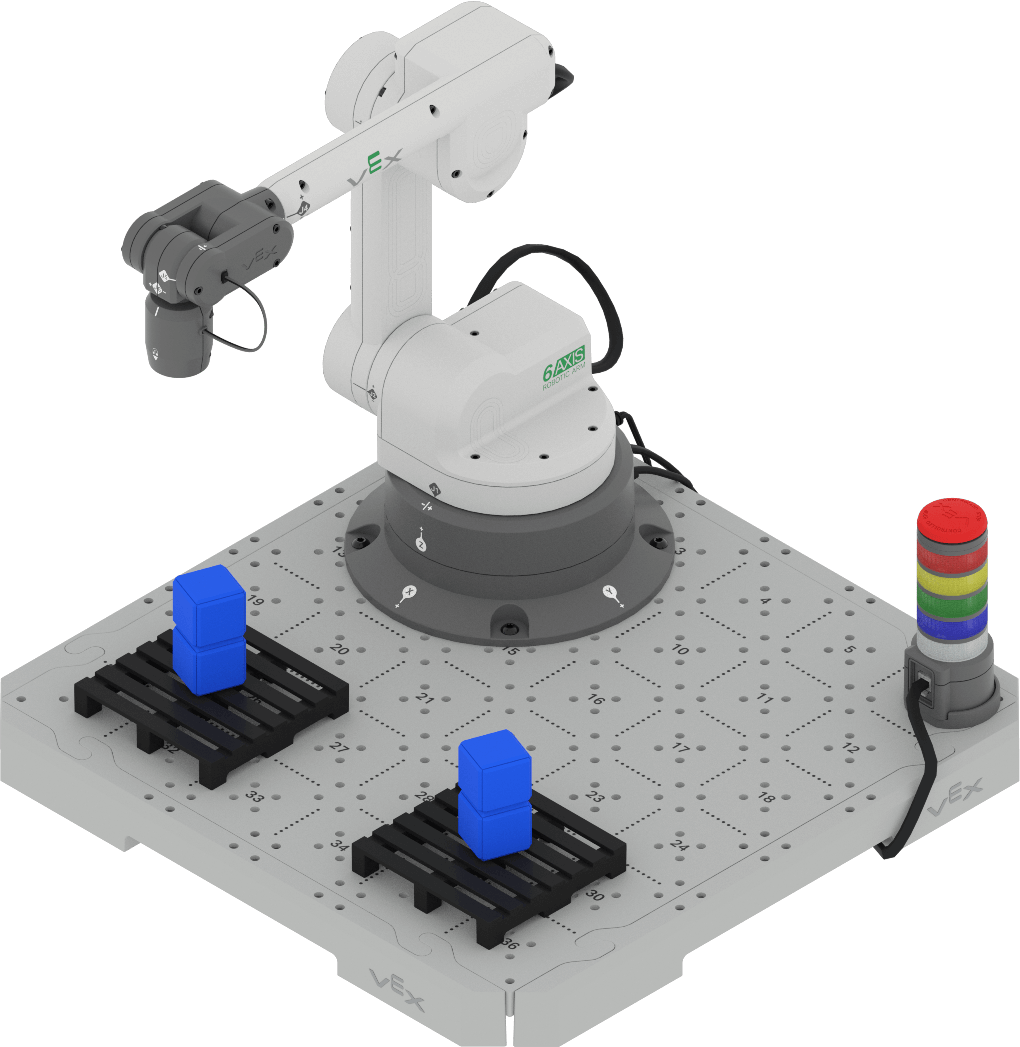
- Follow the process you have learned to make a plan for how to code the 6-Axis Arm to stack two additional Cubes on the second pallet with your group. Be sure that you are all agreed on your approach before you begin building onto your project. You can build onto your project from this Lesson.
- Document your plan in your engineering notebook. Be sure you have decomposed each step into the smallest possible behaviors.
- Once you have created and documented a plan, review your plan with your teacher.
- Build onto your project in VEXcode to match the plan your group agreed upon.
- Rename your project Unit 8 Lesson 2 Activity and save it before you begin editing the project.
- Use Comment blocks in your project to organize your project to match your plan.
- Run the project incrementally to test it. Manually place each of the Cubes in the loading zone once the previous Cube has been moved.
- Does the 6-Axis Arm successfully create both stacks of Cubes the way you planned? There should be one stack of two Cubes on each pallet. If not, continue to edit the project until you have successfully created two stacks.
- Be sure to document any adjustments to your plan in your engineering notebook.
Check Your Understanding
Before moving on to the next Lesson, ensure that you understand the concepts in this Lesson by answering the following questions in your engineering notebook.
Check Your Understanding questions > (Google Doc / .docx / .pdf)
Select Next > to move on to the Putting It All Together activity.