
Play
Part 1 - Step by Step
- InstructInstruct students that they will be working in groups to build a flagpole for their Astronaut using pins, standoffs, beams, and plates.
- Distribute a Blueprint Worksheet to each group.
- Instruct students that they can only use the pieces provided.
- ModelModel for students what a flagpole could look like. Attach an Orange Standoff to a Grey Plate as an example.
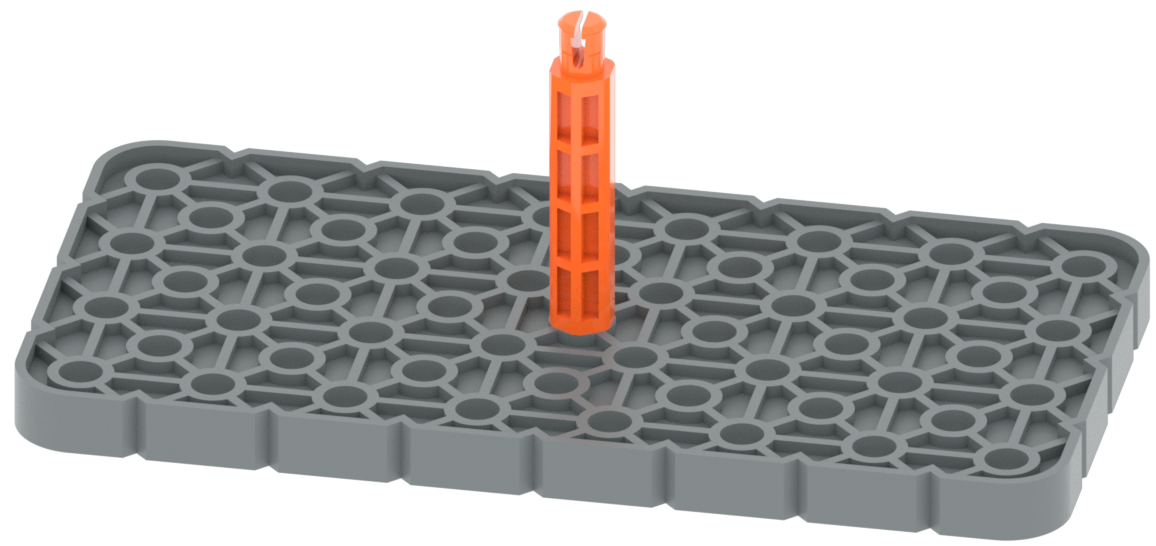
Example Flagpole Base - FacilitateFacilitate the building process.
- Ensure students are only using the following pieces from the VEX GO Kit.
- 6 Red Pins
- 4 standoffs (any size)
- 3 Red Beams
- 2 Grey Large Plates
- 1 Pin Tool
-
1 Astronaut (optional)
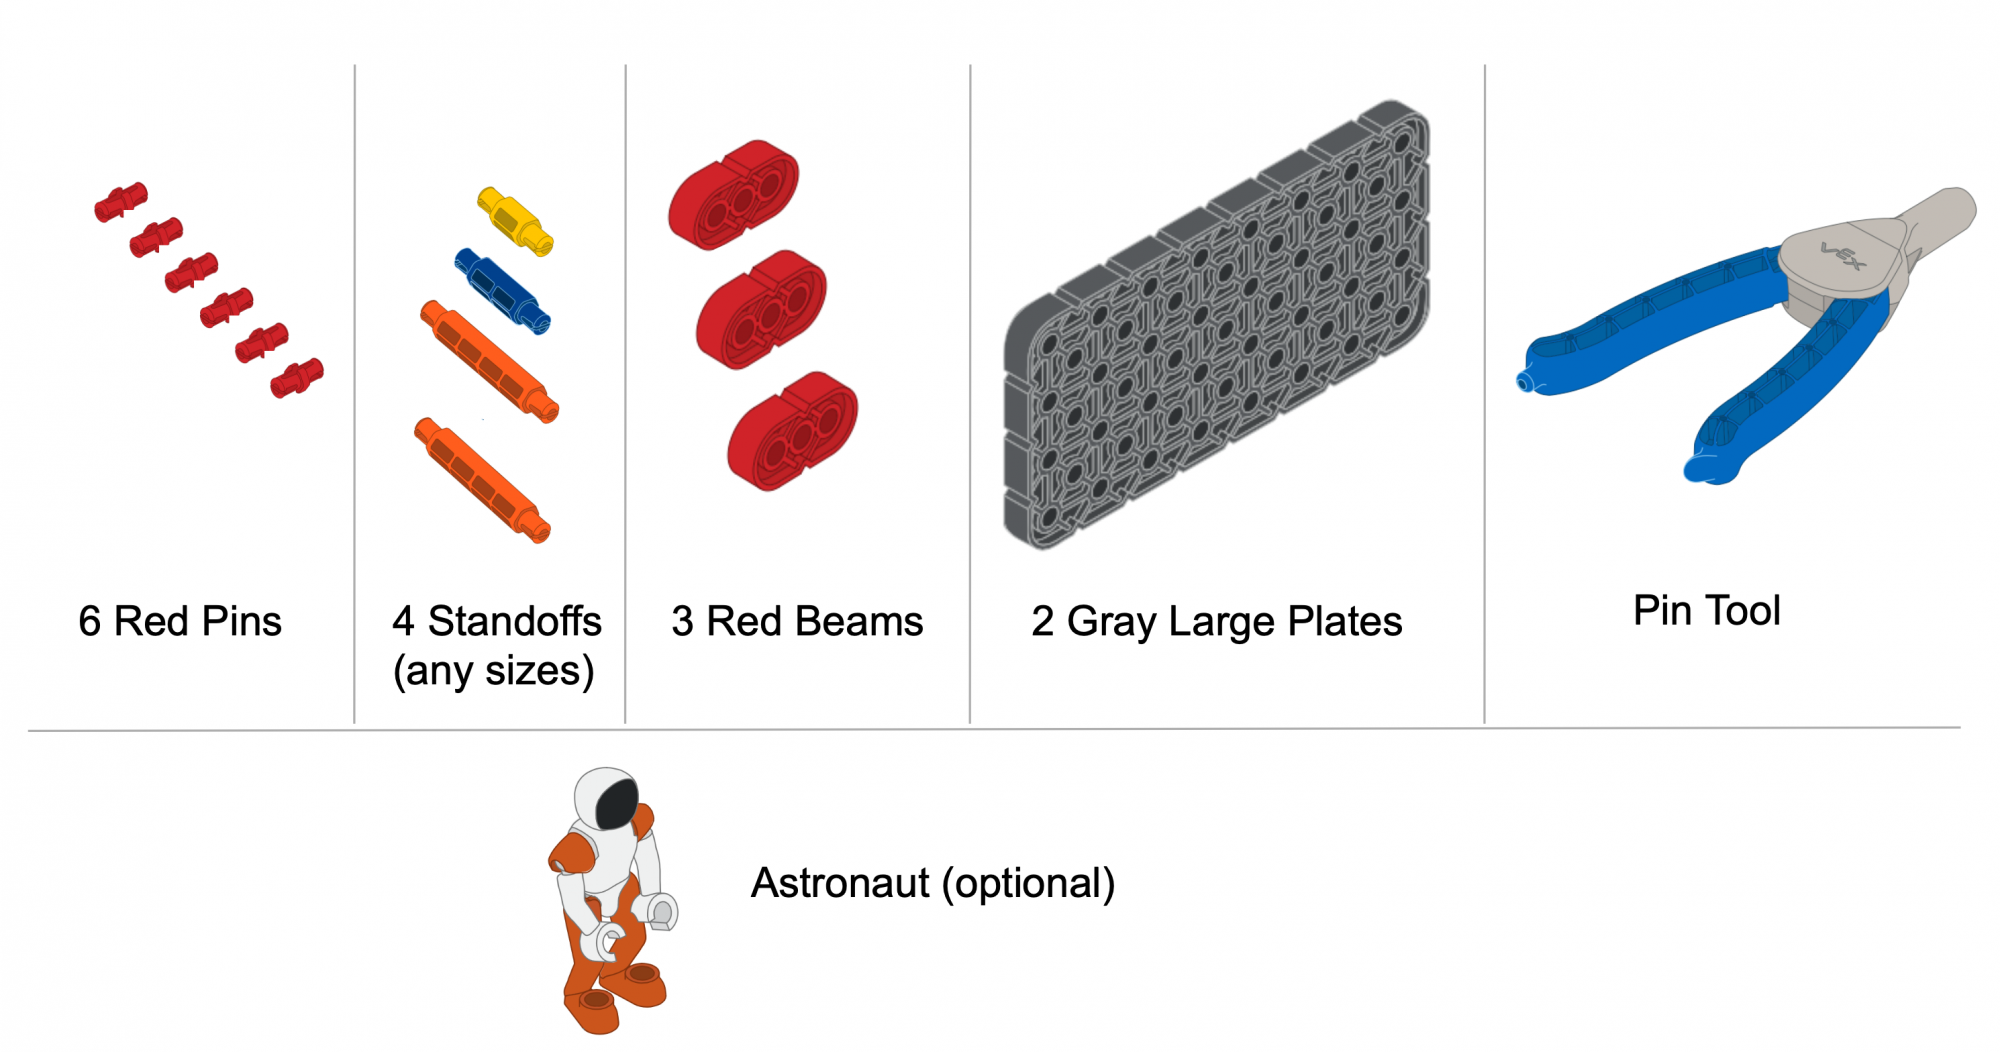
Use these pieces from your Kit to build
- Ensure students are only using the following pieces from the VEX GO Kit.
- RemindRemind groups to draw their ideas and discuss their plans before building. Remind students to use the Blueprint Worksheet and to take turns when building.
- AskAsk groups about their process while they build. Refer to group sketches, and encourage the use of part names when talking with students. Offer suggestions and note positive group building and problem solving strategies.
Optional: “Questions?” If students are unable to answer a question in the moment, encourage them to use sketch paper to keep track of questions to ask at the Mid-Play Break.
Mid-Play Break & Group Discussion
As soon as every group has finished their NASA Flagpole build, come together for a brief conversation.
- Share builds and describe how they were assembled using spatial language and part names.
- Where is one piece positioned versus another?
- Inside, outside, on top of, below, across
- What were the features of the pieces used?
- Straight, tall, bent, short, small, big, large, tiny
- Where is one piece positioned versus another?
- Which pieces were most useful and why?
Part 2 - Step by Step
- InstructInstruct students that they are going to participate in a ‘build challenge.’
- Students will have ten additional pieces (five Red Pins and five Orange Beams) to modify their design in order to create the tallest flagpole.
- Instruct students that their flagpole has to be freestanding (stand on its own), and they will have five minutes to complete this challenge.

- ModelModel for students how pins and beams can be connected to build a flagpole.

Example Flagpole Build - FacilitateFacilitate the build challenge by encouraging discussions with students.
Ask questions such as the following:
- Is there anything you can change on your build to make it taller?
- Are there any pieces you wish you could use and why?
- RemindRemind Remind students that after five minutes, they will share their flagpole builds with the class.
- AskAsk groups about their plans and build strategies. Encourage them to use spatial language in discussions.