
Engage
Launch the Engage Section
ACTS is what the teacher will do and ASKS is how the teacher will facilitate.
| ACTS | ASKS |
|---|---|
|
|
Engage
-
InstructInstruct
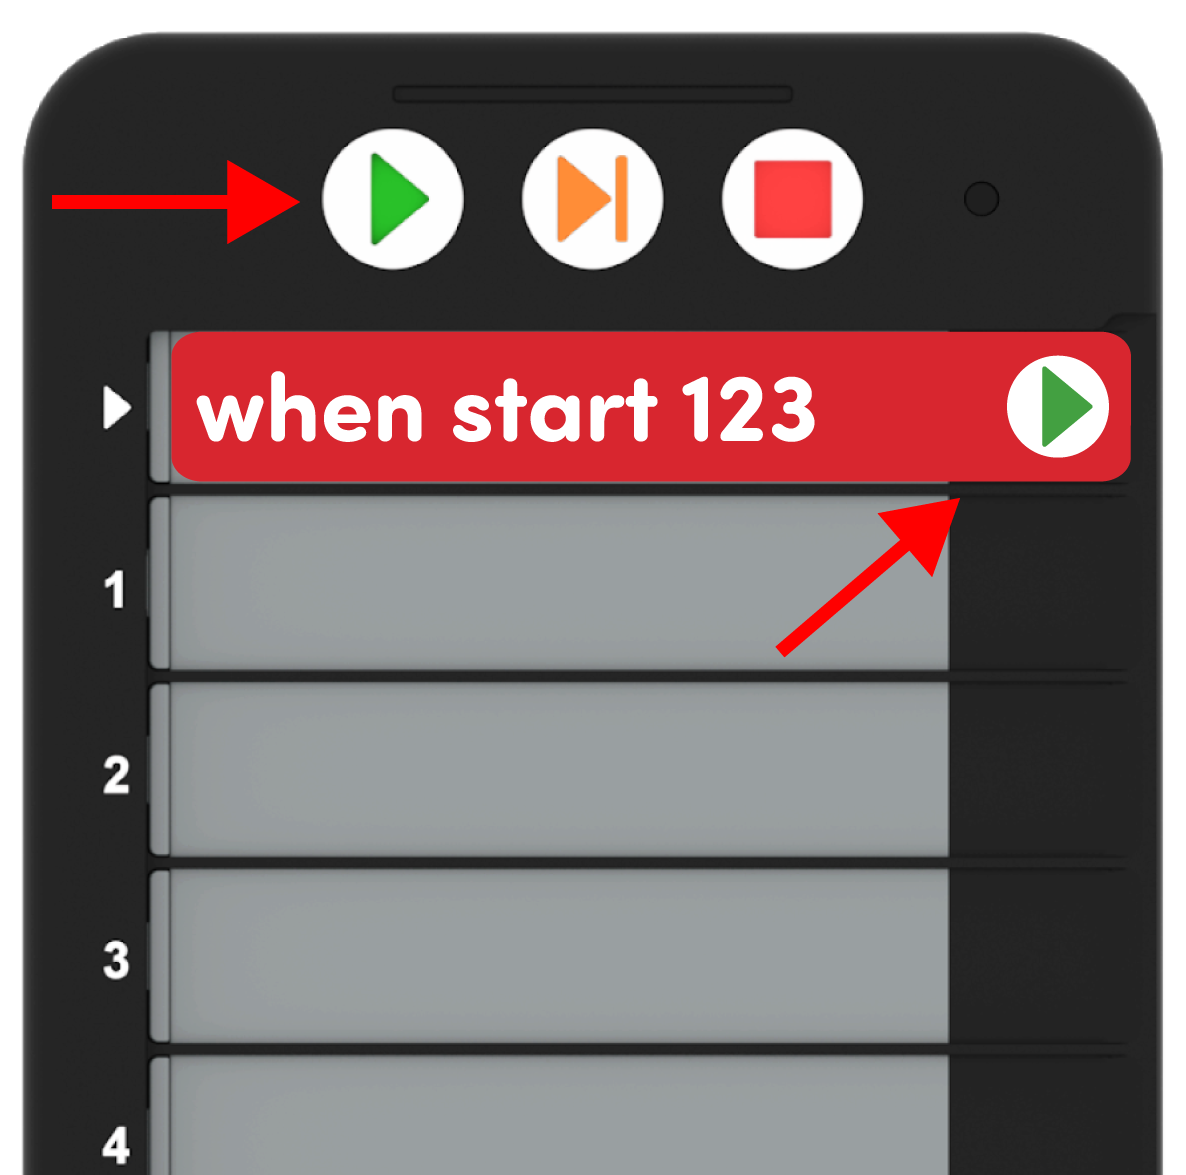
students that they are going to practice taking turns to use the Coder and Coder cards with the 123 Robot in their groups. They should follow along with you as you demonstrate the steps for inserting Coder cards into the Coder, then waking and connecting the 123 Robot to a Coder, and starting a project. Begin with the "When start 123" Coder card.

"When start 123" -
DistributeDistribute
a set of Coder cards to each group of students that will be working together. Guide students to look at the symbols to interpret what each Coder card will have the 123 Robot do. Sets should contain the following cards: "Turn left", "Turn right", "Play honk", "Act crazy", "When start 123", and "Drive 1".

Coder Cards Needed -
FacilitateFacilitate
students working with a partner, and how to place the Coder card in the Coder and pressing the Start button.
- When working in their groups, one student will choose the Coder card and place it in the Coder. The other will start the project by placing the 123 Robot and pressing Start. Show students how to do this with "When start 123" card. Point out that this card does not cause any actions with the 123 Robot, but needs to be the first card in a project in order for a project to start. They should keep this as the first card in the Coder for the Lab. Point out that the symbol on the “When start 123” Coder card and the Start button match.
Starting the Project - Then, they should choose one additional card, such as "Turn left", and place it in the Coder under the "When start 123" card. Have students follow along.
- Next, model how to connect the 123 Robot to the Coder.
- First, wake the 123 Robot by pushing the wheels along a surface until you hear the startup sound.
- Then, turn on the Coder by pressing the Start button.
- Once the Coder and the 123 Robot are turned on, connect the 123 Robot to the Coder. Do this by pressing and holding the Start and Stop buttons on the Coder, and the Left and Right buttons on the 123 Robot for at least 5 seconds, until you hear the connected sound, and the indicator lights flash in time, as shown in the animation below. Turn on sound for this animation.
- For more information about the Coder, see the Using the VEX 123 Coder VEX Library article.
Video file- Once connected, press Start on the Coder to start the project and test the Coder card and observe the 123 Robot behavior.
- OfferOffer positive reinforcement for correct vocabulary usage and turn-taking during this process.

Teacher Troubleshooting
- Students will need to place the "When start 123" card in the Coder first to have a project start. Additional Coder cards will be executed in the order in which they are placed in the Coder.
Facilitation Strategies
- In Play Part 1, remind students to be patient and try all the different cards one by one. This will help them to differentiate which card causes which behavior.
- Use printables as manipulative to support project planning - See the printable resources available in the VEX Library, and use them with students as they are planning and building their Coder projects. You could use the motion planning sheets for students to draw the path they want their 123 Robot to travel, as well as the fill-in project and motion planning sheets for students to document their Coder cards and the path of the 123 Robot. You can also use the fill-in Coder sheet for students to write or draw their Coder cards to "save" their projects.
- Use Coder card posters to reinforce learning with the Coder - Highlight specific Coder cards, or refer to cards as you are teaching with the Coder card posters. Students can use these posters to review terminology as they are working with VEX 123. See the Using Coder Cards Posters in the Classroom VEX Library article to access these printable posters and to see more strategies for using them in your learning environment.